16 min read
How to Hide Wires on a Brick Wall (4 Methods)

Bricks are great for constructing solid walls, but keeping wires hidden can be challenging.
Still, hiding wires on brick walls with the right planning, tools, and materials is possible.
Quick Summary: You can hide them completely by embedding them into a cut-out portion of the brick. The wiring is best concealed during construction; otherwise, you can apply the chasing method, which is similar, except it’s a plastered wall that you will have to re-plaster and paint. Without embedding, you would have to attach the enclosure on the surface, cover them in some other way, or disguise them.
I will go into more detail below.
Hiding Wires on a Brick Wall (Introduction)
Below are 4 methods for hiding wires on a brick wall from the least to most noticeable to help you choose which one to apply. This article focuses mostly on the first two and the third in brief below.
Ways to Hide Wires on a Brick Wall
Method 1: In a Plain Brick Wall (Concealed Wiring) It is best done on an unplastered brick wall at the time of construction or renovation and will completely hide the wiring. | 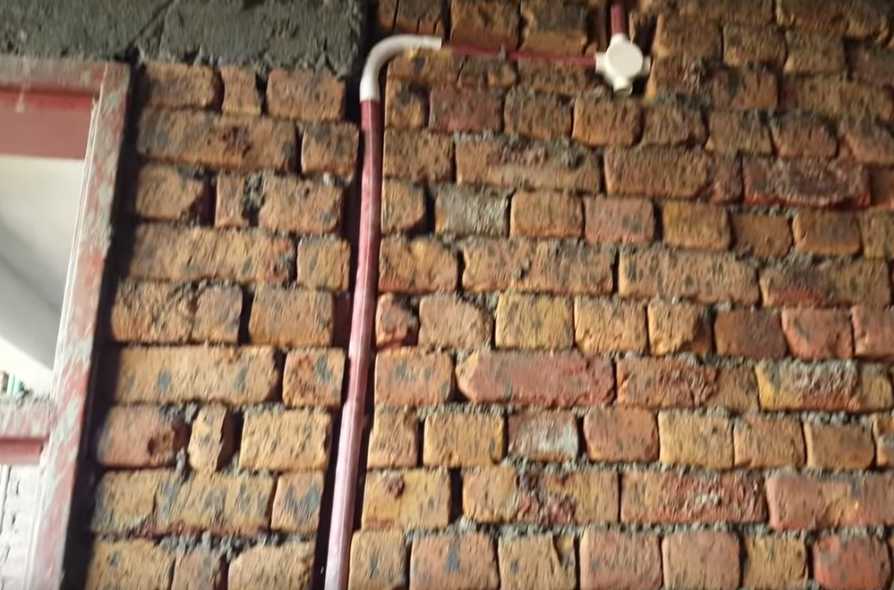 |
Method 2: In a Plastered Wall (Chasing) You can still hide wires in a plastered brick wall, but it will involve more work. | 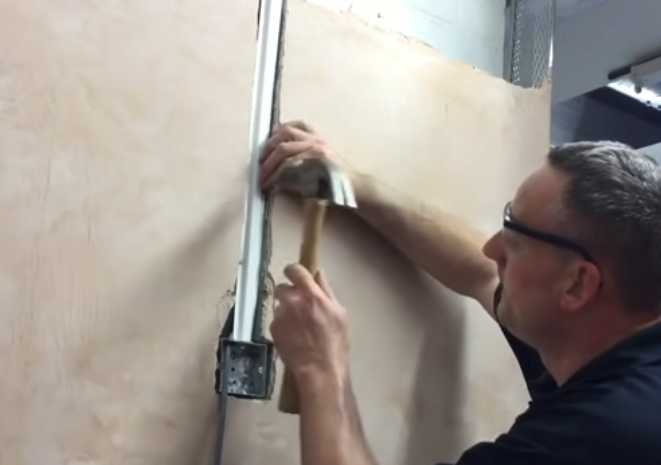 |
Method 3: Surface Concealment It involves attaching enclosures on the surface if you don’t want to cut the wall. | 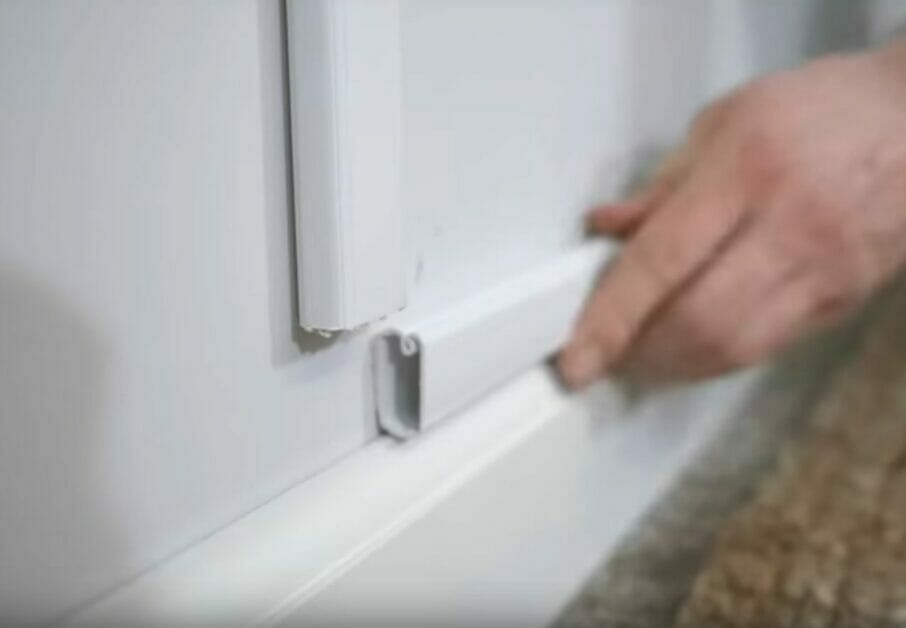 |
Method 4: Covering and Disguising Methods A quicker and easier solution is to cover the wires without cutting and attaching enclosures or disguising them creatively. | 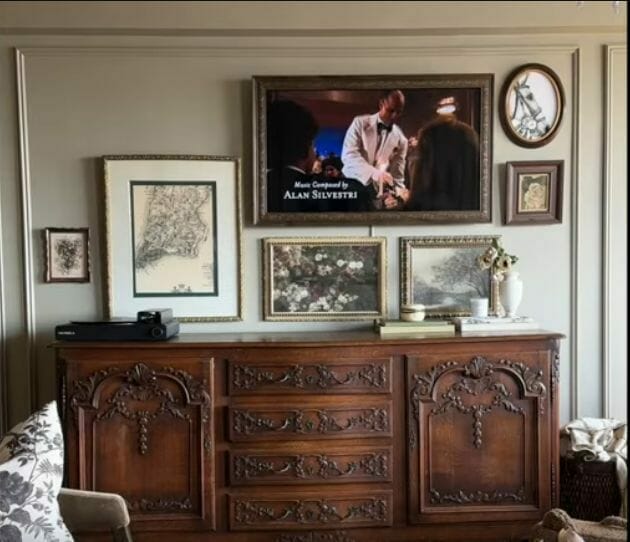 |
The requirements are listed under each method. Let’s get started.
Method 1 – Hiding Wires on a Plain Brick Wall (Concealed Wiring)
Hiding wires is best done by embedding them in a plain (unplastered) brick wall at the time of construction before plastering.
This is called concealed wiring, as it completely hides the wiring. However, consult an engineer if it’s a load-bearing wall.
Requirements
You will need a tape measure, spirit level, a straight edge or ruler, nails or screws, and a hacksaw, cutter, or blade.
Additionally, this method requires chalk, a grinder or cutter, a hammer drill or electric chisel, and the pipes or conduits through which you will run the wires.
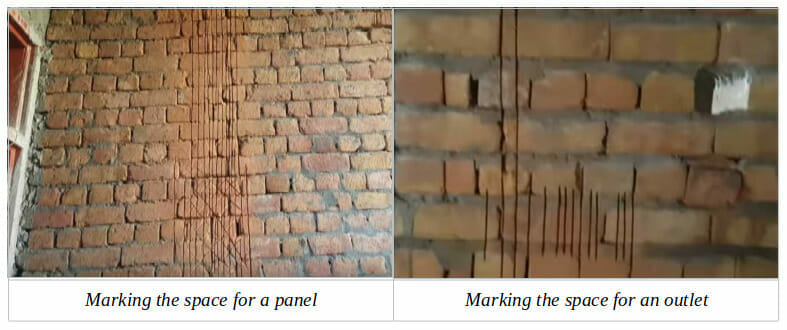
Step 1: Marking
The first step is to mark the lines for the wires to pass along.
Use chalk and a straight edge to make the horizontal and vertical lines. Marking ensures you’ve planned the wiring well and know exactly where to cut. It may include space for the main panel and the wiring to outlets and light fittings, as necessary.
Also, make all necessary measurements to know how much piping you need.
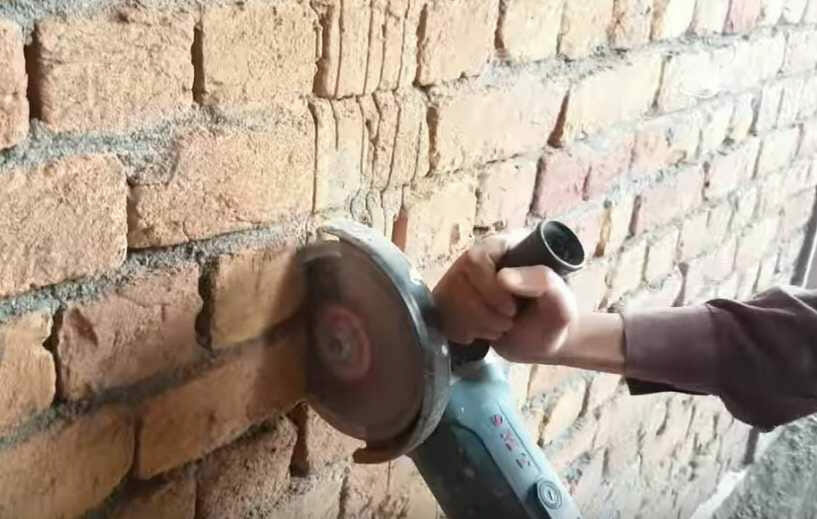
Step 2: Cutting
The second step is to cut along the lines you marked in Step 1 using a grinder to make space for the conduits or pipes.
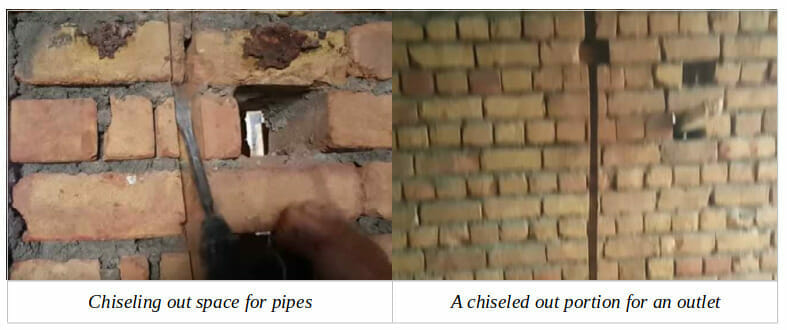
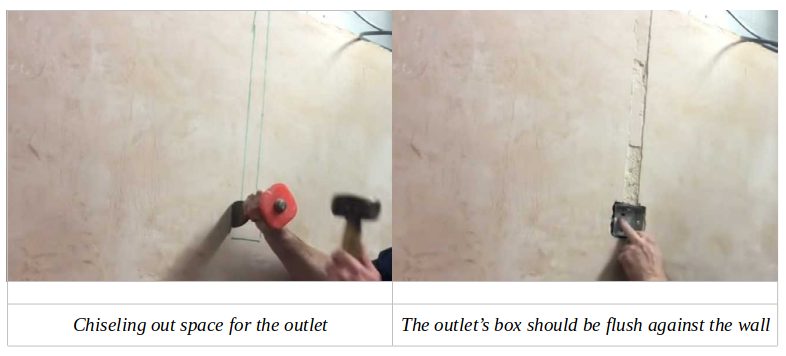
Step 3: Chiselling
Chisel out the spaces and routes for the pipes, outlets, junction boxes, bends, etc. You can do it using an ordinary chisel and hammer, but an electric chisel will make it easier if you have a lot of chiseling to do.
Step 4: Routing
The purpose of the cutting was to make space to lay the pipes or conduits. Various types, sizes, and lengths are available to route wires.
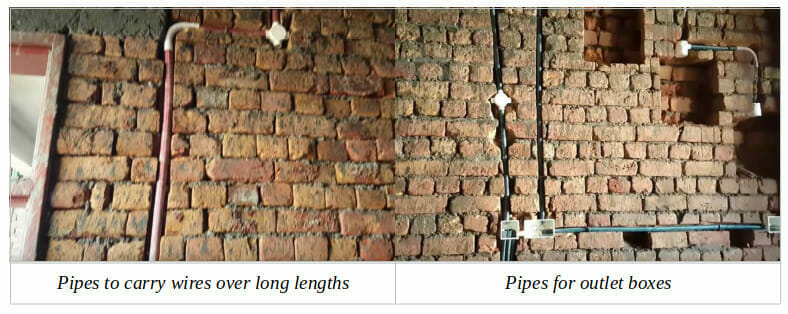
All the items should fit inside without sticking out.
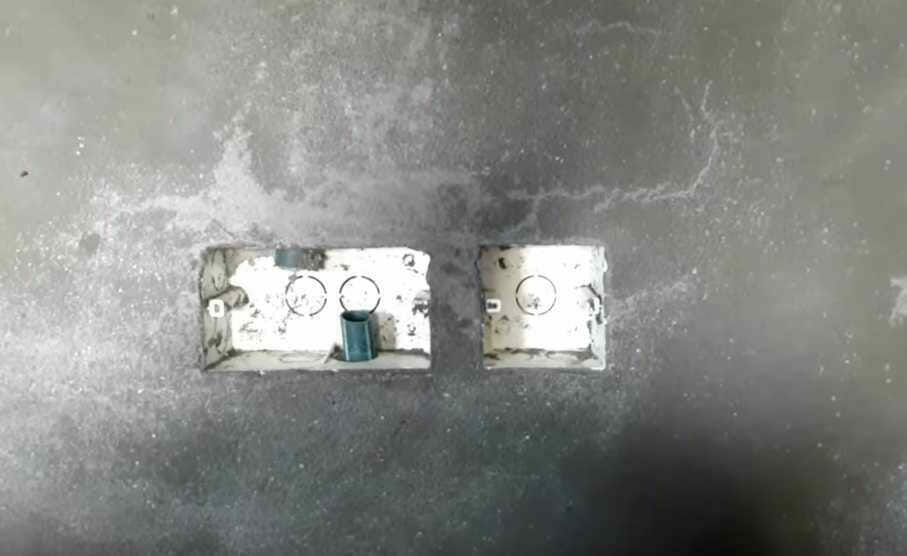
However, the outlet boxes should only be slightly out from the brick surface to allow the plastering to level with them later. The one below is an example where the outlet is temporarily covered to keep it clean while plastering. It should also be fixed securely to the brick wall.

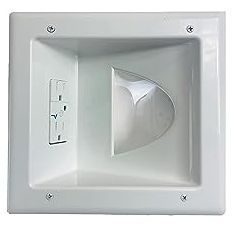
Recessed plates provide another useful way to create routes for future hidden wiring.
They are used in pairs and can cover either short distances or the height or breadth of a room. Fit one at both ends of a long stretch before plastering over the space between them.
Step 5: The Result After Plastering
Plastering a wall is usually necessary anyway, especially if they are clay bricks, so hiding the wires beforehand is wise planning.
After plastering the wall, the pipes and wires will be hidden, leaving only the wiring to be done.
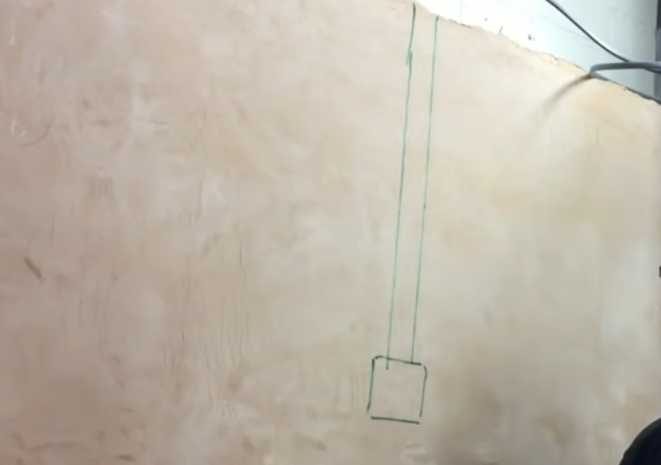
If you installed recessed plates, such as a short distance for hiding TV wires, you could create a setup like this:
Step 6: Wiring
The final step is to do the wiring after feeding and passing the wires along the pipes.
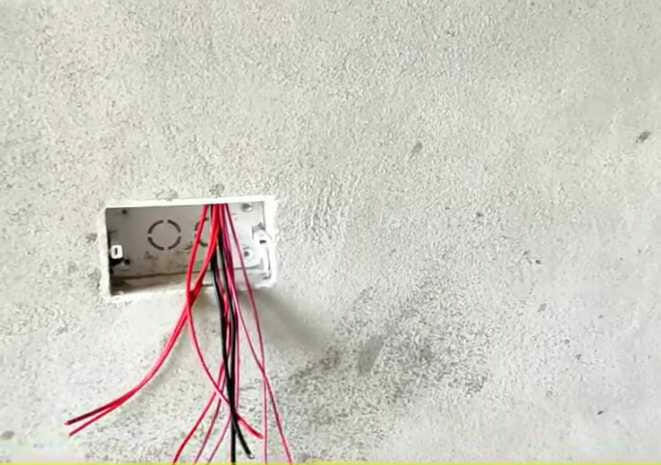
The wires will be completely hidden when the outlet on the brick wall is wired.
Method 2 – Hiding Wires on a Plastered Brick Wall (Chasing)
If your brick wall is plastered, you can still do concealed wiring, but you will have to cut through the plaster.
Your options will be more limited, and there will be more work involved in re-plastering. This method is called chasing.
Requirements
You will need a tape measure, spirit level, a straight edge or ruler, nails or screws, and a hacksaw, cutter, or blade.
Additionally, this method requires a pencil, ruler, cutter, hammer drill, or electric chisel, the pipes or conduits through which you will run the wires, and caulk, putty, or plaster.
Step 1: Marking
If you have wires already in place, unclip them and move them out of the way.
As in Method 1, the first step is to mark the lines for cutting along. Mark two lines for both edges using a pencil.
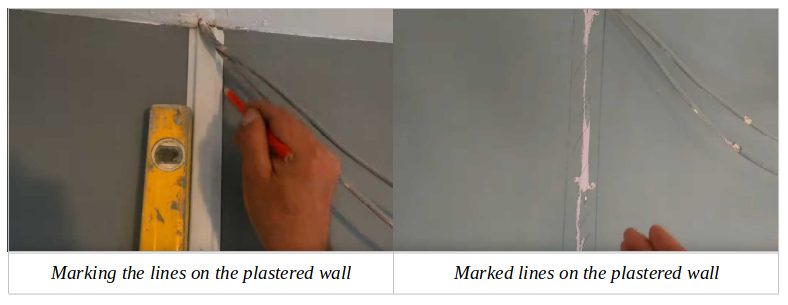
If installing a new outlet, mark the space for the box, as well.
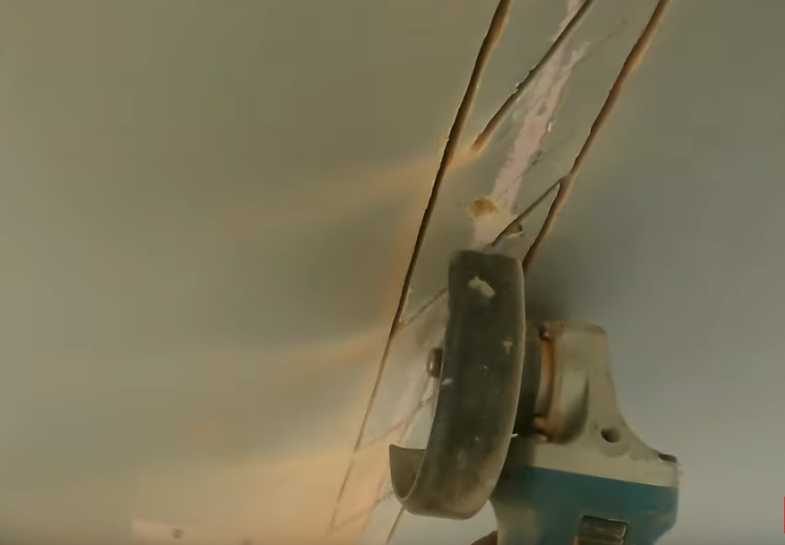
Step 2: Cutting
Cut carefully along the lines you marked in Step 1.
Step 3: Chiseling
Chisel out the marked area using a chisel and hammer.
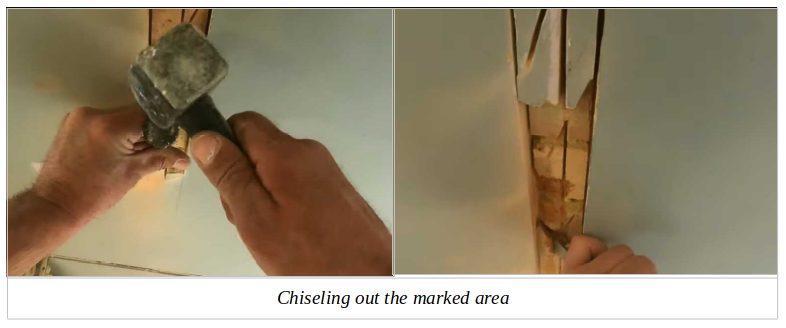
Chisel out the space for the outlet, if you are installing one. Then, please insert it into its place to ensure you have enough depth. It should be flush against the wall’s surface and not stick out.
Step 4: Routing
After chiseling through the brickwork up to the required depth, insert the lengths of conduit, pipe, channel, or whatever you have to pass the wires through.
An alternative to Step 4 in Method 1 is to attach the wires directly to the wall and attach a channel over it by nailing it to the brick.
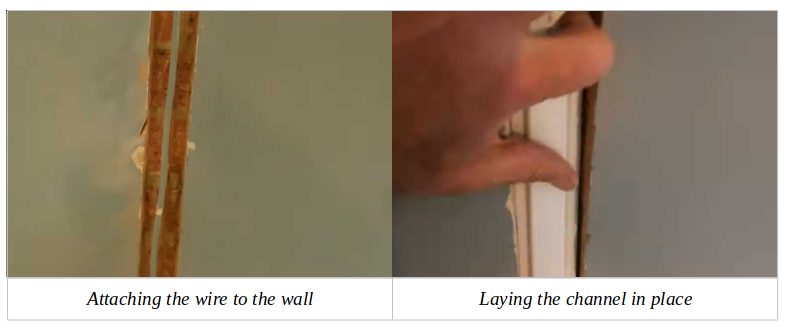
For an outlet, make the conduit or channel go all the way flush against it. Hammer the conduit in place with nails.

Step 5: Plastering
The fifth step is plastering or caulking over the channel to cover the gap completely.

Allow the plaster to dry before sanding and painting it over.
Step 6: Sanding and Painting
Use sandpaper to smoothen the plastered wall when dry.
Use a brush or roller for painting over the smoothed surface. The color should match the rest of the wall.
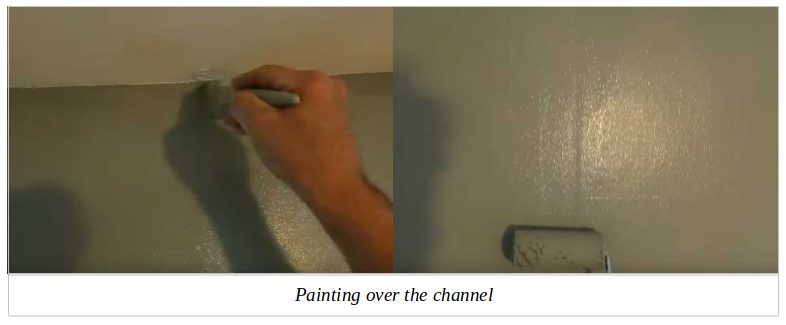
Once the paint is dry, the wall will be ready to put the furniture back against.
Method 3: Surface Concealment
Various enclosures can be used to hide wires by embedding them inside a brick wall or attaching them to the surface.
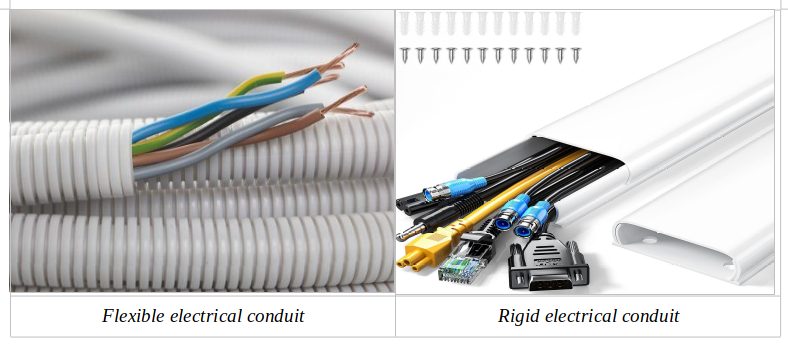
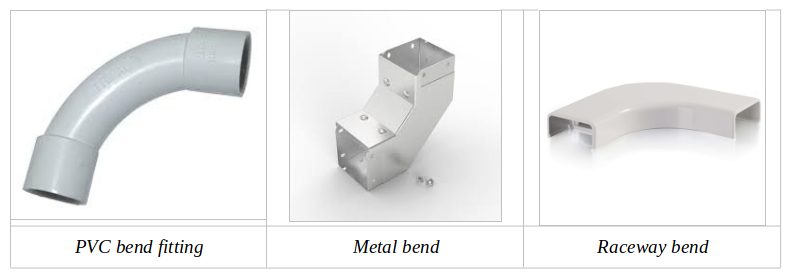
So, if you don’t want to or can’t cut the wall to embed the wires inside or out of view, you can still route them through your chosen enclosures on the surface. Such enclosures include conduits, cord covers, cable concealers, cable raceways, and pipes. You can buy long pieces, easily cut them to the required lengths, and use various joining parts.
They come in long lengths and widths, making them ideal for concealing wires. They are available in various metal, plastic (PVC, uPVC, CPVC, PPR, HDPE, etc.), and rubber forms and may be rigid or flexible. You can even make a similar enclosure yourself using wood. If buying them, look for:
- Conduits
- Pipes
- Raceways
- Trunking
They are also described as cord covers, cable concealers, or wire cover kits.
You can get around corners using a bend, create a t-junction using a t-bend, or add a 4-way junction box.
Requirements
You will need a tape measure, spirit level, a straight edge or ruler, nails or screws, a hacksaw, cutter, or blade, and the conduits you will run the wires.
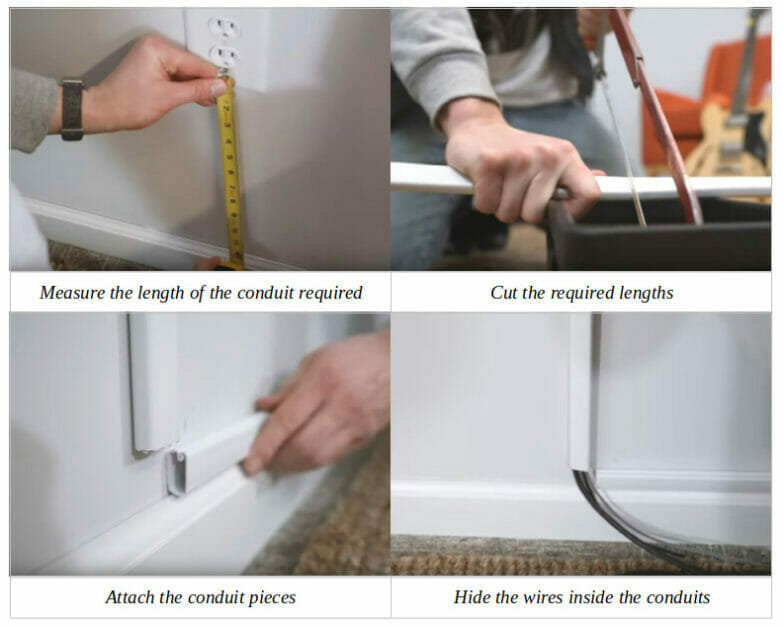
Procedure
The general procedure is:
- Make all necessary measurements and markings to know where to attach the enclosure.
- Cut the lengths into the required pieces.
- Attach the enclosures using nails or drilling into the wall and using screws.
- Insert the wires.
- Attach the cover over the enclosure.
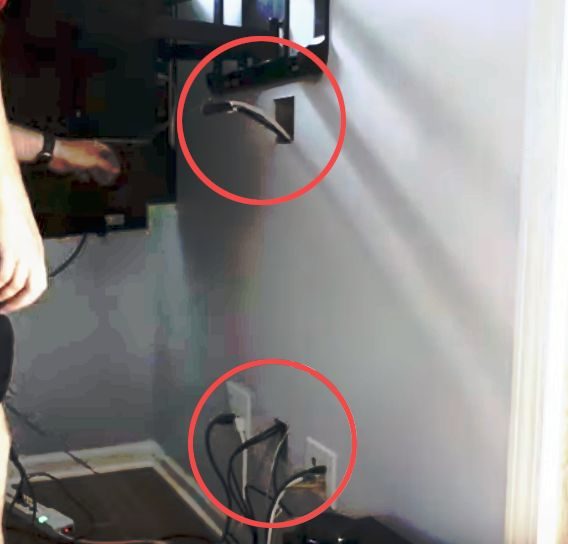
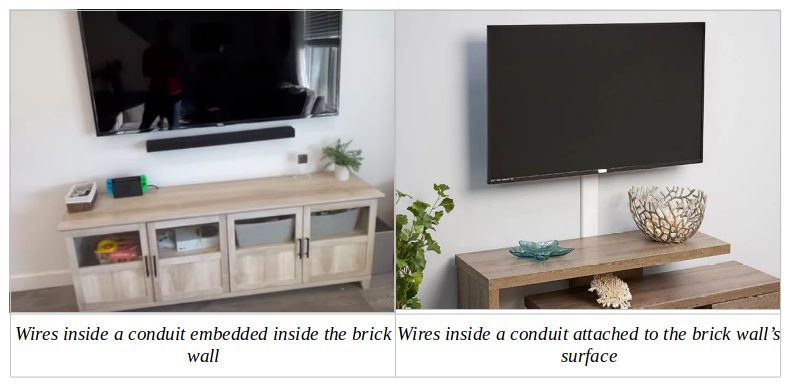
When concealing wires inside an enclosure attached to the surface of the brick wall, the enclosure will be visible, but the wires will not. Here’s an example of TV wires enclosed inside a raceway attached to the wall vertically next to one in which the conduit is embedded.
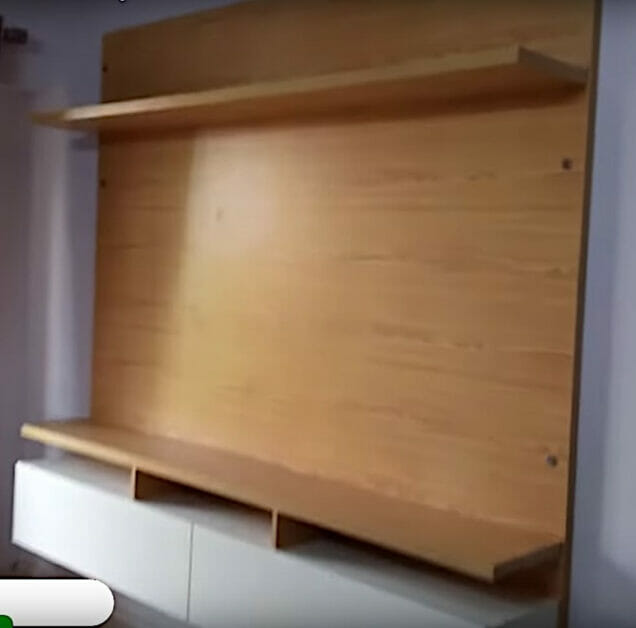
You can even cover a larger portion of the brick wall with a structure to completely hide the wires. Here’s an example of a media wall with a cabinet along the bottom, specially designed for a TV.
Method 4: Covering and Disguising
Other ways to cover wires include putting a frame over them, plants in front of them, applying wallpaper, such as faux brick, if you want to preserve the brick look, and installing a false curtain.
Otherwise, you can disguise the wires by painting them so they camouflage with the brick wall and turning them into wall art.
References
Deep recessed plate with outlet. https://www.amazon.ca/DataComm-Recessed-Voltage-Duplex-Suppressor/dp/B004Q7F030
Flexible electrical conduit. https://www.pipelife.com/buildings/electrical-conduits.html
PVC bend fitting. https://www.cabac.com.au/p/cable-wire-management/conduit-fittings-enclosures/fittings/sbw25-p
Wall-mounted TV wires are hidden inside conduits. https://www.lowes.com/c/Cable-management-concealment-Electronics-Electrical
Video References:
A D Electric
A J Electric
Creative Crambo
Echogear
Glenn Frazee
Framed TV
GSH Electrical
The Weekend Builder
Woodakh