6 min read
Drill Bit for Ceramic Pot (My Recommendation)

Ceramic pots, as charming as they are, can be quite fragile. The last thing you want is for those ordinary drill bits to swoop in like wrecking balls and turn your beautiful pots into a mosaic of sadness.
Masonry drill bits are the go-to when drilling holes in ceramic pots. They’re not your average bits but are designed to tackle the tough stuff like ceramics, tiles, stone, and even concrete.
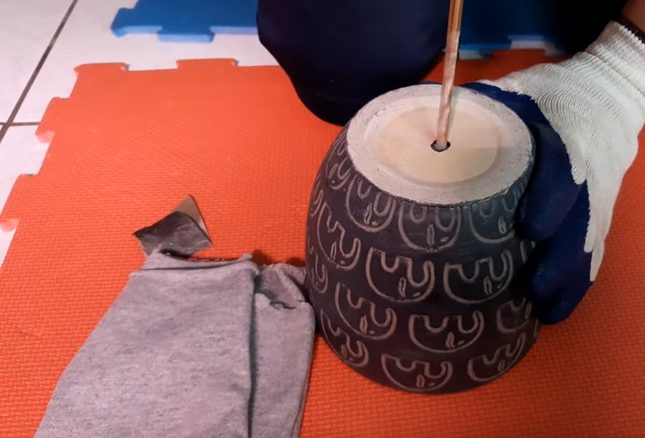
Stay tuned because I’m about to show you how to cut those neat and accurate holes in ceramic pots like a pro!
Why Masonry Drill Bits Rock for Ceramic Pots
Here’s the lowdown on masonry drill bits – they’re the real deal for drilling through tough materials like ceramics, concrete, tiles, and stone. I’ve tackled many projects where precision and the right tools were key. These materials are tough cookies, and you need a bit that’s up for the challenge.
Now, let’s chat about ceramic pots. They’re like that delicate glassware you handle with extra care. Use a regular drill bit, and you might end up with a pot in pieces – trust me, I’ve been there, and it’s not a fun lesson.
You must use a masonry drill bit to avoid turning your ceramic pots into an accidental jigsaw puzzle. It’s all about applying the right amount of pressure with a tool that knows how to handle the fragility of ceramics.
Types of Masonry Drill Bit
Now we will talk about the champions of the drilling world – Tungsten and Carbide-Tipped Bits. Understanding these bits is crucial whether you’re jazzing up a ceramic pot for your succulents or tackling a home renovation project.
- Tungsten Bits – The Tough Guys: These bits are like the superheroes of drill bits. Tungsten, a super-hard element, helps them slice through ceramics without sweat. It reminds me of when I had to drill through some tough old tiles – these bits were lifesavers!
- Carbide-Tipped Bits – Heat’s No Biggie: When things get hot (and they will), these bits keep their cool. They withstand the heat caused by all that drilling friction. Trust me, keeping your bits cool is key – like that time, I had to pause frequently while drilling through a particularly stubborn pot.
With masonry bits, you get a range of sizes for different tasks. For most ceramic pots, a 1/2-inch bit does the trick. Remember, the right size bit means the right size hole – crucial for proper drainage in those plant pots.
Troubleshooting Common Issues
Trust me, I’ve been there – it’s like walking a tightrope above a tile floor. Here’s how you can dodge those pesky problems like cracking or chipping and keep your ceramics looking sharp.
- Cracking Craziness: Ever drill into a ceramic pot and hear that heart-sinking crack? It’s like stepping on a Lego in the dark. The secret? Start slow! Use a low-speed setting on your drill and gently increase as you go. Pressure control is key – think of it as a dance, not a race.
- Chipping Challenges: Chipping can turn a neat hole into a jagged mess. To avoid this, place masking tape over your drilling spot. It’s like putting a mini bulletproof vest on your pot. The tape helps prevent those little chips and keeps your edges smooth.
- Slippery Situations: Ever had your drill bit skid across the pot like a kid on a slip ‘n slide? To keep things steady, mark your spot with a permanent marker or use a spring-loaded punch for a small indent. It’s like giving your drill a tiny target to aim for.
- Overheating Ordeals: Drills can get hotter than a barbecue grill in July. To keep things cool, dip your drill bit in water occasionally. It’s like giving your bit a little spa treatment – it keeps it cool and collected.
- Depth Dilemmas: Drilling too deep is like pouring too much hot sauce – it’s hard to take back. Use a piece of tape on your drill bit as a depth guide. It’s like having a stop sign right where you need it.
Remember, folks, every pot is a new adventure. Stay patient, stay focused, and keep those pots crack-free. Happy drilling, and may your pots always stay in one piece!
Keeping Your Drill Bits Sharp: Maintenance and Storage Tips
Maintaining your drill bits is a lot like caring for a prized set of chef’s knives. Here are my tips for keeping those bits as sharp and reliable as the day you bought them.
| Task | Frequency | Tips, Tricks & Personal Anecdotes |
|---|---|---|
| Clean After Use | After each use | Use a toothbrush or cloth to remove debris. I always clean my bits after a day’s work. |
| Lubricate | Monthly | Apply a drop of machine oil. I learned my lesson when they got stiff once. Now, oiling them is a monthly ritual. |
| Sharpness Check | Every 3 months | Use a bit sharpener or take them to a professional. I compare keeping my bits sharp to maintaining my favorite chef’s knife. |
| Proper Storage | Constant | Store in a dedicated case or organizer. I used to toss them in a box, but now each bit has its slot – a game-changer. |
| Avoid Moisture | Constant | Keep them in a dry place and use silica gel packs. I got hit by rust once; now, I keep my bits as dry as the desert. |
| Regular Inspections | Before use | Check for wear or damage. I always give my bits a quick once-over. |
Remember, taking care of your masonry drill bits is investing in future projects. Treat them right; they’ll be your trusty partners in your DIY adventures. Happy drilling!
Frequently Asked Questions
- Can I Use A Regular Drill Bit Instead?
- Sure, you could, but it’s risky. Regular bits might crack your pot. It’s like using a butter knife to cut a steak – not the best idea.
- What’s The Ideal Drill Speed For Ceramic Pots?
- Go for a medium speed. Too fast, and you risk cracks; too slow, and you’ll be there all day.
- Can I Drill A Hole Without A Power Drill?
- Technically, yes, but it’s tough. It’s like trying to paddle a boat with your hands – possible, but not practical.
- Is It Necessary To Wear Safety Gear While Drilling?
- Absolutely! Safety goggles are a must. Protecting your eyes is as important as wearing a helmet when cycling.
- What Should I Do If My Drill Bit Gets Stuck?
- Turn off the drill, wiggle it gently, and pull out. Patience is key, like getting a key unstuck from a lock.
References
Organizations:
- Ceramic Arts Network. https://ceramicartsnetwork.org/
Books:
- “The Potter’s Bible: An Essential Illustrated Reference for both Beginner and Advanced Potters” by Marylin Scott. https://www.barnesandnoble.com/w/the-potters-bible-marylin-scott/1112345003
Website Resources:
- The Spruce Crafts. https://www.thespruce.com/
- Home Repair Tutor. https://homerepairtutor.com/
Video References:
These Succulent Buddies