
12 min read
A Gorgeous Montana Barndominium (Under $300K)


Edited by: Louise (Editor In Chief)
Fact/quality checked before release.
Fact/quality checked before release.
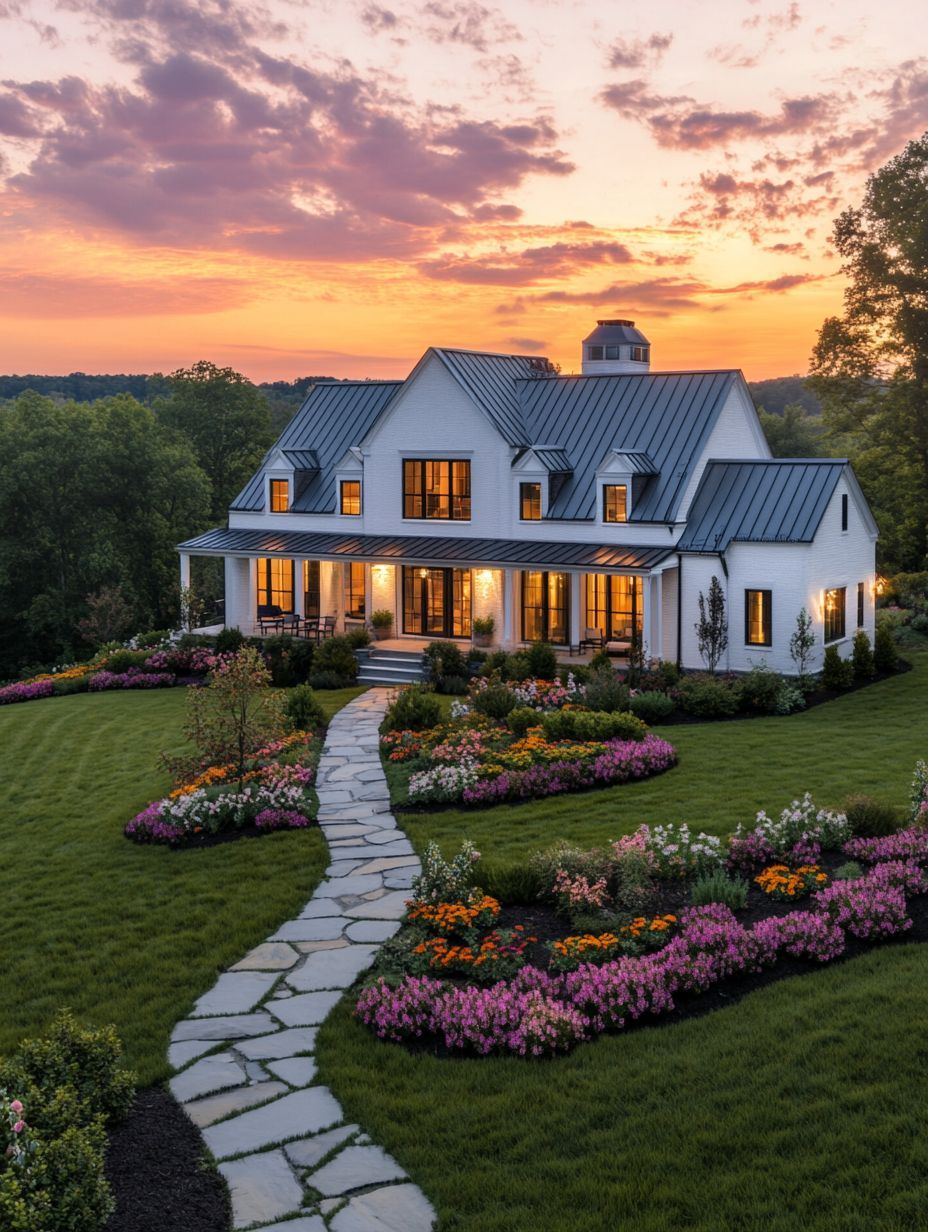
Picture this: you’re standing in the middle of big Montana sky, wind in your face, and you’ve got a plan that’s equal parts cozy home and legit workshop. Not a “cute little hobby corner,” either. I’m talking real space for tools, projects, a vehicle up on jack stands, and that one half-finished thing you swear you’ll get back to.
In this text, I’m walking you through how I’d build a gorgeous Montana barndominium with workshop space built for under $300K. We’ll hit the vision, the shell, the layout, the shop setup, the budget, and the Montana-only stuff that can sneak up on you (hello, snow loads). And I’ll toss in the lessons I learned the hard way, because I’ve absolutely been that guy who bought the wrong door and had to “make it work.”
The Vision: Comfortable Living Plus A Real Workshop
A barndominium only works if it doesn’t feel like you’re living in a garage… and the shop only works if it’s not just a big empty box you can’t actually use. My vision here is simple: warm, livable home on one side, serious workshop on the other, with a layout that keeps the peace between sawdust and Sunday morning pancakes.
I like to start by asking one question: What do I want to do in the shop that I can’t do in a normal garage? If your answer is “restore an old truck,” “build furniture,” “weld without burning my eyebrows,” or “run a small side business,” then yeah, you need a real workshop.
Why A Barndominium Makes Sense In Montana
Montana doesn’t mess around. Weather swings. Snow. Wind. Mud season that tries to steal your boots. A barndominium makes sense because it’s efficient to build, it can be tough as nails, and it’s flexible.
Here’s the big win: you’re basically building a strong, simple shell that goes up fast, then you finish the inside but you want. That can keep labor costs from getting totally outta control.
And I’m gonna say it: Montana is made for this style. You can lean into that lodge-ish vibe without it feeling fake. Metal roof, clean lines, wood accents, big porch. It fits.
How The Floor Plan Balances Home And Shop
The trick is the “buffer zone.” I like the living space and shop space to share a wall, sure, but not share a lifestyle.
What works great is:
- Shop on one end, home on the other
- Mudroom/laundry right where you enter from the shop
- A mechanical room (water heater, HVAC, etc.) along that shared wall to help with sound
- Bedrooms pushed away from the shop side, because nobody wants to hear an air compressor at 10:30 pm
If I’m sketching this out, I’m thinking something like 1,200 to 1,500 sq ft living plus 900 to 1,200 sq ft shop. That’s a sweet spot where it feels roomy, but you’re not paying to heat a hangar.
The Site And Shell: Smart Choices That Keep Costs Down
This is where the budget is either saved or absolutely wrecked. People get excited about fancy finishes, but your site work and shell can eat the whole under-$300K dream in one bite if you’re not careful.
I learned this on a project years ago where we had “a gorgeous view” and also “a nightmare driveway.” Guess which one cost more. Yep.
Picking A Practical Build Site And Footprint
If I’m trying to keep this under $300K, I’m looking for:
- Short driveway (or at least an easy one)
- Decent soil for septic, because failing a perc test is a bad day
- A spot that’s not a wind tunnel
- A footprint that doesn’t require a bunch of weird corners
Simple shapes are cheaper. A clean rectangle is your best friend. Every bump-out and roof jog looks cool… and costs money. Also, set the building so snow slides and drifting don’t bury your doors. You can’t enjoy a shop if you’re shoveling it open like a cartoon.
Post-Frame Or Steel Shell: What Works Best For Budget
For a Montana barndominium, I usually see two routes:
- Post-frame (pole barn style)
- Red-iron steel or steel-framed shell
Post-frame can be super cost-effective and fast, especially if you’ve got local builders who do it all the time. Steel shells are awesome too, but depending on local pricing and crew availability, they can climb.
If the goal is under $300K, I lean toward what’s common in your area. The “best system” is the one that has:
- Reliable crews
- Predictable material supply
- Straightforward engineering for snow load
And don’t skip engineering. Montana snow loads are not the place to wing it. Not even a little.
Doors, Windows, And Exterior Finishes That Look High-End
Here’s a funny thing: you can make a barndominium look expensive without actually spending like a maniac.
My favorite high-impact moves:
- Bigger windows on the house side, but keep the total count reasonable
- One statement entry door (doesn’t have to be custom, just looks solid)
- A covered porch. Porches are like instant charm.
- Use two exterior materials max. For example: metal siding plus a wood accent wall, or metal plus stone wainscot (but keep stone small, it gets pricey fast)
Also, garage/shop doors matter. A tall overhead door looks pro and it’s insanely useful. Just don’t buy the cheapest one and then act surprised when it rattles like a shopping cart.
Inside The Home: Layout, Finishes, And Everyday Function
Inside is where I want it to feel like a home, not like “I’m camping in a building.” You can go simple, but it should still feel intentional.
An Open Great Room That Still Feels Cozy
Open concept is great until you’re yelling across the house like you’re directing airport traffic.
What I like is an open great room with “zones”:
- Kitchen with an island (not massive, just practical)
- Dining area by windows
- Living area anchored by a fireplace or wood stove look
If you do a vaulted ceiling, it feels awesome. Just remember: tall ceilings can cost more to heat. The compromise I love is a modest vault in the main room, then standard ceilings in bedrooms.
And here’s a little trick: use lighting to warm it up. A couple pendants and some wall sconces can make even basic drywall feel way more finished.
Bedrooms, Bath(s), And Storage That Don’t Waste Square Footage
I’d rather have a slightly smaller bedroom and a smart closet than a big bedroom with nowhere to put anything.
A good under-$300K setup might be:
- 2 bedrooms + 1 or 2 baths
- A small office nook (even a hallway built-in desk works)
- A real pantry (doesn’t have to be huge)
Storage is where people mess up. If you don’t plan storage, your house becomes storage. Coats on chairs. Boots everywhere. Random tool bags in the kitchen. It’s chaos.
Put a mudroom at the main entry, especially if you’re coming in from the shop. Montana life is messy, and that’s fine, but let the mud stop at the door.
Durable, Budget-Friendly Finishes With A Montana-Lodge Feel
You can get that Montana-lodge feel without spending “fancy cabin” money.
My go-to finish picks:
- LVP flooring (good quality). It handles dogs, snow boots, and dropped tools.
- Painted cabinets or simple shaker cabinets
- Butcher block or affordable quartz-look counters (shop around, seriously)
- A couple wood accents: open shelves, a beam, or a tongue-and-groove ceiling in one area
Here’s my little confession: I once tried to cheap out on trim and thought, “Nobody notices trim.” People notice trim. I noticed trim. I ended up redoing it later, which is the most expensive way to save money. So yeah, pick decent trim profiles and install them clean. You’ll thank yourself.
Workshop Space That’s Actually Useful
This is the heart of the whole thing. The workshop is where you build, fix, create, maybe blow off steam after a long week. If the shop is cramped or underpowered, you’ll hate it.
Sizing The Shop For Vehicles, Tools, And Projects
If you want a shop that works, think in real dimensions, not vibes.
A solid baseline:
- 30×30 is good for basic projects and one vehicle
- 30×40 is where it starts feeling like a real deal shop
- 40×40 is amazing if the budget allows
I’d rather have a slightly smaller house and a shop I actually use than the other way around. Because let’s be honest, the shop becomes the hangout spot anyway.
Add these if you can:
- A 12-foot overhead door if you’ve got a truck, trailer, or future plans
- A man door near the driveway so you’re not opening the big door every time
- Space for a workbench that’s not jammed into a corner
Power, Lighting, Ventilation, And Compressed Air Basics
This is where “real workshop” starts.
- Electrical: plan more outlets than you think. Put them every few feet. You will use them.
- Lighting: bright, even LED shop lights. No dark corners.
- Ventilation: if you’re welding, painting, or running a lot of dust, you need airflow.
- Compressed air: if you’re doing air tools, run a line or at least plan a spot for the compressor that won’t drive you nuts
Also, run internet out there if you can. I know it sounds silly, but pulling up a manual or a how-to video while you’re elbow-deep in a project is basically modern survival.
Noise, Dust, And Fire Separation From The Living Area
This part is not optional, it’s sanity.
Do these things:
- Insulate the shared wall well
- Use solid-core doors between shop and house
- Consider fire-rated drywall on the shop side where required
- Seal gaps like you’re trying to keep out a swarm of tiny dust monsters
And dust control matters. If you’ve ever tracked fine sawdust into a house, you know it ends up everywhere, including places that don’t make sense. Like the inside of your fridge. How. Why. It just does.
The Under-$300K Budget: Where The Money Goes
Okay, let’s talk numbers. Under $300K is doable, but you’ve gotta make a bunch of unsexy decisions on purpose.
First, I’m assuming you’re being realistic about what’s included. Land is usually separate. And if your site needs a mile-long driveway, a complicated well, and power brought in from far away, that’s gonna change everything.
Sample Cost Breakdown By Major Line Item
Every build is different, but here’s a sample breakdown that’s in the spirit of an under-$300K Montana barndominium with workshop space:
- Site work (grading, gravel, excavation): $15K to $35K
- Foundation/slab: $25K to $45K
- Shell (framing, siding, roofing): $70K to $110K
- Windows/doors: $12K to $25K
- Plumbing + electrical + HVAC: $35K to $65K
- Insulation + drywall: $20K to $40K
- Interior finishes (flooring, cabinets, paint, fixtures): $25K to $55K
- Shop build-out (electrical, lighting, basic heat): $10K to $25K
- Permits/fees/contingency: $10K to $20K
Can you see the theme? The shell and the mechanical stuff take a big bite. That’s normal.
Where To Spend For Longevity Versus Where To Save
If I’m choosing where to spend, I’m spending on:
- Roof and exterior details that keep water out
- Insulation and air sealing (comfort is everything)
- Electrical capacity for the shop
- Good windows where it counts (not necessarily fancy everywhere)
Where I save:
- Simple cabinet layouts (no weird custom stuff)
- Fewer plumbing moves (keep bathrooms near the kitchen wall if possible)
- Stock interior doors and basic trim (installed well)
- Affordable flooring that’s tough
And listen, I love fancy tile as much as the next guy. But if tile is what pushes you over budget, it’s not worth it. Not right now.
DIY-Friendly Tasks That Move The Needle
If you’re handy, sweat equity can help a lot. Just don’t DIY the stuff that can wreck your safety or your inspections.
DIY wins that actually matter:
- Painting (huge savings)
- Installing LVP flooring
- Basic trim work if you’re patient
- Shop shelving and workbenches
- Landscaping and gravel spreading
Quick story: I once tried to install a door without shimming it right because I was in a hurry. The door swung open by itself for like two weeks. My buddy walked in, watched it drift open, and goes, “Is your house haunted or are you just bad at doors?” I fixed the shims. No ghosts. Just me.
That’s the vibe here. Do what you can, but do it right, or you’ll redo it later while muttering to yourself.
Utilities, Permits, And Weather: Montana-Specific Realities
Montana is incredible, but it’s not forgiving. If you ignore utilities and weather, your budget and comfort will both suffer.
Well, Septic, And Driveway Costs To Plan For Early
These costs can surprise people because they don’t feel like “the house,” but they are.
Plan for:
- Well depth and pump costs (can vary a lot by area)
- Septic system sized for bedrooms and local code
- Driveway and culverts if needed
- Power run from the road to the building site
If you can, talk to local well drillers and septic installers before you finalize your site. They’ll tell you what’s typical in your area, and they’ll also tell you what’s a bad idea. Usually with a little laugh.
Insulation, Heating, And Snow Loads
If you want your barndominium to feel good in January, insulation and heating aren’t optional upgrades. They’re the whole game.
- Aim for solid wall and roof insulation levels that match your climate zone
- Air sealing matters as much as insulation
- Consider shop heat. Even a modest unit heater can keep projects from freezing up
And snow loads: your roof structure needs to be designed for it. I know I already said it, but I’m saying it again because roofs are expensive and gravity is undefeated.
Permitting, Inspections, And Shop Use Considerations
Permitting depends a lot on county rules, zoning, and whether you’re in city limits. The workshop adds extra questions, too, especially if you plan to:
- Run a business
- Have customers on site
- Store flammables
Call your local building department early. It’s not the fun part, but it saves you from the “Wait, we can’t do that?” moment when you’re already halfway in.
Also, insurance. A house with a big shop can need different coverage, especially if there’s business use. Better to know up front than after you’ve filled the shop with tools.
Conclusion
If you want a gorgeous Montana barndominium with workshop space built for under $300K, it’s not about luck. It’s about stacking smart choices: a practical site, a simple footprint, a tough shell, and a shop that’s planned like you mean it.
If I were doing this tomorrow, I’d start with the layout and the site plan before I picked a single backsplash tile. Because once the shell and utilities are right, the rest is just decisions. Fun decisions.
And hey, if you take one thing from me, let it be this: build the shop you’ll actually use, and build the house that can handle real Montana life. Snow boots, projects, muddy dogs, late nights, all of it. That’s the good stuff.