7 min read
How to Test Positive and Negative Speaker Wires with a Multimeter? (Guide)
Hey everyone, I will walk you through a task that might seem daunting at first but is quite simple once you know the steps: testing the polarity of your speaker wires using a multimeter.
In general, the most common way to check the polarity of the speaker wires with a multimeter is to:
- Step 1: Unplug all audio system components to ensure safety before you start.
- Step 2: Set your digital multimeter to the DC volts setting.
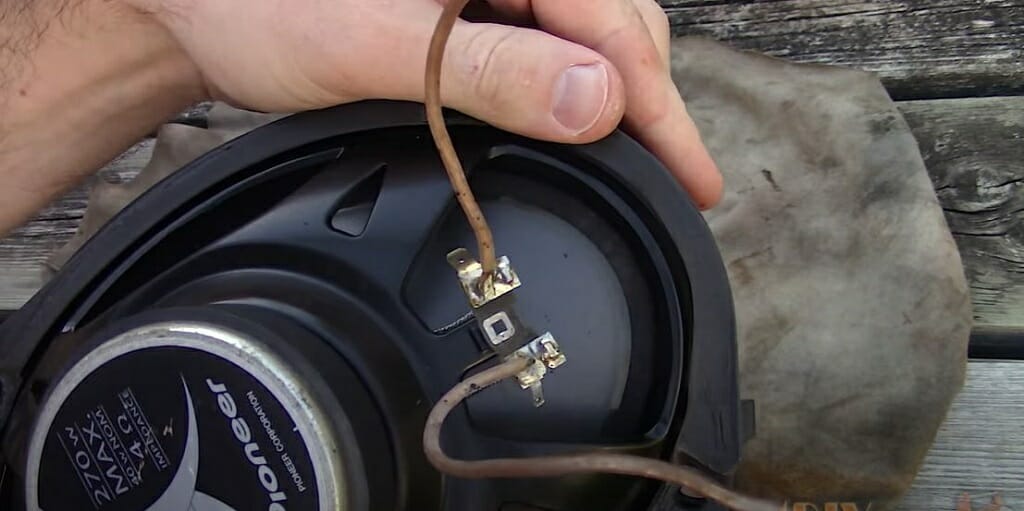
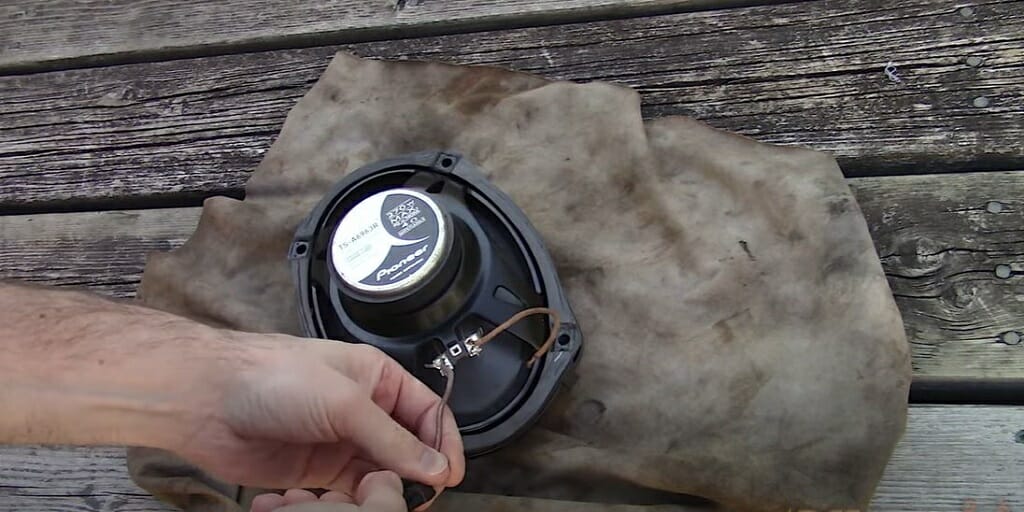
- Step 3: Identify your speaker’s larger (positive) and smaller (negative) terminals to guide your testing.
- Step 4: Attach the multimeter’s probes to the speaker wires.
- Step 5: Turn on the radio or your audio source to signal through the wires and watch the multimeter for a reading.
- Step 6: A positive reading on the multimeter indicates the red probe is connected to the positive wire and the black probe is on the negative wire.
- Step 7: After confirming the polarity, reconnect your audio system using the photo you took as a reference, ensuring everything is set up for optimal sound performance.
This guide will take you through the process step by step, so you can be confident that your audio setup is wired correctly and ready to deliver crisp, clear sound. Let’s dive in.
How to Use a Digital Multimeter to Determine the Polarity of the Speaker Wires?
Today, we’re tackling a task that might seem small but is mighty important for achieving that crystal-clear sound quality we all crave: testing speaker wire polarity.
I’ve streamlined the process into seven easy steps. So grab your multimeter, roll up your sleeves, and ensure your speakers are set up for success.
Step 1 – Prep Your Space
Begin by powering down and unplugging all components of your audio system. Snap a photo of your setup to help you remember how to reconnect everything later.
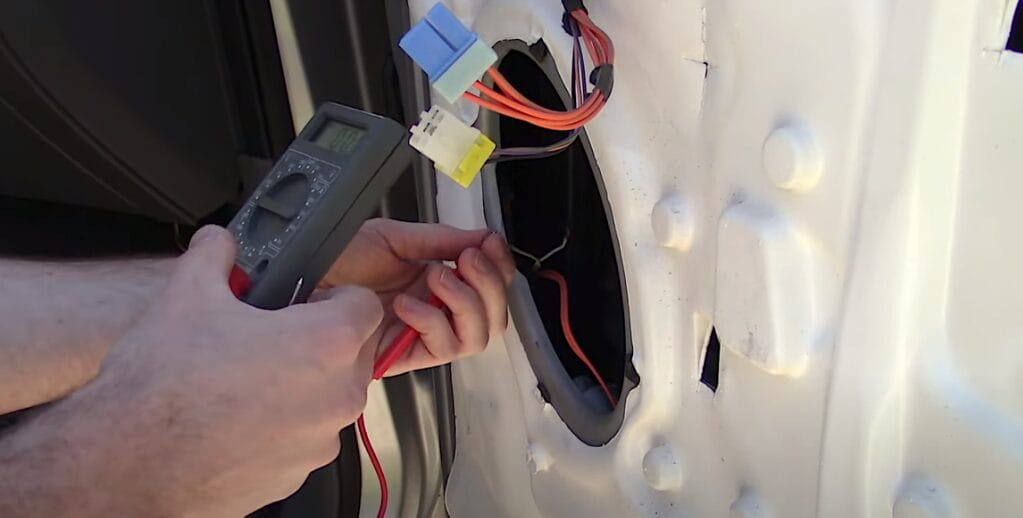
Step 2 – Set up the Multimeter
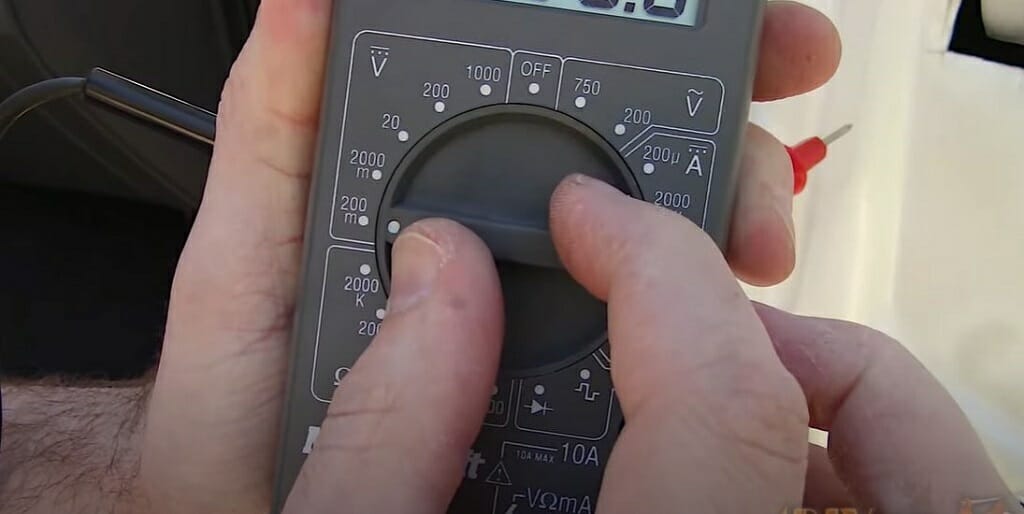
Dial your digital multimeter to the DC volts setting, aiming for accuracy in the 200-millivolt range. Attach the black probe to the COM port and the red probe to the VAΩ port.
Step 3 – Identify Speaker Terminals
Look at the terminals on your speaker; you’ll find a larger one (positive) and a smaller one (negative). Keep this in mind as you test the wires.
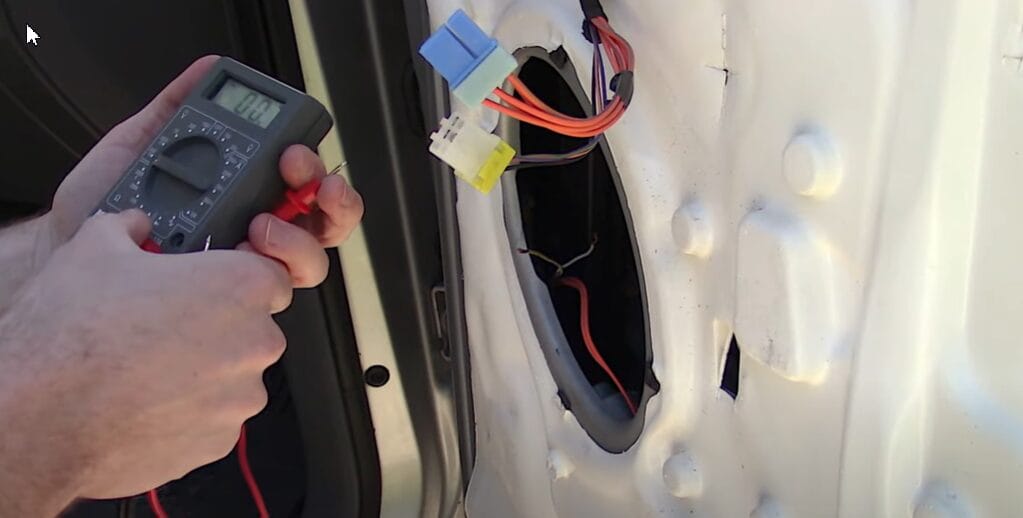
Step 4 – Connect Multimeter Probes
Attach the multimeter probes to the speaker wires. You can use any available wire extensions for an easier connection.
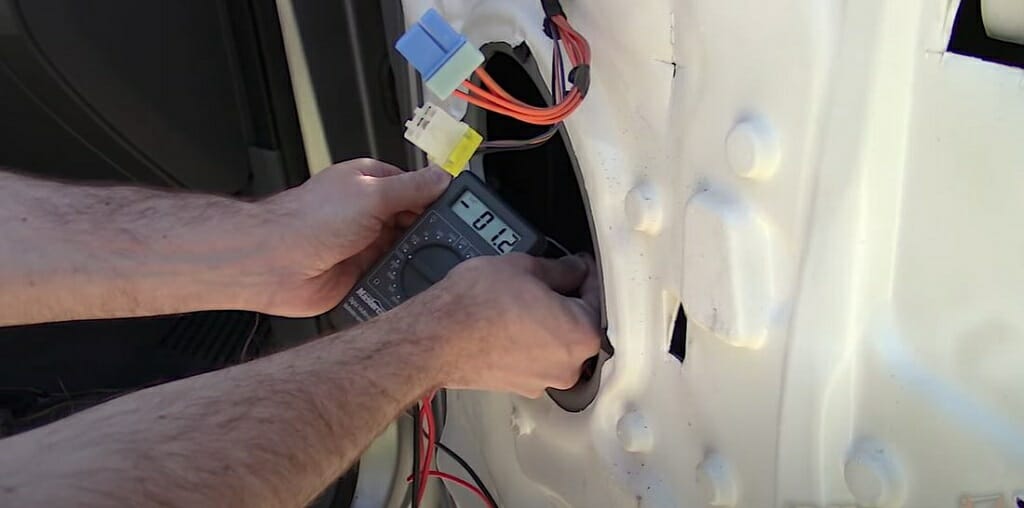
Step 5 – Power On and Test
Watch the multimeter with the radio or another audio source turned on to send a signal. You’re looking for a positive or negative reading to determine the wire polarity.
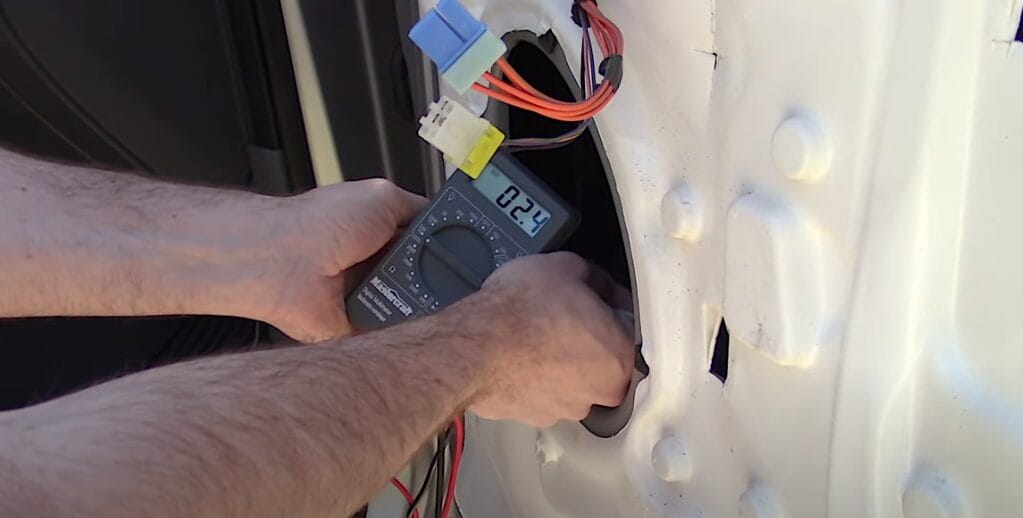
Step 6 – Interpreting the Reading
A positive reading means you’ve got the red probe on the positive wire and the black probe on the negative wire. Note the wire characteristics (color, striping) for future reference.
Step 7 – Reassemble and Test
Once you’ve confirmed and corrected any polarity issues, reconnect your system. Refer back to the photo you took at the start for guidance.
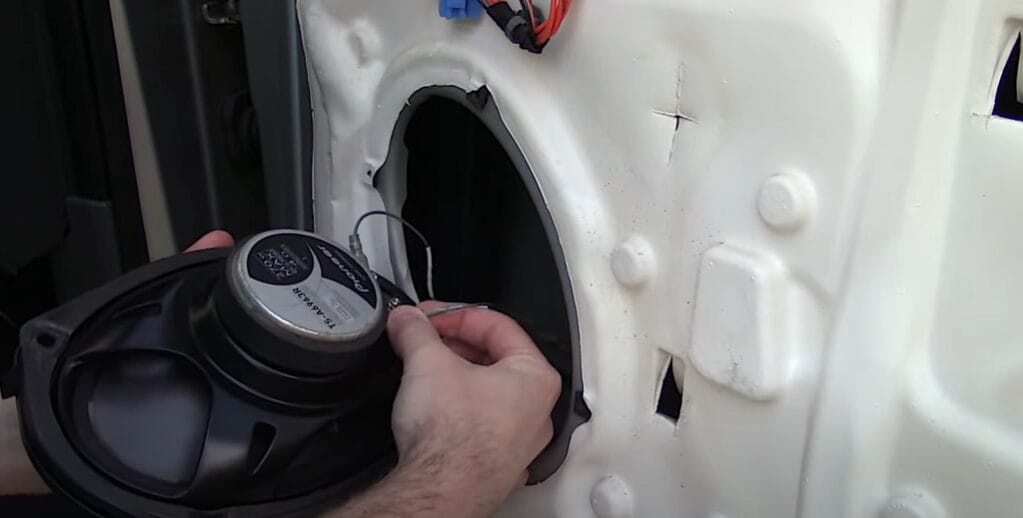
Fire up your audio system to enjoy the clear, dynamic sound of correctly wired everything.
Troubleshooting Tips for Testing Speaker Wire Polarity
When diving into DIY audio setups, ensuring your speaker wires are correctly polarized is crucial for achieving that perfect sound. However, even with the best instructions, you might run into a few hiccups along the way.
To keep you on track, here’s a straightforward table of common issues you might encounter while testing speaker wire polarity, along with practical solutions to get you back to smooth sailing—or, should we say, smooth listening.
| Problem | Solution |
|---|---|
| Unclear Wire Markings | Examine the wires closely for any subtle differences like a stripe or text. Determine polarity using a small battery or multimeter, then mark the wires yourself. |
| Ambiguous Multimeter Readings | Ensure the multimeter is on the correct setting and its battery is not low. Check connections for security and avoid contact between wires or with metal surfaces. |
| There is no Movement in the Speaker Cone with the Battery Test | Verify the battery is charged, and connections are secure. If there’s no movement, inspect the speaker and wires for damage. |
| Distorted Sound After Connection | Check wire polarity again. If correct but distortion persists, inspect the speaker for damage and review amplifier settings. |
| No Continuity in Wires | Inspect wires for visible damage. Use a multimeter to check both wires together; lack of continuity indicates a break or poor connection. |
We’ll dive into some common problems you might encounter during this process and offer practical solutions to help you resolve them efficiently.
Remember, patience and detective work can help ensure your audio setup delivers the best sound quality.
Frequently Asked Questions
- What Is a Digital Multimeter and Why Do I Need It for This Task?
- A digital multimeter is a tool that measures electrical values such as voltage, current, and resistance. It’s crucial for this task because it helps you identify which speaker wire is positive and which is negative, ensuring your sound system is set up correctly for the best audio quality.
- Can I Test Speaker Wires Without a Multimeter?
- While a multimeter is the most accurate tool for testing speaker wire polarity, alternative methods include using a small battery to observe speaker cone movement. However, these methods may not provide as clear or reliable results as a multimeter.
- Is It Safe to Test Speaker Wires with a Multimeter?
- Testing speaker wires with a multimeter is safe if you follow the correct procedure. Ensure all components are unplugged before you start, and handle the multimeter probes carefully to avoid short circuits.
- Can Incorrect Speaker Wire Polarity Damage My Equipment?
- Incorrect speaker wire polarity won’t necessarily damage your equipment, but it can significantly affect sound quality. Reversing polarity can cause audio signals to cancel out, leading to poor performance of your sound system.
- How Often Should I Check My Speaker Wire Polarity?
- It’s a good idea to check your speaker wire polarity whenever you set up a new system, make changes to your existing setup, or experience sound quality issues. Regular checks are not typically necessary unless you suspect a problem.
Resources
Organizations
- Audio Engineering Society (AES) – https://aes2.org/
- Consumer Electronics Association (CEA) – https://www.standardsportal.org/usa_en/sdo/cea.aspx
Books
- “The Sound Reinforcement Handbook” by Gary Davis & Ralph Jones https://books.google.com/books/about/The_Sound_Reinforcement_Handbook.html?id=d7ft6F8ZUdcC
- “Home Theater For Dummies” by Danny Briere & Pat Hurley – https://books.google.com/books?id=78W137fjjkQC&printsec=copyright
Website Resources
- Crutchfield – https://www.crutchfield.com/
- Audioholics – https://www.audioholics.com/
- Parts Express Project Gallery & TechTalk Forum – https://techtalk.parts-express.com/
Video References
4DIYers