8 min read
What Color Speaker Wire is Positive? (Identification, Polarity)

You might be thinking, “Wire is wire, right?” Well, not exactly. It turns out that the color of your speaker wire can tell you a lot about its Polarity.
Now, if you’re like me when I first started messing around with audio equipment, terms like “positive” and “negative” wires might sound more fitting for a science lab than your living room setup, but trust me, getting this right can make a world of difference in how your music sounds!
Quick Summary: Here’s the deal: typically, the positive speaker wire is red, while the negative one tends to be black or white. Don’t sweat it if yours aren’t these colors! There are no hard and fast rules in this game. The key is consistency; make sure whatever color you decide is ‘positive’ on one end matches up with ‘positive’ on the other.
I will go into more detail below!
The Color Coding in Speaker Wires
Let’s start with the basics. Speaker wires are typically red and black. Typically, but not always — remember, this is just a general rule! The red wire is usually positive (+), and the black one is generally negative (-) or ground.
But wait, there’s more! You might also run into clear speaker wires where one side has some marking (like text or a stripe). In case you come across these bad boys, here’s what you need to know:
- The marked side is often positive.
- The unmarked side stands for negative.
Now, if things couldn’t get any more twisted (get it?), we have green and white wires too. These are pretty rare, though:
- Green usually means left channel
- White or grey often stands for the right channel
It seems like many colors to keep track of when we all want some sweet sound from our speakers. That’s why I’m here! To help make sense of audio chaos!
Different manufacturers may use different colors. It might seem like they’re just trying to drive us crazy – but they’re aiming for clarity… even if it doesn’t always feel that way!
So next time when dealing with speaker cables feels like defusing a bomb in an action movie – take a deep breath and remember:
| Color | Function | Association |
|---|---|---|
| Red | Positive | Marked Side |
| Black/Ground | Negative | Unmarked Side |
| Green | Left Channel | |
| White/Grey | Right Channel |
Deep Dive Visuals – Positive and Negative on Speaker Wire
Let’s review. In most cases, you’ll find that:
- The positive wire has a solid color or stripe (like red or another bright color)
- The negative wire is usually black or has no markings
What’s important here isn’t necessarily the exact hue but recognizing that two distinct colors represent positive and negative connections.
Not to confuse you further, but occasionally, both wires might be the same color! When this happens:
- Look for a line or text printed along one side of the cable. That’s typically your positive indicator.
- If there are no lines or text, check for square versus rounded edges—the square edge generally denotes positive.
Here comes my favorite bit: When in doubt… try it out! Yes! You heard me right; hook them up and give them a whirl. If your speakers sound odd or distorted — flip those wires around because chances are you’ve got them reversed.
Remember, folks—while we want to get our setup just right—it’s not likely to cause serious damage if we accidentally swap our connections momentarily. Take your time and play around until everything sounds as it should!
What If There’s No Color on My Speaker Wire?

Okay, let’s say you’ve got your hands on a speaker wire, and there’s no hint of color. It happens to the best of us. Don’t worry; I’m here to walk you through this.
Your first thought might be, “What now?” Well, let me tell you – it’s not the end of the world if your speaker wire has no colors. It can happen more often than not with some brands or older models.
So, how do you determine which is positive and which is negative? Here are a few tricks that might help:
- Look for markings: Some wires may not have colors but could still have markings. One side of the wire might be completely smooth, while the other has ridges or lines.
- Check for text or symbols: Some manufacturers put small text or symbols on one side of the wire.
- Test with a battery: This should be your last resort because it requires extra caution! Connect each end of the wire to a small battery (like AA). The speaker cone will move outward if connected correctly – positive terminal to positive wire.
Please pay close attention here, folks: it’s important never to connect speakers with reversed Polarity, as this can damage them!
Now remember – these are just guidelines and may not work in every case. But they’re worth trying before calling in professional help (or buying new wires).
How to Correctly Connect Your Positive Speaker Wire
1. Identify the Positive Wire Color
- We’ve mentioned this a few times above: The positive speaker wire is often a different color than the negative one. While red is commonly used for positive, it can vary based on the manufacturer.
- Always refer to your equipment’s manual for wire colors and connections guidance.
2. Consult the Manual
- Check the manual of your speakers, amplifier, or audio equipment. Manufacturer instructions are a reliable source for correct wiring information.
3. Confirm Positive Wire
- Determine which wire is positive. It’s a crucial step in ensuring proper audio setup.
4. Prepare for Connection
- Gather your speaker wire and identify the positive end, usually marked with a stripe or color.
- Identify the terminals on both the speaker and the amplifier.
5. Connect Positive Wire
- Attach the positive wire (e.g., red) from the speaker to the corresponding positive terminal on the amplifier.
- Ensure a secure and snug connection without any loose strands.
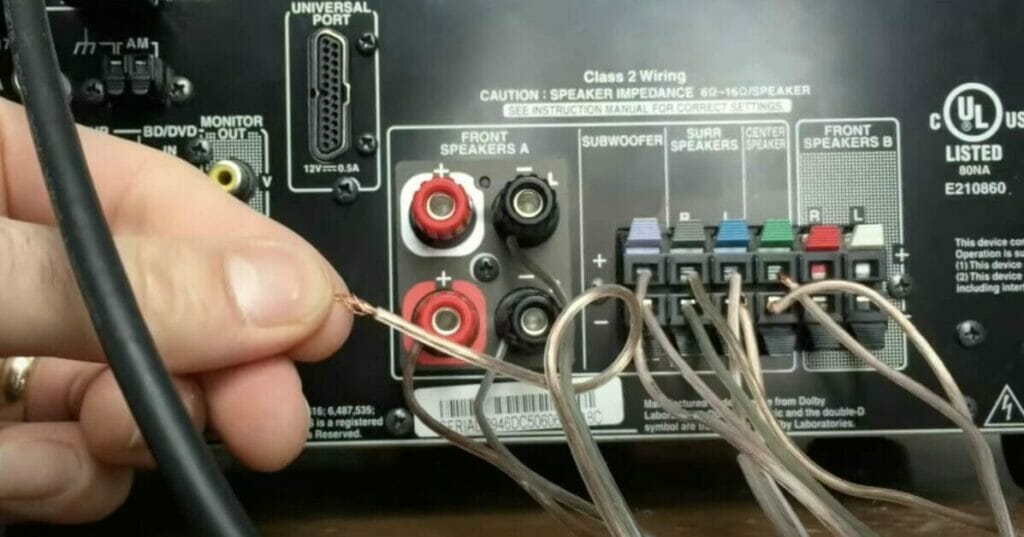
6. Match Terminal Colors
- Ensure the speaker’s positive terminal matches the amplifier’s positive terminal.
7. Connect Negative Wire
- Attach the negative wire (often black or silver) from the speaker to the negative terminal on the amplifier.
8. Maintain Polarity
- Keep the wire polarity consistent. The positive wire on one end should match the positive terminal on the other end.
9. Avoid Polarity Mix-Up
- Be cautious not to swap wires or reverse polarities between speakers. Incorrect Polarity can result in lower audio quality due to phase cancellation.
10. Remember the Golden Rules
Follow these essential guidelines:
- Check wire colors for identification.
- Ensure terminals are correctly matched.
- Avoid mixing up polarities between connections.
11. Double-Check Connections
- Before finalizing, review your connections. Make sure wires are securely attached to their respective terminals.
12. Test Your Setup
- Turn on your sound system and play audio to verify that the speakers produce sound as expected.
13. Troubleshooting
- If you encounter sound issues, ensure the wires are connected properly and maintain Polarity.
- Troubleshoot by checking for loose connections or reversed wires.
Following these steps and adhering to the golden rules will ensure a proper and optimal audio setup for your sound system.
Until next time, happy listening, my friends!
References
Studies and Organizations:
- Institute of Electrical and Electronics Engineers (IEEE). https://www.ieee.org/
- Audio Engineering Society (AES). https://aes2.org/
Books:
- “The Audio Expert: Everything You Need to Know About Audio” by Ethan Winer
- “The Sound Reinforcement Handbook” by Gary Davis and Ralph Jones
Website Resources:
- Crutchfield. https://www.crutchfield.com/
- HowStuffWorks. https://www.howstuffworks.com/
- Audioholics. https://www.audioholics.com/
Video References:
Techquickie
Quality Mobile Video
Audio Advice
Vintage Stereo
The Review King