8 min read
How to Wire a Trolling Motor for 24 Volts (2 Methods)
A 24V trolling motor is more powerful than a 12V one, giving you more powerful fishing capability.
It provides a good balance for affordable fishing compared to 12V and 36V. But the wiring would be different, as you can imagine. It requires 2 batteries to provide 24V. So, let’s see how you would wire a 24V trolling motor.
To wire a trolling motor with 24V, join two 12V batteries in series using a jumper cable connecting two opposite polarity terminals. Then, connect the power supply’s positive wire to the nearest battery’s positive terminal and its negative one to the second battery’s negative terminal.
It is a simple setup, so I will also show alternative options, including one or two circuit breakers and switches.
Wiring a 24V Trolling Motor
You can arrange a 24V power supply for your trolling motor by using a single 24V battery or connecting 2 12V ones in series, which is more common.
I will describe 2 different methods for wiring 2 12V batteries in series to power a 24V trolling motor: one based on the first wiring diagram below, which incorporates a circuit breaker, and a simpler method that excludes it.
If you need help deciding which one to apply, I recommend including a circuit breaker if you can (Method 1).
Wiring Diagram
A simple circuit for wiring two 12V batteries in series to a 24V trolling motor would look like this:
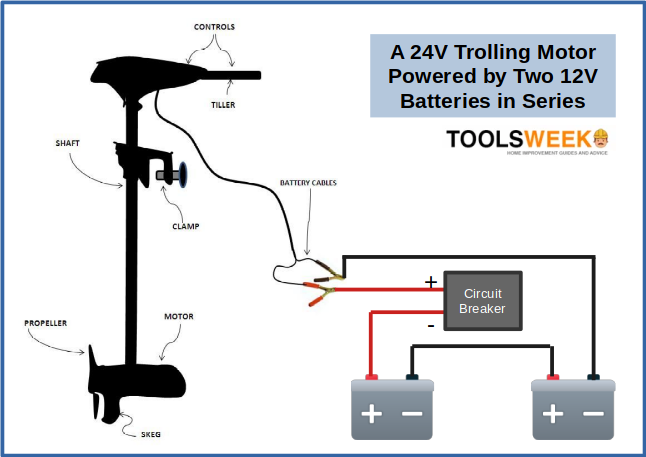
The circuit breaker in the above circuit is optional but recommended. It will help protect the motor and wiring. You can alternatively use a fuse or exclude it. I’ve also given the wiring diagrams for more alternatives at the end.
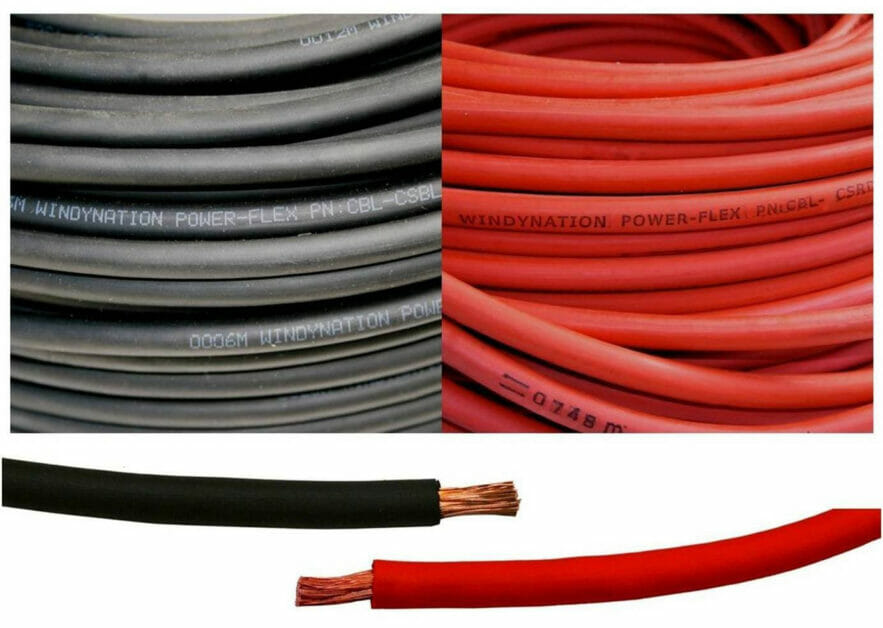
Wires
A 24V trolling motor normally requires an 8-gauge wire unless it is over 20 feet, in which case, use a 6-gauge wire instead.
6-gauge wire is thicker than 8-gauge wire and will better cope with voltage drop for a longer run. You will need a pair of cables and one or two additional lengths. Normally, red and black ones are used. One additional length will function as a jumper wire between the batteries.
Note that the red wire usually connects to the positive terminal and the black wire to the negative one. But the series arrangement requires connecting one pair of opposite terminals together, so one terminal connection will look odd by having a different colored wire attached to it.
Batteries
As you can see in the wiring diagrams above, wiring a 24V trolling motor requires connecting 2 12V batteries in series.
The 2 batteries will double the voltage to provide 24V (12V + 12V). So, you will need 2 batteries and know how to wire them in series. As long as you have 2 healthy 12V batteries, you can obtain 24V, but only if wired in series, not parallel.
The type of batteries doesn’t matter so much, but I’ve covered this information at the end if you want to know your options. Suffice it to mention, use 2 batteries of the SAME type, i.e., don’t mix different types.
Circuit Breaker
If you include a circuit breaker, you usually need a 40-amp one.
Method 1: Wiring a 24V Trolling Motor Incorporating a Circuit Breaker
Follow the steps below to wire 2 12V batteries in series to power a 24V trolling motor by incorporating a circuit breaker in the circuit. Refer to the first wiring diagram above.
Step 1: Connect the Positive Wire
Connect the power cable’s positive (red) wire to the circuit breaker’s positive terminal.
Step 2: Connect the Circuit Breaker
Connect the circuit breaker’s negative terminal to the nearest battery’s positive terminal.
Step 3: Connect the Jumper Wire
Connect a jumper wire from the middle pair of opposite terminals from one battery to another. Usually, this means the first battery’s negative terminal to the second battery’s positive terminal.
Step 4: Connect the Negative Wire
Connect the power cable’s negative (black) wire to the free negative terminal on one of the batteries, usually at the far end.
Method 2: Wiring a 24V Trolling Motor without a Circuit Breaker
Method 2 is similar to Method 1 except that the power cable’s positive wire connects directly to the first battery’s positive terminal without passing through a circuit breaker, as it is excluded from the circuit.
Step 1: Connect the Positive Wire
Connect the power cable’s positive (red) wire to the nearest battery’s positive terminal.
Step 2: Connect the Jumper Wire
Same as Step 3 in Method 1: Connect a jumper wire from the middle pair of opposite terminals from one battery to the other. Usually, this means the first battery’s negative terminal to the second battery’s positive terminal.
Step 3: Connect the Negative Wire
Same as Step 4 in Method 1: Connect the power cable’s negative (black) wire to the free negative terminal on one of the batteries, usually the one at the far end.
Alternative Methods and Battery Options
Two Circuit Breakers
It’s possible to include 2 breakers in the circuit instead of one.
To do so, include the second breaker on the positive leg of the second battery. Both breakers will then protect the positive side of each battery.
Relay Switch
If you’ve arranged your system for parallel wiring when the switch is turned off, you can use a relay to switch between the two modes, i.e., parallel on battery power and series when disconnected. This is called ‘series switching’.
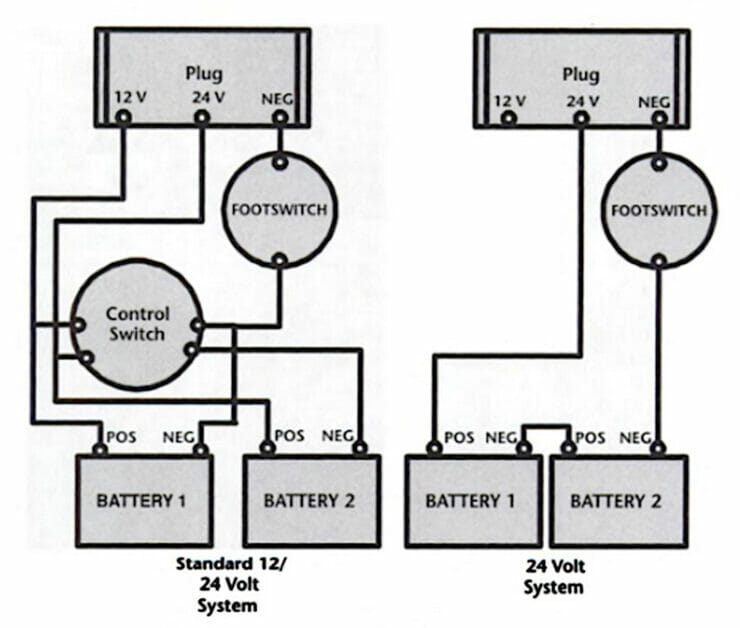
Footswitch and Control Switch
Below are 2 more alternative wiring diagrams for wiring a trolling motor with 24 volts, incorporating a footswitch. Apply either of them, depending on whether you prefer to include an additional control switch.
Battery Options
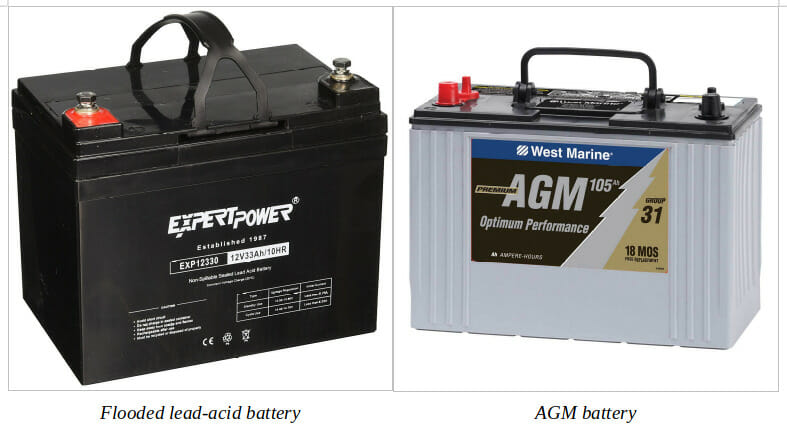
Consider one of these two popular battery options if deciding which one to use:
- Anglers and automobile owners commonly use flooded lead-acid batteries, which are generally cheaper than AGM ones.
- AGM batteries are relatively more expensive than flooded lead-acid ones but more advantageous. They are sealed and, therefore, leak-proof and maintenance-free. They also have a performance edge and a longer lifespan.
Whichever type of battery you choose, remember to buy the same for both 12V batteries.
Frequently Asked Questions
Alright, all you DIY warriors out there! Do you have some burning questions about wiring that 24V trolling motor? Let’s get you powered up with some answers.
1. So, why would I choose 24V over 12V or 36V for my trolling motor?
- Great question! 24V gives you that sweet spot with more power than a 12V but without needing the three batteries like a 36V setup. Plus, it’s easier on the wallet compared to 36V. It’s like upgrading your toolkit without emptying your pocket!
2. Can I use any old batteries for this setup?
- Nope! You’re going to want two 12V batteries. And remember, consistency is key, so make sure they’re the same type. Don’t mix and match, my friend.
3. Why should I consider using a circuit breaker?
- Think of it as a safety net for your trolling motor. It helps protect your motor and wiring from any unexpected surges. And who doesn’t like a bit of extra safety, right?
4. I’ve got some old 12V batteries lying around. Can I use those?
- Well, it depends on how “old” we’re talking. Batteries have a lifespan, so investing in some fresh ones is better if they’re past their prime. Give your motor the juice it deserves!
5. How do I know if I’ve wired everything correctly?
- Ah, the moment of truth! Once everything is wired up, plug in your motor and give it a whirl. If it powers up and runs smoothly, you’re in business! If not, double-check those connections.
6. What’s the difference between series and parallel wiring?
- It’s all about the flow of power! When you wire in series, you’re doubling the voltage (like combining two 12V batteries for 24V). Parallel keeps the voltage the same but increases the duration the batteries will last.
7. Any final words of wisdom for a newbie like me?
- You bet! Always double-check your work, stay safe, and remember every DIY project is a learning experience. And hey, if you hit a snag, there’s no harm in reaching out for a little expert advice. Keep those DIY vibes strong, and happy fishing!
Alright, team, gear up, and let’s make that boat hum with power! Whatever you do, do it with passion and precision. Catch you on the water!
References
Website Resources:
- 8 gauge wire. https://www.amazon.in/Gauge-Welding-Battery-Copper-Flexible/dp/B01MS8ZGXA
- AGM battery. https://www.westmarine.com/west-marine-group-31-dual-purpose-agm-battery-105-amp-hours-15020258.html
- Lead-acid battery. https://www.amazon.in/ExpertPower-1-Pack-12v-33AH-Lead-acid/dp/B06XWCVV6P
- Minn Kota 24 Volt trolling motor. https://www.amazon.com/Minn-Kota-Riptide-Trolling-Bluetooth/dp/B07K372ZTT/
Books:
- John C. Payne. The Fisherman’s Electrical Manual. Sheridan House. https://www.google.com.pk/books/edition/The_Fisherman_s_Electrical_Manual/5Q7hPiv_3YsC?hl=en&gbpv=0
Video References:
Eric Gaskamp