12 min read
How to Wire a Subpanel (Easy Steps)
A subpanel is necessary when you need more space for breakers than your main panel allows or if extending the power supply to a nearby isolated building.
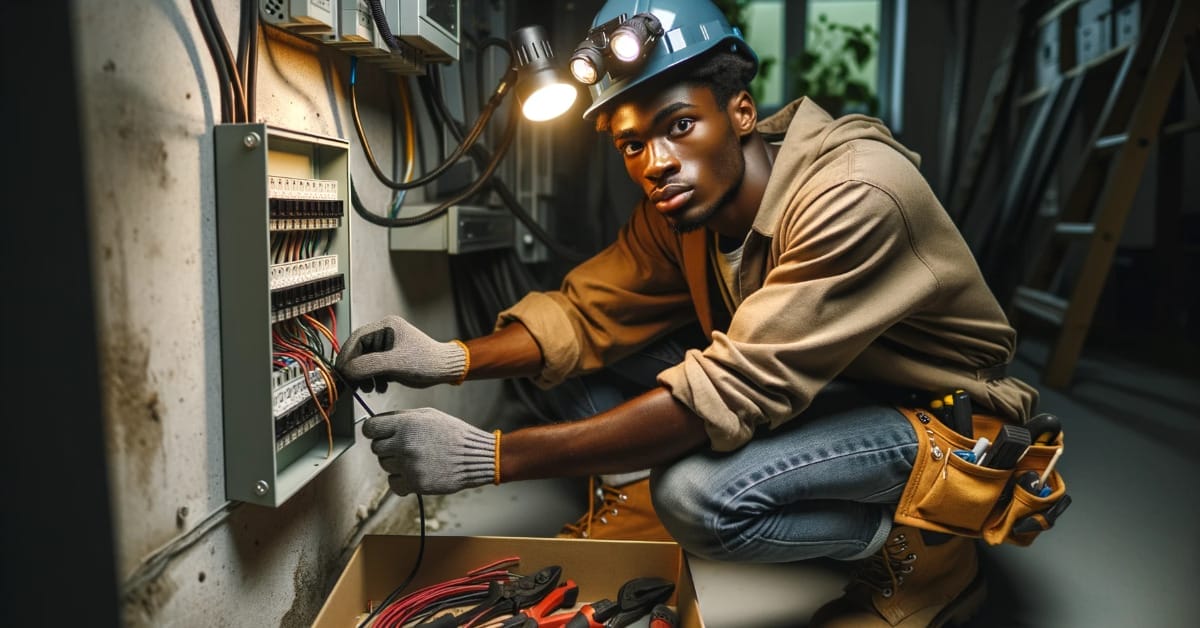
Wiring one is not that difficult if you’re generally competent with electrical wiring, although it might look complicated if you’ve never done it before. But it would be best only to do so when you’re confident you can.
Quick Summary: Wiring a subpanel involves connecting it to the main panel via a conduit, connecting the power supply cables through it, and connecting the individual circuit wires to the subpanel. Each type (hot, neutral, and ground) will go to its corresponding bus bar. Then, attach a breaker for the subpanel.
Use this article for informational purposes only until you’re ready to wire a subpanel.
Requirements and Safety
You will need the following main items, tools, and materials:
| Main Items | Tools | Materials |
| Subpanel Conduit (threaded ends) Electrical cables Circuit breaker (double-pole) | Screwdriver Wrench Wire cutter Wire stripper Pliers Power drill | Screws Wall plugs |
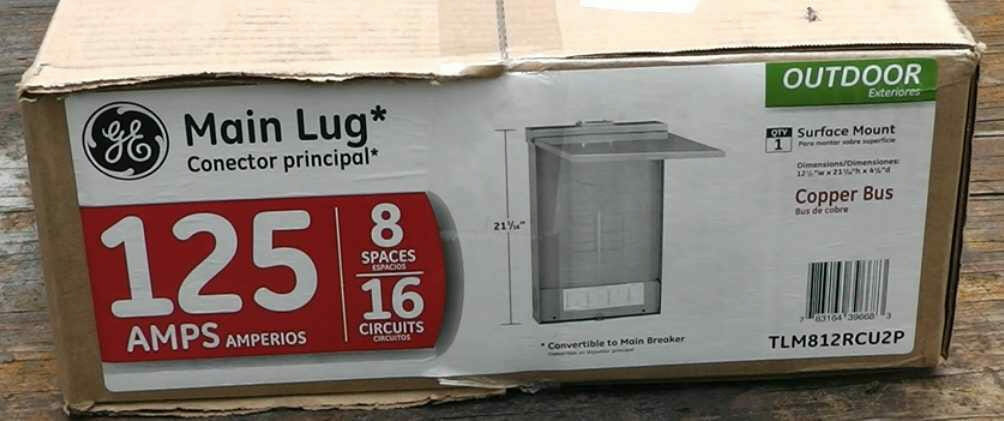
The Subpanel
Start by preparing the subpanel for installation.
When buying one, consider the total amperage you want it to handle and how much space you need for the circuit breakers. Houses in the US have at least a 30-amp subpanel or a 100 to 200-amp one, which is more common for the main panel. The number of circuit breakers will depend on how many circuits you want to include in the sub-panel.
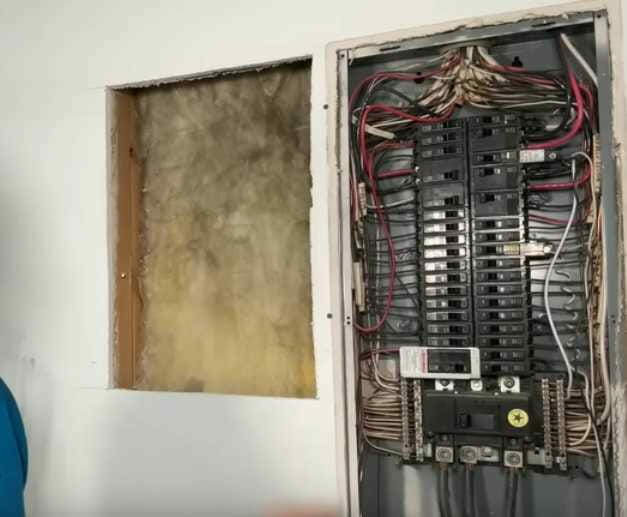
You should only work on a panel or subpanel if you’re comfortable wiring it and can easily identify its parts. Identify these parts of the subpanel: the neutral bus (or terminal bar) and grounding bus bar. If the subpanel is missing the ground bus bar, you can buy and add it separately.
The Conduit
The conduit should cover the length from the sub-panel to the main panel, with some overlap for the internal bushings.
This guide assumes the subpanel is close to the main panel, so a single short conduit can easily connect it and will share its ground connection.
Electrical Cables
The electrical cables should be thick enough to handle the current.
The main power supply cable from the sub-panel to the main panel is usually six gauges.
Circuit Breaker
You will need a double-pole circuit breaker.
Depending on your load requirements, it may be rated between 30 and 125 amps.
Safety
Safety is paramount.
Please take all necessary safety measures when working on and connecting the subpanel to the main panel. This should include:
- Wear rubber gloves.
- Wear eye goggles.
- Stand on a wooden platform.
- Consult your local electrical code.
Wiring a Subpanel
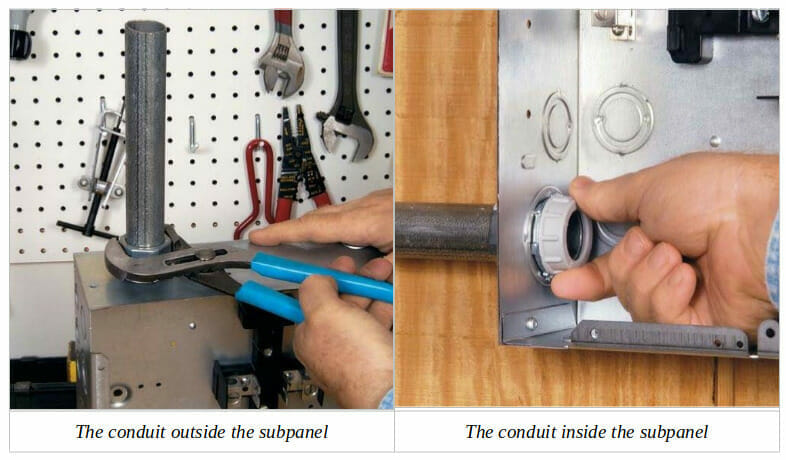
Step 1: Install the Conduit
Install a length of conduit from the sub-panel to the main panel to provide a protective route for the wires that join them.
Use a nut on the outside where the conduit joins to the subpanel and a plastic cap (bushing) on the inside, as shown below. They should cover the threads on the conduit by turning them clockwise.
Step 2: Prepare the Main Panel
Before working on the main panel, turn the main power switch off.
Remove a knockout on its side to fit the conduit from the sub-panel. Push the conduit into the hole and attach a cap, as you did at the subpanel.
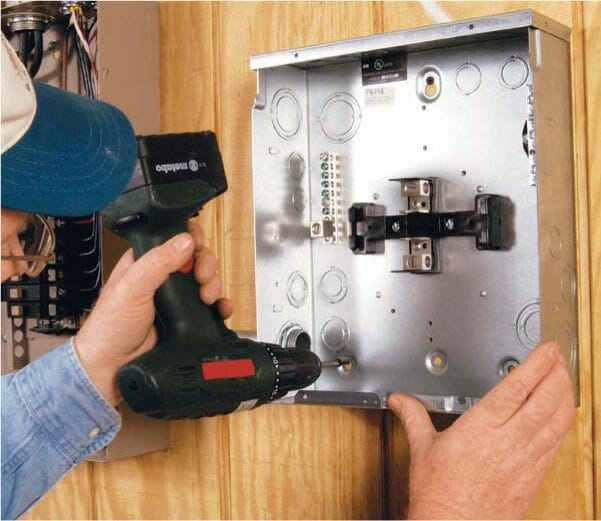
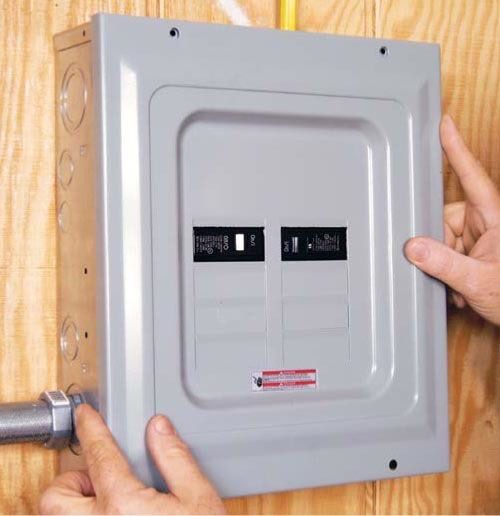
Step 3: Attach the Subpanel
With the conduit in place, attach the subpanel box to the wall. Ensure it is vertical.
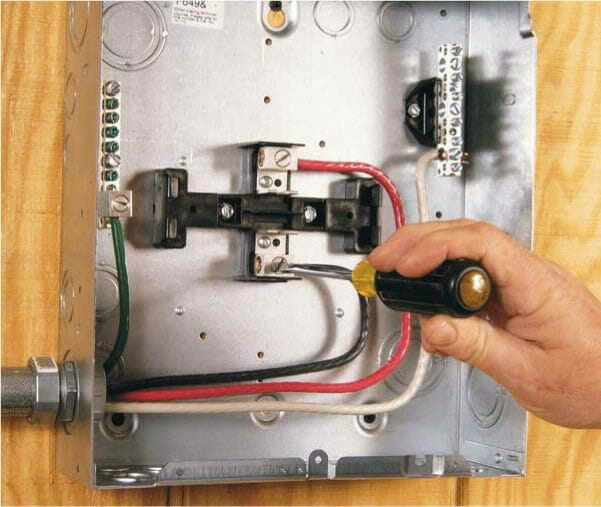
Step 4: Attach the Ground Wire
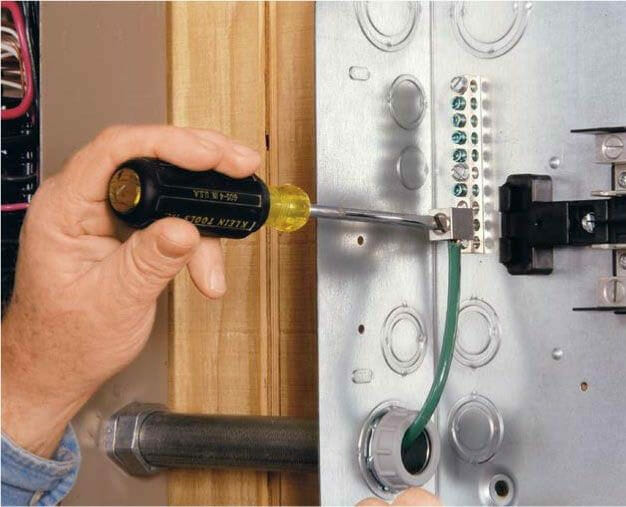
Step 5: Attach the Neutral Wire
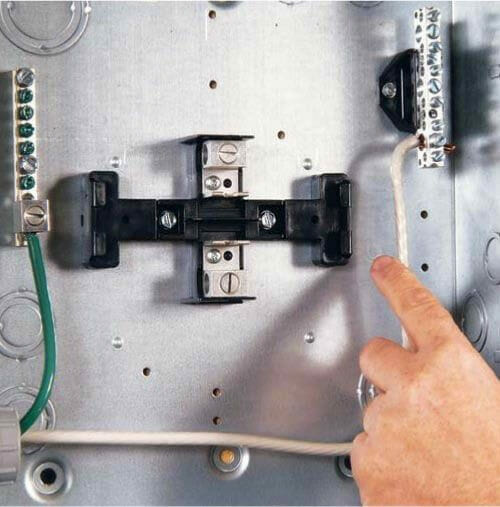
Feed the neutral (white) wire through the conduit to the main panel and attach its end to the neutral bus bar in the subpanel.
If reaching the bus bar requires a 90° turn, as in the picture below, bend gently at the corner because you must leave sufficient space for the circuit breakers in the middle.
Step 6: Attach the Hot Wire
Feed the hot (black and red) wires through the conduit to the main panel and attach its end to the hot bus bar in the subpanel.
Bend gently at the corners to reach the hot bus bar and leave sufficient space for the circuit breakers in the middle.
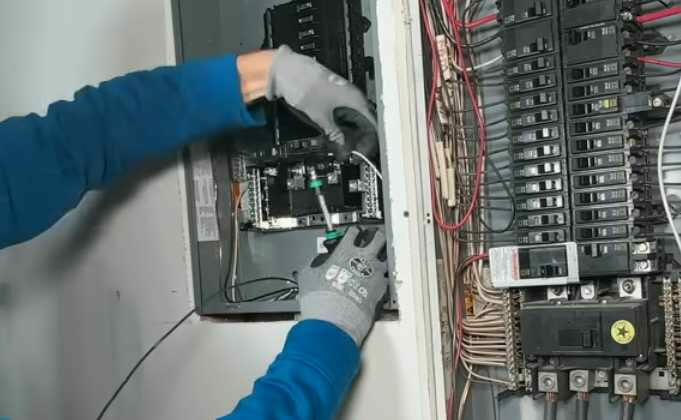
Step 7: Attach the Circuit Cables
Attach the circuit cables one by one, i.e., the cables from the individual circuits on which you have outlets and other circuits to be routed via the sub-panel.
Attach them using cable connectors. Strip off their sheathing and strip the wire insulation from their ends.
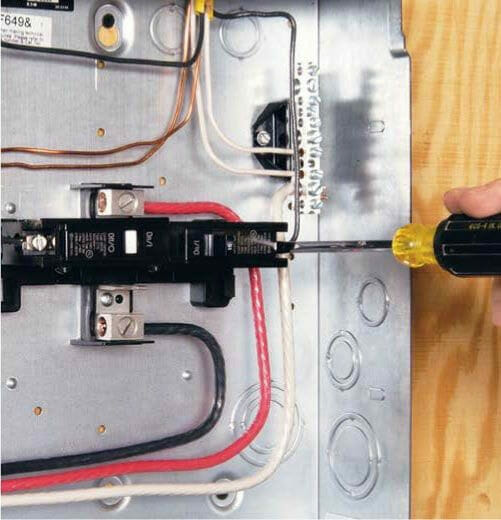
Step 8: Attach the Circuit Breakers
Attach the circuit breakers, one for each circuit.
Each circuit should normally have a separate circuit breaker. Hook one end of the breaker in the hot bus and push the other inside the clip.
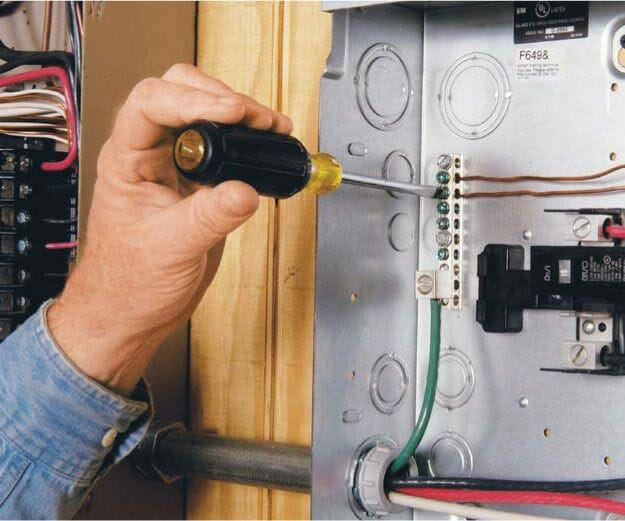
Step 9: Attach the Ground Wires
Attach the green or bare copper circuit wires to the grounding bus bar in the subpanel.
Step 10: Attach the Neutral Wires
Attach the white circuit wires to the neutral bus bar in the subpanel.
Step 11: Attach the Hot Wires
Attach the hot (black or red) wires to the hot bus bar in the subpanel.
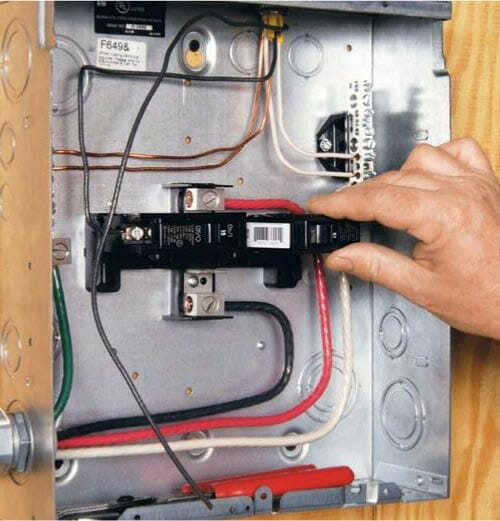
Step 12: Ensure a Neat Layout
Try to lay the wires out neatly so that they don’t overlap so much or interfere with other wires and breakers.
A neat layout will impress the electrical inspector. Repeat the last few steps for each circuit, and ensure all the screws are tight.
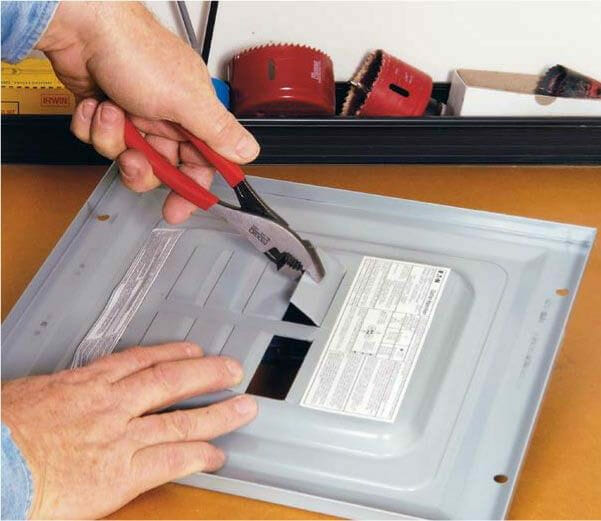
Step 13: Remove the Breaker Openings
Remove the knockouts on the cover for the breaker openings using pliers.
Step 14: Attach the Cover
Attach the cover after completing all the wiring, attaching the circuit breakers, and removing the breaker openings.
Slide the cover over the sub-panel. Ensure it is flat against its box. Once in place, attach the screws to secure the cover.
I also recommend you label the circuit cables so you know what they service.
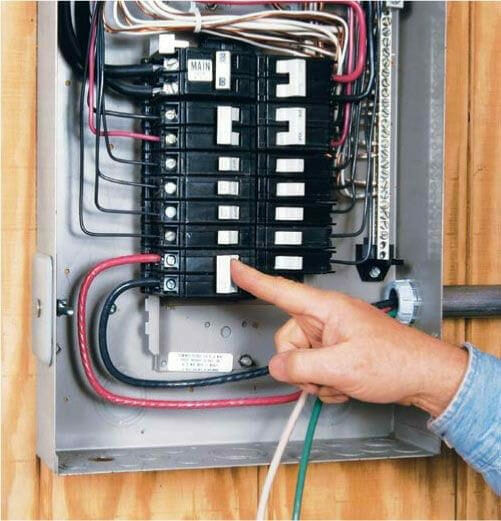
Step 15: Connect the Hot Supply Cables
Connect the two hot supply cables, i.e., the black and red wires passing through the conduit, to the circuit breaker in the main panel that services the sub-panel.
Step 16: Attach the Subpanel Circuit Breaker
The subpanel circuit breaker is a double pole one because you must switch both hot cables (black and red) simultaneously.
Attach the breaker carefully into position on the hot bus bar. Then, flip the breaker switch to the on position when done.
Step 16: Connect the Other Supply Wires
Connect the sub-panels neutral and ground supply wires to the natural and grounding bus bars. In some panels, the neutral and ground bus bars are combined in a single bar; otherwise, they should be separate.
Step 17: Attach the Cover and Power On
Remove the knockout plate for the double breaker servicing the sub panel.
Attach the cover and label this circuit breaker to identify the subpanel.
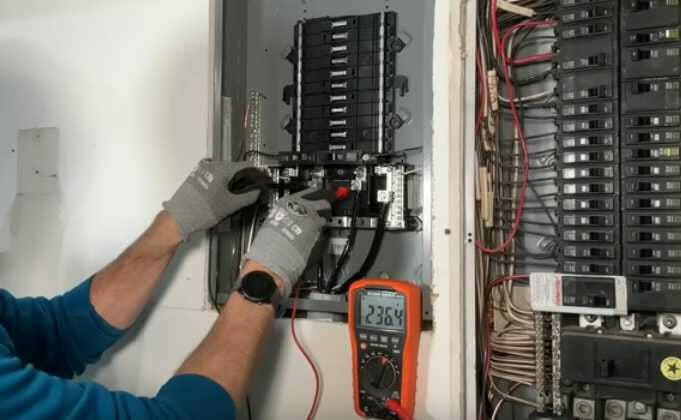
Step 18: Testing
I recommend you test the wiring before finishing.
Troubleshooting Your Subpanel Setup
Alright, folks! You’ve dived deep into the world of subpanels, and maybe, just maybe, things aren’t running as smoothly as you’d hoped. Don’t sweat it. Let’s tackle some common issues and get that power flowing safely.
1. No Power in the Subpanel
- Main Breaker: First, did you turn on the main breaker after all the wiring was done? It’s easy to forget, so give it a check.
- Connections: Sometimes, it’s the simple things. Go back and make sure every connection is tight. A loose wire can be the culprit.
- Circuit Breaker: Ensure the double-pole breaker in the main panel, which services the subpanel, is in the ON position.
2. Only Half of the Subpanel Has a Power
- Dual Supply Wires: Remember, two hot wires feed your sub-panel. If only half the panel works, one might not be connected properly. Double-check those connections!
3. Flickering Lights or Unstable Power
- Grounding and Neutral Bars: Ensure the ground and neutral bars in the subpanel are isolated if it’s a detached building. They should be connected if it’s in the same building as the main panel.
- Wire Gauge: If you’ve got the wrong gauge of wire, you might not get stable power. Double-check to ensure you’re using the right thickness.
4. Circuit Breaker Keeps Tripping
- Overloaded Circuit: This one’s common. It will trip if you’re putting too much demand on a single circuit. Spread out those power demands!
- Faulty Appliances: Sometimes, it’s not the subpanel but an appliance causing the trip. Check any appliances connected to the subpanel circuits.
5. Buzzing or Humming Sounds from the Subpanel
- Loose Connections: A buzzing sound can often mean a loose connection. Turn off the power and check each connection point in the sub-panel.
- Breaker Issues: A faulty or old breaker can cause hum. Consider replacing it.
6. Subpanel Feels Warm or Hot
- Overloaded: It could be overloaded if your subpanel is hot to the touch. Consider upgrading or redistributing the load.
- Poor Ventilation: Ensure the subpanel is in a well-ventilated area. It needs to breathe!
7. Sparks or Burning Smell
- Immediate Action: This is a serious one. Turn off the main breaker immediately and consult a professional. You could have a short circuit or another major issue.
Alright, team, remember: when in doubt, always consult with a professional. Electrical work is no joke; safety should always be your priority. And give yourself a pat on the back for diving into this project. With some troubleshooting, you’ll be powered up in no time!
References
Creative Homeowner. The ultimate guide to wiring. 8th updated edition. Creative Homeowner. 2017
Video References:
Everyday Home Repairs
Homesteadprepper