11 min read
How to Install a Barbed Wire Fence (7-Step Guide)
Hey there! Ready to dive into a project that’s as rugged as it is rewarding—installing a barbed wire fence.
Whether you’re looking to keep livestock in check, protect your garden, or add an extra layer of security to your property, a barbed wire fence is a practical solution that’s been around for ages.
In general, installing barbed wires is pretty straightforward. The steps are as follows:
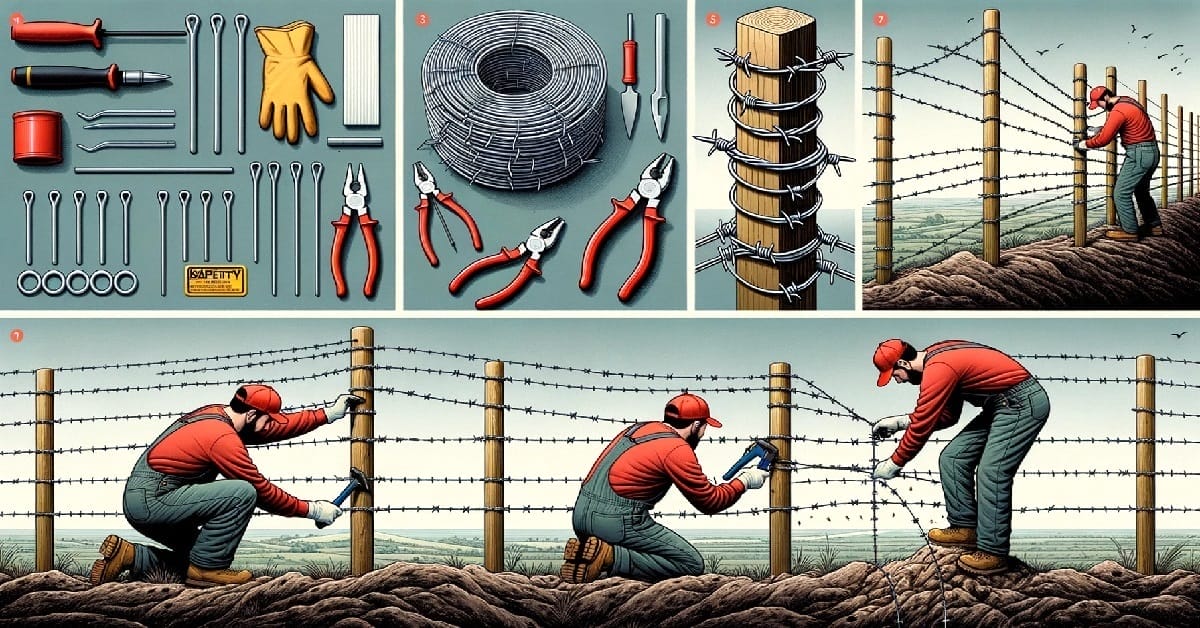
- Step 1: Choose the right barbed wire.
- Step 2: Mix up wooden and metal posts for versatility, and always wear gloves to protect your hands while tying the wire.
- Step 3: Use a four-wheeler with an attachment or walk it out with a friend to smoothly roll out the barbed wire.
- Step 4: Stretch the wire using a reliable tool, anchoring it against something solid to get it tight without snapping.
- Step 5: Secure the wire to posts, using staples for wooden ones and clips or ties for metal, and leave extra wire for adjustments.
- Step 6: Install T-post clips every 50 feet for added stability, using a special tool to bend them around the posts.
- Step 7: Clear the fence line before starting to prevent the wire from snagging and ensure a smoother installation process.
So, grab your gloves, gather your tools, and let’s get to work on installing a barbed wire fence that’s sturdy, effective, and built to last. Ready? Let’s do this!
Essential Gear for Your Barbed Wire Fence Project
Trust me, having the right tools and protection makes all the difference between a smooth project and a trip to the emergency room. Here’s what you’re going to need:
- Hammer: This is a no-brainer. You’ll need a sturdy hammer for driving in those staples. Ensure it feels good in your hand because you’ll swing it a bit.
- Wrench: Essential for tightening those radisseurs (wire tensioners). It’s all about keeping that wire taut and in place.
- Protective Gloves: I cannot stress this enough – do not skip the gloves. Barbed wire is unforgiving; a good pair of heavy-duty gloves can save you from nasty cuts.
- Wire Cutter: You’ll need a reliable wire cutter for trimming your barbed wire to the perfect length. It’s like giving your fence a good haircut.
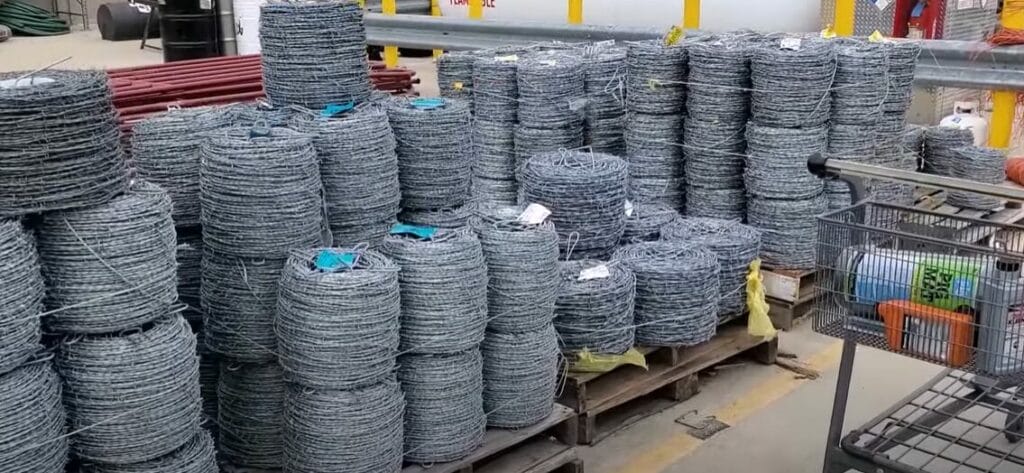
- Barbed Wire: Obviously, you need the star of the show. Choose the right gauge and type for your needs. Remember, it’s all about keeping those cows out or whatever you’re fencing in (or out).
- Staples: These little guys secure the wire to your wooden posts. Ensure you have plenty on hand because running out mid-project is a real buzzkill.
- Radisseurs: These tensioners are crucial for getting your fence line just right. Nobody likes a saggy fence. It’s all about that tight, crisp line.
And let’s talk safety gear, because, let’s face it, we’re not just talking splinters and bruises here. Barbed wire means business. So, gear up with:
- Safety Glasses: Keep those peepers protected. You only get one pair of eyes, after all.
- Heavy-Duty Gloves: Yes, I’m mentioning gloves again. They’re that important.
- Sturdy Footwear: Don’t skimp on your shoes. You need something tough that can take a step on a stray piece of wire without flinching.
- Protective Clothing: Long sleeves and pants are your friends. Think of them as your personal armor against those barbed barbs.
So, grab your gear, call up a friend, and let’s get fencing. It’s going to be a great project.
Installing a Barbed Wire Fence: A Step-by-Step Guide
Let’s dive into setting up a barbed wire fence that’s about 200 feet long. I’m all about keeping things natural and functional, so let’s get to work.
Step 1: Choose Your Barbed Wire
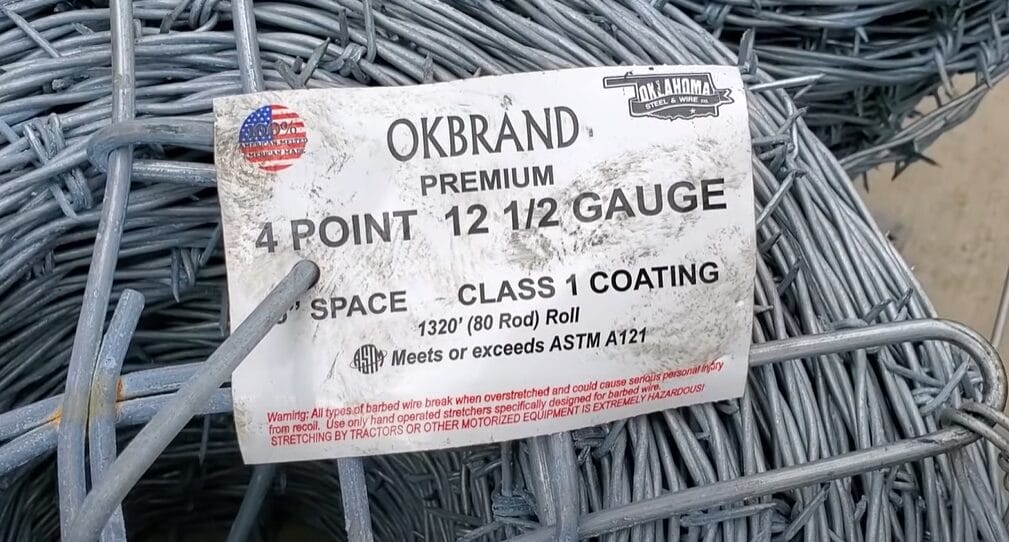
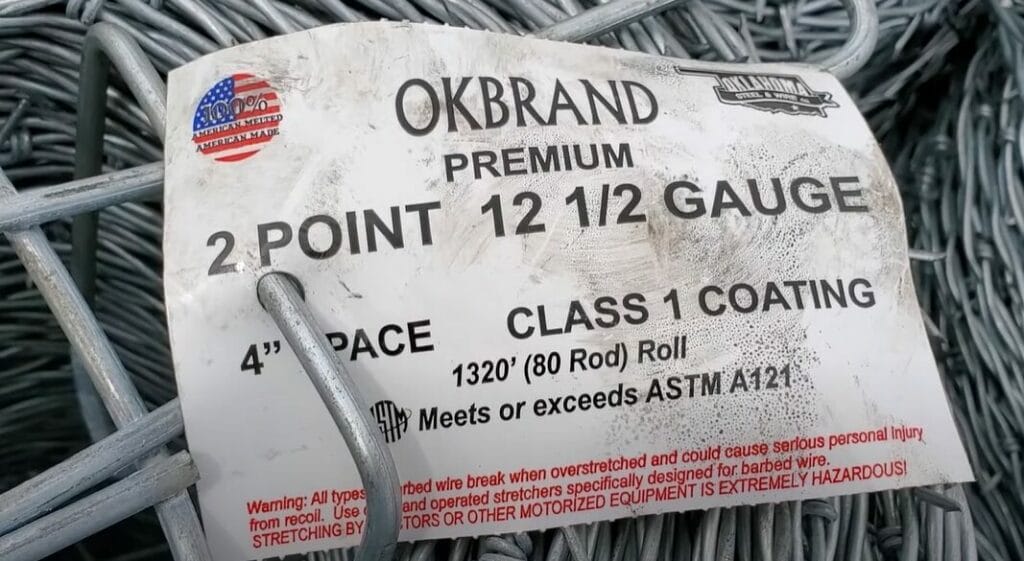
First off, you’ve got to know your materials. There are mainly two types of barbed wire: the low tensile 12 and a half gauge wire and the high tensile 15 gauge wire. The 12.5 gauge needs more stretching than the 15 gauge.
You’ll also find two-point and four-point wires. Personally, I always opt for the four-point wire; more points seem better, though it might not make a huge difference. And don’t forget about the zinc coating: Class 3 wire is my go-to for its rust resistance.
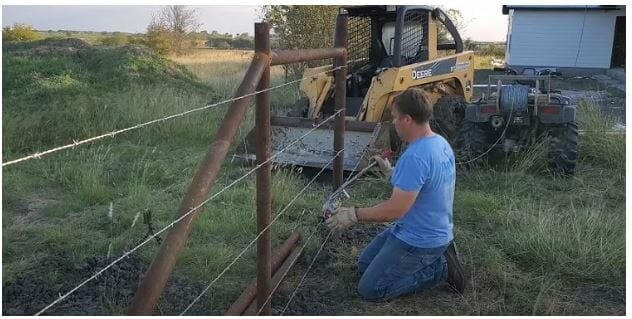
Step 2: Tying the Barbed Wire to Posts
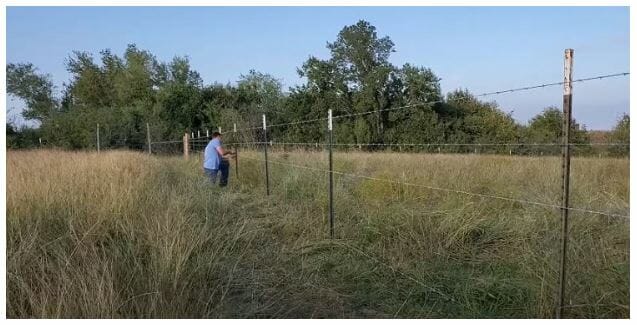
For our project, we mixed it up with wooden and metal posts on different sides, mainly because we’re connecting to a pipe fence around our new house.
Generally, wooden posts are easier to work with since you can just hammer in a staple, unlike with metal posts. And remember, work gloves are a must with barbed wire. Trust me on this.
Step 3: Rolling Out the Barbed Wire
I’ve got this handy attachment for my four-wheeler that makes rolling out the wire a breeze.
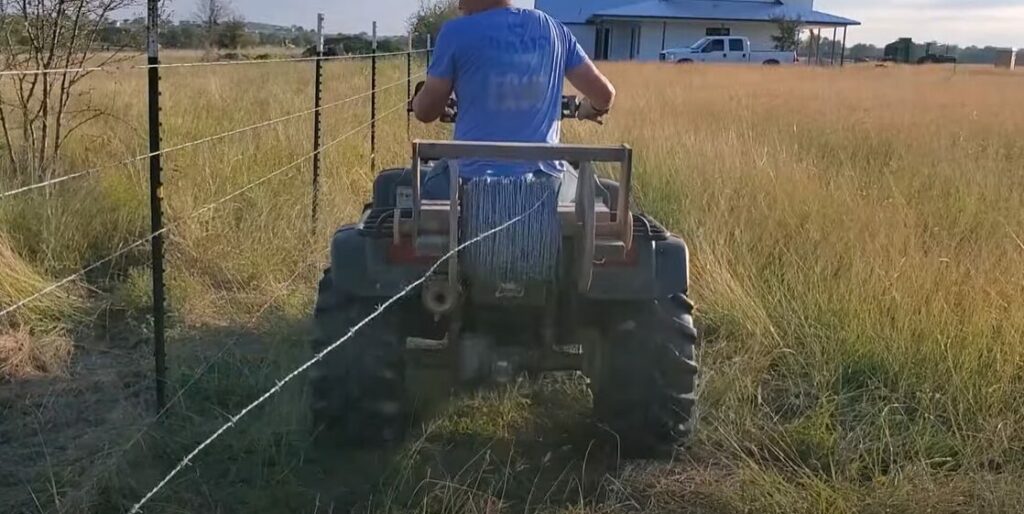
You could also use a tractor or just walk the wire out with a buddy. Whatever method you choose, just keep an eye on the wire to avoid tangles and potential scratches to your equipment.
Step 4: Stretching the Barbed Wire
Stretching the wire is key. I’ve used all sorts of grippers over the years, but a simple, sturdy tool has never let me down. You can use anything that won’t move as an anchor – a skid steer, a tractor, or even a sturdy tree.
The goal is to get the wire tight but not so tight it snaps. This is where the 15 gauge wire shines, requiring less stretch than the 12 gauge.
Step 5: Securing the Wire
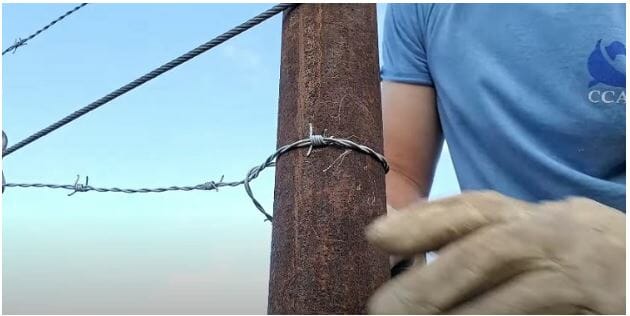
If you’re working with wooden posts, you’d staple the wire directly to them. With metal posts, you’ll use clips or ties. And always leave extra wire at the end for adjustments – it’s easier to cut off excess than to add more wire.
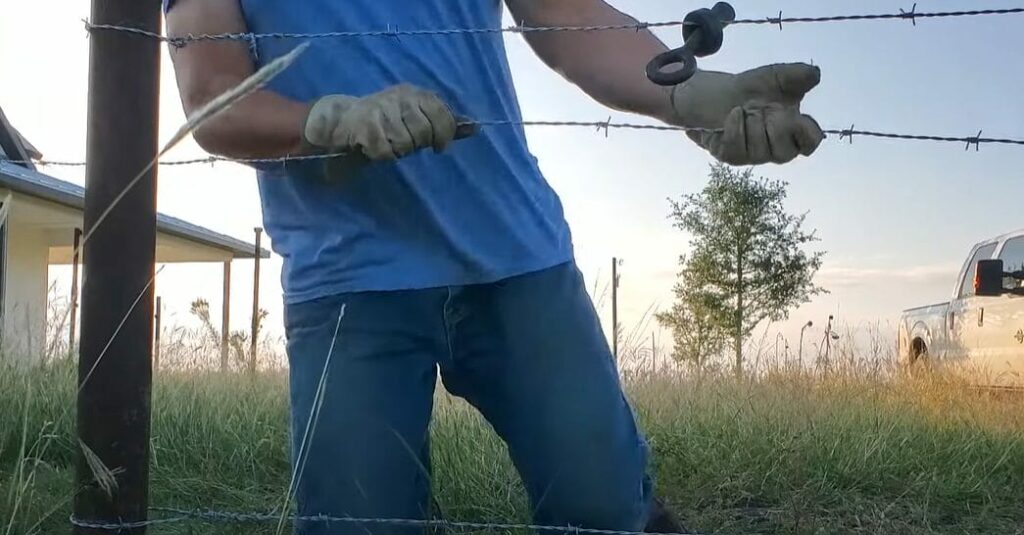
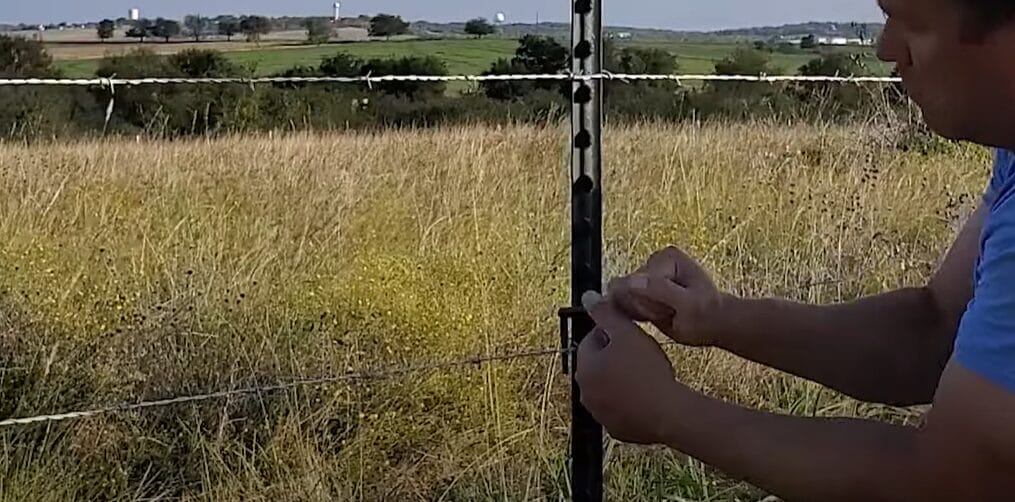
Step 6: Installing T-Post Clips
About every 50 feet, I add some T-post clips for extra stability. I’ll circle back and add more once all the wires are in place. There’s a perfect tool for bending these clips around the posts.
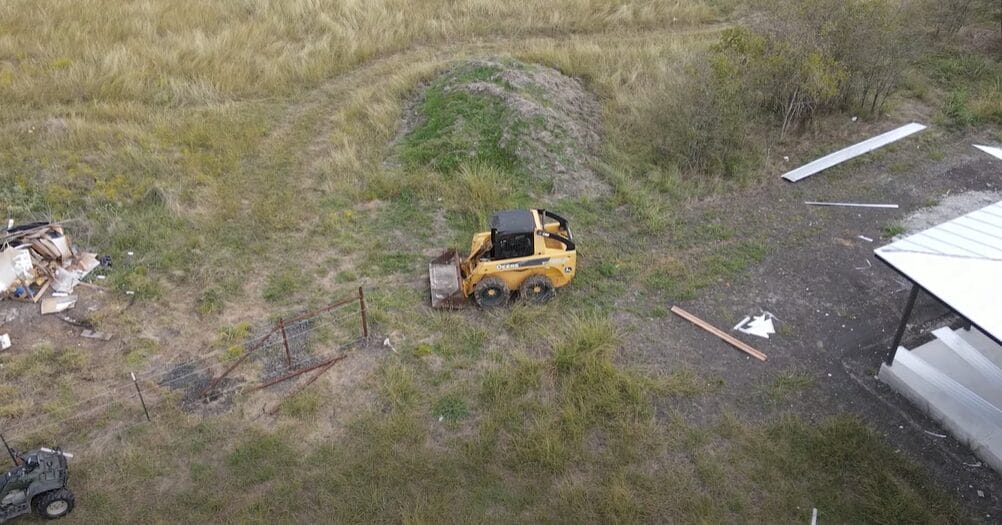
Step 7: Clean-Up
Before rolling out the wire, I always clear the fence line. It makes the whole process smoother and prevents the wire from snagging. Plus, it’s just neat and tidy, which makes for a better-looking fence.
And there you have it! Installing a barbed wire fence is a straightforward but rewarding project. It keeps the cows where they should be, gives the bees their space, and adds a bit of rugged charm to the property.
Barbed Wire Fence Installation Across Diverse Terrains
Installing a barbed wire fence is one adventure that varies greatly with the lay of the land. Here’s how I tackle these varying conditions, ensuring that your fence stands strong and serves its purpose no matter where you are.
Flat Land: Flat terrain might seem like the easiest scenario for fence installation, and in many ways, it is. However, water pooling and soil erosion can pose challenges. To keep your fence standing tall:
- Ensure Proper Drainage: When setting posts, consider slight angling to facilitate water runoff, preventing pooling around the base, which can weaken your foundations over time.
- Depth and Stability: Don’t skimp on the depth of your post holes, even in flat conditions. A good two to three feet deep, depending on the height of your fence, ensures stability.
Hilly Terrain: Hills can complicate things with gravity playing against you, but with some planning, you can use the landscape to your advantage.
- Follow the Contour: Let your fence follow the natural contour instead of fighting the hill. This approach looks more natural and maintains tension and strength in the wire.
- Use Taller Posts on the Downslope: This compensates for the slope and keeps the wire tension even across dips and rises.
Rocky Areas: Rocky terrain can be the trickiest, with hard ground making it difficult to dig post holes.
- Find the Path of Least Resistance: Sometimes, it’s about working with the rocks rather than against them. Map out your line and adjust as needed to avoid the largest obstacles.
- Use Concrete for Stability: When you hit rock not too far down, setting your posts in concrete can provide stability needed. It’s a bit more work, but it pays off in durability.
General Tips for All Terrains:
- Maintain Tension: No matter the landscape, maintaining the right tension in your barbed wire is crucial. Use a fence stretcher and check tension regularly as you work your way along the fence line.
With a bit of ingenuity and hard work, you’ll have a fence that not only meets your needs but also blends with the landscape, enhancing your property’s functionality and aesthetics.
Barbed Wire Fence Maintenance and Repair Guide
Keeping your barbed wire fence in tip-top shape isn’t just about maintaining its appearance; ensuring it continues to serve its purpose effectively is crucial.
Let me guide you through some essential tips on maintaining and repairing your barbed wire fence, drawing from my hands-on experiences.
| Maintenance Task | What to Look For | Recommended Action |
|---|---|---|
| Regular Inspection | Sagging wires, loose or leaning posts, signs of rust, damage from wildlife or weather conditions | Walk the fence line seasonally, wearing gloves for protection. |
| Sagging Wires | Wires that have lost tension and are sagging between posts | Use a fence stretcher to retighten the wires. Replace broken wires rather than attempting to splice them. |
| Rust Detection | Areas of the wire or posts that show signs of rust | Use a wire brush to remove light rust and apply a rust inhibitor. Replace heavily rusted sections. |
| Wildlife and Weather Damage | Bent or flattened sections from animal activity or extreme weather | Check and adjust the tension of the wires. Straighten or replace posts as needed. |
| Post Maintenance | Wobbly, rotting, or pest-infested wooden posts; rusted metal posts | Replace or reinforce unstable posts. Treat wooden posts with preservatives or set in concrete for durability. |
| Tool and Part Supplies | Lack of necessary tools or spare parts for repairs | Keep a set of essential tools (wire cutters, fence stretcher, extra wire, staples) and spare parts readily available for quick fixes. |
Remember, a well-maintained barbed wire fence is an investment in your property’s security and functionality. And trust me, there’s a certain satisfaction in looking out over a well-kept fence line, knowing it’s doing its job because you’ve done yours.
References
Organizations:
- National Agricultural Library (NAL). https://www.nal.usda.gov/
- American Fence Association (AFA). https://www.americanfenceassociation.com/
Books:
- “Fences, Gates, and Bridges: And How to Build Them” by George A. Martin.
- “Building Fences & Gates: How to Design & Build Them From the Ground Up” by Richard Freudenberger.
- “The Fence Bible: How to Plan, Install, and Build Fences and Gates to Meet Every Home Style and Property Need, No Matter What Size Your Yard” by Jeff Beneke.
Website Resources:
- The Family Handyman. http://familyhandyman.com/
- Instructables. http://instructables.com/
Video References:
LRR