13 min read
How to Build a Hog Wire Fence (9 Steps)
This article shows how to build a hog wire fence.
Whether you have a home or an agricultural or industrial property, a hog wire fence can be a useful addition, and it’s not only to keep hogs inside the pen. I will guide you through the process, from gathering the requirements to attaching the gate.
Quick Summary: When building a hog wire fence, plan well and consider the dimensions, layout, aesthetics, gate, etc. Here’s an outline of all the steps involved:
- Plan the hog wire fence.
- Dig holes for the posts.
- Dig trenches.
- Install the posts.
- Mark and cut along the notches.
- Attach the lower rails.
- Attach the wire mesh and staple the wires.
- Attach the upper rails.
- Attach the gate.
Continue reading for more detailed instructions.
Why Build a Hog Wire Fence?
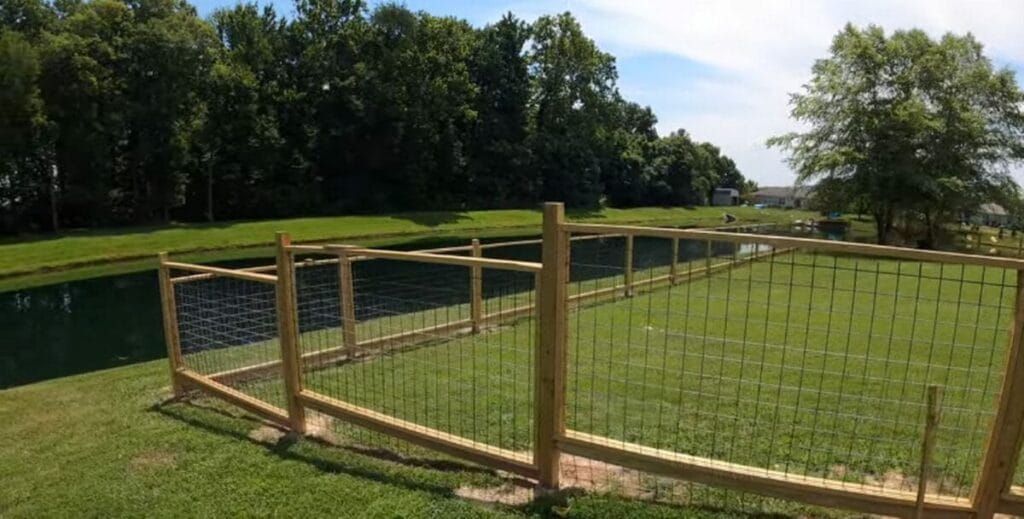
A hog wire fence is not only for keeping hogs inside the pen.
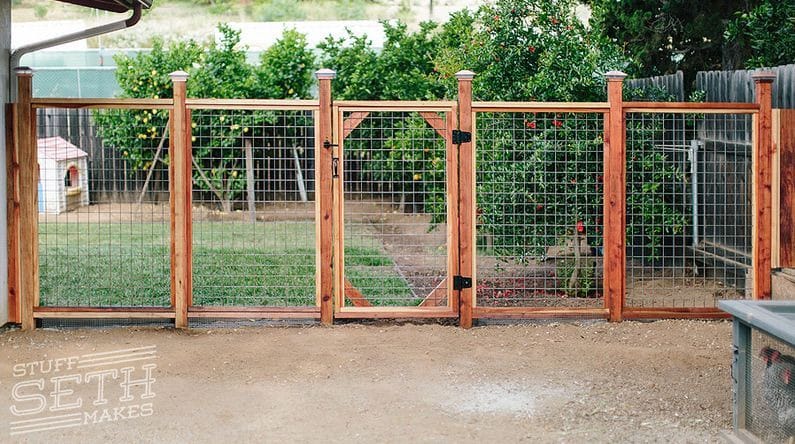
Although hog wire fences originated on farms, they are equally useful in other settings. A hog wire fence is a great alternative to unsightly barbed wire and high fencing that will help keep your property safe without blocking the view. You can choose from a variety of designs.
They are also often used around patios and home swimming pools and for decorative purposes or to mark a route.
Requirements and Considerations
1. Planning
Proper planning is key to building a good hog wire fence.
Survey the area and think about how you will build one. Consider the following:
- How high do you want the fence to be?
- What path will the perimeter take, and how long will it be?
- Do you prefer using posts, rails, and wire mesh or buying panels instead (or making your own)?
- Aesthetic considerations: How would you like the fence to look? Consider the materials you will use, the style, shape, and color.
- Think about the gate you will use and whether you will buy or make it.
- Gather all the requirements listed below.
2. Dimensions
You can build a hog wire fence according to any size that suits your needs.
But generally, hog wire fences have a typical height ranging between 4½’ to 5’ (4.5 to 5 feet). The upper mesh spacing is usually 7-9”, and the lower spacing is usually 1-3”. 5 typical dimensions are indicated in the illustration below.

3. Panels
You can buy ready-made hog wire fence panels to make it easier to build one.
Such ‘hog wire panels’ are typically flat and rigid and come in various sizes and designs if you can find a good supplier. Irrespective of the design, a hog wire fence panel typically has a complete frame around it (along the top, bottom, and sides).
However, the panels are not usually sturdy enough to use alone, so you will still require some sturdy support to keep them in place. Wooden or metal posts are normally used for this purpose.
4. Wooden or Metal Fencing?
One thing to consider when building a hog wire fence is whether to go for a wooden or metal one.
Generally:
- Wooden frames are cheaper and easier to install than metal ones but can rot within a few years. You can usually build a wooden hog wire fence with basic DIY skills without needing to hire someone else, though it would be helpful to have an assistant.
- Metal frames are more expensive and difficult to install but last much longer than wooden ones. They don’t rot like wooden ones do. But you may need a welder to build a metal hog wire fence.
Requirements
Building a hog wire fence requires the following items:
- Large items: posts (wooden or metal), rails, hog wire mesh,
- Tools: spade, hammer, power drill
- Instruments: measuring tape, pencil
- Materials: screws, staples, gravel, concrete, soil
Building a Hog Wire Fence
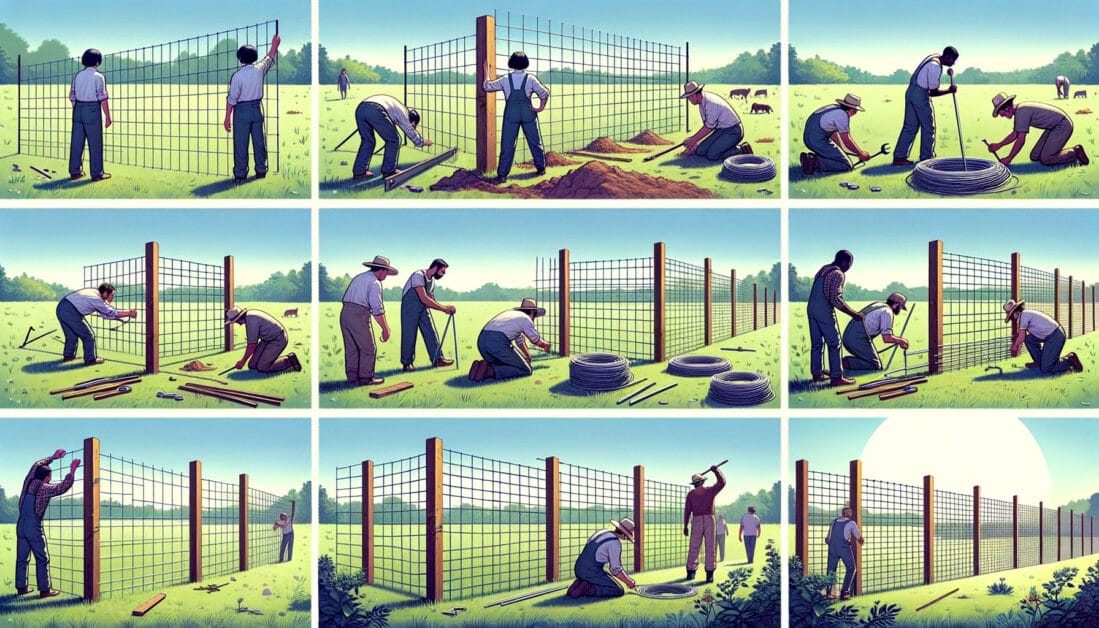
Follow the step-by-step method below to build a hog wire fence.
Step 1: Plan the Hog Wire Fence
Plan the fence’s location and layout, including the exact spots for all the posts.
Take measurements and mark all key points around the perimeter to ensure what you build is according to what you planned. You will also need to know how much wood, metal, or how many panels to buy.
Ensure you don’t accidentally drill into utility lines, pipes, or wires.
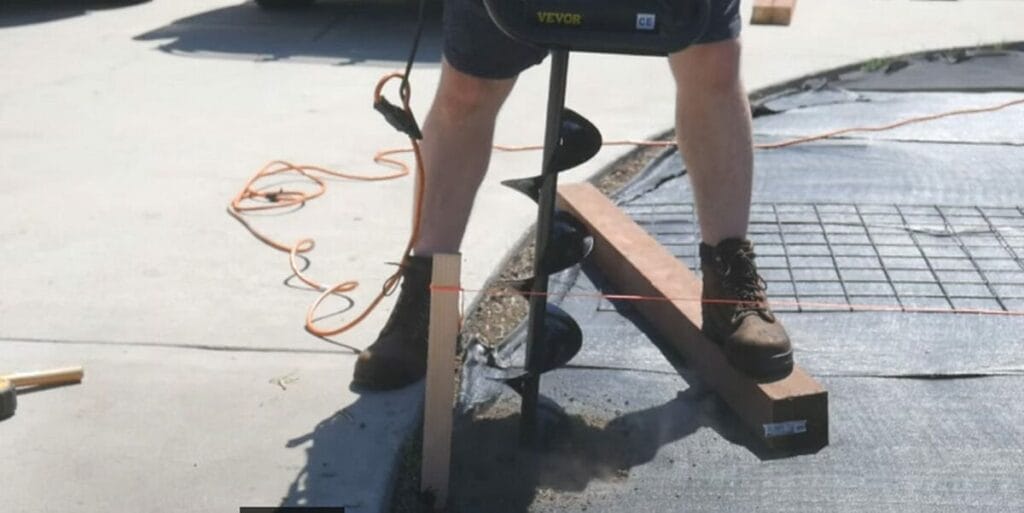
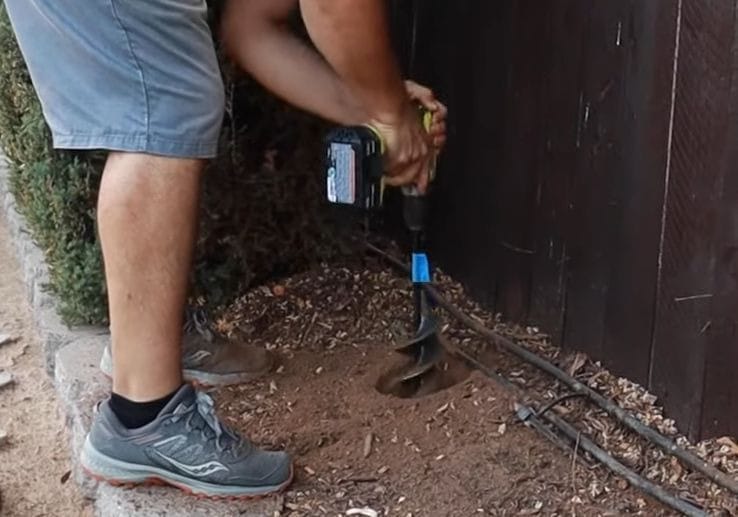
Step 2: Dig Holes for the Posts
Dig holes for all the hog wire fence posts using a post-hole or auger digger.
If you live in an area with a cold climate, dig below the frost line.
Step 3: Dig Trenches
Dig trenches along the perimeter to a depth of about 1 foot.
These trenches will be used to insert wires deep underground and prevent critters from burrowing under them.
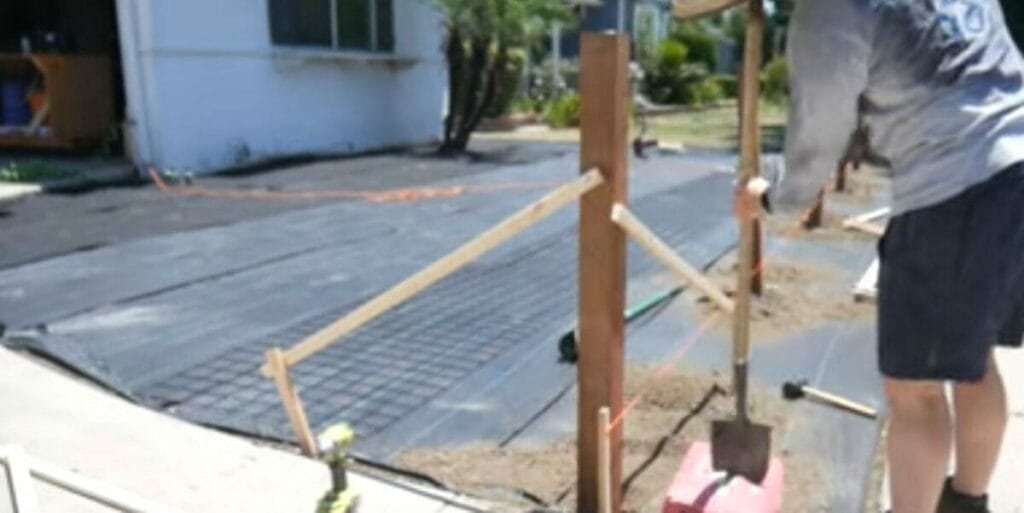
Step 4: Install the Posts
Install the posts in the holes you made for them.
Ensure they stick to the same height unless the fence is on a sloped ground. Backfill the ground around each post with gravel, concrete, firm soil, or a combination. All the posts must be secure because the stability of the entire fence will depend on them.
Step 5: Mark and Cut along the Notches
Mark the notches on the posts before cutting grooves in them.
Carefully cut along the notches and ensure they are all level.
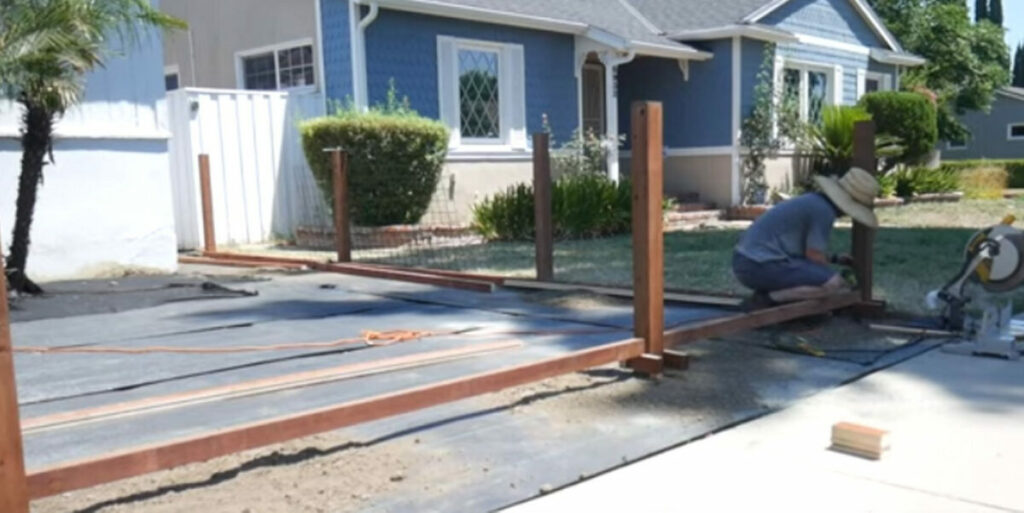
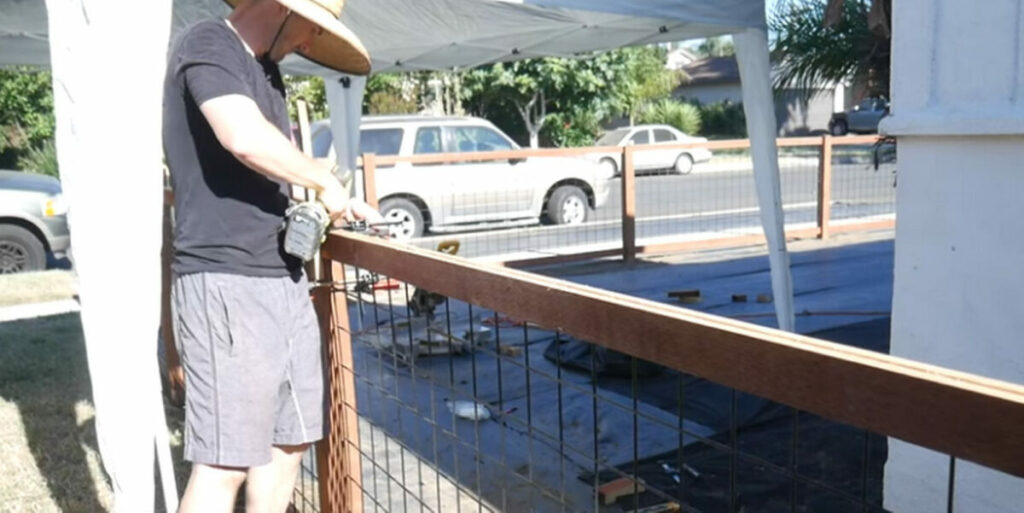
Step 6: Attach the Lower Rails
Once the posts are securely in place, set the lower rails (or the panels).
Drill holes for the screws to secure the rails to the posts. Ensure they don’t split as you work around the perimeter.
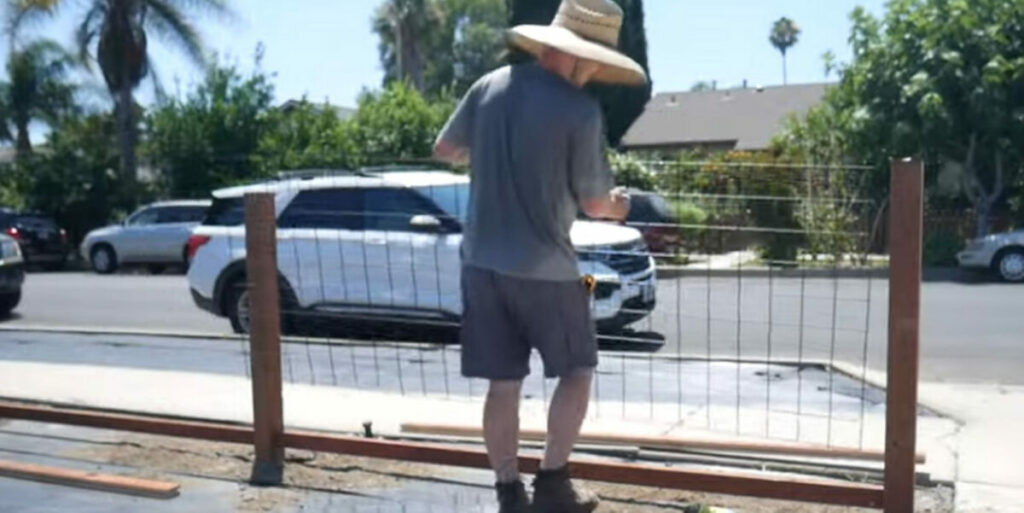
Step 7: Staple the Wires
Staple the wires to the posts and rails.
Unroll the hog fence wire mesh from one post to the next. Secure the wire as you go along using galvanized staples. Ensure an even alignment of the wires. The more they are aligned, the nicer the fence will look.
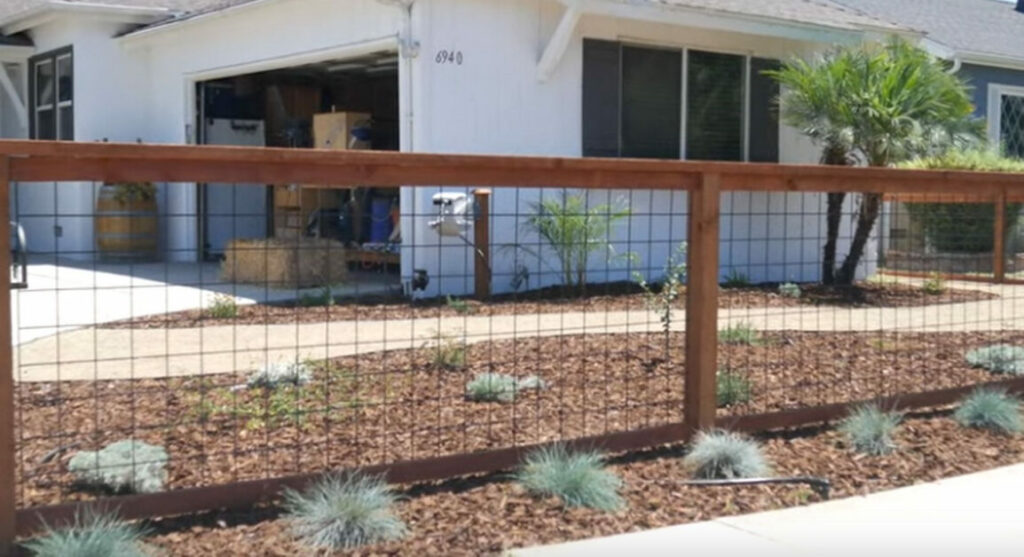
Step 8: Attach the Upper Rails
Attach the upper rails and staple the wire mesh to them.
Step 9: Attach the Gate
Attach a gate in the opening you designated for the hog wire fence.
You can either buy a ready-made gate or build your own as desired.
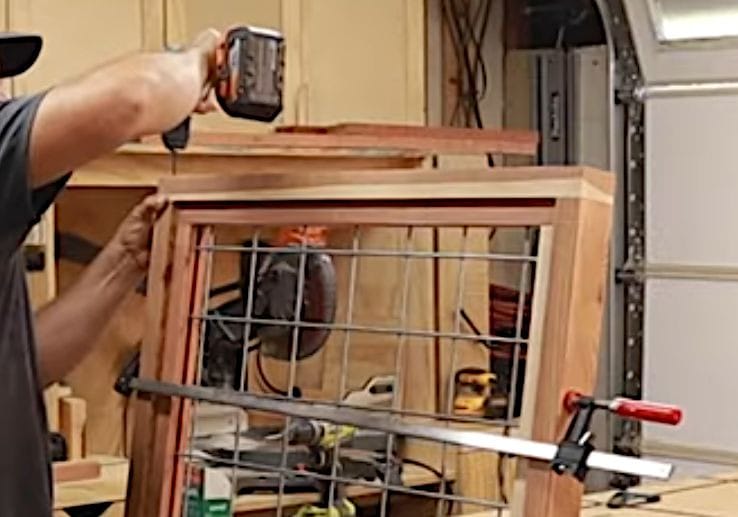
Making Your Own Panels
An alternative to the above method is to either buy or make your own panels.
I’ll show you how to make your own. It should have an outer frame and an inner frame, and the wire mesh should be fitted in each panel separately, as shown below. Make as many as you require according to your chosen size and design.
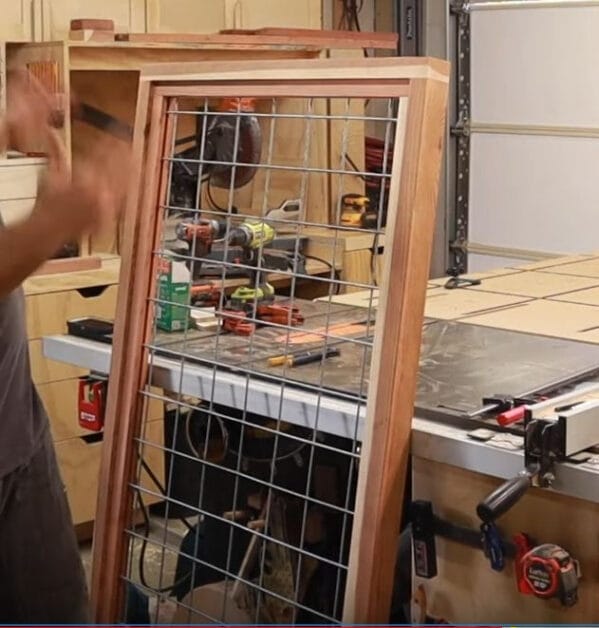
We’ll only review some important points to ensure, so I’ve described them as stages.
Stage 1: The Outer Frame
Ensure the outer frame pieces have right-angled corners when securing them together by drilling and screwing.
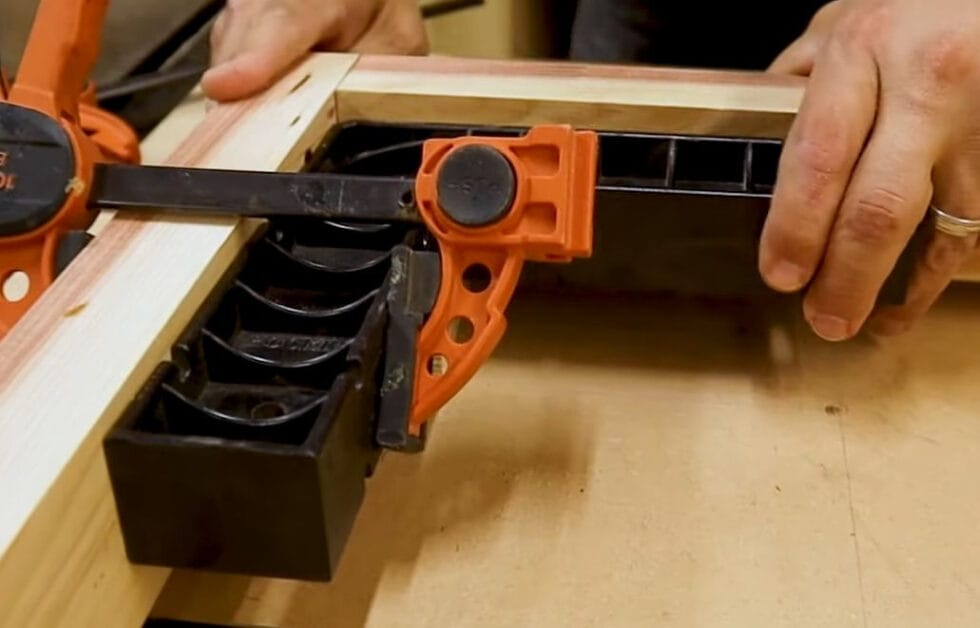
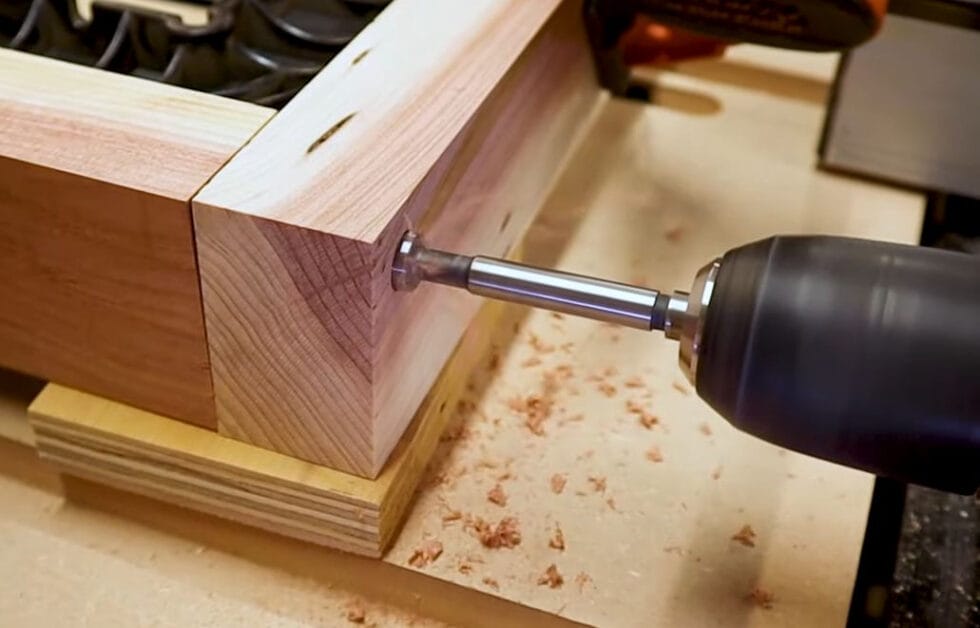
Stage 2: Corner Joints
Drill holes into the corners to join them together.
Leave an opening on one side (a width) to insert the wire mesh.
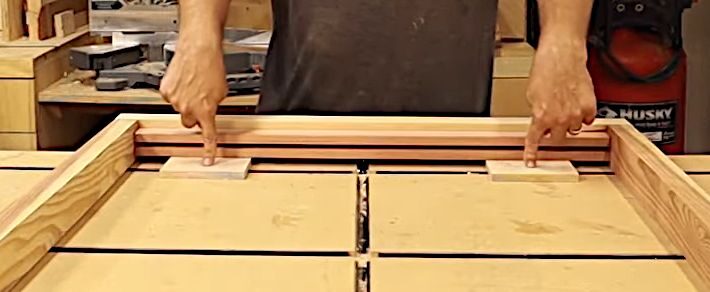
Stage 3: The Inner Frame
I recommend creating an inner frame to secure the wire mesh instead of attaching the mesh to the main frame.
It should have a groove along it for inserting the wire mesh later. Center the inner frame to be equally spaced from both edges. Then, screw the inner frame pieces to secure them to the main (outer) frame.
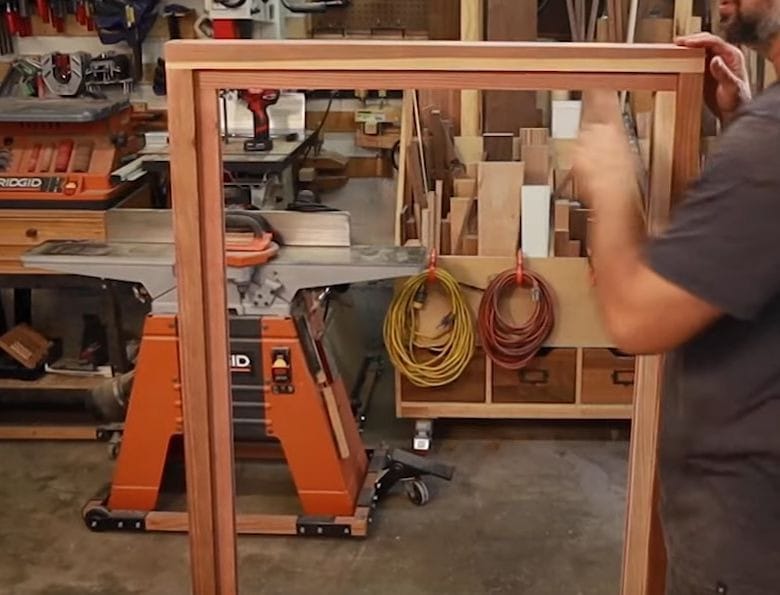
The two frames should look as shown below when you’ve done all three sides before attaching the hog wire mesh and fourth side.
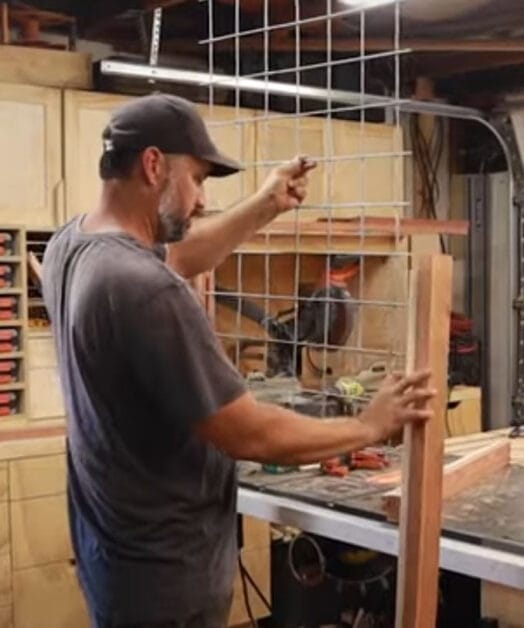
Stage 4: The Wire Mesh
Cut the wire mesh to the required size and insert it into the grooves on the inner frame.
Stage 5: Attach the Final Piece
Attach the final top piece after inserting the wire mesh.
Stage 6: Repeat the Above
Repeat the above for however many panels you need.
Stage 7: Install the Panels
Dig holes at the marked spots for the panels and install them into place, securing them with concrete after ensuring they are aligned and level.

Stage 8: Install the Gate
Finish off by installing the gate.
FAQs Section
Can Hog Wire Fences Be Customized For Different Heights?
Absolutely! You can customize a hog wire fence to fit any height requirements. Just make sure to adjust the number of wire rows accordingly and ensure the stability of your posts to support the chosen height.
What Is The Ideal Post Spacing For A Hog Wire Fence?
A hog wire fence’s ideal spacing between posts is typically 8 feet. This can provide a good balance between stability and material usage. However, you might adjust this depending on the terrain and the level of support your fence needs.
Do You Need Special Tools To Install A Hog Wire Fence?
You’ll need basic tools such as a spade, hammer, power drill, measuring tape, and pencil. Having a post-hole digger can also greatly simplify the process.
Is It Necessary To Use Concrete For Installing Posts?
Using concrete to install your posts is not mandatory, but it significantly increases the stability and longevity of your fence, especially in varying weather conditions.
Can Hog Wire Fences Keep Out Small Animals?
Hog wire fences can keep out small animals, especially if you dig trenches and bury the bottom part of the fence as recommended. The smaller the mesh size near the ground, the better it will keep small critters out.
How Do You Prevent Rust On Metal Frames Or Wire Mesh?
For metal frames or wire mesh, use galvanized steel or coat the metal with rust-resistant paint. Regular maintenance also helps to prolong their life.
What Is The Best Way To Attach The Wire Mesh To The Posts?
The best way to attach wire mesh to the posts is by using galvanized staples or fencing clips. This ensures a secure fit and helps to maintain the tension across the mesh.
Can A Hog Wire Fence Be Used For Climbing Plants?
Yes, a hog wire fence makes an excellent trellis for climbing plants. The grid structure allows plants to weave through easily, providing a natural and beautiful aesthetic to your fence.
References
Organizations:
- Merrill S. Timmins. Farmers’ Bulletin, Issue 2247. U.S. Government Printing Office. 1971
Video References:
Stuff Seth Makes
The JadeForest
Workshop Edits