14 min read
How to Hide TV Wires Without Cutting Wall (4 Easy Tips)
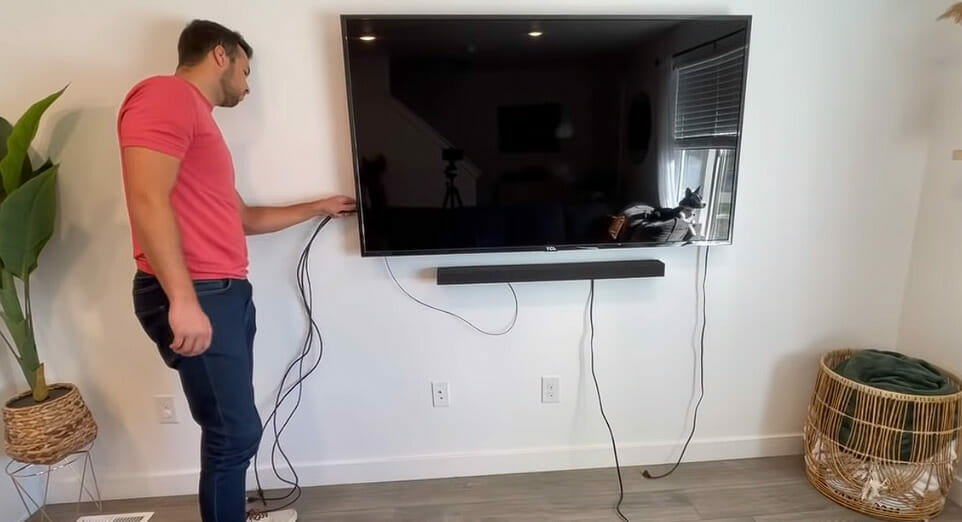
Let’s face it – nobody likes seeing a tangle of TV wires hanging down the wall. It ruins the clean look most of us wear with our flat screens.
Luckily, some pretty nifty solutions out there will help keep those pesky cables hidden away without having to do anything drastic like cutting into your walls.
Quick Overview
| Wire Management Method | Description |
|---|---|
| Cord Covers | Simple, stick-on solutions that encase cables. |
| Baseboard/Crown Molding | Hide wires behind decorative elements. |
| DIY Cable Art | Turn visible cables into wall art. |
| Furniture Arrangement | Use strategic furniture placements to conceal wires. |
Assessing the TV and Wire Layout
Before we get started, let’s take a minute to assess the layout of your TV and its wires. This is important because it’ll help us plan our strategy more effectively.
Start by looking at where your TV is currently positioned – is it on a stand or mounted on a wall? How far away are the outlets? Are they directly behind the TV or off to the side?
Let’s also consider the types of cables and wires that need hiding. Are we talking about just a power cord, or are there HDMI cables, speaker wires, and ethernet cables in this jumble, too? The type of wire can affect how easily it can be hidden.
Once you understand your current situation, sketch out a rough diagram (and hey – don’t worry if you’re no Picasso). Jot down where each cable starts and ends. This will give you a clear vision of what needs to be done.
Keep this layout handy because, in the next section, I will dive into some methods for making these unsightly cords disappear like magic!
4 Wire Management Methods
Let’s get to business and tackle your messy problem—visible TV wires. Surface wire management solutions come in.
Method 1. Cord Covers
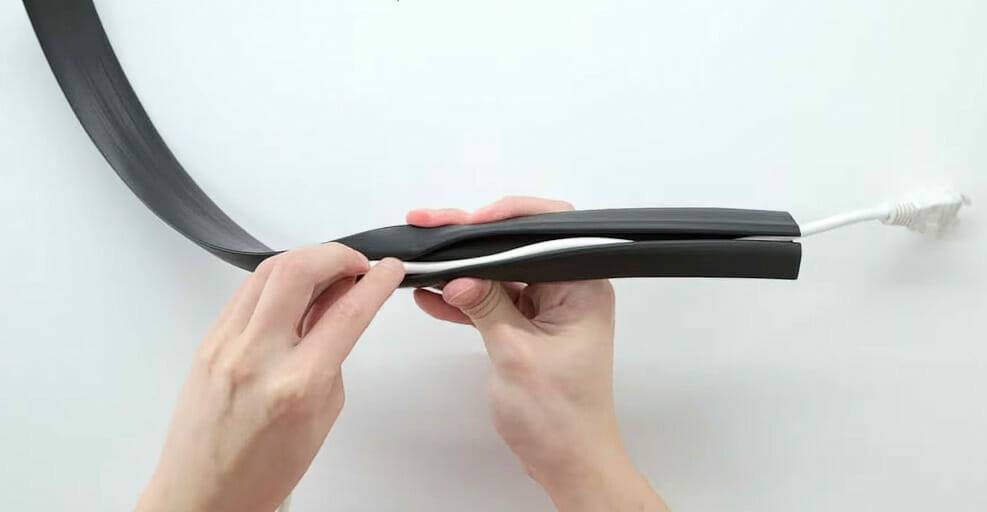
The first thing that may come to mind is cord covers. They’re simple to use and provide an immediate solution. You stick them onto your wall, tuck those ugly cords inside, and voila!
| Step | Instructions |
|---|---|
| 1. | Assess the Situation: Identify the number and type of wires that need to be hidden. This will help you determine the size and length of the cord cover required. |
| 2. | Purchase Cord Covers: Based on your assessment, purchase cord covers. They’re available in various lengths, sizes, and colors. Some even allow you to paint over them to match your wall color. |
| 3. | Prepare the Wires: Bundle your wires together using zip ties or Velcro straps. This will make it easier to fit them into the cord cover. |
| 4. | Measure the Length: Measure the distance from the TV to the point where the wires will be plugged in. This will give you the required length for the cord cover. Cut the cord cover if necessary. |
| 5. | Install Cord Cover Base: Most cord covers come with a base that attaches to the wall first. Position the base where you want it, and mark the points for screws or adhesive strips. Secure the base to the wall following the manufacturer’s instructions. |
| 6. | Insert the Wires: Once the base is secured, lay your bundled wires into the channel of the cord cover base. |
| 7. | Attach the Cover: Snap or slide the top part of the cord cover over the base, enclosing the wires. |
| 8. | Secure the Ends: Some cord covers come with end caps for a cleaner look. Attach these end caps if provided. |
| 9. | Paint (Optional): If you’ve purchased a paintable cord cover, you can paint it to match your wall. Use a primer first, then your chosen paint color. Allow each coat to dry thoroughly. |
| 10. | Check Functionality: Turn on your TV and connected devices to ensure all cables function correctly. |
| 11. | Maintain Appearance: Dust and clean the cord cover as needed to keep it looking neat and clean. |
Notes:
- Always follow the manufacturer’s instructions when installing cord covers.
- If you’re renting, check with your landlord before making any modifications.
- Remember that cord covers work best for horizontal or vertical wire runs. If your TV is placed at an angle or requires a diagonal run, you may need to get creative with the cord cover placement.
With these steps, you should have a neater space without visible TV wires!
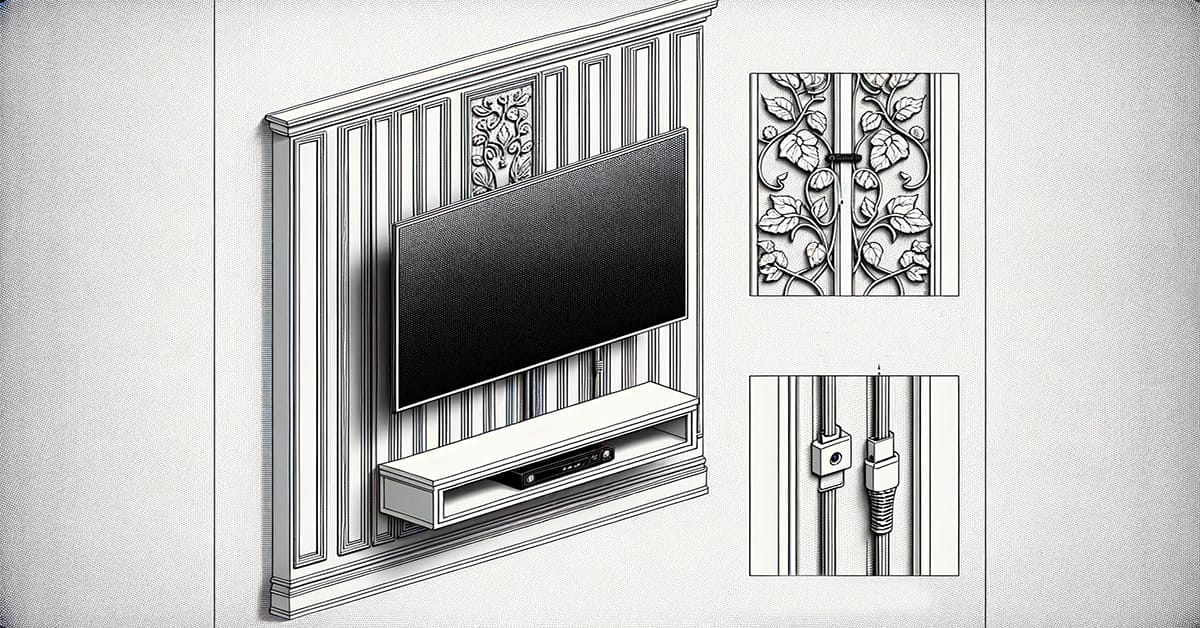
Method 2. Baseboard or Crowd Molding
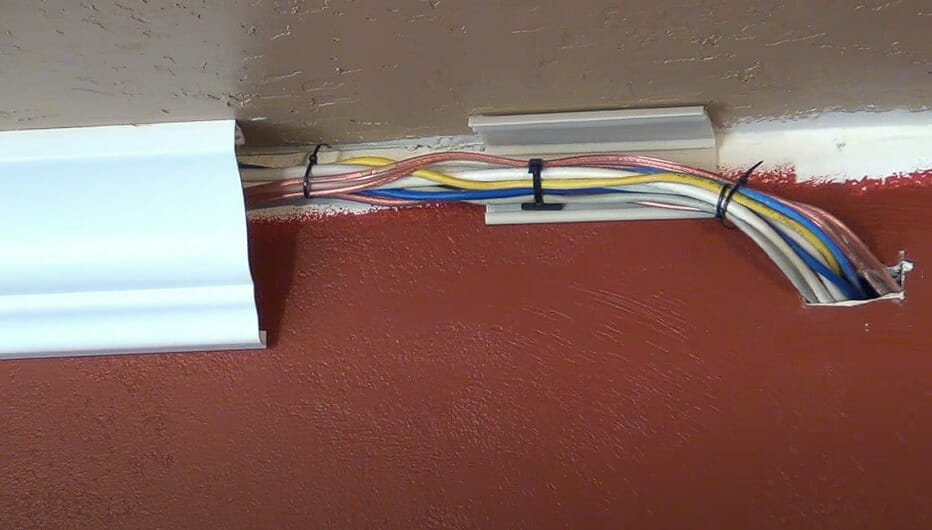
Another option we have here is the baseboard or crown molding route. These moldings are a decorative element for your house and a secret hiding space for those pesky wires.
| Step | Instructions |
|---|---|
| 1. | Assess the Situation: Determine the number and type of wires that need hiding. This will influence the size and style of the molding you choose. |
| 2. | Cut Molding to Size: Using a saw, cut the molding to the desired length, considering any corners or turns. |
| 3. | Measure the Length: Measure the distance from your TV to where the wires will be plugged in. Purchase sufficient molding length based on this measurement. |
| 4. | Purchase Materials: Buy your molding and other required materials like nails, adhesives, or mounting clips. |
| 5. | Prepare the Wires: Bundle wires together using zip ties or Velcro straps for easier insertion into the molding. |
| 6. | Insert Wires: Press or slide your bundled wires into the channel behind the molding. If the molding has a removable face, you can reattach it now. |
| 7. | Attach Molding to Wall: Position the molding so the TV wires can easily slide into the back channel. Secure the molding to the wall using the method recommended for that particular type (e.g., nails, adhesive, clips). Ensure it’s level. |
| 8. | Maintain Appearance: Clean and dust the molding to retain its appearance. |
| 9. | Secure Corners and Joints: If your molding needs to turn a corner or if you have joined pieces, make sure these joints are neatly aligned and secure. |
| 10. | Paint (Optional): If you’ve purchased unpainted molding or want to change its color, paint it to match or complement your wall. Ensure you use appropriate paint and primer for the material. |
| 11. | Purchase Materials: Buy your molding and any other required materials like nails, adhesives, or mounting clips. |
| 12. | Check Functionality: Turn on your TV and connected devices to ensure all cables function correctly. |
Notes:
- If you’re uncomfortable making precise cuts for corners or joints, consider hiring a professional or seeking assistance from a knowledgeable friend.
- If you’re renting, always check with your landlord before modifying.
- Although this method avoids cutting the main wall, you’ll still need to make small nails or screw holes to secure the molding.
With this method, your TV wires will be neatly tucked away behind stylish molding, adding a touch of elegance to your room!
Method 3. DIY Cable Art
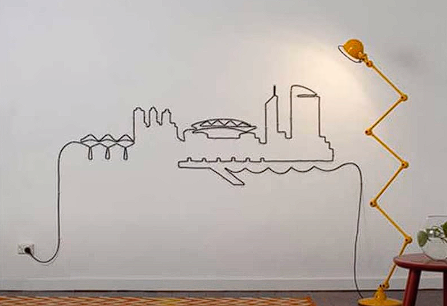
If you’re like me and enjoy crafty solutions, DIY cable art could be up your alley! Turn those cables into something fun, like a tree or a skyline silhouette on your wall!
It’s creative, unique, and above all—it makes dealing with visible cables less of a chore and more of an adventure!
| Step | Instructions |
|---|---|
| 1. | Assess the Situation: Identify the number, type, and length of wires that you want to transform into art. |
| 2. | Assess the Situation: Identify the number, type, and length of wires you want to transform into art. |
| 3. | Gather Materials: Depending on your design, you might need additional materials like adhesive cable clips, colored tape, or wire connectors. |
| 4. | Prepare the Wall: Ensure the wall area where you’ll be working is clean and dry. If you intend to paint a backdrop or add other decorative elements, do this first and let it dry. |
| 5. | Sketch a Design: On a piece of paper, sketch a design or pattern you’d like to create using the wires. This could be geometric shapes, abstract designs, or recognizable objects or silhouettes. |
| 6. | Lay Out the Design: Using light pencil marks or painter’s tape, trace your design on the wall as a guideline. |
| 7. | Position the Wires: Start positioning your TV wires along the design. Use adhesive cable clips or colored tape to hold them in place. If the wires are too long, you can loop or zigzag them to fit the design. |
| 8. | Add Decorative Elements (Optional): Depending on your design, you might want to add other decorative elements, like beads, string lights, or other craft materials. |
| 9. | Secure the Wires: Once satisfied with the layout, securely fasten the wires in place. Ensure that they’re not pulled too tight to avoid damage or disconnection. |
| 10. | Maintenance: Periodically check to ensure adhesive clips or tapes are holding up. Replace or reinforce as needed. |
| 11. | Check Functionality: Turn on your TV and connected devices to ensure all cables function correctly and that nothing was accidentally unplugged or damaged. |
Notes:
- Ensure any adhesives or tapes won’t damage the wall paint or finish.
- This method is especially suitable for those who love creative projects. If you feel not artistically inclined, consider getting a friend involved or looking for design inspirations online.
- Remember that while the goal is to create an artwork, the functionality of your devices should not be compromised.
By embracing the presence of the wires and turning them into a decorative element, you’ll have a unique feature that both conceals and celebrates the cables!
Method 4. Furniture Arrangement
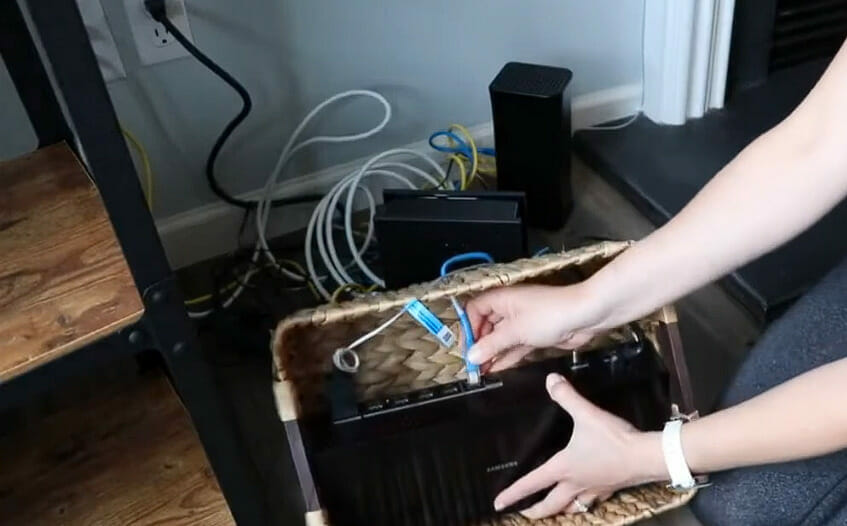
Lastly, consider incorporating furniture arrangements to hide those TV wires. Strategically placing furniture such as bookshelves or cabinets near your television set can hide those dangling eyesores.
| Step | Description |
|---|---|
| 1 | Assessment: Evaluate the length and quantity of wires you aim to conceal. Note which devices they’re connected to. |
| 2 | Choose the Right Furniture: Opt for TV stands or media centers with a built-in cable management system or concealment options. They typically have holes at the back for wires to pass through and shelving to hold devices, which helps reduce visible clutter. |
| 3 | Regular Maintenance: As you add or remove devices over time, reassess your wire management. Regularly check to ensure wires are concealed, and no new wires are exposed. |
| 4 | Use Wire Clips or Channels: You can get adhesive wire clips or channels that stick to the back of your furniture, allowing you to route the wires neatly. This keeps the wires organized and out of sight from a front view. |
| 5 | Decorative Elements: Consider placing decorative items like potted plants, vases, or photo frames in front of some wires to obscure them from view. Ensure these don’t clutter the space or block access to essential devices. |
| 6 | Utilize Storage Boxes: Place power strips or excess cable length inside decorative storage boxes or baskets at the base of the TV stand. This can keep the unsightly tangles hidden. Ensure there is some ventilation if there are devices that could generate heat. |
| 7 | Cable Sleeves: Group wires together using cable sleeves. This creates a single, more organized line of cables instead of many individual ones dangling. You can then run this along the edge or leg of the furniture, making it less noticeable. |
| 8 | Rug Tactics: If your wires need to run across the floor, consider using a rug or carpet to cover them. They not only hide the cables but also prevent tripping hazards. |
| 10 | Assessment: Begin by evaluating the length and quantity of wires you aim to conceal. Note which devices they’re connected to. |
Remember, safety comes first! Ensure wires are not bent at extreme angles and don’t overload power strips or outlets. Always keep wires away from heat sources or sharp edges.
Avoiding Common Mistakes and Safety Hazards
First off, let’s talk about overloading your power outlets. It’s tempting to cram all those plugs into one spot, but it can lead to overheating or even fires.
Always use a high-quality power strip with surge protection if you need extra sockets.
- Don’t plug in more devices than the outlet or power strip is rated for.
- Never daisy-chain power strips together.
Next up: damaging your cables. When hiding wires behind furniture or along baseboards, be careful not to bend them too sharply or pinch them under heavy items.
- Keep bends gentle and wide.
- Protect wires from sharp edges with plastic conduit or cable protectors.
Lastly, securing wires properly. You want those cords out of sight and secure so that they won’t become trip hazards.
- Use adhesive-backed cable clips for light-duty applications.
- Use screw-on clamps for heavier cables like the main TV power cord.
So there you have it! I hope these tips help keep your wire-hiding project safe and successful. Remember: take your time, plan, and when in doubt, consult a pro!
RELATED How to Hide Wires (4 Methods)
References
Organizations:
- The National Electrical Contractors Association (NECA). https://www.necanet.org/
- Consumer Electronics Association (CEA). https://www.cta.tech/
Websites:
- Houzz Forums. https://www.houzz.com/discussions
- Lifehacker. https://lifehacker.com/
Video References:
The Weekend Builder
UT WIRE
RacewayCrown
Plan n Design
Home with Marika – Interior Design