12 min read
How to Find Broken Wire in a Heated Floor (6 Steps)

A broken wire is one of the main things to look for when troubleshooting an electrical fault, but how would you do that with a heated floor?
You can find a broken wire in a heated floor by conducting a continuity (resistance) test. You should check it before installing the system, before and after embedding, and again after laying the tiles.
To conduct a continuity test to find a broken wire in a heated floor, set the multimeter to ohms and connect the probes to the lead wires (black and white or blue). The reading should be close to the manufacturer-specified one. A broken wire will have a widely different reading.
You can repeat the test long after installing the system, but if you find a broken wire and want to pinpoint the exact spot to know which tile to remove, you will need a higher-power insulation tester and an infrared detector.
Continue reading to learn how to find a broken wire in a heated floor in more detail. I’ve also included details of an additional insulation test and recommendations for minimizing future damage after successfully installing the system in your home.
Heated Floors
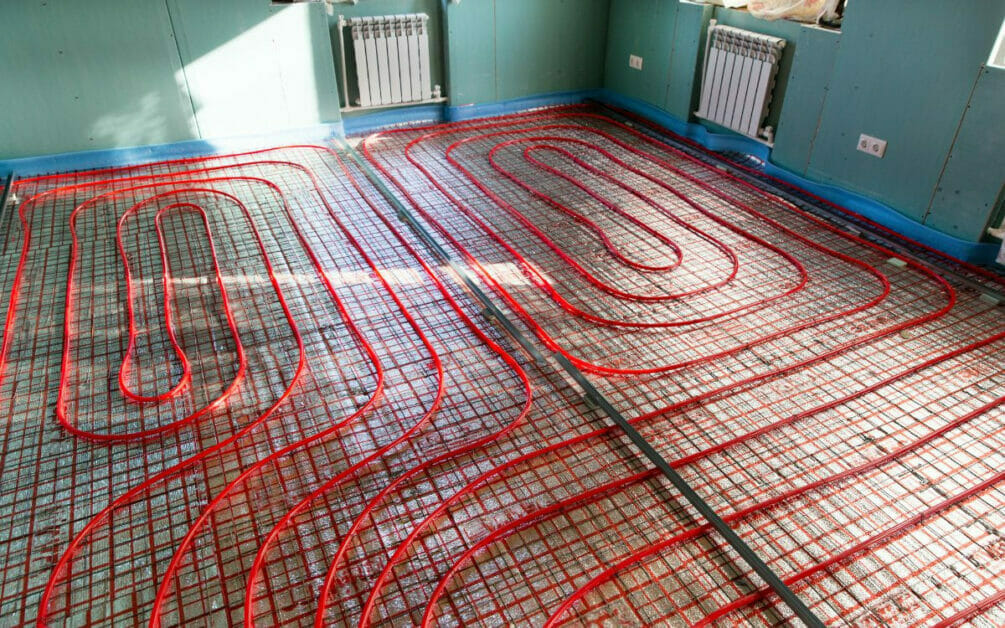
Radiant underfloor heating is an economical and effective way to keep a floor at a comfortable temperature.
A heated floor system usually consists of a flexible, insulated heating element joined to non-heating conductors. The heating portion is usually contained inside a fabric material to keep the cables spaced apart that are laid on top of a layer of insulation or thermal barrier, secured to the floor using a high-temperature adhesive. [Creative Homeowner, 2007, p. 192]
NEC’s section 424.44(E) requires heated floors to have GFCI protection. Also, the non-heating conductors must be protected where they leave the floor by a rigid conduit, whether metallic, non-metallic, or tubing.
Checking for a Break in a Floor Heating Cable
Checking for a break in a floor heating cable is essential before laying it because it’s impossible to access it again afterward without breaking the floor.
Wires specially designed for floor heating are usually marked with resistance ratings in ohms; otherwise, I recommend you do so yourself before installing them. Some manufacturers describe a testing procedure. Follow them carefully if they do, especially if it’s a condition for the warranty to be valid.
You don’t want to tile over a heating system with a broken cable and find yourself having to repair the floor.
Types of Tests
You can conduct three types of tests on electric floor heating mat systems: a resistance test, an insulation test, and a floor sensor test.
The main test we will focus on here is the resistance test between conductor wires to ensure no break in the non-heating and resistance conductors. But, I will also briefly cover the insulation test to check if it is broken.
A broken cable must be repaired or replaced.
Testing Phases
You should conduct these tests before installing the system and at other phases of the installation process. One manufacturer recommends you do so:
- Before installing the system
- After installing but before embedding
- After embedding
- After laying the floor tiles
You can also repeat the test when you suspect a broken wire if the electric floor heating system fails to work properly.
Requirements
The only requirements to find a broken wire in a heated floor are a screwdriver to open the thermostat and a multimeter to conduct the tests.
Conducting the Resistance Test
The resistance test verifies a cable’s continuity, i.e., that it has no breaks and the proper wattage rating.
Follow these 4 steps to conduct a resistance test:
Step 1: Set the Multimeter
Set the multimeter to read ohms or use an ohmeter instead.
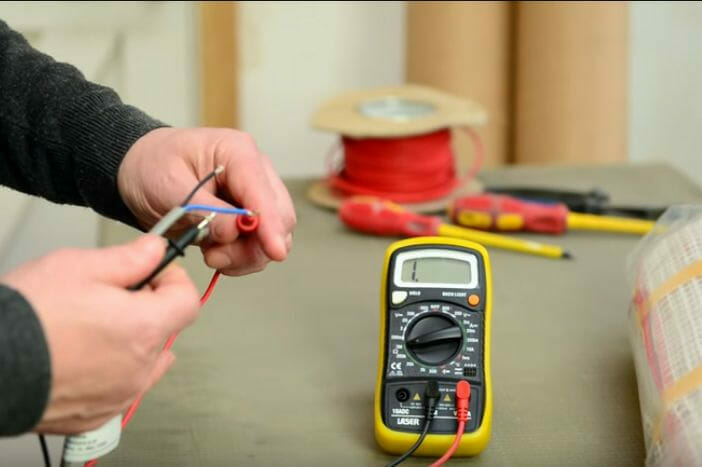
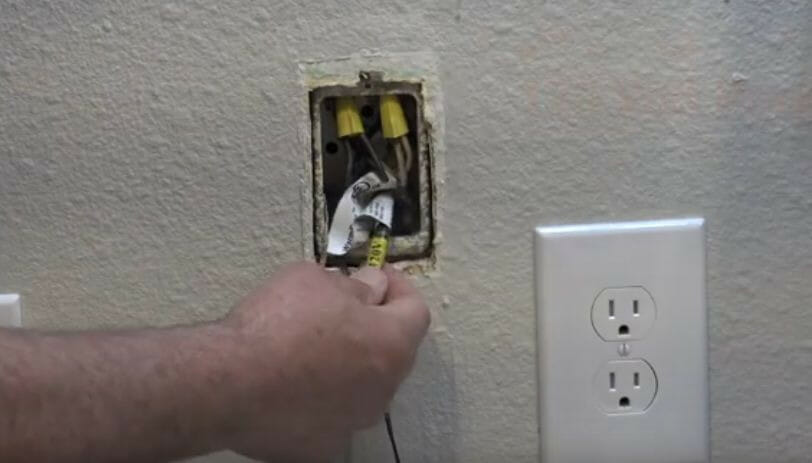
Step 2: Connect the Probes
Connect the multimeter’s probes to the black and white (or blue) lead wires (not the ground wire). See the picture below on the left.
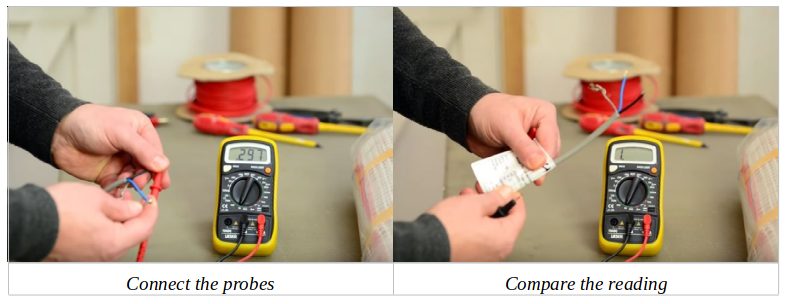
Step 3: Compare the Reading
Compare the resistance reading to the expected value specified by the manufacturer. See the picture above on the right.
In this case, the obtained reading was 297, and 298 was specified. So, that’s considered accurate, and the cable is fine. A damaged wire will have a widely different reading.
Generally, a lower resistance means a higher current can pass through, which can lead to melting and burning, and a higher resistance means a lower current that may be insufficient for the system to work effectively. A complete break would prevent any current from passing, so the system would fail.
Step 4: Log the Reading
Record the resistance reading in the cable test log and on the cable tag if present.
Here is a sample of a cable test log provided by one electric floor heating mat system manufacturer.

Conducting the Insulation Test
The resistance test verifies a cable’s continuity, i.e., that it has no breaks and the proper wattage rating.
Follow these 4 steps to conduct a resistance test:
Step 1: Set the Multimeter
Set the multimeter to read ohms or use an ohmeter instead.
Step 2: Connect the Probes
Connect the multimeter’ black (negative) probe to the ground wire (braided, uninsulated part) and its red (positive) probe to the black and white (or blue) wires of the cold lead in turn.
Step 3: Check the Reading
Check the insulation reading. It should be ‘OL’ or ‘OPEN’, indicating the cable is fine.
If you get a different reading, the cable’s insulation is damaged.
Step 4: Log the Reading
Record the insulation reading in the cable test log.
Minimizing Future Damage
Even if all the cables are fine at the time of installation, minimize the risk of breakage in the future by ensuring the following:
- Carefully plan the heating cable layout.
- Don’t install the system over any floor that requires nailing.
- Give enough space for the non-heating conductors to reach the control unit, usually mounted on the wall.
- Don’t overlap the heating cables.
- Don’t overlap the non-heating cables with the mat’s heating area.
Checking for a Break in a Floor Heating Cable After Installation
It’s possible to conduct a more thorough check for a break in the wires of an electric heating mat system, but if you find a fault and want to locate the exact spot where the wire is broken, you will need to use more equipment.
An expert best does this check because it uses higher current under a controlled condition and requires a high-voltage tester and infrared detector.
To show how this would be done, we will follow an inspection by a professional from an electric floor heater system supplier when responding to a complaint about it not working.
Here are the steps:
- Remove the thermostat.
- Repeat the resistance test (see Step 3 in the resistance test described above).
- Conduct a higher current test if a broken wire is identified.
- Survey the entire area above the electric floor heating mat system.
- Look for specific hot spots using an infrared detector.
- Remove the tile over the problem spot.
- Fix the broken wire (not covered in this article).
Step 1: Remove the Thermostat
Remove the thermostat and inspect the wires inside.
Step 2: Conduct a Resistance Test
Conduct a resistance test.
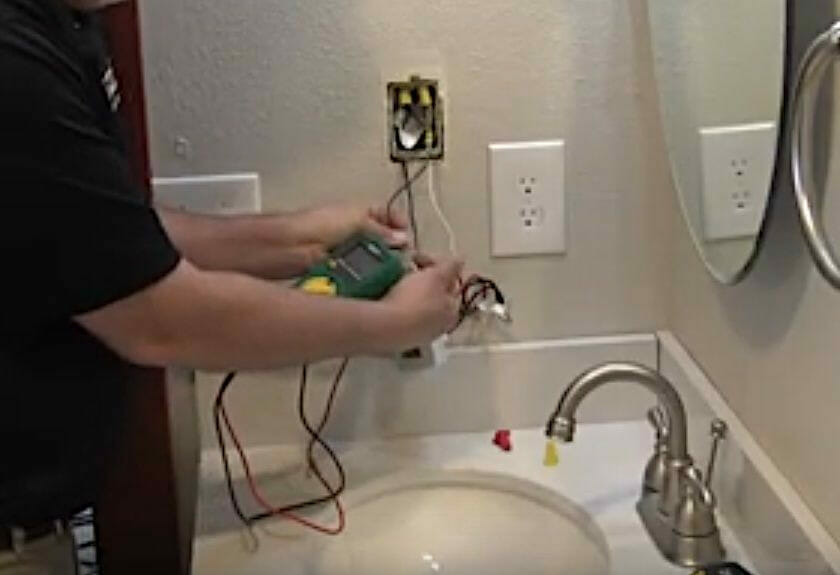
The reading in this case was 9 ohms, whereas 77.9 ohms was specified, indicating a bad cable.
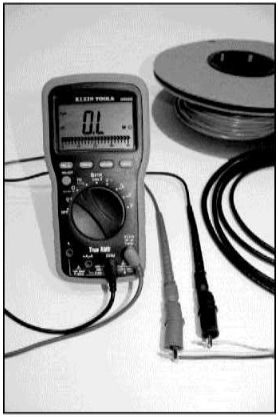
Step 3: Test Using Higher Current
A professional may use a higher voltage insulation tester like the one below to identify the exact problem spot.
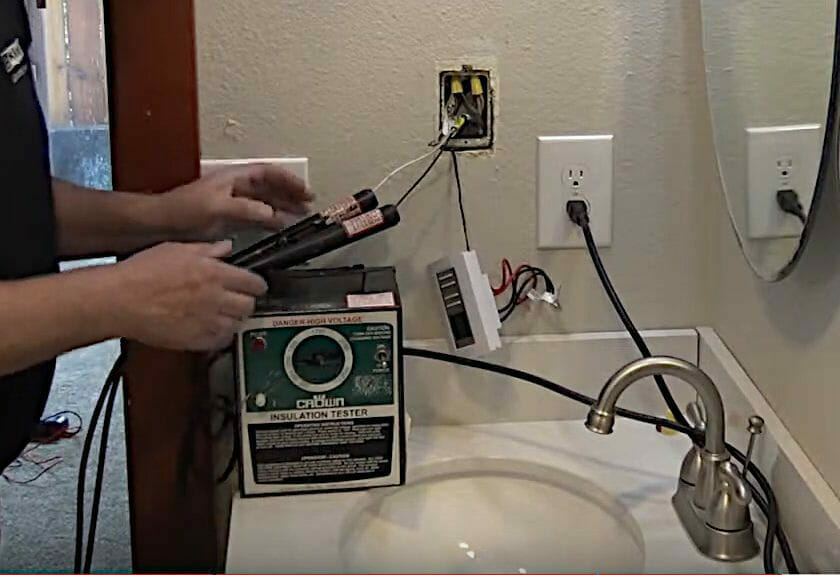
Step 4: Survey the Area
The problem spot can now be identified using a temperature sensor, temporarily allowing a higher current flow.
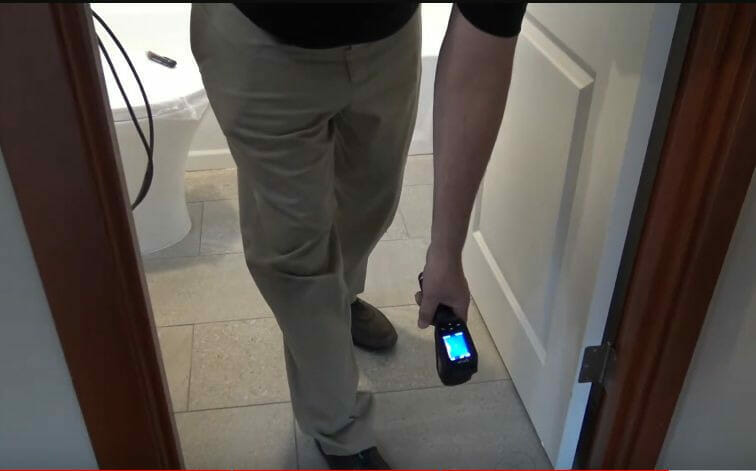
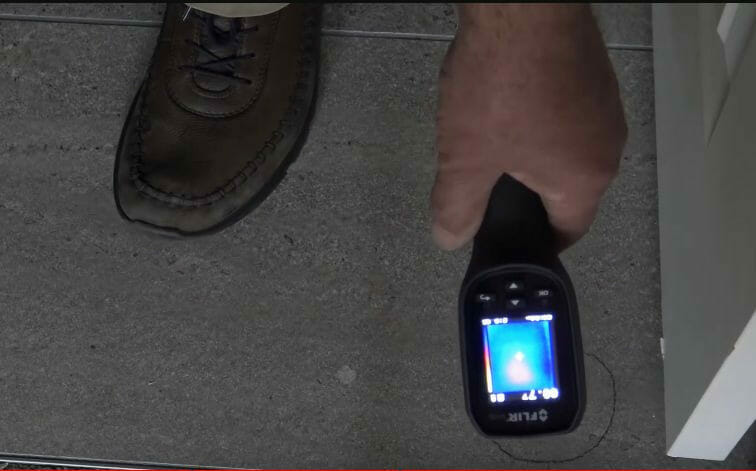
Step 5: Look for Hot Spots
Continue surveying the area over the heating system using an infrared detector. Look out for a high-temperature spike or arc fault, as identified below.
Step 6: Remove the Tile
Having located the exact spot where the temperature spike occurs, turn the insulation tester off and remove only that tile underneath. The infrared detector saved us from having to open the entire floor.
Once the broken part of the wire is found, repair it.
FAQ: Troubleshooting Heated Floors
Q: What’s the first thing I should look out for if my heated floor is acting up?
A: Before tearing up those tiles, always suspect a broken wire. It’s like a detective story – you must find the missing link!
Q: How do I find this “missing link” in my heated floor?
A: Great question! The hero tool here is the multimeter. Conduct a continuity (resistance) test. Connect the probes to those lead wires (like black and white or blue). You might have a rogue wire if the reading isn’t close to what the manufacturer says.
Q: Wait, I’ve laid my tiles already. Can I still check for breaks?
A: Of course! Although it’s easier to check before, if you suspect a broken wire, it’s not the end of the road. But to pinpoint that exact troublesome spot, you’ll need something more powerful, like a high-power insulation tester and an infrared detector. Think of it as the X-ray vision for your floors!
Q: Tell me again about these “tests” I can conduct on my heated floor.
A: Alright, gather around for some testing 101! There are three main ones for electric floor heating mat systems:
- Resistance Test: Checks continuity and wattage rating.
- Insulation Test: Also about continuity and wattage, but a bit more detailed.
- Floor Sensor Test: We didn’t go deep into this one in the article, but it’s another tool in your arsenal.
Q: When should I conduct these tests?
A: Multiple times, my friend! Before installing, after installing, but before embedding, post-embedding, and after setting down those tiles. It’s like double-checking your work – always a good idea!
Q: I’m not handy, but I have a screwdriver and a multimeter. Can I still try to find a broken wire?
A: You betcha! The basics you need are just that – a screwdriver and a multimeter. Dive into the detailed steps in the article, and if things seem a bit too technical, there is no harm in calling in an expert.
Q: Let’s say I find a break after installing the floor. What then?
A: It’s a bit like a treasure hunt. Using a high-voltage tester and an infrared detector, an expert can identify the exact problem spot. From there, you’ll have to remove just that tile to get to the wire and fix it.
Q: I want my heated floors to last. How can I make sure I don’t have to deal with broken wires in the future?
A: It’s all about laying the foundation right! Plan the cable layout, avoid nailing over the system, and ensure those heating cables aren’t overlapping. And don’t rush it – taking your time now might save you a headache later!
References
Website References:
- Hydronic Radiant Floor Heater. https://www.attainablehome.com/hydronic-radiant-floor-heater-pros-and-cons/
- Creative Homeowner. The ultimate guide to wiring: Complete home projects. Creative Homeowner. 2007
- King. Electric floor heating mat systems. https://king-electric.com/wp-content/uploads/kel_product_files/FCM-Install.pdf
Website References:
Underfloor heating hq
King Electrical Manufacturing Co