11 min read
How To: Easily Clean Refrigerator Coils for a Cooler Kitchen (Guide)

As we all know, refrigerators are an essential part of our daily lives, and it’s important to keep them running smoothly to ensure that our food stays fresh and safe to eat.
Here’s a quick guide to cleaning your refrigerator coils:
🔌 Step 1: Unplug: Safety first!
📍 Step 2: Find Coils: Where’s the hideout?
🧽 Step 3: Coil Clean-Up: Get down to the nitty-gritty.
🧼 Step 4: Detailed Wipe: Catching every speck.
🔌 Step 5: Reassemble and Power Up: Back to business!
In this article, I’ll share some of my favorite How-tos and quick tips on maintaining your refrigerator. So, whether you’re a seasoned pro or just starting out, there’s something here for everyone. So, let’s get started!
Preparation for Cleaning
Before cleaning your refrigerator coils, preparing the necessary tools and materials is important. Here are the steps you should take to prepare for cleaning:
- Remove any items from the top and sides of the refrigerator: Before cleaning the coils, remove any items on top of or around the refrigerator. This will give you easier access to the coils.
- Prepare cleaning tools: You will need a vacuum cleaner with a brush attachment, a coil cleaning brush, and a clean cloth or sponge.
- Wear protective gear: Wear gloves and a dust mask to protect yourself from dust and debris while cleaning the coils.
By following these steps, you can prepare yourself for cleaning your refrigerator coils and ensure a successful cleaning process.
Step 1: Unplug your Refrigerator

I always unplug my refrigerator before starting any maintenance or repair work, and cleaning the refrigerator coils is no exception. If the power outlet is behind the refrigerator, I may need to pull it from the wall to unplug it.
I don’t worry about spoilage because the cleaning process is quick, and the doors will remain closed, keeping my cold foods safe.
Once I’ve unplugged the refrigerator and read the manual, I’m ready to start cleaning the condenser coils.
Step 2: Locating the Condenser Coils

Now that I have unplugged the fridge, it’s time to locate and clean the condenser coils. These coils are responsible for removing heat from the refrigerator and keeping it cool.
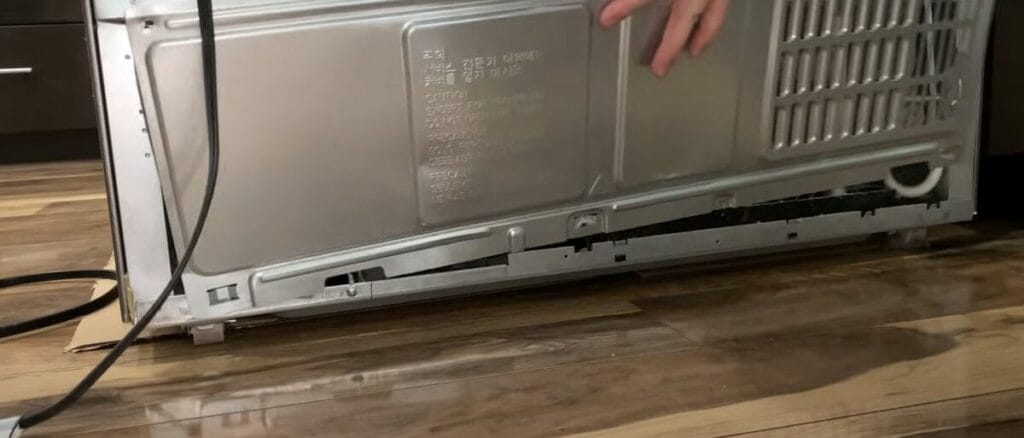
I found the condenser coils at the base of the fridge in front, behind a toe-grill that snaps off. If your fridge doesn’t have a toe grill, you’ll find the condenser coils on the back.
If the coils are on the back of the fridge, I need to pull the fridge away from the wall to clean them. This can be a bit of a hassle, but ensuring that the coils are clean and working efficiently is worth it.
Step 3: Cleaning the Coils
Now that I have removed the base grille and located the coils, it’s time to clean them.
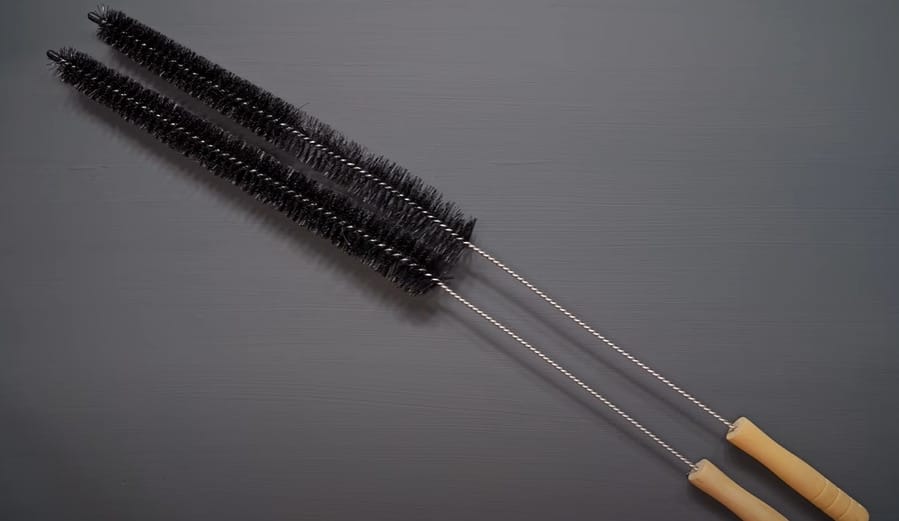
To do this, I will need a coil condenser brush. The brush is approximately 27 inches long with short bristles on the top one-third, and its cylindrical design makes it easy to slip it between the spaces in the coil grid.
Step 1: Start by brushing away the dust with the coil condenser brush. I will work it back and forth to remove the dust.
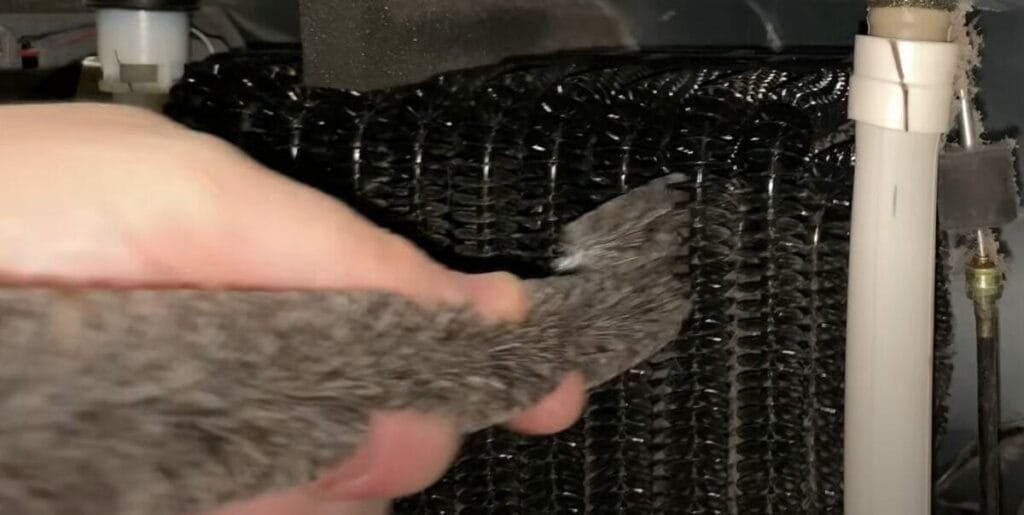
Step 2: Try gently twisting it to get into corners and tight spots. As I brush, I will keep the vacuum running to suck up the dust.

Ensuring the coils are completely clean is important, so I will take my time and be thorough.
Step 4: Wiping Down
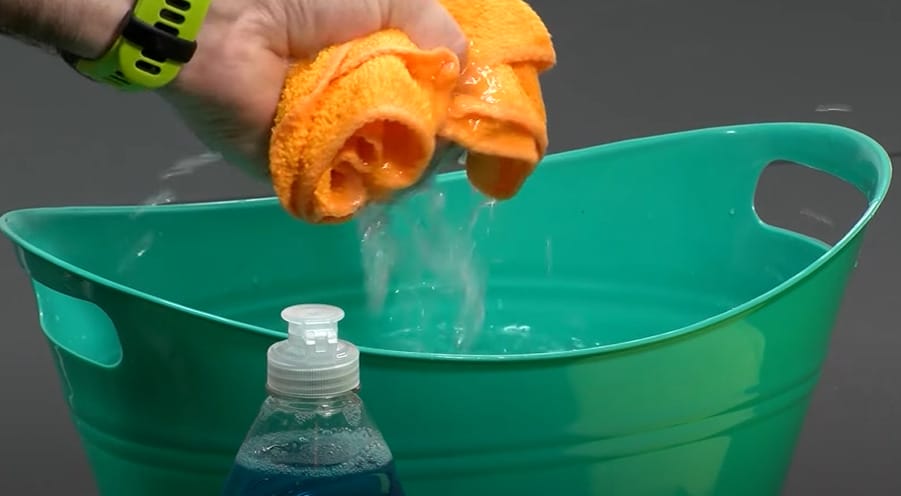
After you’ve used the coil cleaning brush, there’s often more to do to ensure a thorough clean. This step involves a detailed wipe-down to remove any lingering dirt or dust.
You’ll need a microfiber cloth for this. These cloths are great because they trap dirt without scratching surfaces, perfect for delicate coils and surrounding areas.
A mild soap solution might be necessary if you encounter particularly stubborn grime during the brushing step.
Step 5: Reassembling and Plugging Back In
Now that the coils are clean, you can vacuum dust on the floor.
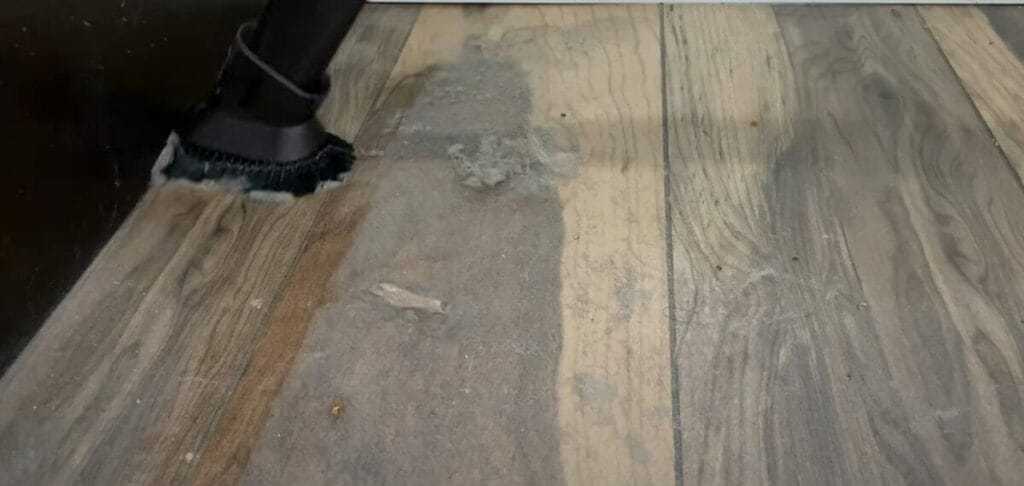
If you removed any panels or covers, now’s the time to put them back.
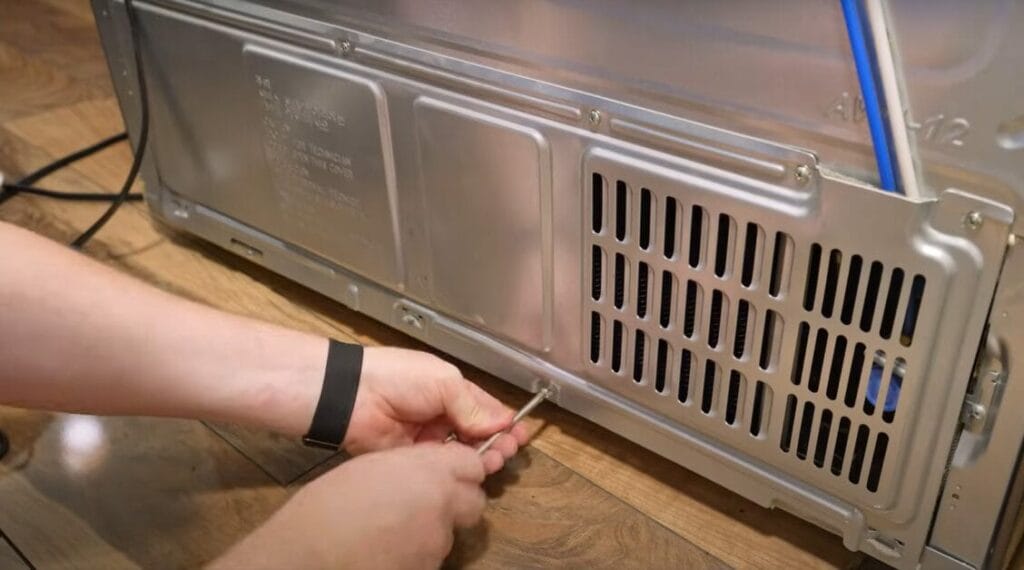
Once everything’s back in place, plug your fridge back in. Congrats, you’ve just given your fridge a new lease on life. It’s all about maintaining and maximizing what you’ve got, right?
Troubleshooting Common Issues
You might run into some snags after giving your refrigerator coils a good clean. Don’t sweat it – here’s how to tackle some common issues you might face:
- Excessively Dirty Coils: If your coils look more like a dust bunny convention than part of a fridge, it’s time for some extra elbow grease. If the regular brushing and vacuuming aren’t cutting it, consider using a commercial coil cleaner. Spray it on, let it sit for the time recommended on the label, then wipe clean. Wear gloves and work in a well-ventilated area when using chemical cleaners.
- Fridge Not Running Smoothly Post-Cleaning: Sometimes, after a thorough cleaning, your fridge might not kick back on as smoothly as you’d like. First, ensure it’s properly plugged in and check your home’s circuit breaker or fuse box. If it’s still not starting, give it a moment. Fridges often need a little time to reset their internal thermostats after being unplugged.
- Odd Noises After Cleaning: It’s not uncommon for a fridge to make some new sounds after a cleaning. If you hear something unusual, double-check to ensure everything was reassembled correctly. If a piece was put back loosely, it could be causing vibration or noise.
- Coils Too Delicate or Hard to Reach: If you’re struggling to clean the coils without damaging them, or if they’re in a hard-to-reach spot, it might be time to call in a professional. Regular maintenance is crucial, but so is keeping your appliance in top-notch condition. A professional can safely handle delicate or awkwardly located coils.
- Persistent Odor or Dirt: If there’s still an unpleasant smell or visible dirt after cleaning, the issue might lie elsewhere in the fridge, like in the drip pan. Give the pan a thorough cleaning to see if that resolves the problem.
Remember, regular coil cleaning is a key part of fridge maintenance, but sometimes, issues can go beyond just a simple cleaning. Consult your refrigerator’s manual or contact a professional for help when in doubt. Keeping your fridge running efficiently is the goal; sometimes, knowing when to call in the experts.
Maintenance Tips
I’ve learned that cleaning the refrigerator coils is an essential maintenance task that can help keep your fridge running efficiently and save money on your energy bill. Here are some tips to help you keep your coils clean:
- Vacuum the coils regularly: Use a narrow hose attachment to vacuum the coils at least twice a year or more often if you have pets that shed a lot. This will help remove dust and other debris that can build up on the coils and reduce efficiency.
- Brush the coils: If the coils are on the back of the fridge, you can use a coil brush to remove any debris the vacuum may have missed. Work the brush back and forth to remove dust, and gently twist it to get into corners and tight spots.
- Clean the drip pan: The drip pan is located underneath the fridge and collects any water that drips from the freezer. Over time, this can become dirty and moldy, so it’s important to clean it regularly. Remove the pan and wash it with warm, soapy water.
- Check the door seals: If the door seals are damaged or dirty, they can cause air leaks that can reduce the efficiency of your fridge. If necessary, check the seals regularly and clean them with warm, soapy water.
- Keep the fridge full: A full fridge is more efficient than an empty one, so try to keep your fridge stocked with food and drinks. This will help maintain a constant temperature inside the fridge and reduce the workload on the compressor.
These maintenance tips help keep your fridge running efficiently and save money on your energy bill. Remember to clean your coils regularly and check the other components of your fridge to ensure that everything is working properly.
Frequently Asked Questions
Q: How Often Should I Clean My Refrigerator Coils?
A: Aim for every 6 to 12 months. Consider cleaning more frequently if you have pets or the fridge is in a high-traffic area.
Q: Can I Use Any Vacuum Cleaner for This Job?
A: Yes, most vacuum cleaners with a brush attachment are suitable. A soft-bristled brush can also work if you don’t have this attachment.
Q: Is It Safe to Use Water to Clean the Coils?
A: Avoiding water directly on the coils is better to prevent corrosion or electrical issues. Stick to dry methods like brushing and vacuuming, or use a slightly damp cloth if necessary.
Q: How Do I Know If the Coils Are Clean Enough?
A: The coils are clean enough when all visible dust and debris are removed, and no loose material obstructs airflow.
Q: Can Cleaning the Coils Lower My Energy Bill?
A: Yes, it can. Clean coils help your fridge run more efficiently, reducing energy consumption and potentially lowering energy costs.
Q: Will Cleaning My Refrigerator Coils Extend Its Lifespan?
A: Yes, regular cleaning can extend the lifespan of your refrigerator. It helps the appliance run more efficiently and reduces wear and tear on the system.
Q: Is There a Risk of Damaging the Refrigerator While Cleaning the Coils?
A: There’s minimal risk if you’re gentle and use the right tools. Be careful not to bend or break the coils during cleaning forcefully.
Q: Do All Refrigerators Have Exposed Coils?
A: Not all. Some newer models have enclosed coils. Check your refrigerator’s manual for your model’s specific design and maintenance guidelines.
References
Organizations:
- U.S. Department of Energy. https://www.energy.gov/
- ENERGY STAR. https://www.energystar.gov/
Books:
- “The Complete Do-It-Yourself Manual” by Family Handyman. https://www.barnesandnoble.com/w/the-complete-do-it-yourself-manual-newly-updated-family-handyman/1133241792
- “Troubleshooting and Repairing Major Appliances” by Eric Kleinert. https://www.barnesandnoble.com/w/troubleshooting-and-repairing-major-appliances-eric-kleinert/1100554410
Website Resources:
- This Old House. http://thisoldhouse.com/
- The Spruce. http://thespruce.com/
Video References:
AmplifyDIY
W Service