5 min read
Spectacular Ball Chair Makeover in Bruges, Belgium
One of the most creative and prolific upholsterers I’ve met through Upholstery Club, my little international FB Page of upholstery fanatics, is Steve Vanhulle from Bruges, Belgium. He, like most upholsterers, does custom jobs that pay the bills, but he enjoys the more creative challenges nowadays. He’s a guy who found his calling, but he told me that this wasn’t always the case.
At shool I was a bit of a rebel and at the age of 16 it was decided it would be better for me to work as an apprentice! As I didn’t want to become a baker or butcher because of the early working hours the only apprenticeship going was a upholstery one! I had never heard of this job but decided to give it a go.
Repeatedly, I have students or inquiries from people who want to come in and upholster a sofa with no experience at all. I try to explain that upholstery, contrary to the blogosphere of upholstery makeovers, is NOT something you pick up in a day or two. Steve explains,
The first year I was only allowed to strip the upholstery. The following years I first started with small pieces and slowly moved on to more difficult ones.
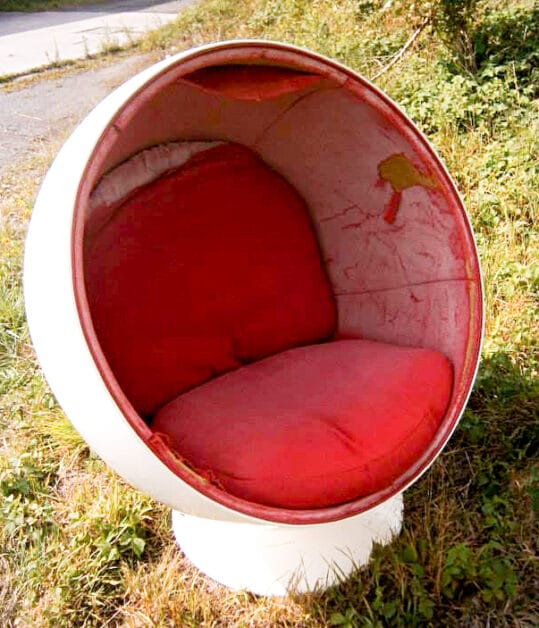
The Ball Chair BEFORE:
Tearing down furniture, or stripping it, is the best way to understand upholstery. Looking beyond the staples and tacks, you can see how cuts are made to accommodate furniture rails, how folds and calculated pleats enable fabric to contour smoothly over a round seat. It’s much more than slapping a piece of fabric on an old chair. It takes time to understand it, and it takes even more time to master it. Apprenticeships in an upholstery shop can last up to five years. Steve was taught the old fashioned way.
After completing his apprenticeship and a stint in the military, Steve returned to the upholstery shop where he had trained. Having a few more years of experience under his belt, and the owner retiring, Steve and his (now) business partner, Maureen Lebacq, decided to set up their own upholstery business. At that time, custom upholstery was a thriving business and work was plentiful. They were building a good reputation with important architects and international antique dealers in and around Bruges. It wasn’t long before their work was noticed by the Royal Family.
As we are located in a beautiful medieval town, the then Prince Filip and Princess Mathilda often came to Bruges for the weekend and would shop in the shops of our antique dealers. So Monday morning they would come to the shop with furniture which needed to be upholstered for them by the next weekend. So over the years we did make a lot of upholstery for them.
Steve and Maureen preferred to keep the shop small, only hiring extra help when needed. They still love what they do, but Steve prefers doing the more creative work nowadays. And since Prince Filip became the king in July, Steve says you could say they are now the ‘King’s Upholsterers’. Not too shabby.
Steve sent me pictures of his latest creative endeavor, the complete makeover of a 1963 Eero Aarnio Ball Chair. The chair was given to Steve’s client by her uncle who possibly didn’t know what he was giving away, but didn’t care for the chair anyway. It’s not often that we get to see just exactly how someone upholsters an iconic molded fiberglass midcentury chair, but Steve so very generously shared his process and his pictures with us. He adds,
Also, lucky for the girl, Mom and Dad payed for the upholstery.
(How much do you think this would cost in the US?)
Steve described for me his upholstery of the Ball Chair.
After carefully removing the old foam with fabric still stuck on, I had a good template to cut out the new pieces! The mistake I made with my first attempt to upholster was to glue the fabric on the cutout pieces of foam while on the flat work table!! The trick is you can only make 1 piece at a time, the fabric needs to be glued on the topside of the foam while in the ball. Leave to dry, so when dry the foam with fabric is the shape as the ball. When dry, fold over fabric and glue on backside foam. Repeat this with all the pieces… (using spray glue so not to make marks through fabric) Now you can glue a peace at a time in the ball. Tip: Start at the top and work down so if any glue falls it doesn’t fall on fabric. To glue pieces in ball now use glue with brush. And finish off by making cushions…
Fitting the foam to the inside of the chair:
This looks like what he described as trying to glue the fabric on the foam outside of the chair, when he figured out that he needed to glue it on the foam inside the ball.
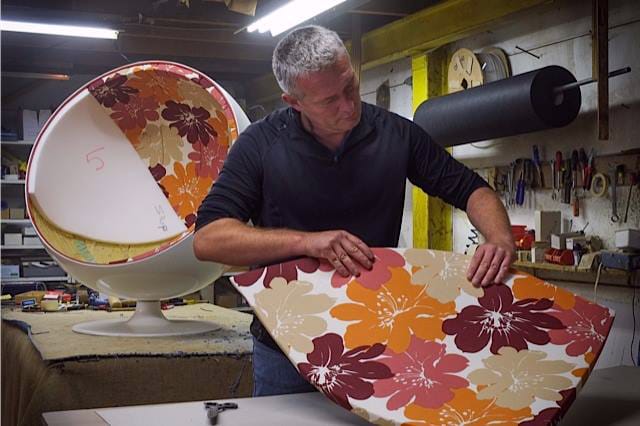
Steve adhering fabric on the foam while it’s in the ball-
Foam pieces all covered-
Fitting the seat cushion and almost done-
As you can tell, sometimes even the very best upholsterers use Trial and Error as their process. Well done Steve!
Visit Steve’s FB page, Mousse op maat ‘Select Style’ which means, Foam Cut to Size.