12 min read
Seal the Deal: How to Weatherstrip Your Door Like a Pro (Guide)
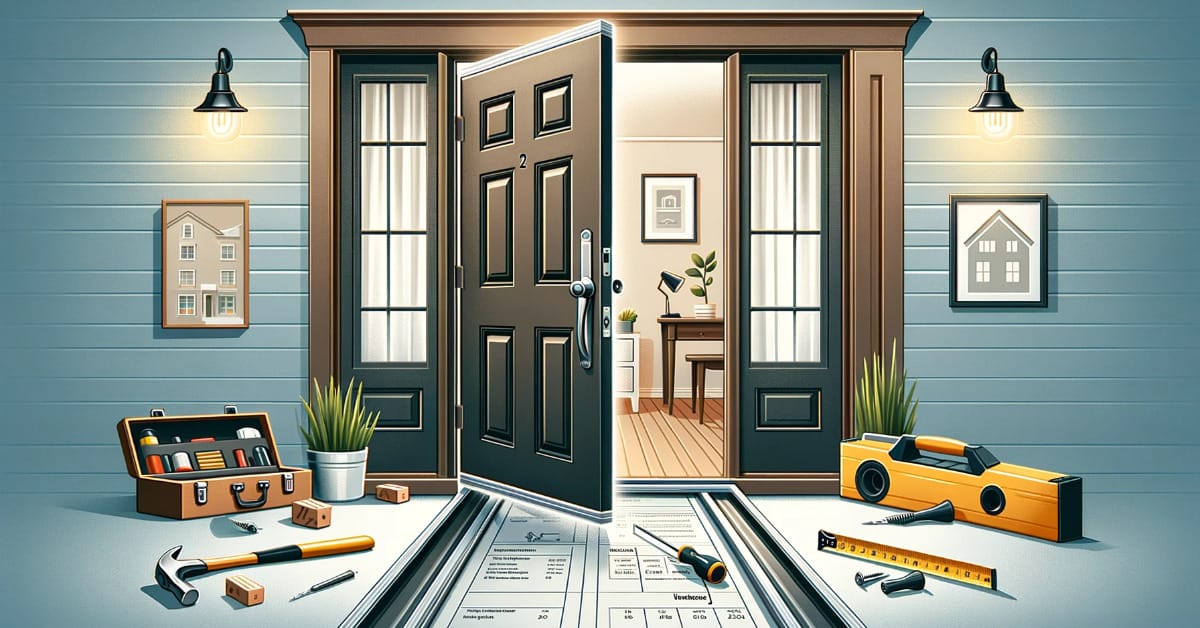
When it comes to home maintenance, one task often overlooked but can make a huge difference is installing weather stripping on your doors.
Let’s Get a Quick Look at The Game Plan Here and What We’ll Cover:
- 🚪 Door Prep
- 🔧 Hinge Adjustment
- 📏 Measure Gaps
- 🛍️ Select Strips
- ✂️ Cut to Fit
- 🔍 Final Trims
- 🛠️ Install & Seal
Whether you’re a seasoned DIY enthusiast or a novice, this guide is handy.
Tools and Materials Needed

For a DIY project on installing weatherstripping for doors, here’s a list of tools and materials you’ll need to complete the job:
Tools:
- 📏 Tape Measure: Measure the door and frame for weather stripping.
- 🧼 Cleaning Supplies: Soap, water, and a rag or sponge to clean the frame.
- 🔧 Screwdriver: Tighten the door hinges.
- ✂️ Scissors/Utility Knife: Cut weatherstripping to size.
- 🔨 Staple Gun/Hammer: Reinforce weatherstripping if needed.
Materials:
- 🌬️ Weatherstripping: Felt, foam, or rubber for insulation.
- 🔒 Adhesive: Stick the weatherstripping to the frame.
- 📍 Heavy-Duty Staples/Tacking Nails (Optional): For extra hold.
- 🛡️ Sealant (Optional): Extra moisture and air barrier.
Getting Started – Install Weatherstripping for Doors
Hold on to your hammers, DIY enthusiasts! Weatherstripping installation is much easier than it sounds. That’s right, installing new weatherstripping on your door is a task you can do yourself.
Here are the steps you’ll need to follow to install weatherstripping around your doors:
Step 1: Ready the Doorway
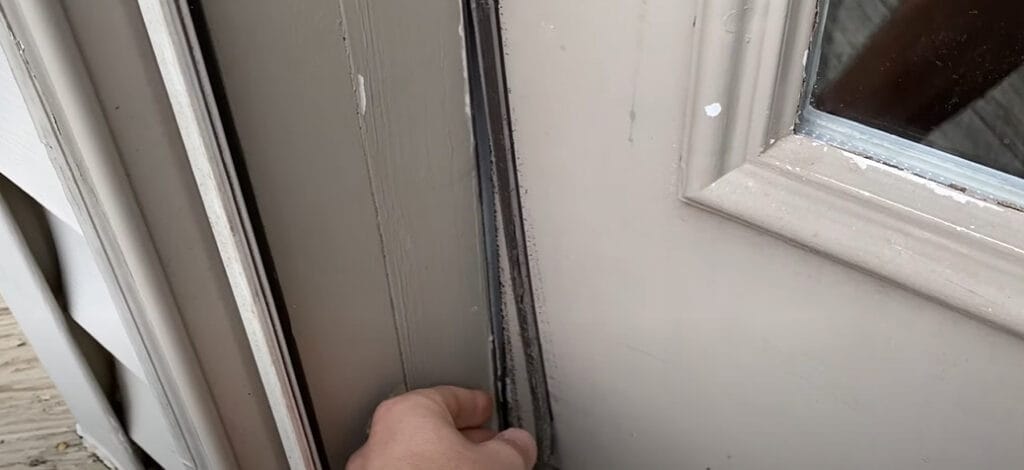
Before you get started, you’ll need to prepare the area around your door by cleaning it thoroughly. Remove the old weatherstrip if you have it installed.
Step 2: Secure the Door Hinges

Before cutting your weatherstripping, it’s important to ensure your door is properly hung. To do this, lift the door upward using the doorknob.
If there’s any play and the door moves upward, tighten the screws on the top hinge. Then, make sure the screws in the bottom hinge are also secure.
This will ensure the door is tightly fitted and the weatherstripping can do its job properly.
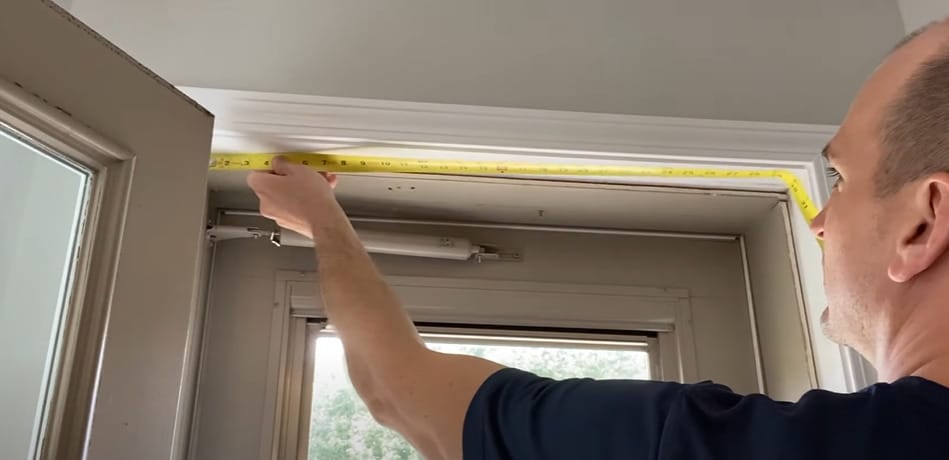
Step 3: Take the Dimensions of the Door Frame
To determine how much weatherstripping you’ll need, you’ll need to measure the gap between the door and the jamb.
Be sure to measure twice, once along the side and again along the top, as these measurements may differ. You’ll also want to measure the width of the jamb, as this will determine how wide your weatherstripping needs to be.
Step 4: Select Suitable Weatherstripping Material

Weatherstripping comes in various materials, each with its pros and cons. Felt weatherstripping is cheap and easy to cut and install but not very durable.
Foam weatherstripping is slightly more expensive but wears better than felt. Rubber weatherstripping is the most expensive option but most durable and offers the best insulation.
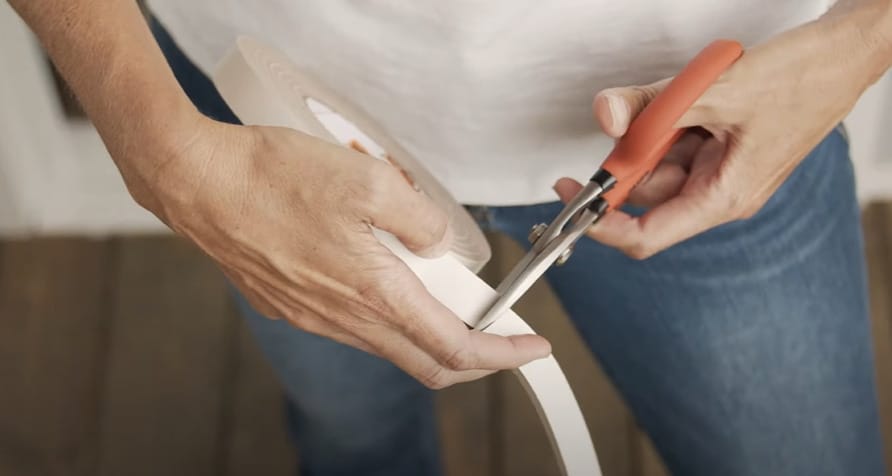
Step 5: Segment and Trim Weatherstripping to Fit
Before adhering to the weatherstripping, hold each piece up to the doorframe to confirm that you’ve cut the lengths properly. You may mark it with a marker for a precise cut.
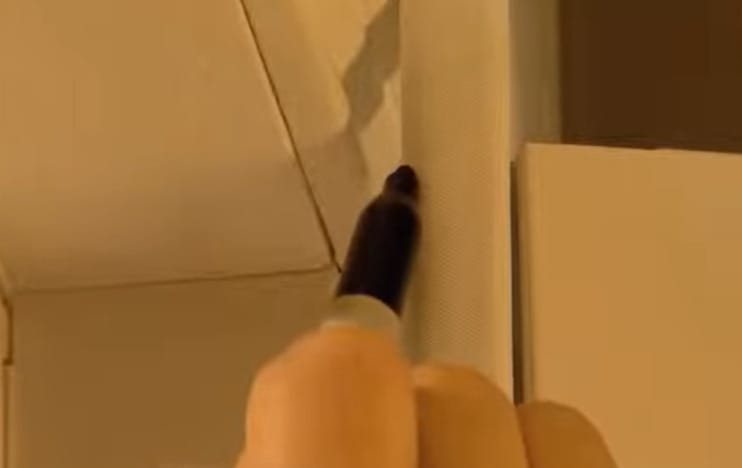
Once you’ve chosen your weatherstripping and measured it twice, it’s time to cut it into segments. You’ll need one segment for the top and two for the sides.
Step 6: Fine-tune the Trim if Necessary
If your weatherstripping segments are too short, you must re-measure and cut a new piece. If they’re too long, that’s okay—you can trim the excess after the stripping is in place.
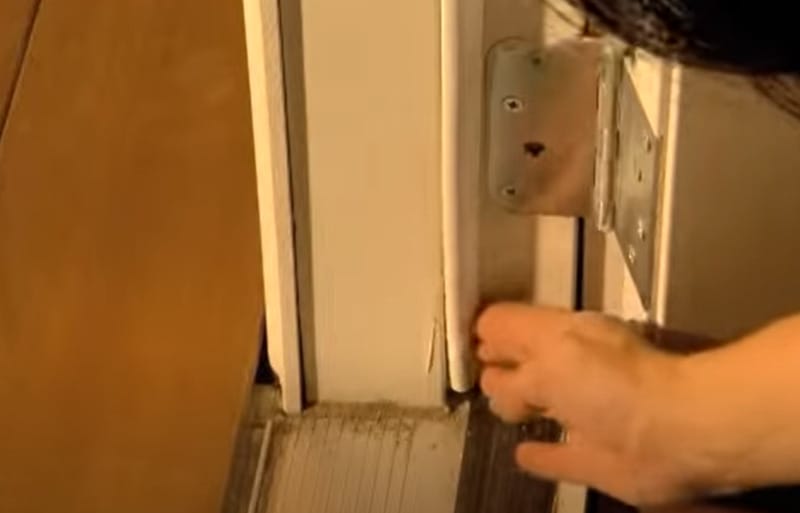
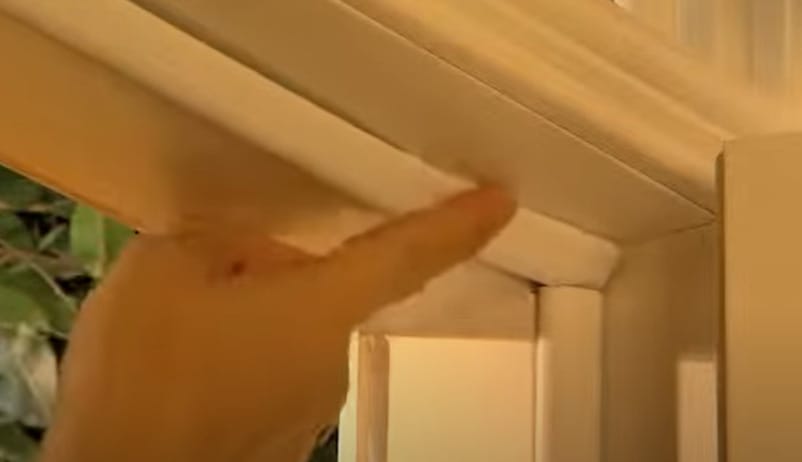
Step 7: Attach Weatherstripping to the Door
If your weatherstripping has an adhesive back, peel it away and press it into place around the perimeter of the door jamb.
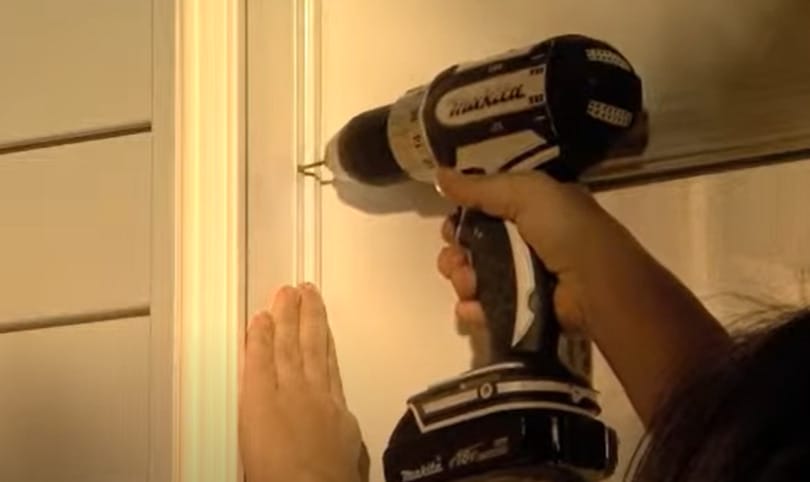
Even if your weatherstripping has adhesive, you may wish to reinforce the installation with heavy-duty staples or small tacking nails. Either will help keep the weatherstripping in place over time.
How to Maintain Weather Stripping
Maintaining your weather stripping isn’t just about comfort; it’s a savvy move for energy efficiency and keeping your home in tip-top shape.
- Regular Checks: Maintaining a comfortable climate at home necessitates regular checks of your weather stripping.
- Air Movement: Doors without weather or worn-out stripping let in unwanted air, affecting comfort and energy bills.
- Dust and Pests: Good weather stripping keeps out dust and pests, ensuring a cleaner home.
- Foam Tape Wear: Foam tape weather stripping may need replacement within a year, so check and replace periodically.
- Seal Protection: Spraying rubber seal protectant on weather-stripping after the adhesive sets can prolong its life.
- Silicone Spray: In winter, apply silicone spray to prevent ice and snow from sticking to weather stripping.
- Durability vs. Cost: When choosing weather stripping, consider durability over cost, as more expensive options may last longer and require fewer replacements.
Cost Savings Calculation for Energy Efficiency
Let’s crunch some numbers to see the kind of green you’ll keep in your wallet by sealing up those drafts.
| Year | Energy Cost Savings Calculation |
|---|---|
| Initial | – Monthly energy bill: $200 |
| – Potential savings with weather stripping: 20% | |
| Year 1 | – Monthly savings: $40 |
| – Annual savings: $40 x 12 = $480 | |
| – Cost of weather stripping materials: $50 | |
| – Net savings for the first year: $480 – $50 = $430 | |
| Year 2-5 | – Annual savings: $480 |
| – Cumulative savings over 5 years: $480 x 5 = $2,400 | |
| – Less initial material cost: $2,400 – $50 = $2,350 |
Common Mistakes
Alright, home improvers, let’s dive into the common slip-ups you might make while installing weather stripping and how to dodge those little pitfalls.
- Not Measuring Twice: We’ve all heard the old saying. Measure twice and cut once. Don’t eyeball it and end up with weather stripping that’s too short because you can’t stretch it to fit.
- Skipping Surface Prep: You’re eager to start, but hold up! A dirty, dusty, or damp surface is a no-go for adhesive. Clean up and dry off for a stick that stays.
- Choosing the Wrong Material: All-weather stripping is not created equal, folks. Pick the one that suits your door and your climate. Don’t go soft when you need something tough.
- Ignoring the Manufacturer’s Instructions: This is no time for creative interpretation. The manufacturer knows their stuff. Follow their guide for the best fit and longest life.
- Going on the Cheap: Cutting costs? Not here, you shouldn’t. Cheap materials might save you now, but they’ll cost you durability and effectiveness. Invest in quality.
- Overlooking the Door’s Operation: If your door doesn’t shut right after you weather-strip, that’s a big whoops. Ensure it still closes snugly without a wrestling match.
- Forgetting the Threshold: It’s not just the sides and top; that threshold needs love, too. Missing it means you’ve left a welcome mat out for drafts.
- Improper Alignment: Stick it on straight, or you’ll find gaps. And gaps are drafty little beasts. Take your time to line it up right.
- Leaving Tools Behind: It’s not a treasure hunt, folks. Clean up your tools and leftover materials. Leaving them can lead to accidents or damage to your newly sealed door.
Now, get out there and seal those doors like a pro. Remember, a little know-how goes a long way to keeping the great outdoors, well, outdoors. Happy fixing!
Troubleshooting Guide for Weather Stripping Installation
Hit a snag with your weather stripping installation? No sweat! Here’s a no-nonsense guide to troubleshoot common hitches and get you back on track.
Problem: The Door Won’t Close
- Solution: If that door’s putting up a fight and won’t close, you may have gone too thick on the weather stripping. Peel it back and opt for a thinner strip, or adjust the placement to allow more room for the door to close.
Problem: Weather Stripping Peels Off
- Solution: Is adhesive not sticking? Clean the frame with a mix of water and a little rubbing alcohol. Let it dry completely, then give it another go. If it still won’t stick, it’s time to switch to weather stripping with a staple or nail fix.
Problem: Gaps in the Corners
- Solution: Notice a little breeze sneaking in the corners. That’s a classic case of misalignment. Remove the strip and reapply, ensuring it’s snug at every corner. If you’re dealing with self-adhesive strips, apply some sealant to those pesky gaps for an airtight seal.
Problem: Stripping is Too Short After Cutting
- Solution: Cut a strip short. Before you toss it, see if it fits a smaller frame section. Always remember the golden rule: measure twice, cut once. If it’s a lost cause, use it as a practice piece for perfecting your technique.
Problem: Door Squeaks After Installation
- Solution: Got a new soundtrack with every door swing? Likely, the weather stripping is rubbing against the door. Apply a dab of silicone lubricant to the side of the stripping that comes into contact with the door. It should quiet down those squeaks.
Problem: The Stripping Compresses Too Much
- Solution: Weather stripping should be a buffer, not a pancake. You’ve got the wrong type if it’s squishing down too much. Switch it out for a denser material that can handle the slam without losing its cool.
Frequently Asked Questions
- Can Weather Stripping Be Painted?
- Absolutely! But make sure you pick a paintable type. Some materials, like vinyl or silicone, may not take to paint as well, so choose accordingly if you plan to customize the look.
- What’s the Difference Between Weather Stripping and Caulking?
- Weatherstripping is for moving parts, such as doors and operable windows. Caulking seals cracks and gaps in non-moving parts, like where your window meets the house.
- Can Weather Stripping Be Used for All Types of Doors and Windows?
- For sure! Different shapes and sizes are available to fit just about any door or window. Whether you’ve got sliding, rolling, or stationary windows or doors, there’s a weather-stripping solution.
- Can Weather Stripping Prevent Water Leaks?
- It helps, but it’s not a cure-all. You may need more than weather stripping to keep the water out if you’ve got serious leaks.
- How Do I Choose the Right Weather Stripping for My Climate?
- Think about your local weather patterns. If you’re in a wet climate, look for waterproof options. Extreme temperatures? Go for something that can handle the heat or cold.
- What’s the Best Time of Year to Install Weather Stripping?
- Ideal conditions would be on a dry, warm day. Cold weather can make some materials stiff and less adhesive, so aim for a temperate day for installation.
- How Do I Know If I’ve Installed Weather Stripping Correctly?
- No drafts or light should come through the door or window edges. You’re all set if you can close a piece of paper in the door or window and pull it out without tearing.
References
Organizations:
- ENERGY STAR. https://www.energystar.gov/
- The U.S. Department of Energy. https://www.energy.gov/
Books:
- “Home Maintenance For Dummies” by James Carey and Morris Carey. https://www.barnesandnoble.com/w/home-maintenance-for-dummies-james-carey/1016375971
- “The Complete Guide to Home Insulation” by Black & Decker. https://books.google.com.ph/books/about/Black_Decker_The_Complete_Guide_to_Wirin.html?id=e_XZAwAAQBAJ
Website Resources:
- This Old House. https://www.thisoldhouse.com/
- Home Depot. https://www.homedepot.com/
- Lowe’s. http://www.lowes.com/
- The Family Handyman. https://www.familyhandyman.com/
Video References:
The Home Depot Canada
Everyday Home Repairs
The Home Depot