16 min read
How to Repair and Reinforce Aging Furniture Frames (Guide)
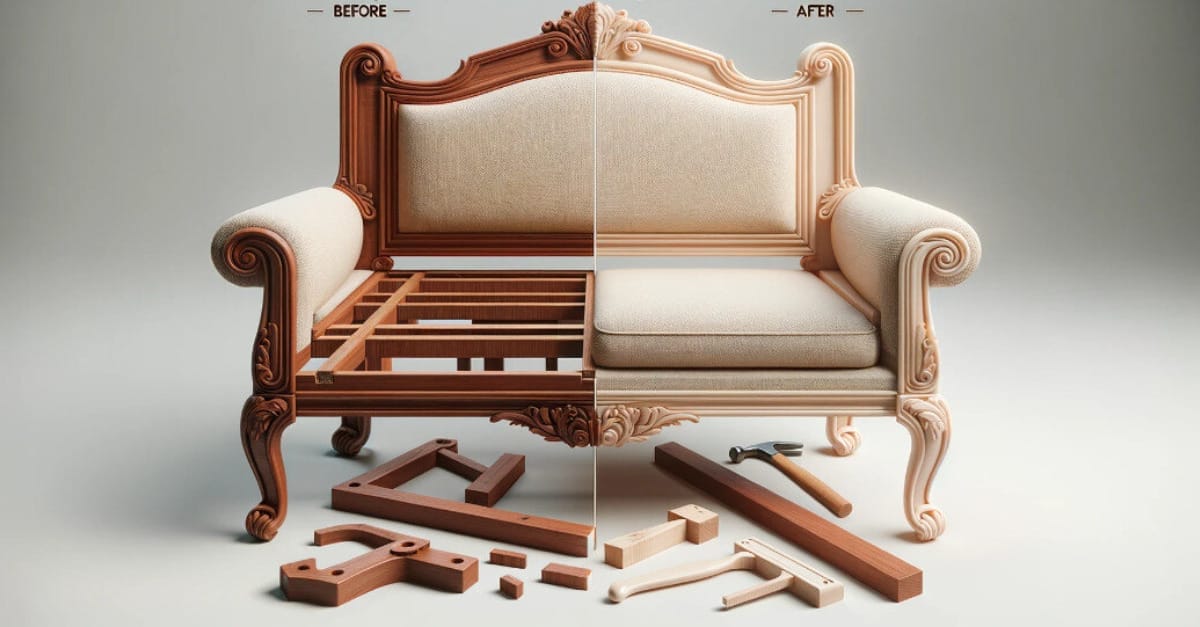
Alright, folks, here we go! You’ve just stumbled upon an absolute gem of a furniture piece—it could be a precious family heirloom or an incredible score from the flea market. Now, the goal is to make sure this beauty stands the test of time. You know, even the toughest furniture can start showing its age after a while, with frames that get a bit shaky and joints that aren’t as sturdy as they used to be. No need to fret because we’ve got the power of DIY magic on our side!
We’re about to roll up our sleeves and put in some elbow grease to give this old piece a glorious comeback, ensuring it’s rock solid and ready for the spotlight. Let’s turn back the clock on this one and show it some love, making sure it’s ready to shine for years to come. So, grab your tools, and let’s get to work—it’s time to make some DIY magic happen!
Quick Summary: In this guide, we provide an overview of essential steps to repair and reinforce aging furniture effectively:
- Step 1: 🔍 Examine the furniture to locate weak connections, particularly at joints like mortise and tenon.
- Step 2: 🧹 Remove old glue or debris with care.
- Step 3: 🧼 Clean the joints and apply high-quality wood glue, ensuring complete joint coverage.
- Step 4: 🗜 Attach a clamp to the joint and let the glue dry based on the manufacturer’s instructions.
Let’s get started below.
Basic Tools and Materials Needed
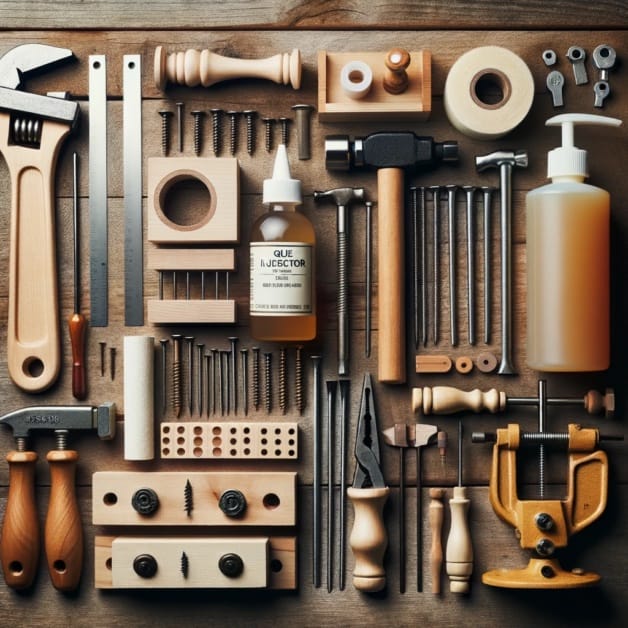
You’ll need a few essential tools and materials to give your aging furniture a new lease on life. Let me walk you through them!
- Glue. This is the backbone of any furniture repair. A high-quality wood glue like Titebond III will hold everything together and ensure a strong bond.
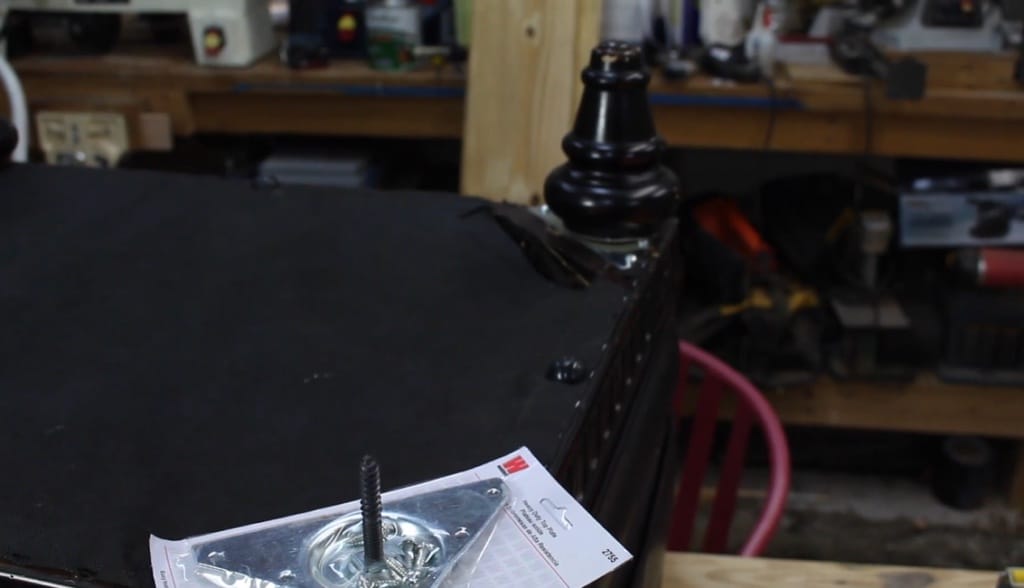
- Nails and screws. May be needed to secure parts of the frame further, especially if there are existing ones to replace. It’s best to have a variety of sizes on hand, just in case.
- Clamp. This is helpful when gluing wood pieces together, as it keeps everything in place while the glue dries. Adjustable bar clamps are my go-to for this job.
- Glue injectors. These are useful for getting glue into tight spots or repairing joints. They look similar to syringes but are designed specifically for working with adhesives.
- Vise. You may need these to secure parts in place when gluing or nailing. This little buddy can hold onto your furniture, ensuring an even, secure connection.
- Chisel. This may be handy when cleaning or reshaping old wood or removing excess glue. Ensure you have a set of chisels in various sizes and a mallet for your wood chiseling needs.
- Sandpaper. You’ll need it for prepping surfaces and smoothing rough edges.
Now you’re ready to tackle that aging furniture and give it the love it deserves! Patience goes a long way, even with simple tools and materials. Good luck, and enjoy breathing new life into your old treasures!
Step-by-Step Repair Process
Proper process is essential when repairing wooden furniture to ensure its value remains intact. Trust me, it’ll feel like a new piece when we’re done.
Step 1: Identify the Loose Joints
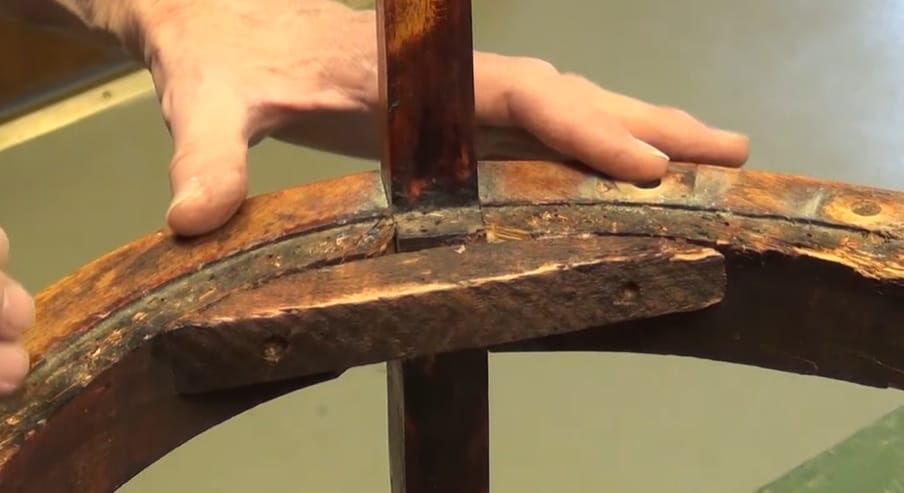
- First things first, we need to identify the loose joints.
- Gently wiggle and shift your furniture to locate any weak connections. Since mortise-and-tenon joints are commonly found in wooden furniture, pay special attention to those.
Step 2: Disassemble the Loose Joints
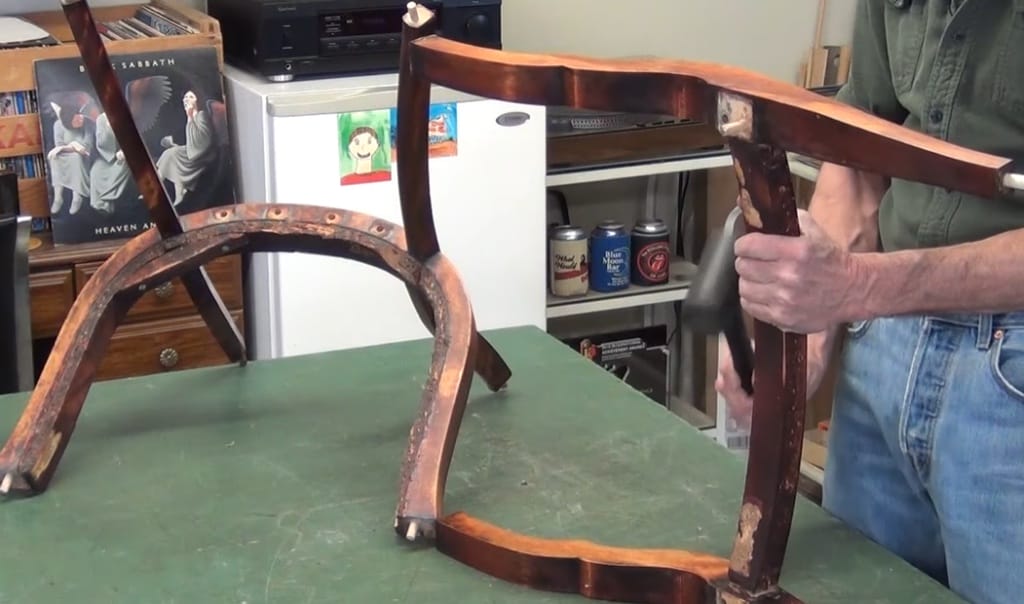
- Now, let’s disassemble the loose joints.
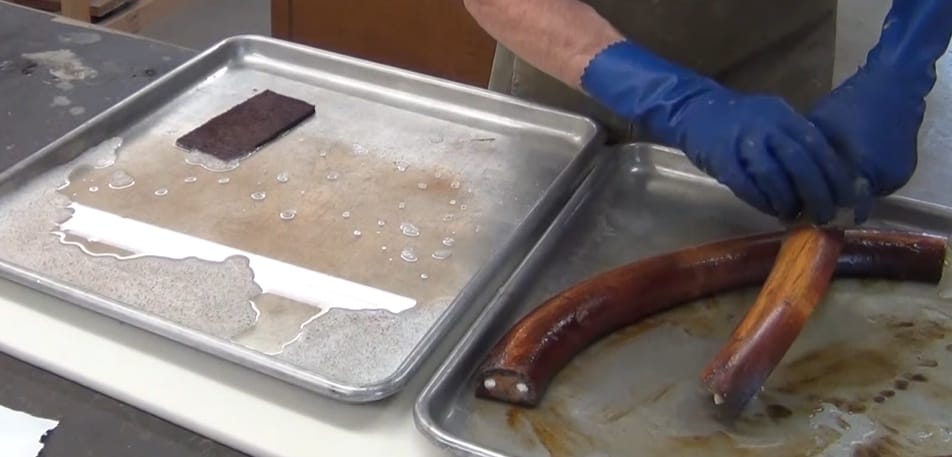
- Remove any old glue or debris as carefully as possible. Remember, we’re trying to keep the integrity of the furniture here, so don’t go prying joints apart with brute force.
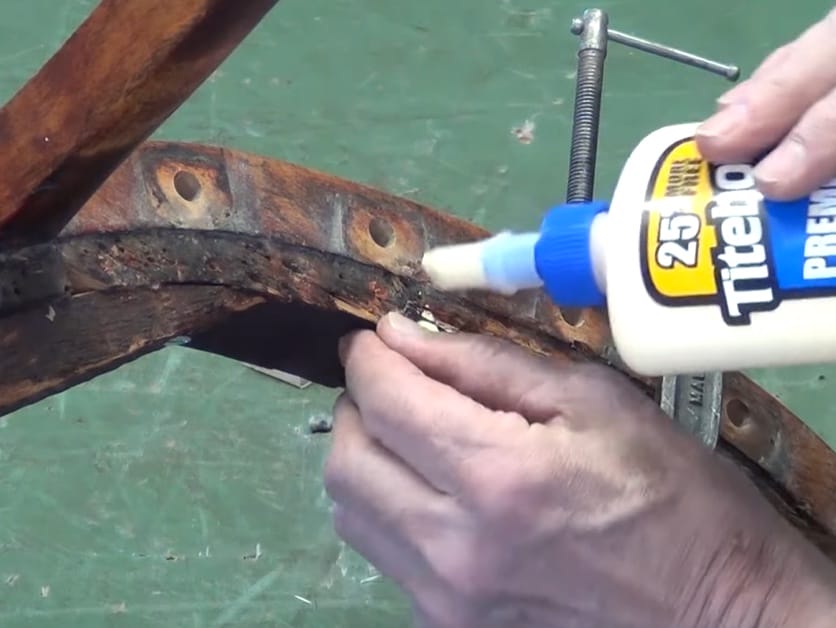
Step 3: Apply Wood Glue
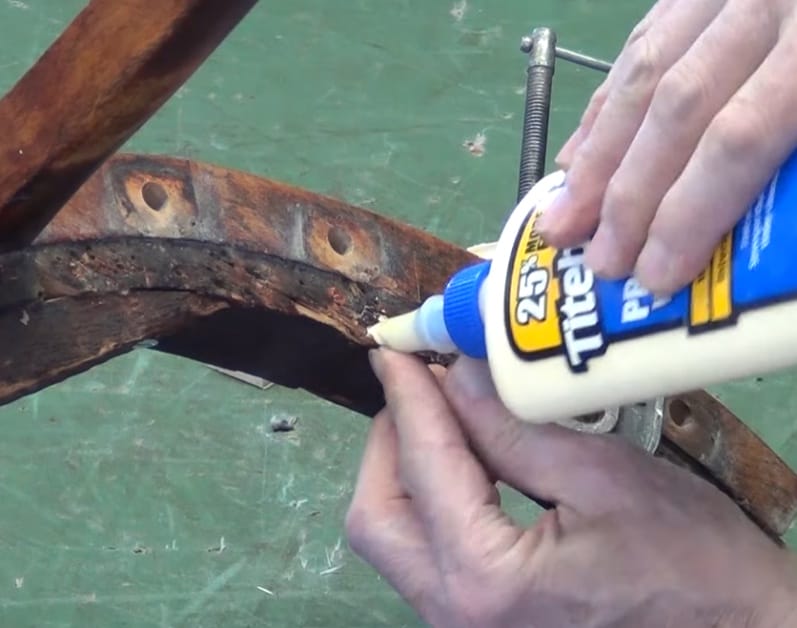
- Once everything is clean, apply high-quality wood glue to the joint surfaces. Be generous but not excessive. We want the glue to cover the entire joint without spilling out.
- Make sure you use appropriate glue for your wooden furniture.
Step 4: Clamp the Joint
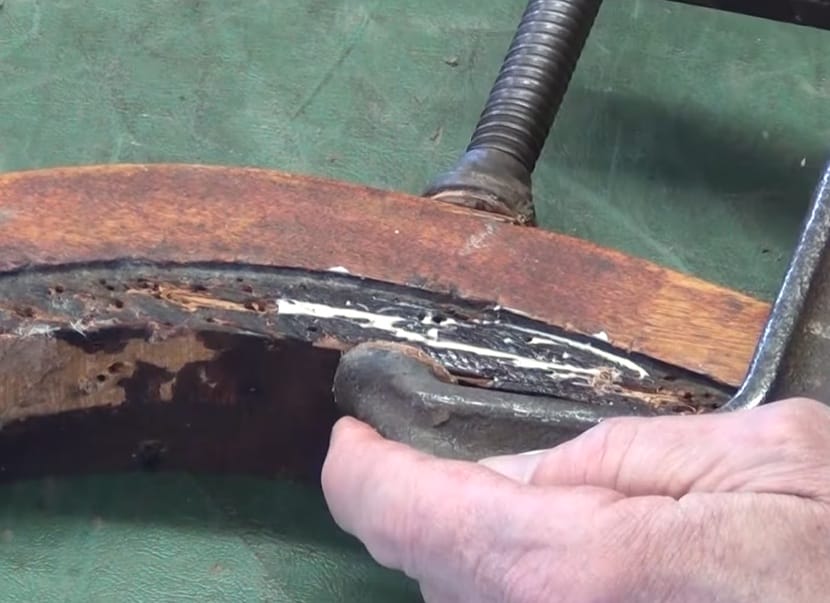
- It’s time for the clamping part. Clamp the joint securely so the glue can dry and bond correctly.
- Follow the manufacturer’s recommended drying time. Don’t rush it; give the joint enough time to create a solid connection. Patience is key, folks.
Step 5: Refinish the Furniture
- Guess what? You’re almost there! You might need to refinish the furniture to blend the repair with the original finish.
- A well-matched finish will make your repair invisible. If refinishing isn’t your thing, you could always leave it to a professional. It’s worth the investment, trust me.
Look at that – we just breathed new life into your old furniture! Following these steps gave your aging frame a much-needed facelift and helped maintain its value. Great job!
Techniques to Reinforce Aging Frames
By following these techniques, you’ll surely breathe new life into your furniture frames and keep them functional for years.
Technique 1: Re-gluing Loose Joints
- Loose joints are common in older furniture, and they can compromise the overall strength of the frame. I like to remove the joints, clean them, and then re-glue them using strong wood glue to restore stability. That can make your furniture as good as new!
Technique 2: Using Metal Brackets or Plates
- The wooden frame or legs may sometimes show signs of splintering or cracks. I find it helpful to reinforce those areas with metal brackets or plates. This hardware addition will help maintain the structural integrity of the furniture.
Technique 3: Replacing Wood Screws and Nails

- Now, let’s talk about the importance of wood screws and nails. It’s crucial to double-check the hardware on your aging furniture frames. Replace any rusted or damaged screws and nails with new ones if needed. This keeps the frame functional and safe for daily usage.
Technique 4: Adding Support to Larger Components

- As for strengthening your furniture, don’t forget about adding support to larger components. For instance, placing a center leg on a lengthy sofa frame can distribute weight, preventing future sagging and frame damage.
Technique 5: Reinforcing the Joints with Dowels or Metal Fasteners
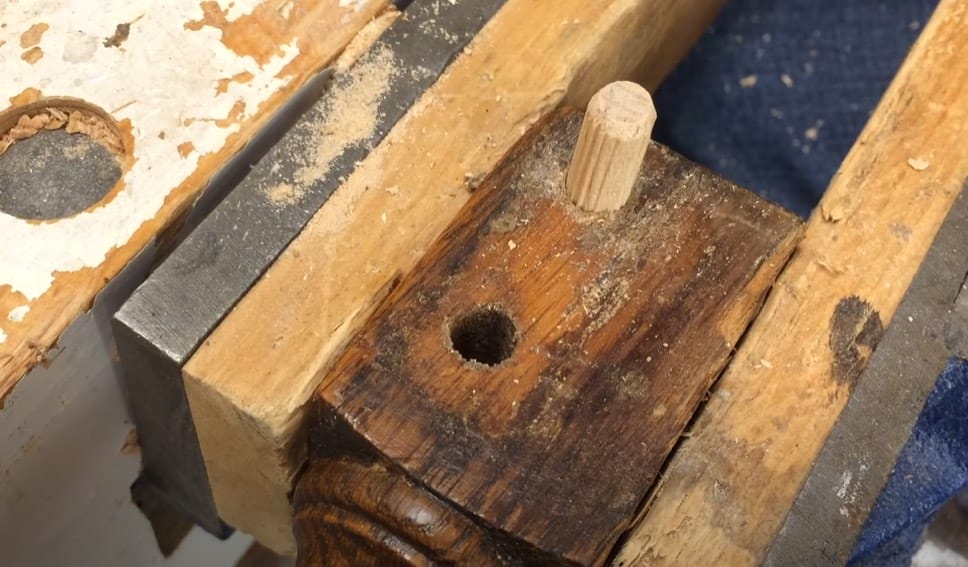
- Lastly, sometimes it’s necessary to reinforce the joints themselves. One of my favorite methods is using a small wooden dowel or metal fastener. They’ll bridge the gap between the individual joint sections, making them stronger and more secure.
Maintaining and Preventing Future Damage
Now that we’ve touched on repairing and reinforcing those aging furniture frames, let’s dive into maintaining and preventing future damage. I have some tips and tricks to help you keep your furniture in tip-top shape.
Regular Cleaning
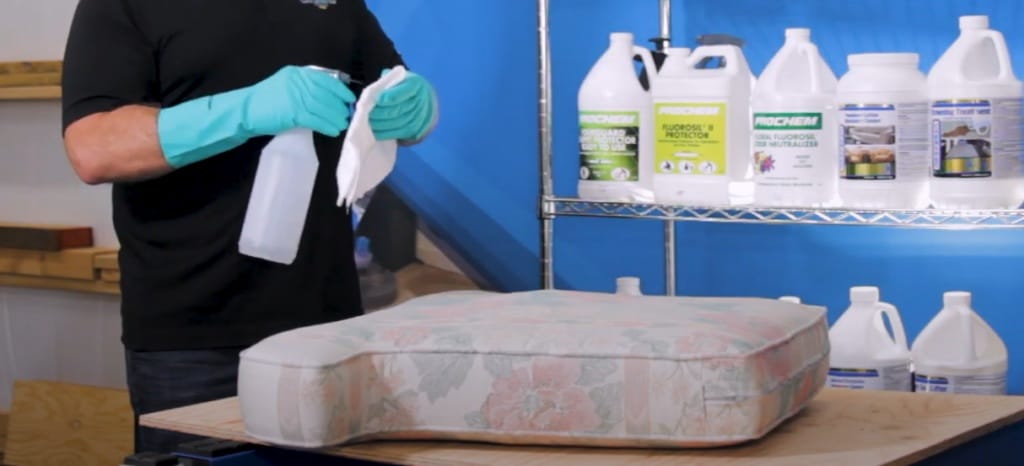
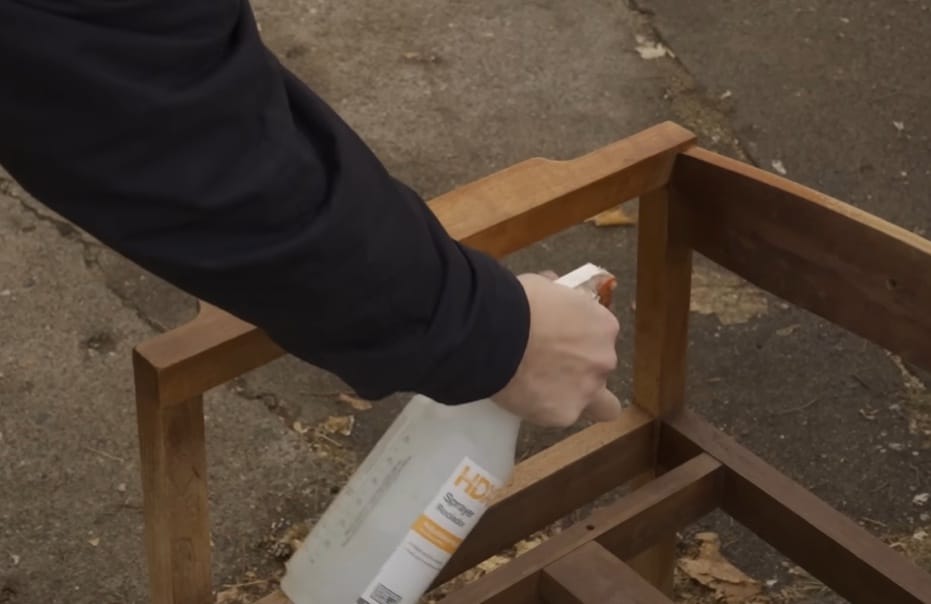
- First things first, regular cleaning is crucial. Grab a soft cloth and gently wipe down the furniture to remove dust and dirt. Always avoid spraying cleaning solutions directly onto the upholstery; apply it to a cloth and wipe gently.
- Mix mild soap and water for more stubborn stains, then buff dry with a clean cloth. Remember, consistent cleaning is the key to preserving your furniture’s lifespan.
Restoring the Finish
- Now, onto restoring that stunning finish. If it’s time for a fresh coat of lacquer, follow my lead.
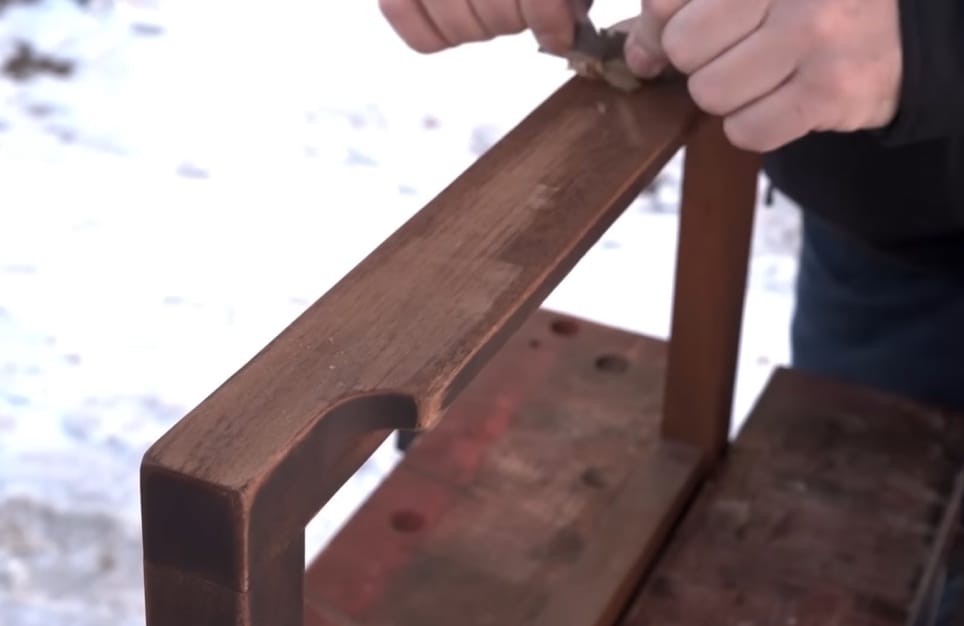
- Begin by stripping away the old finish using a quality stripper or a sanding block.
- Once you’ve exposed the raw wood, it’s time to apply a new layer of lacquer. For the best results, spray an even coat in thin layers, allowing it to dry between applications.
Cost Analysis: Repairing vs. Replacing
Alright, let’s get down to brass tacks – the numbers. Cost is often a significant factor when deciding between repairing and replacing furniture. Here’s a rough breakdown to help you make an informed decision.
| Item/Service | Repairing | Estimated Cost (Repair) | Replacing | Estimated Cost (Replace) |
|---|---|---|---|---|
| Materials | Wood glue, screws, nails, lacquer, upholstery fabric | $20 – $100 | New furniture piece | $100 (chair) to $5,000 (high-end sofa) |
| Tools | Clamps, sandpaper, glue injector | $50 – $200 | N/A | N/A |
| Professional Services | Furniture repair or restoration | $100 – $1,000+ | Delivery and disposal | $50 – $200 |
| Intangible Factors | Sentimental value, time investment (Not factored into cost) | N/A | Time-saving, modern designs (Not factored into cost) | N/A |
| Total Estimated Cost | $170 – $1,300+ | $150 – $5,200+ |
Upholstery Protection
Regarding the upholstery, prevention is the name of the game. Position your furniture away from direct sunlight, as it can cause fading and weaken the fabric over time. Additionally, keeping your furniture away from heating and air vents can prevent excessive drying and humidity damage.
- Rotate and Reposition: Regularly adjust your furniture to ensure even wear, especially for items like sofas.
- Humidity Control: To prevent wood from swelling or drying out, monitor the humidity in your home and consider using dehumidifiers or humidifiers as needed.
- Immediate Spill Cleanup: When spills occur, act quickly by blotting (not rubbing), and use the right cleaning agents for the material.
- Protective Covers: For frequently used furniture, consider using covers or throws that can be easily washed and safeguard against wear.
- Regular Inspections: Routinely check your furniture for signs of damage or wear, especially loose screws and weakened joints.
- Weight Limit Awareness: Be conscious of the weight capacities of furniture pieces like cabinets and dressers to prevent overloading.
- Pets: If you have furry friends, trim their claws and offer alternative scratching or resting areas.
- Protective Pads: Add pads to furniture legs to prevent floor scratches and distribute weight evenly.
By following these quick and easy steps, you’ll maintain and prevent future damage, keeping your furniture looking fabulous for years. So go on, have fun with it!
Alternative Solutions for Furniture Repair
Not everyone has a workshop filled to the brim with tools and supplies, and that’s okay! Let’s explore some handy alternatives to make furniture look sturdy and sharp.
- Alternative to Wood Glue:
- If wood glue is unavailable, PVA glue can be used as a substitute. It may not provide the same strength as wood-specific adhesives, but it is suitable for temporary fixes or non-load-bearing joints.
- Alternative Clamping Methods:
- In the absence of a clamp, heavy objects like books or weights can be used. After applying glue to a joint, position the furniture and place the weight on top to hold the pieces together while the glue dries.
- Substitute for Wood Polish:
- If you don’t have wood polish or lacquer, a mixture of equal parts vinegar and olive oil can temporarily enhance the appearance of wood furniture.
- Protection from Sunlight:
- If furniture is exposed to direct sunlight, which can damage the upholstery, consider using UV-protective curtains. These curtains block harmful UV rays, reducing potential fading and damage to the furniture.
- Fillers for Gaps or Cracks:
- If the wood filler is unavailable, a combination of sawdust from the same type of wood and PVA glue can be used. Mix the two until you achieve a paste-like consistency, and then use it to fill in gaps or cracks.
- Replacing Screws or Nails:
- If a screw or nail is missing, toothpicks or matchsticks with some glue can be used to fill in the holes temporarily. Once the glue has dried, trim any excess length and sand it to match the surrounding area.
Safety Precautions
Safety always comes first, especially when diving into a hands-on project like furniture restoration. Let’s ensure you’re fully equipped with the knowledge to handle every step carefully.
- Protective Gear:
- Always wear safety goggles to shield your eyes from dust, splinters, or stray chemicals.
- When working with chemicals or finishes, slip on some gloves to prevent skin contact and potential reactions.
- Ventilation is Key:
- When using chemicals, paints, or lacquers, ensure you’re in a well-ventilated area. Those fumes can be potent, and it’s essential to have fresh air circulation.
- Handle Tools with Care:
- If you’re using any power tools, familiarize yourself with their operation before starting. Always disconnect them from the power source when not in use.
- Watch Your Step:
- Keep your workspace tidy. Clear away any cords, tools, or debris from the floor to prevent trips or mishaps.
- Store Chemicals Safely:
- Always keep chemicals in their original containers with labels intact. Store them out of reach of children and pets and away from heat sources.
- Lifting Techniques:
- When moving or lifting heavy furniture, bend at the knees and keep the item close to your body. This technique helps prevent back strain.
- Fire Safety:
- Remember that some chemicals can be flammable if you’re stripping or refinishing. Keep them away from open flames, and always have a fire extinguisher nearby.
- First Aid Ready:
- Have a basic first aid kit close at hand. Accidents can happen, and it’s good to be prepared for minor cuts or scrapes.
Frequently Asked Questions
- How Often Should I Inspect My Furniture?
- Please give it a once-over every few months. It’s all about maintenance, like you’d check your car’s oil or rotate its tires. This way, you’ll spot any issues before they become big problems.
- Is There a Difference Between Indoor and Outdoor Furniture Care?
- Big time! Outdoor pieces battle the elements, so they’ll need more TLC. Think weatherproofing, covers, and regular clean-ups.
- What’s the Deal with Humidity and Wooden Furniture?
- Wood and water have a complicated relationship. Too much humidity can cause swelling, while too little can lead to cracks. It’s all about finding that sweet spot and maintaining balance.
- Is Sanding Always Necessary Before Refinishing?
- Most of the time, yes. Sanding helps remove old finishes, smoothens out imperfections, and prepares the wood to absorb the new finish evenly. So, roll up those sleeves and get sanding!
- How Can I Reduce the Chemical Smell After Refinishing?
- Ventilation is key. Keep the room airy, and consider placing bowls of activated charcoal or baking soda nearby. They help absorb those strong odors.
- Are There Natural Alternatives to Traditional Furniture Cleaners?
- You bet! A mix of equal parts white vinegar and water makes an excellent all-purpose cleaner. For wood, a dab of olive oil and lemon juice works wonders.
References
Organizations:
- National Furniture Association. http://www.nationalfurnitureassociation.com/
Books:
- “The Furniture Bible” by Christophe Pourny
- “The Complete Manual of Woodworking” by Albert Jackson, David Day, and Simon Jennings
Website Resources:
- Woodworker’s Journal. https://www.woodworkersjournal.com/
- Fine Woodworking. https://www.finewoodworking.com/
- Upholstery Resource. https://www.upholsteryresource.com/
Video References:
Buckminster Upholstery
Four Oaks Crafts
Fixing Furniture
Legend Brands
Dashner Design & Restoration