5 min read
How to Change Carbon Monoxide Detector Batteries (Types and Timelines)
Wireless carbon monoxide detectors require periodic replacement of their batteries to keep them functioning well. You don’t want to place your life in danger because you forgot to switch a battery out.
I will go into more detail below.
Changing a Carbon Monoxide Detector Battery
Low-Battery Signal
The keypad usually gives a low-battery signal, and you may hear a chirping sound from time to time, indicating the same.
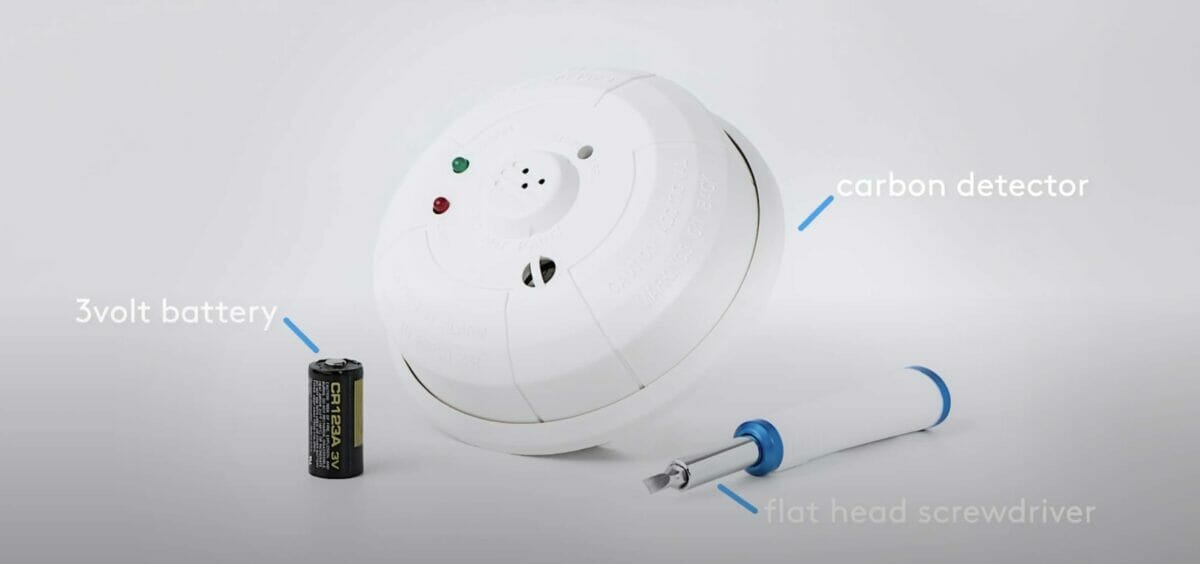
Batteries
Carbon monoxide batteries usually require 2 or 3 AA-sized, 1.5-volt batteries.
However, some models operate on single 9-volt or 3 AAA batteries instead. The batteries can last up to 3 years on low usage but may require replacing sooner, depending on usage and placement.
You may need to replace them at least once a year.
Recommendations
I recommend:
- You only use regular non-rechargeable batteries, as rechargeable ones might not provide sufficient power.
- You work in a well-ventilated place when changing the battery.
- Disconnect the power source before changing the battery.
- Wear gloves, especially if the old batteries are corroded.
- You don’t mix old/weak and new/fresh batteries in the same device.
Procedure
This procedure is for changing the batteries in a single carbon monoxide detector.
Suppose you have multiple detectors in your home, connected together as a single system. In that case, you may have a keypad alerting you of a low battery and identifying which detector needs its batteries replaced.
Follow the steps below to change a carbon monoxide detector battery.
Step 1: Set the System in Maintenance Mode

Put your system into maintenance or test mode.
This may cause it to produce a short beep or siren.
Step 2: Detach the Detector
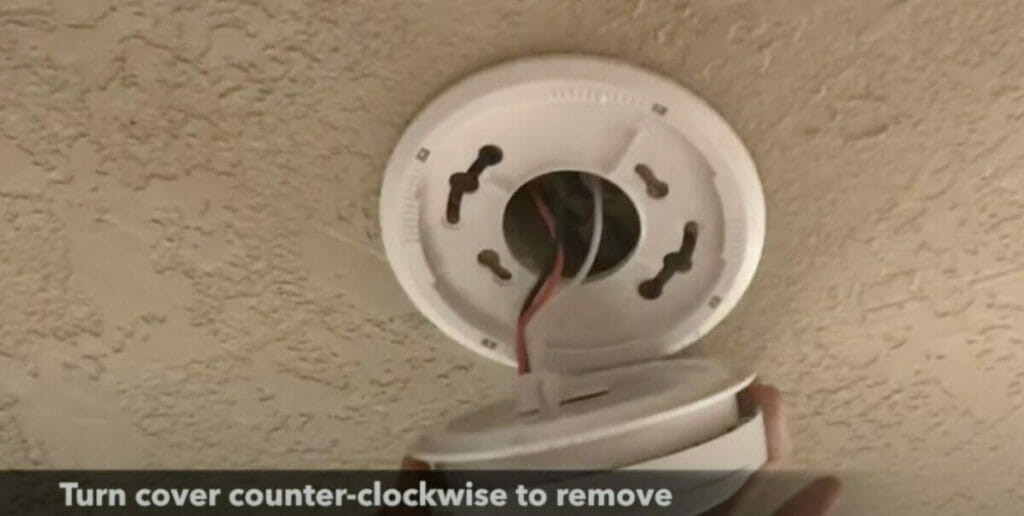
Detach the carbon monoxide detector from its base by turning it about ½ an inch counter-clockwise.
Don’t press the test button while removing the battery because it can be very loud.
Step 3: Remove the Batteries
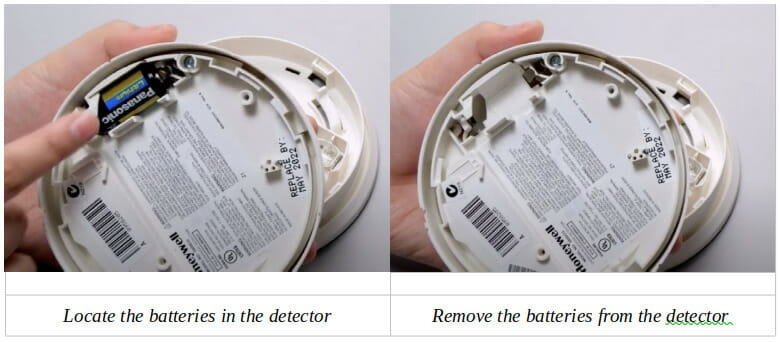
Slide the battery compartment on the back of the detector to open it.
Remove the old batteries.
Step 4: Replace the Batteries
Replace them with identical new ones.
It may require 2 or 3 batteries. Ensure you insert the batteries correctly, according to the polarities. Match the plus (+) and minus (-) signs.
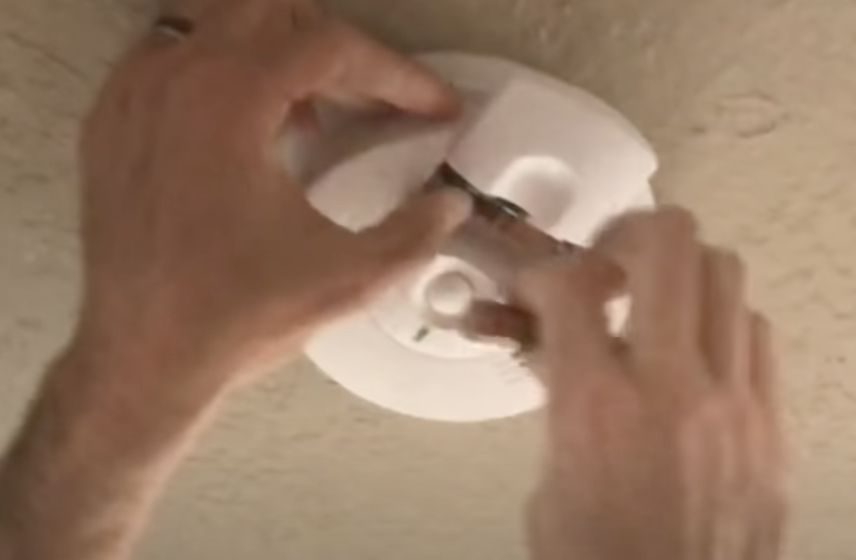
Step 5: Reattach the Detector

Reattach the detector about 10-20 seconds after replacing the batteries.
Line up the marker on the device’s body with the marker on its base, press, and rotate the cover clockwise about ½ an inch.
Step 6: Test the Detector

Having replaced the batteries, it’s best to test the carbon monoxide detector by pressing the test button.
You will hear a short beep or siren, and an LED light might also blink. This verifies that the detector is now operational again with the fresh set of batteries.
Most models only give the test sound while the test button is pressed.
Further Recommendations and Advice
After replacing the batteries, I further recommend the following:
- Disposing of the old batteries safely or sending them for recycling.
- Testing and resetting the device after replacing the batteries – see Step 6.
If the above guide doesn’t help your particular carbon dioxide detector model, consult the manual that came with it.
References
Video References
ADT
Hayden Homes
Unboxingexperience7