
11 min read
A Montana Barndominium With Rustic Beams Built For Under $320K (plan, costs, design)


Edited by: Louise (Editor In Chief)
Fact/quality checked before release.
Fact/quality checked before release.
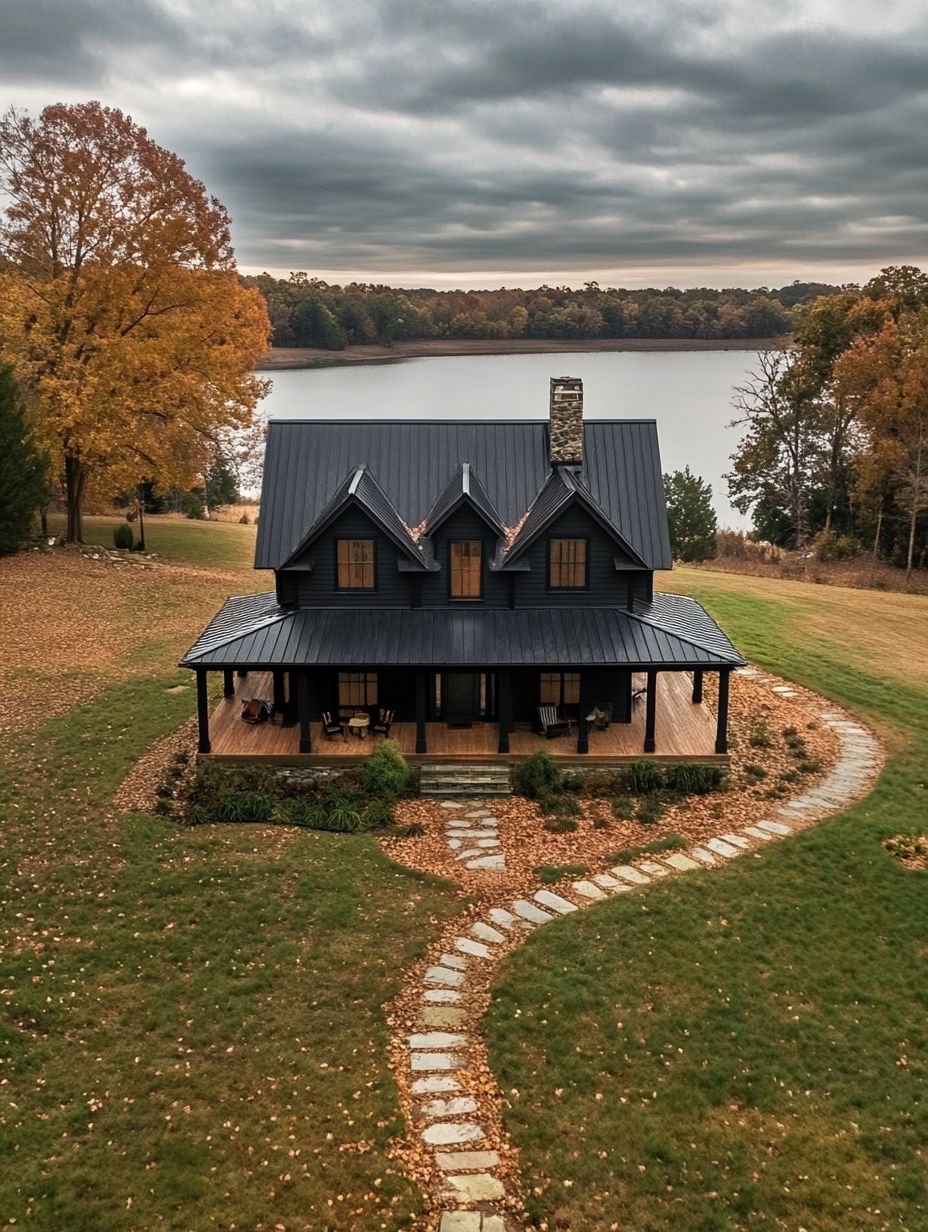
Picture this: you’re standing in the middle of a wide-open Montana view, the kind that makes you breathe a little deeper without even trying. Now picture a barndominium right there. Big, simple shape. Tough exterior. And inside? Rustic beams, warm finishes, and that “wait… this feels fancy” vibe.
Here’s the fun part: I’m walking you through how a Montana barndominium with rustic beams can be built for under $320K without it looking like you cut corners everywhere. We’re gonna talk vision, floor plan, beam choices, the real cost breakdown (yep, the unsexy stuff too), Montana weather realities, and the design tricks that keep it bright, durable, and not stuck in 1997 cabin-land. And I’ll share the couple moments where I almost blew the budget because I got a little too excited. It happens.
Alright, let’s build this thing in your head.
The Vision: A Budget-Friendly Montana Barndo That Still Feels High-End
I love a good “we’re doing this on a budget” challenge. Because a budget doesn’t mean boring. It means you get laser-focused. You stop buying random stuff that looks cute online and start spending on what actually changes the feel of the home.
For this Montana barndominium with rustic beams, the vision was simple: clean barndo shell on the outside, warm lodge energy on the inside, and a firm “nope” to runaway costs.
Why Montana Was The Right Backdrop For This Build
Montana makes barndominiums make sense. The landscape is wide, the weather is real, and people actually use their homes. Mud boots. Dogs. Firewood. Gear.
A barndo fits that lifestyle because it’s built to be tough. Metal siding, simple roof lines, practical layouts. And because the setting is already dramatic, you don’t need to over-design every inch. Let the view do some heavy lifting.
Also, a barndo in Montana doesn’t feel like a trend. It feels like… yeah, that belongs here.
Setting The Non-Negotiables: Rustic Beams, Warm Finishes, And A Firm Cap
Before anything else, I set the non-negotiables. This is how you keep a build under control.
Mine were:
- Rustic beams you can see, not hidden “maybe someday” beams.
- Warm finishes (not all-gray-everything, please).
- A hard cap under $320K. Not “around” $320K. Under.
And look, I’m gonna be honest. The second you start saying, “Well it’s only a little more…” your budget starts laughing at you. A budget is like a fence. The second you leave the gate open, your money runs off into the woods.
I learned that the first time I priced out a fancy front door. I had one in my cart that cost more than my first car. I closed that tab so fast I almost sprained a finger.
The Floor Plan: Simple, Livable, And Easy To Build
A barndominium floor plan should feel like a good pair of work boots. Comfortable. Durable. Not complicated.
The best way to protect the budget is to keep the footprint simple and the structure straightforward. If your plan looks like a puzzle piece, it’s gonna cost like one too.
How The Layout Prioritized Everyday Flow And Flex Space
The layout focused on daily life:
- Open kitchen, dining, living as the main hangout zone
- Bedrooms tucked to one side for quiet
- A flex space that can be office, guest room, hobby room, or “I need five minutes alone” room
- Direct entry from outside with a drop zone for coats, boots, and muddy chaos
The flex space is the secret weapon. Because your life will change. Kids, remote work, aging parents visiting, a new hobby where you suddenly need a table saw. So instead of adding square footage, you add flexibility.
Right-Sizing Square Footage To Protect The Budget
This is where people get themselves in trouble.
Bigger isn’t always better, it’s just… bigger. And every extra square foot shows up again and again:
- foundation cost
- framing cost
- roofing cost
- heating cost
- flooring cost
- finishing cost
So I aimed for “enough space to breathe”, not “space to host a volleyball tournament indoors.” If you right-size the home, you can afford the details that make it feel high-end, like beams, better lighting, and durable finishes.
And yeah, it takes discipline. Because it’s tempting to add “just one more” room. But “just one more” is how $320K turns into $380K.
Rustic Beams And Structural Choices That Delivered The Look
Rustic beams are the whole mood here. They’re the thing people walk in and go, “Ohhhh, okay. This is nice.”
But you don’t have to buy a truckload of giant solid timbers to get the look. You just need smart choices.
Selecting Beam Materials: Reclaimed Vs. Faux Vs. Box Beams
Here’s the real talk on beam options:
- Reclaimed solid beams: Gorgeous. Tons of character. Can be pricey and heavy. Sometimes you need extra engineering. Also, you might spend time chasing supply.
- Faux beams: Lightweight and easy. Some look surprisingly real, some look like plastic Halloween decor. You gotta pick carefully.
- Box beams (wrapped beams): My favorite middle ground. You build a hollow beam, wrap it in stained wood, and boom, big impact without the big weight.
If you’re trying to keep a Montana barndominium with rustic beams under $320K, box beams are a budget hero. They give you that thick timber look without making your structure more expensive.
Placement And Detailing: Where Beams Make The Biggest Impact
Beams don’t need to be everywhere. In fact, too many beams can make the ceiling feel busy and kinda heavy.
The best placements:
- Main living area ceiling (the “wow” zone)
- Kitchen island area (to define space without walls)
- Entry or hallway (small area, big style payoff)
And detailing matters. A slightly rough-sawn texture. A medium-warm stain. Simple black brackets if you want a little metal edge. Keep it intentional.
I’ve seen people spend a fortune on beams and then put in tiny builder-grade light fixtures. Don’t do that. If you’re gonna frame the ceiling like a masterpiece, light it like one.
The Under-$320K Cost Breakdown: Where The Money Actually Went
Let’s get into the part everyone wants but nobody wants to admit they want: the money.
Every build is different based on land, labor, and finish level. But if you’re aiming for under $320K, you need a realistic split and you need to watch a few categories like a hawk.
Shell, Framing, And Roofing Costs That Define The Baseline
This is your baseline. If you blow it here, you spend the rest of the project sweating.
Big buckets:
- Site foundation/slab (or crawl space)
- Barndo shell package (posts/steel, depending on method)
- Framing and structural lumber
- Roofing and underlayment
A simple roofline saves money twice: it’s cheaper to build and it’s less likely to leak later. Valleys and complicated angles are basically a bill that keeps billing you.
MEP, Insulation, And Windows: The Hidden Budget Drivers
MEP is mechanical, electrical, plumbing. This is where people go, “Wait, it costs how much?”
What drives cost here:
- Electrical service and panel size (especially if you want a big shop or EV charging)
- Plumbing runs (longer runs = more money)
- HVAC sizing for Montana winters
- Insulation level (spray foam is awesome, also not cheap)
- Windows (big glass is pretty, big glass is also expensive)
Windows are a sneaky one. I love natural light. But I’m not paying luxury-window money in every room. I’d rather put a few bigger windows where they matter most (living area, view side) and keep the rest practical.
Finishes And Fixtures: Splurge Vs. Save Decisions That Paid Off
This is where I got strategic.
Splurges that made the home feel high-end:
- Rustic beams (smartly done)
- Good lighting in the main areas
- Solid, durable flooring (not the cheapest option that scratches if you look at it)
Saves that didn’t hurt the vibe:
- Stock cabinets with upgraded hardware
- Simple trim profiles done cleanly
- Mid-range appliances (nobody needs a fridge that emails them)
My favorite trick: spend on the things you touch and see every day. Handles, faucets, lighting, flooring. Then be boring on the stuff nobody brags about at a party.
Montana-Specific Build Considerations
Montana is not the place to play pretend with weather. If you build like you’re in Arizona, Montana will correct you. Quickly.
Snow Loads, Wind, And Roof Pitch Choices
Snow load is serious. It’s not just “a little snow.” It’s weight. Lots of it.
A few smart moves:
- Work with local engineering for snow load requirements
- Choose a roof pitch that sheds snow (too flat can hold weight)
- Plan for wind exposure, especially if you’re out in open land
And don’t skip proper roof ventilation. Ice dams are not a cute winter feature.
Heating Strategy For Long Winters Without Utility Shock
This is where you protect long-term cost, not just build cost.
Options that tend to work well:
- High-efficiency propane furnace (common in rural builds)
- Heat pumps can work, but cold-climate models matter
- Wood stove as backup or main vibe heater (also, it just feels right here)
Insulation is your best friend. If you’re watching the budget, you can still prioritize insulation in the roof and walls because it pays you back every month.
I’ve been in houses where the heat is running nonstop and you still feel cold near the windows. That’s not charming. That’s a problem.
Site Prep And Access: Gravel, Driveways, And Seasonal Scheduling
Montana site work can sneak up on you.
Budget for:
- Gravel driveway and parking pad
- Drainage and grading (water will go somewhere, pick where)
- Delivery access for concrete trucks and materials
And schedule matters. If you plan your build around mud season without a plan, you’re gonna spend time watching your project sit there like a sad little island.
I once watched a delivery truck refuse a site because the access was too soft. The driver was polite about it, but the look on their face said, “No chance.” That delay cost real money.
Interior And Exterior Design: Rustic Without Feeling Dark Or Dated
Rustic can be amazing. Rustic can also turn into “why is everything brown?” real fast.
The goal is warm, not cave.
Balancing Wood Tones, Metal Accents, And Light Paint Colors
Here’s what worked:
- Beams and a couple wood features as the stars
- Light paint on walls to bounce daylight
- Black or dark bronze metal accents to add structure and contrast
If everything is wood, nothing is special. Let the beams be the hero, then keep the supporting cast calm.
Durable Finishes For Mud, Dogs, And Real-Life Wear
I design for real life. That means:
- Flooring that can handle grit (LVP, sealed concrete, or a tough engineered wood)
- Washable paint in high-traffic areas
- Simple baseboards you can touch up without drama
And you know what’s underrated? A legit mudroom zone. Even if it’s small. Hooks, a bench, a spot for wet boots. It keeps the rest of the house from getting wrecked.
Outdoor Living Details That Added Value Without Adding Much Cost
You don’t need a giant outdoor kitchen to make outdoor living feel awesome.
Low-cost, high-value adds:
- A covered porch with a simple roof tie-in
- A big sliding door (placed strategically, not everywhere)
- Outdoor lighting that makes it feel welcoming at night
Montana sunsets are doing half the decorating anyway. Just give yourself a place to sit and enjoy it.
What This Build Teaches: How To Replicate The Results On A Similar Budget
If you want the “high-end barndo” look without a high-end budget, it comes down to a few decisions you make early. Not later when you’re stressed and the plumber is waiting.
The Three Decisions That Kept The Project Under Control
These three choices were the difference-maker:
- Kept the footprint simple. Simple shape, simple roof, fewer weird corners.
- Chose beams strategically. Box beams where they matter, not everywhere.
- Picked a finish strategy. Splurge on impact items, save on hidden stuff.
When I stuck to those, the build stayed calm. When I drifted, the budget started squealing.
Common Budget Traps In Barndominiums And How To Avoid Them
Barndominium budget traps are sneaky because they sound fun at first.
Watch out for:
- Oversized garages and shops that balloon the shell cost
- Too many custom windows (especially big ones on every wall)
- Changing the plan mid-build (change orders add up fast)
- Upgrading everything “just a little” (this is death by a thousand upgrades)
My rule: if an upgrade doesn’t change how you live in the home, slow down. If it does change your daily life, maybe it’s worth it.
Conclusion
A Montana barndominium with rustic beams built for under $320K isn’t some magic trick. It’s a bunch of smart, sometimes boring decisions stacked in the right order, then a few big-impact moves that make the whole place feel intentional.
If you’re dreaming up your own version, start with the non-negotiables, keep the floor plan clean, and treat Montana weather like the boss it is. Then spend your “wow” money on the beams, lighting, and finishes you’ll actually see and touch.
And when you find yourself about to buy that absurdly expensive front door, do what I did. Close the tab. Walk outside. Look at the mountains. You’ll feel better, I promise.