17 min read
What to Do with Unused Live Electrical Wires
Ever stumbled upon a live wire during a DIY home project and thought, “Now what?” Well, you’re not alone. Dealing with unused live electrical wires can be a bit of a head-scratcher.
There are three solid ways to handle unused live electrical wires. Let’s jump right in!
- Capping Off with Wire Nuts – Ensure you’ve turned off the electrical system, then get those wire nuts twisted on the exposed ends of the wires. It’s all about keeping it safe and secure.
- Removing Unused Wires – This one’s like pulling off a magic trick. You disconnect those wires, track where they’re headed, and carefully pull them out.
- Repurposing for New Projects -Use it to light up a new corner of your room or add an outlet where you’ve always needed one. It’s a fantastic way to improve your space and add a personal touch.
In this article, we’ll dive into how to safely handle these live wires, ensuring your DIY projects don’t turn into shocking experiences. So, grab your tools, and let’s get this show on the road.
Understanding the Risks of Unused Live Electrical Wires
When you’re elbows deep in your latest DIY project, stumbling upon an unused live wire can feel a bit like spotting a snake in the grass. You know it’s there; it’s definitely got some bite, but you’re not quite sure how to handle it without getting zapped.
Unused live wires can become serious hazards if left unattended. They could cause electrical fires if they accidentally come into contact with flammable materials, or worse if they’re improperly capped and touch other live wires or metal surfaces.
Electrical shocks from these wires aren’t just painful; they can be downright dangerous. Depending on the voltage, they can lead to anything from a startling jolt to severe injuries or even fatalities.
I can’t stress enough the importance of recognizing these risks. Whether you’re planning to repurpose, relocate, or completely remove these live wires, understanding their present hazards is the first step to handling them like a pro.
Identifying Unused Live Electrical Wires
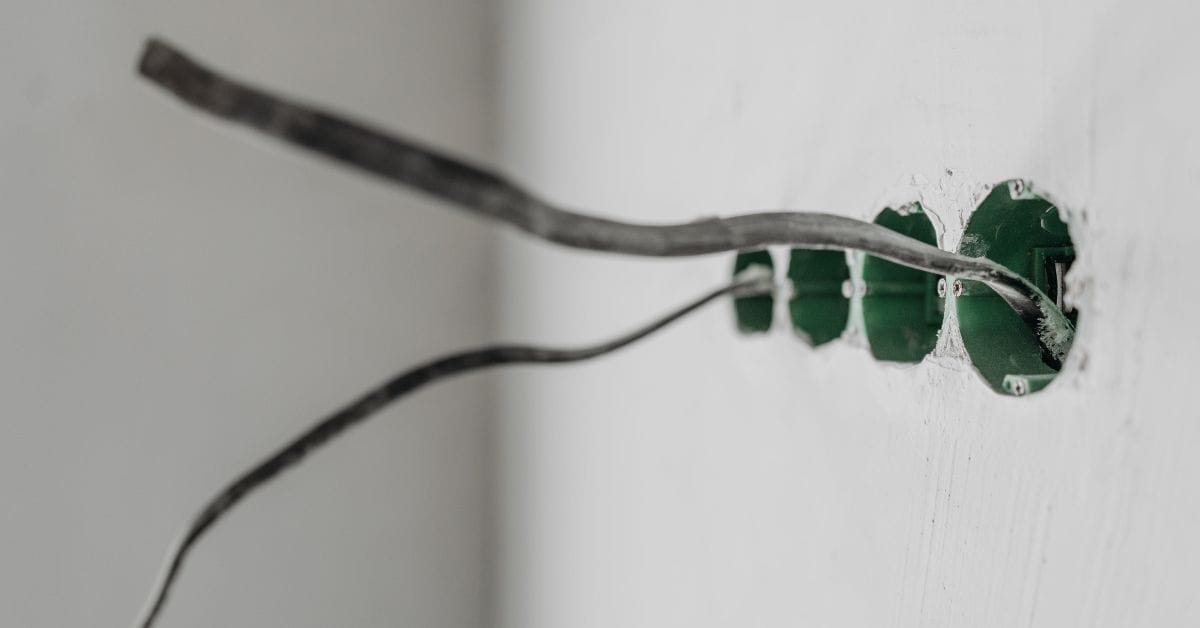
One of the most intriguing parts of DIY home projects is finding those sneaky, unused live wires hidden behind your walls.
Now, I know what you’re thinking, “How do I spot something I can’t see?” I’ll guide you through the process, making it as thrilling as discovering hidden treasure.
Using a Non-Contact Voltage Tester
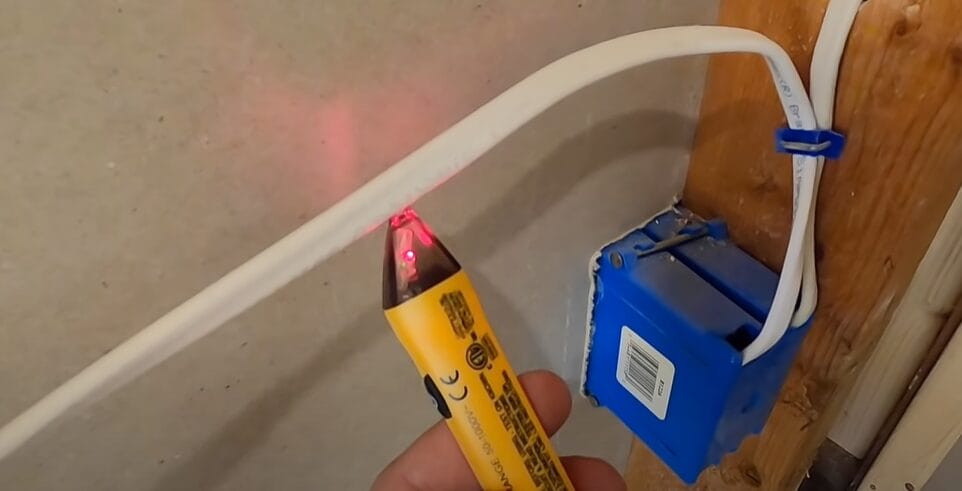
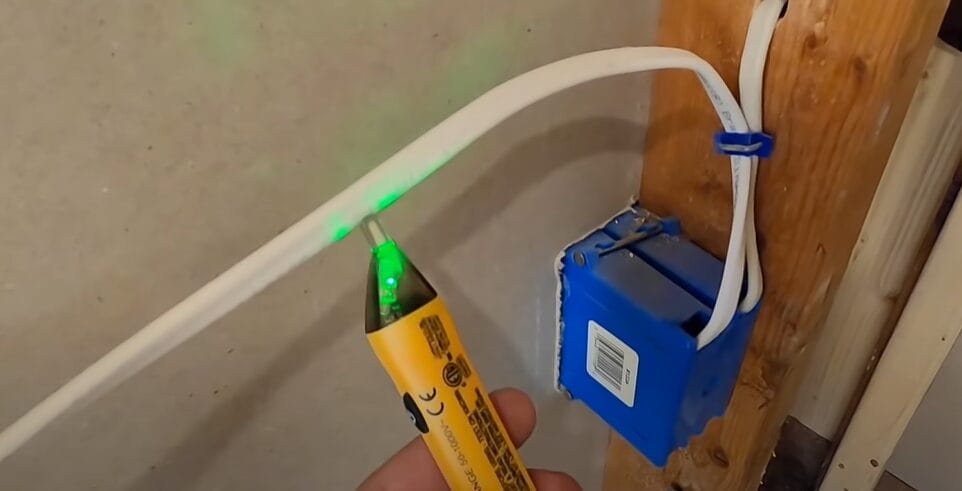
First off, you’ve got to gear up with the right tools. A non-contact voltage tester is your new best friend here. It’s like having X-ray vision.
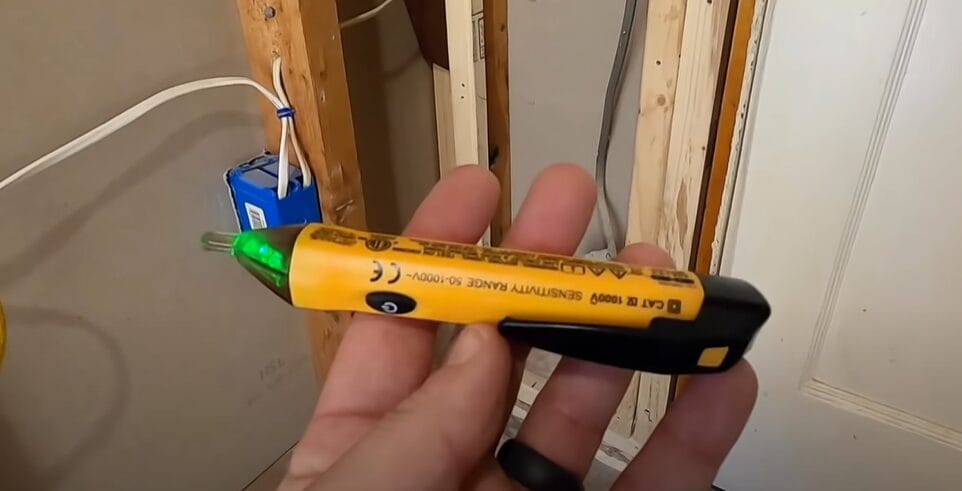
You hover this little gadget near suspected areas, and voilà, it beeps or lights up near live wires. And the best part? It is unnecessary to touch the wires directly, making it a safe option.
Conduct a Visual Inspection
Next, let’s talk about visual inspection. Sometimes, unused live wires are not as hidden as you might think. They could lurk in unfinished basements, attics, or even behind access panels.
Look out for wires that are capped off with wire nuts or electrical tape. These indicators often mean, “Hey, I’m live but not currently in use.”
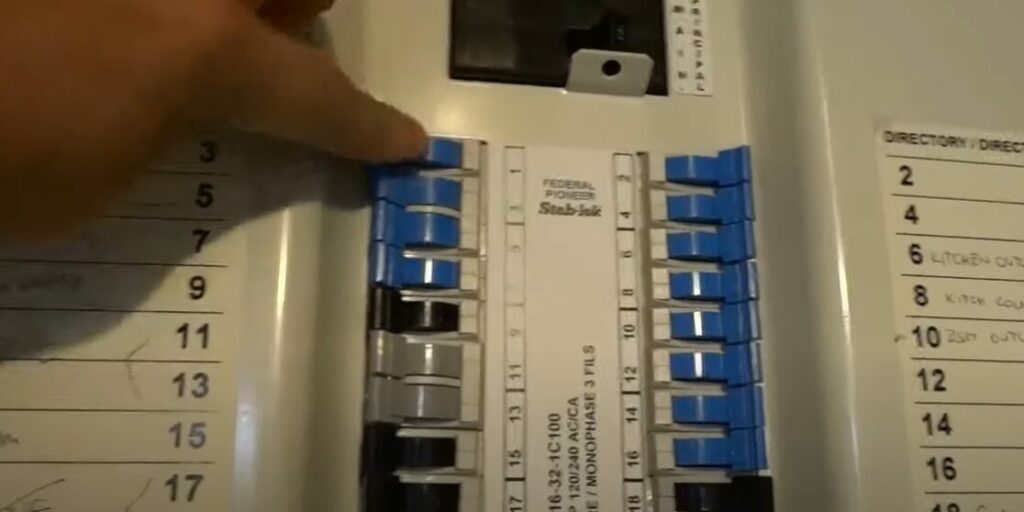
Perform Circuit Breaker Detective Work
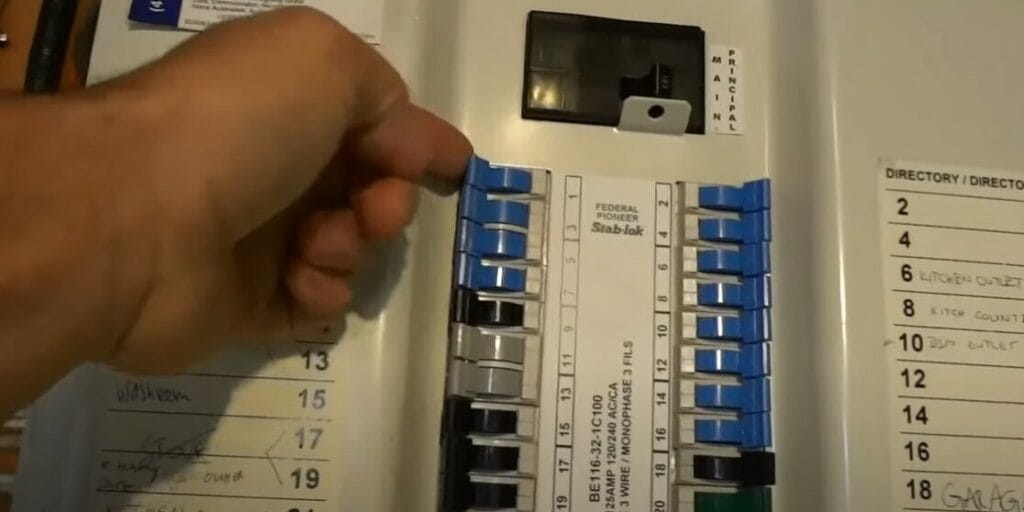
Now for a bit of detective work – circuit breakers. Your home’s electrical panel can give you clues about unused wires.
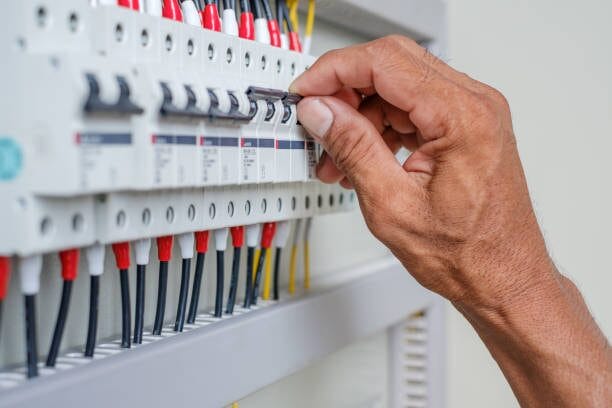
If you see labels like “spare” or circuits that don’t seem to control anything in your home, bingo, you might have found your target. Before you play detective, make sure to turn off the main power – safety first!
Understand Wire Color Coding
Lastly, remember that the color coding of wires can be a big hint. For instance, black, red, blue, and yellow wires are typically used for live connections.
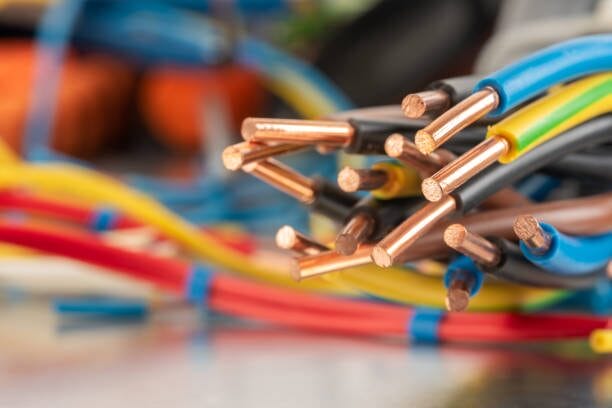
But hey, this isn’t a universal rule, and previous homeowners might not have followed the standard color coding, so always double-check with a voltage tester.
Safety is paramount, so don’t hesitate to call in the pros when in doubt. Let’s keep the adventure safe and electrifying, shall we?
Options for Managing Unused Live Electrical Wires
So, you’ve stumbled upon some live wires that aren’t powering anything currently, and you’re scratching your head, thinking, “What on Earth do I do with these?”
Well, you’re in luck because I’ve got some rock-solid advice for handling those sneaky strands of potential.
First, let’s talk about identification and safety. Ensure you’ve correctly identified the wire as ‘unused’ and not just something inactive now.
Once you’re absolutely sure, tag it! Use a label or a piece of colored tape to mark it clearly. This little step is a huge leap towards safety, ensuring nobody accidentally re-purposes it without knowing its history.
Method 1: Capping Off Unused Wires
Onto the juicy part – managing those wires. One option is to cap them. You can use wire nuts to cover the ends safely.
This method is like putting a lid on it; it ensures that even if the wire inadvertently becomes life, it won’t pose a direct hazard. Here’s how to do it:
Step 1: Power Off
First things first, we’re going to shut off the power to those wires. Head to your electrical panel and flip the switch to cut the power.
This step is crucial, folks. We’re talking zero power flowing to those wires to ensure we can work safely and comfortably. No shortcuts here!
Step 2: Put the Wire Nuts on The Wires
You will usually find three wires – a white one (that’s your neutral), a black one (that’s the hot wire or power wire), and an uninsulated one (that’s your ground).
I’ll be using wire nuts – or Marrettes, as some call them – to cap off each of these wires individually. Ensure your wire nuts are the right size for your working wires.
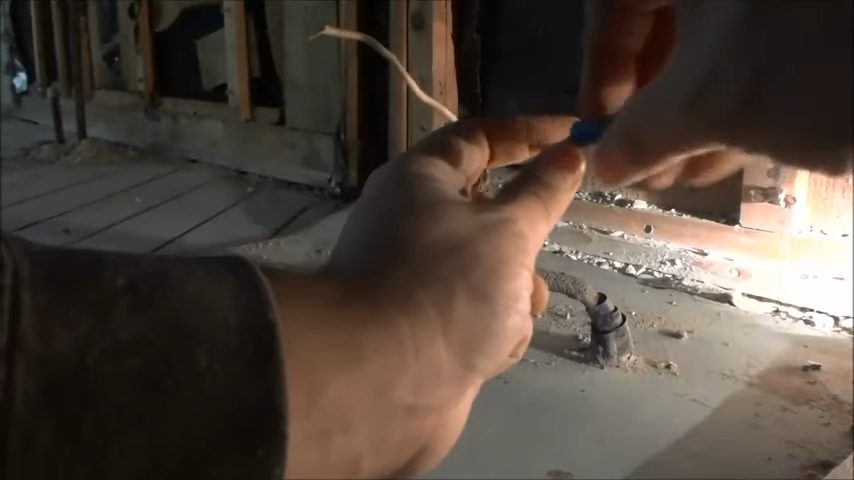
I’ll twist these nuts onto each wire, securing them securely. This step is like putting a protective helmet on each wire – it’s all about safety.
Step 3: Secure with Electrical Tape
Now, for the finishing touch. Although this step is optional, I highly recommend it for that extra security.
Wrap some electrical tape around all three wire nuts, holding them together. This isn’t just about keeping things tidy; it’s about ensuring those caps stay put and don’t get knocked loose.
Once you’ve got them all taped up, head back to your electrical panel and turn the power back on.
And there you have it, my friends, a quick, easy, and safe way to cap off live electrical wires. You’ve now ensured those wires are safely tucked away, reducing any risk of electrical mishaps.
Method 2: Removing Unused Wires Entirely
What if you want to remove the wires entirely? Removing unused wires might be the way to go, especially if you’re certain they won’t be needed.
Let’s dive into how you can safely and effectively eliminate that unused wiring. Here we go in five simple steps:
Step 1: Safety First
Before you do anything, grab your trusty, non-contact voltage tester. It will tell you if there’s any live circuit so you can avoid shocking surprises. If the tester lights up red or beeps, you have live power.
Head to your breaker box and shut off the power to those circuits.

Double-check with your tester to make sure everything’s off. Safety is our top priority, folks.
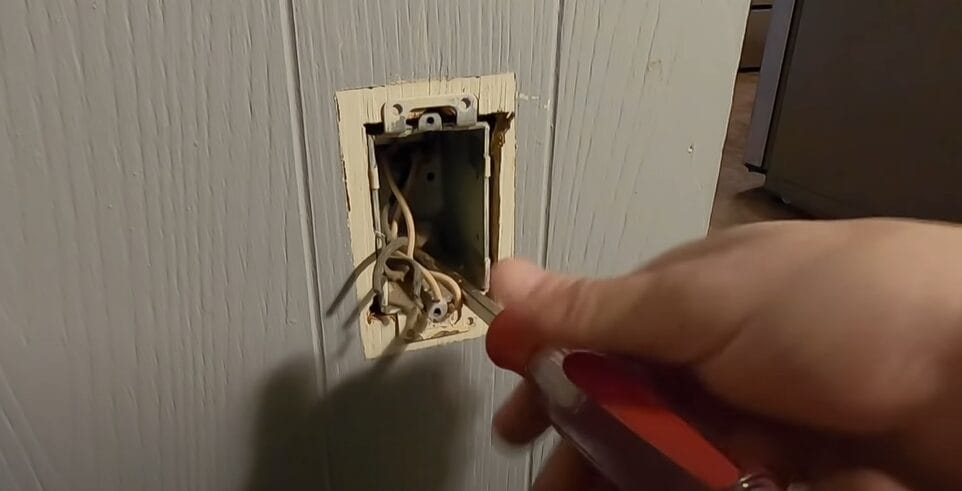
Step 2: Identify and Disconnect
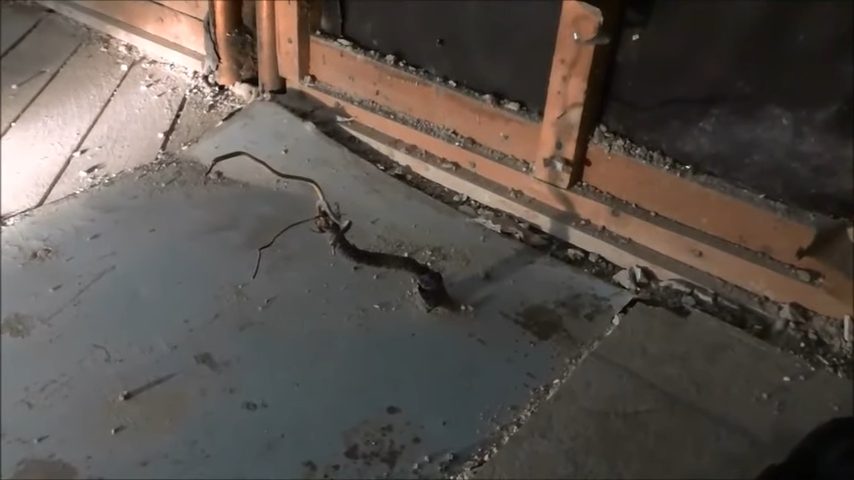
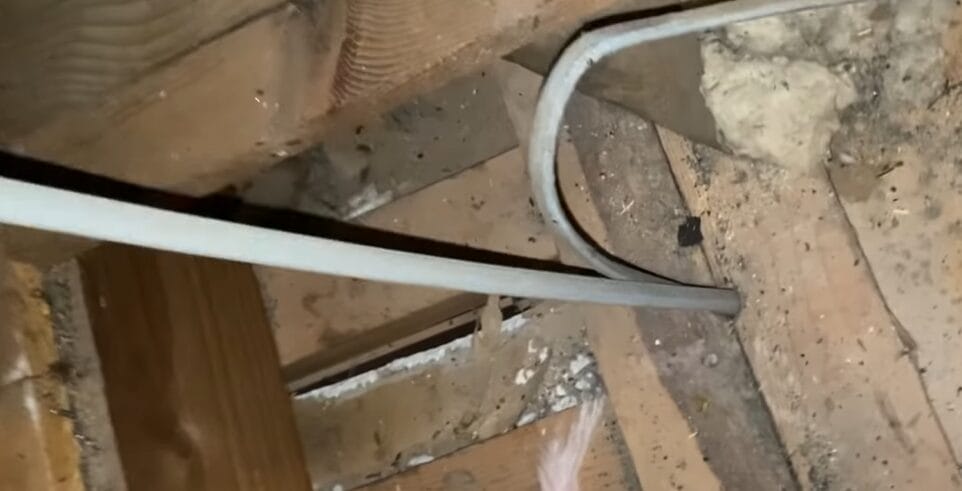
Head up to the attic or wherever your wires are running. You’ll likely see a mix of wires leading to different fixtures like fans or outlets.
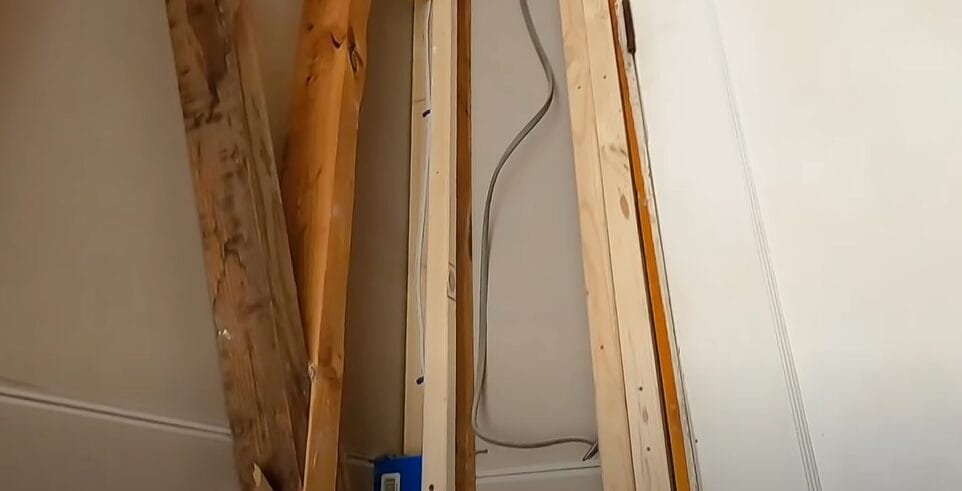
Start by identifying the wires you need to remove. These could be connected to junction boxes or across the attic to various points.
Once you’ve got a handle on what goes where, disconnect the wires from their fixtures or junction boxes. This might mean unscrewing wire caps or detaching them from terminals.
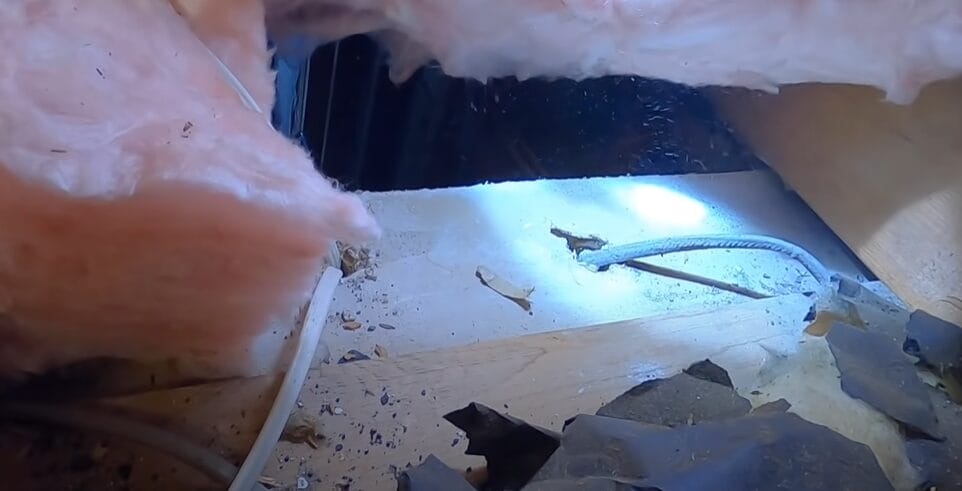
Step 3: Trace and Chase
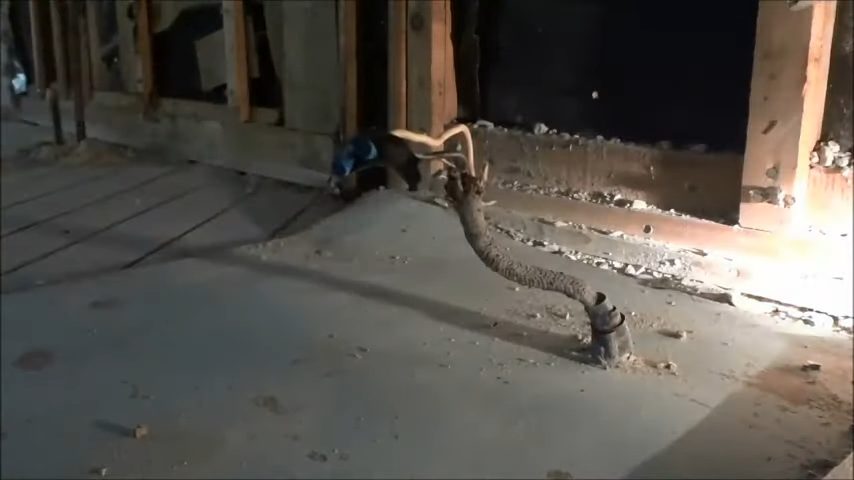
This part requires a bit of detective work. You’ll need to trace where each wire leads. Some might be tucked under insulation or stapled across beams.
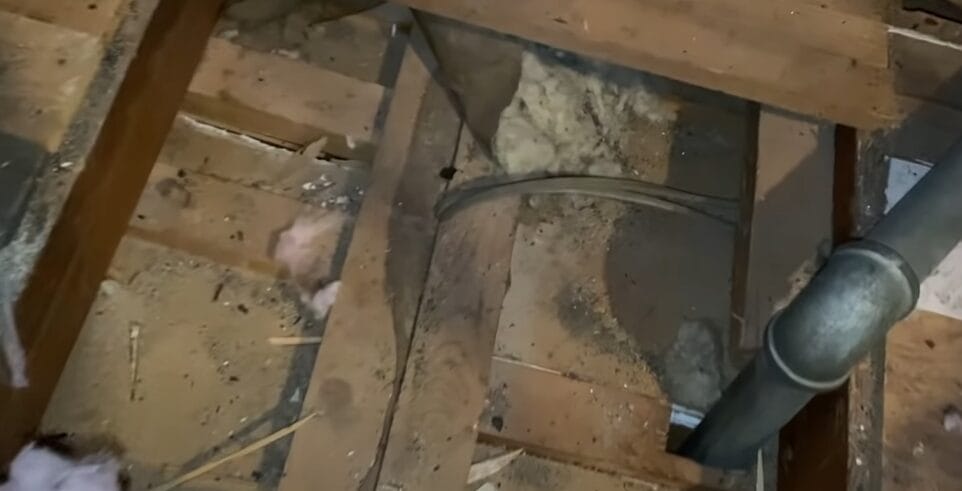
You aim to follow these wires back to their source or any junction boxes they’re connected to. If wires are stapled down, you might need to remove some staples carefully to free them up for removal. Keep track of your path so you don’t miss any hidden wires.
Step 4: Remove Wires
Now comes the satisfying part – pulling those wires out. Start at one end and gently pull the wire through any holes, cross beams, or out of junction boxes.
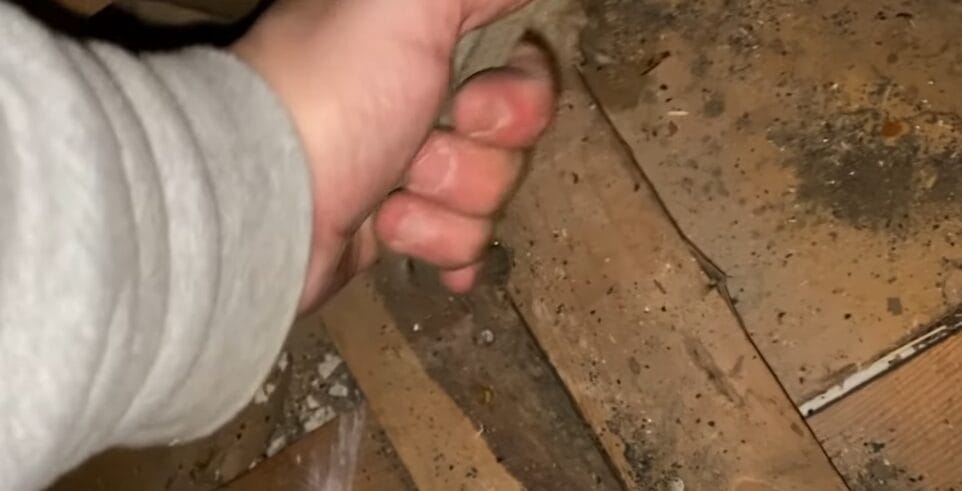
The wires should come out relatively easily if you’ve disconnected everything properly. Remember, if you encounter any resistance, double-check to ensure you haven’t missed a connection or a hidden staple.
Safety, clarity, and a bit of elbow grease are all you need to tackle this project. Stay safe, and happy remodeling!
Method 3: Repurpose the Wire for New Projects
And for those with a bit of a creative spark, consider repurposing the wire. Instead of letting those wires collect dust, why not breathe new life into them?
Here’s how you can transform what you might consider trash into treasure.
1. Powering a New Light Fixture or Adding an Outlet
Are some unused wires lying around? Well, here’s a thought – why not use them to power a new light fixture or add an outlet exactly where you need one?
This idea is perfect for those spots in your home that could use a little extra light or a convenient place to plug in your gadgets.
The process is pretty straightforward but requires a bit of planning.
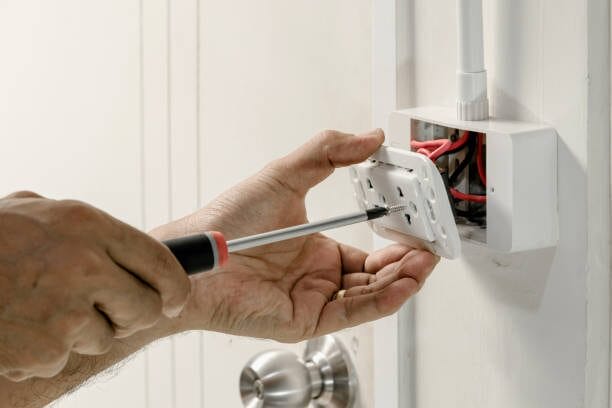
- Step 1: You’ll want to identify the best location for your new fixture or outlet.
- Step 2: Once you’ve got that nailed down, it’s time to put those unused wires to good use.
- Step 3: You might need to extend the wires a bit to reach your desired spot, so ensure you have the right tools and connectors to do the job safely.
Remember, while enhancing your home’s functionality is great, safety should always come first.
2. DIY Electrical Wire Bracelet
Imagine the endless style possibilities here, folks. You can mix and match colors to your heart’s content, creating something unique without spending a dime. Plus, it’s super easy.
Here’s what you do:

- Step 1: Grab three electrical wires and find the middle point to create a loop. This loop is going to be one part of your fastener.
- Step 2: Tape this loop down to a solid surface to keep things steady, and then get braiding!
- Step 3: You will have a cool, colorful bracelet and a great conversation starter once you’re done.
However, I can’t stress this enough – if you’re not entirely comfortable with electrical DIY, bring in a pro. It’s all about making smart, safe choices.
3. DIY Wire Sculpture
Now, for those feeling a bit more adventurous, why not dive into the world of wire sculpture? This is your chance to try your hand at something truly creative.
You don’t have to be Michelangelo here; pick a design that speaks to you. It could be anything from the simple to the sublime.
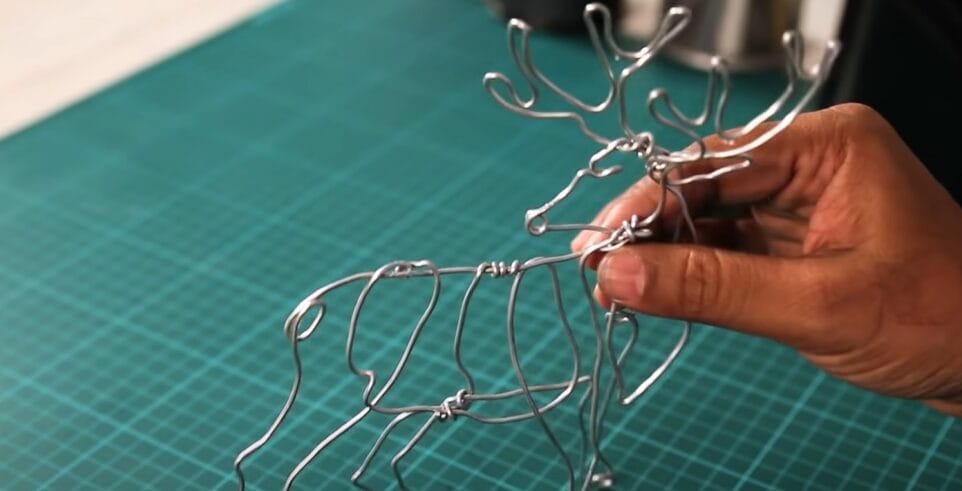
Print out your chosen design as a guide and start shaping your wire to match the outline. The key here is to work with one continuous piece of wire to maintain the integrity of your sculpture.
This project might test your patience, but trust me, the result is worth it. You’ll end up with a one-of-a-kind piece of art that’s sure to impress.
So there you have it, my DIY friends. Who knew old electrical wires could lead to such creative endeavors? Whether you’re accessorizing with a custom-made bracelet or crafting a wire sculpture, the possibilities are as limitless as your imagination.
DIY Vs. Hiring a Professional for Electrical Wire Management
When it comes to Unused Live Electrical Wires, the big question always seems to be whether to dive into a bit of DIY or to pick up the phone and call in a pro.
Now, I’ve always firmly believed in DIY’s power. There’s something incredibly satisfying about solving problems with your own two hands. However, when electricity is involved, the stakes are a bit higher.
| Aspect | DIY | Hiring a Professional |
|---|---|---|
| Approach | Personal involvement in solving problems with hands-on work. | Entrusting the job to someone with specialized skills and experience. |
| Benefits | Saving money and gaining knowledge and skills about the home’s electrical system. | Efficiency, safety, compliance with codes, and peace of mind. |
| Safety Considerations | Paramount importance. Use tools like a non-contact voltage tester to ensure power is off, and wires are not live before starting work. | Professionals handle jobs with established safety protocols, reducing the risk of accidents and ensuring everything is up to standard. |
| When to Choose | Suitable for those comfortable with their skills, familiar with safety procedures, and looking to learn more about their home’s electricity. | Recommended when not fully comfortable with electrical work, dealing with complex wiring, or significant system modifications. |
It balances knowing your limitations and understanding the job’s complexity. If you feel confident and have the necessary knowledge and tools, tackling it yourself can be a rewarding experience.
But never feel bad about hiring a professional. After all, ensuring the Safety and Functionality of your home’s electrical system is always the top priority.
References
Organizations:
- National Electrical Code (NEC). https://neca-neis.org/safety-and-the-nec
- Occupational Safety and Health Administration (OSHA). https://www.osha.gov/
- Electrical Safety Foundation International (ESFI). https://www.esfi.org/
Books:
- “Wiring a House” by Rex Cauldwell. https://www.barnesandnoble.com/w/wiring-a-house-rex-cauldwell/1118175264
- “Electrical Wiring Residential” by Ray C. Mullin and Phil Simmons. https://www.barnesandnoble.com/w/electrical-wiring-residential-ray-c-mullin/1116778103
- “Ugly’s Electrical References” https://rack-a-tiers.com/product-category/uglys-electrical-book/
Website Resources:
- DIY Network. http://www.diynetwork.com/
- This Old House. http://www.thisoldhouse.com/
- Electrical Contractor Network. http://www.electrical-contractor.net/
Video References:
The Fixer
Helpful DIY
KrazyKed
Mad Stuff With Rob