6 min read
How to Test Impedance in a Speaker with a Multimeter (Guide)

The impedance of a speaker is a measurement of its resistance to alternating current. Suppose the impedance is low, then there is a greater current drawn by the speakers from the amplifier. If your amplifier has a high impedance, the loudness and dynamic range will suffer. If the voltage measurement is too low, the amp may break while attempting to provide enough power. All you need is a multimeter to validate the broad range of your speakers.
In general, you can test impedance measures in the speaker. Set the digital multimeter to read resistance before using it. After that, connect the multimeter to the speaker terminals. If you have a 4 impedance speaker, the resistance on the multimeter will be between 2 and 3.4 ohms, an 8 impedance will be between 5 and 7 ohms, and a 16 impedance will be between 12 and 14 ohms. If a speaker has very low impedance, it is defective.
If you are concerned about the speaker’s impedance, I will simplify it. Here’s a fast approach to estimating the impedance of your speaker.
6-Step Multimeter Impedance Measurement in Speakers
1. Examine the Impedance Measure of the Speaker’s Casing
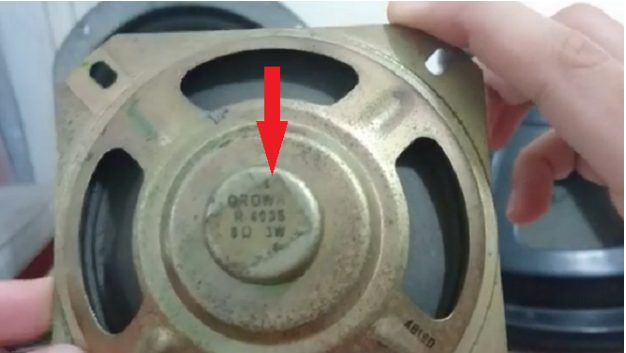
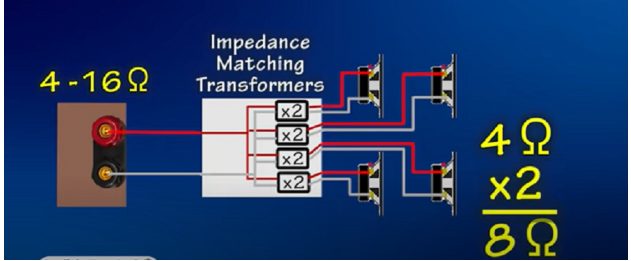
The International Electrotechnical Commission (IEC) standards govern speaker manufacturers. They have what is known as nominal impedance, which all manufacturers must follow. It should be written on the speaker’s enclosure or the speaker itself. Nominal impedance is the lowest estimated output impedance for a particular audio range. (1)
Occasionally, the label will state 4, 8, or 16 ohms. Some manufacturers will mark the actual measured impedance with the reported output impedance. The majority of the bass recordings’ frequencies will be between 90 and 200Hz, with the sub-bass going as low as 20Hz. The frequencies of the midrange track vary from 250Hz to 2kHz. You should note that the actual impedance is near the values within the range and will rise as the frequency increases.
2. Turn Off the Power to the Speaker
Remove the speaker’s connections from the amplifier to do this. Take caution not to break the stands. You will get incorrect results when you do the test without unplugging the power. It can also blow out your multimeter. Any cables that are physically attached to the speaker’s cone or welded on the speaker’s stand should not be removed.
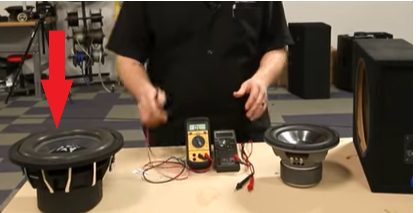
3. Remove the Speaker from its Casing

Remove the speaker from its enclosure for easier access to the positive and negative connections. Open the rear of the cabinet and use a screwdriver to remove the screws that hold the speaker to the casing.
4. Turn your Digital Multimeter to Impedance Resistance Measurement
To measure impedance resistance, a multimeter gives out a little DC. Because impedance is a property of alternating current circuits, this will not directly measure impedance. This method, however, will get you near enough for most home audio installations. (For example, using this method, you can readily tell the difference between a 4-ohm and an 8-ohm speaker.) Use the lowest range resistance option. Many multimeters have a setting of 200. However, a multimeter with a lower value (20) may provide more accurate results.
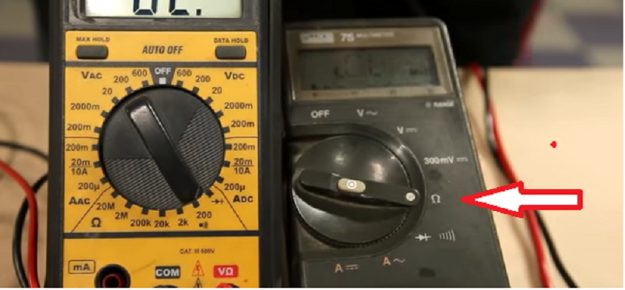
- If your multimeter has only one resistance setting, it is auto-ranging and will automatically find the proper range.
- Too much direct current can harm or ruin a speaker’s voice coil.
5. Attaching the Multimeter Leads to the Terminals of the Speakers
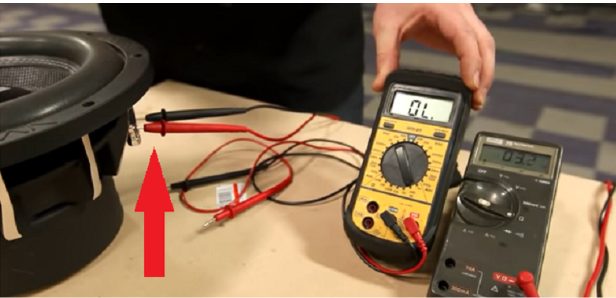
Sift through the terminals to discover which are positive and which are negative. They are frequently identified by a “+” and a “-” symbol. Connect the multimeter’s red probe to the positive side and the black probe to the negative side.
6. Calculate the Multimeter Impedance Measurement Based on the Resistance
Usually, the resistance reading should be around 15% less than the labeled nominal impedance. For example, an 8-ohm speaker should have a resistance of 6 or 7 ohms.
- The nominal impedance of the majority of loudspeakers is 4, 8, or 16 ohms. Unless you obtain an unexpected result, it’s fair to presume your speaker has one of these impedance values when paired with an amplifier.
Multimeter for Dual Impedance
Nowadays, a digital impedance multimeter with dual impedance capabilities is available. The first characteristic is the high impedance input (often 10 Megaohms) integrated within the voltmeter range. The second feature is the voltmeter range itself (low impedance input usually between 2k to 5kohm depending on the meter brand).
Impedance multimeters with dual impedance also can be used to detect whether you get an accurate voltage measurement or a ghost voltage. When your test (which is not getting power) reads the voltage from a nearby electrical source, this is known as ghost voltage. It is usually due to additional unused wiring in the duct being checked as it travels along with other power cables. (2)
Take a look at some of our related articles below.
- How to measure DC voltage with a multimeter
- Multimeter setting for 220v
- How to use a Cen Tech digital multimeter to check voltage
References
(1) IEC – https://www.crunchbase.com/organization/international-electrotechnical-commission
(2) electrical source – https://interestingengineering.com/the-7-basic-sources-of-electricity-you-should-know-about
Video References
Sonic Electronix
AVCSSGuitarWorld
Geoff the Grey Geek