11 min read
How to Wire Smoke Detectors in Parallel (10 Steps)
By the end of this article, you’ll be able to wire a smoke detector in parallel.
For modern homes, smoke detectors are must-have items. You usually install smoke alarms in every room in your home. But without a proper wiring process, all the effort might go to waste. What do I mean by proper wiring? You should wire smoke detectors in a parallel connection. So, when one smoke alarm goes off, every alarm in your home will be activated. In this guide, I’ll show how you can do that with a few simple steps.
In general, to install hardwired smoke detectors in parallel, follow this technique.
- Buy the required 12-2 NM and 12-3 NM cable.
- Cut the drywall according to the number of smoke alarms.
- Turn off the Power.
- Fish the 12-2 NM cable from the main panel to the first smoke detector.
- Fish the 12-3 NM cable from the second smoke alarm to the third one. Do the same for the rest of the smoke alarms.
- Install the old work boxes.
- Strip the three wires.
- Connect the wire harnesses to the smoke alarms.
- Install the smoke alarm.
- Test the smoke alarms and insert the backup battery.
The above 10-step guide will help set up multiple smoke alarms in a parallel connection.
Follow the below article for the complete guide.
10-Step Guide on How to Wire Smoke Detectors in Parallel
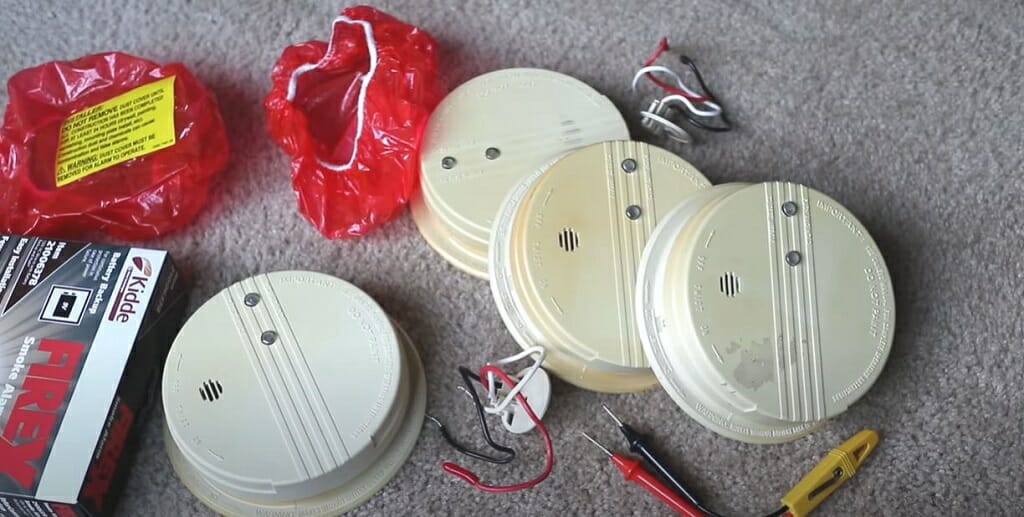
Things You’ll Need
- Three smoke alarms
- Three old work boxes
- 12-3 NM cable
- 12-2 NM cable
- Wire stripper
- Drywall saw
- Screwdrivers
- Few wire connectors
- Electrical tape
- Measuring tape
- Non-metallic fish tape
- Notebook and pencil
- Utility knife
Be mindful of: I’m using only three smoke alarms in this guide. But depending on your requirement, use any number of smoke alarms for your home.
Step 1 – Measure and Buy

Start the process by measuring the lengths of the cables.
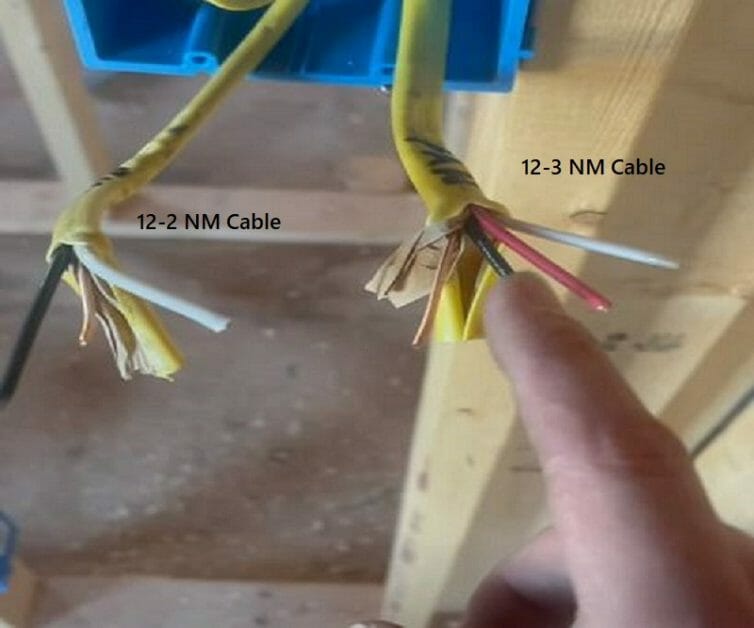
Mainly, you’ll require two different cables during this wiring process; 12-2 NM and 12-3 NM cables.
From the Electrical Panel to 1st Smoke Detector
First, measure the length from the panel to the 1st alarm. Note down the measurement. This is the length of 12-2 NM cables that you need for this process.
From 1st Smoke Detector to 2nd and 3rd
Next, measure the length from the 1st alarm to the second one. Then, measure from 2nd to 3rd. Note down these two lengths. Buy 12-3 NM cables according to these two measurements.
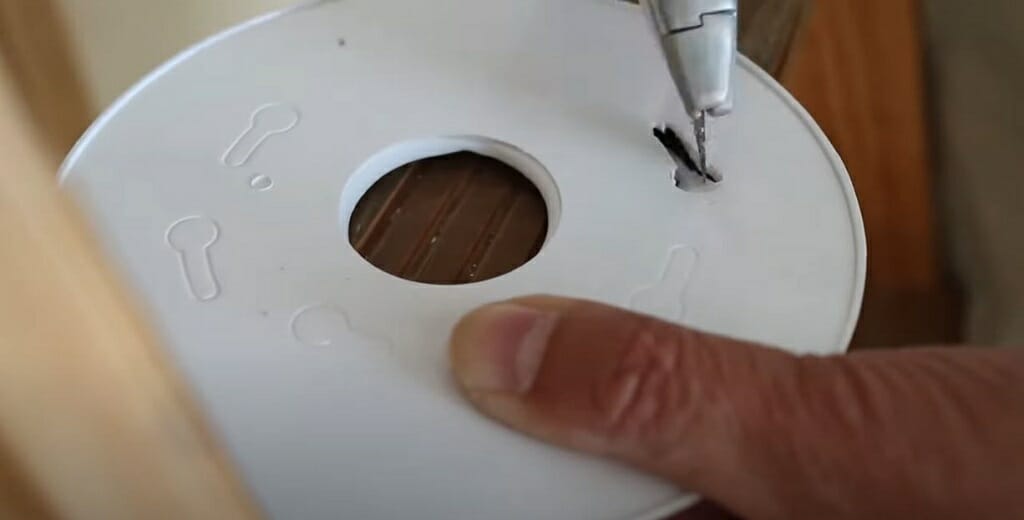
Step 2 – Cut the Drywall
Take the drywall saw and start cutting the drywall on the 1st smoke alarm’s location.
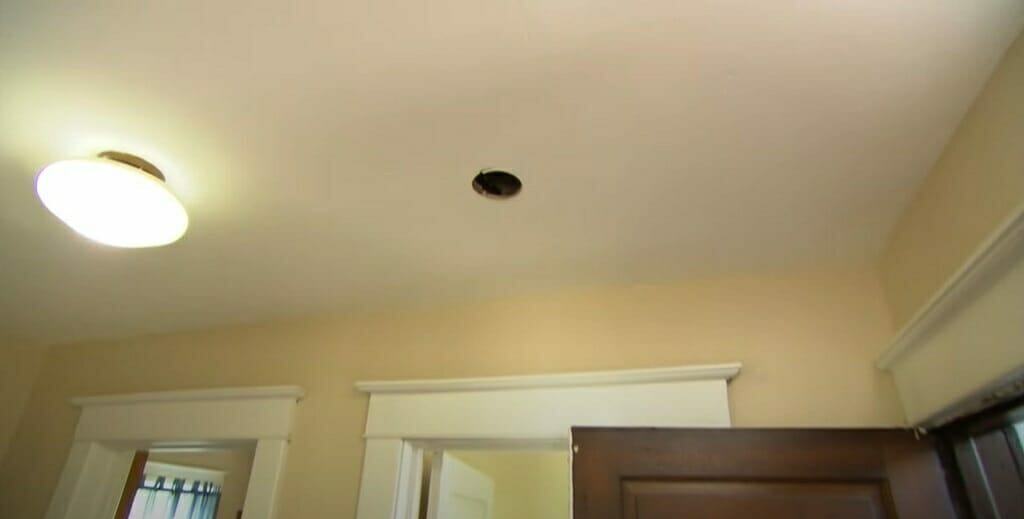
Initiate the cutting according to the size of the old work box. Do the same for the rest of the locations (2nd and 3rd alarm locations).
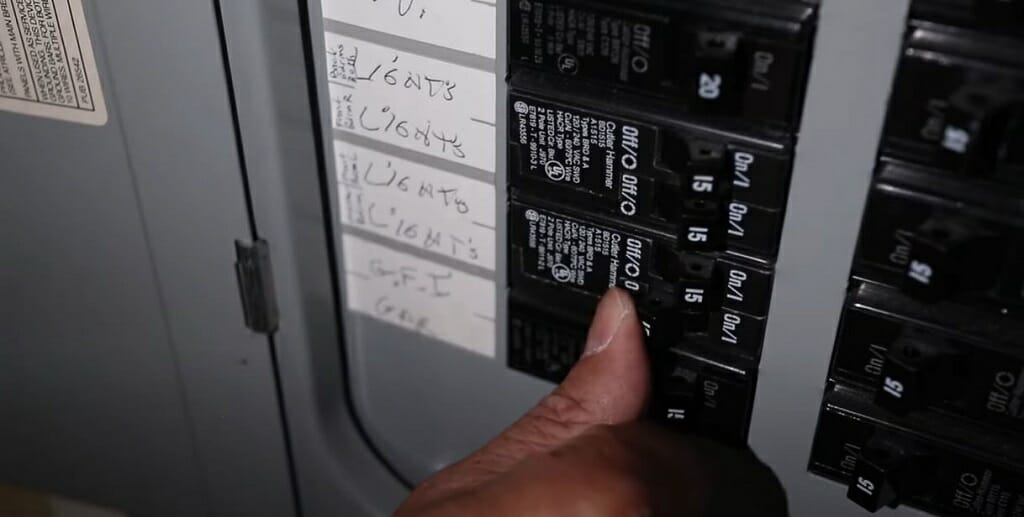
Step 3 – Turn off the Power
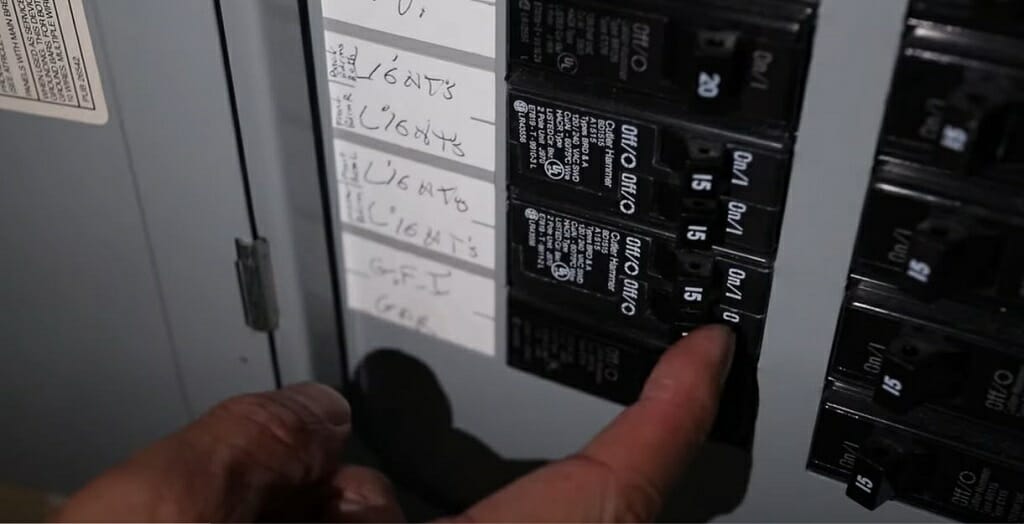
Open the main panel and turn off the power. Or switch off the circuit breaker that supplies power to the smoke detectors.
Be mindful of: When supplying power to three or four smoke alarms, you’ll need a dedicated circuit breaker. So, install a new breaker with appropriate amperage. If required, hire an electrician for this task.
Step 4 – Fish the 12-2 NM Cable
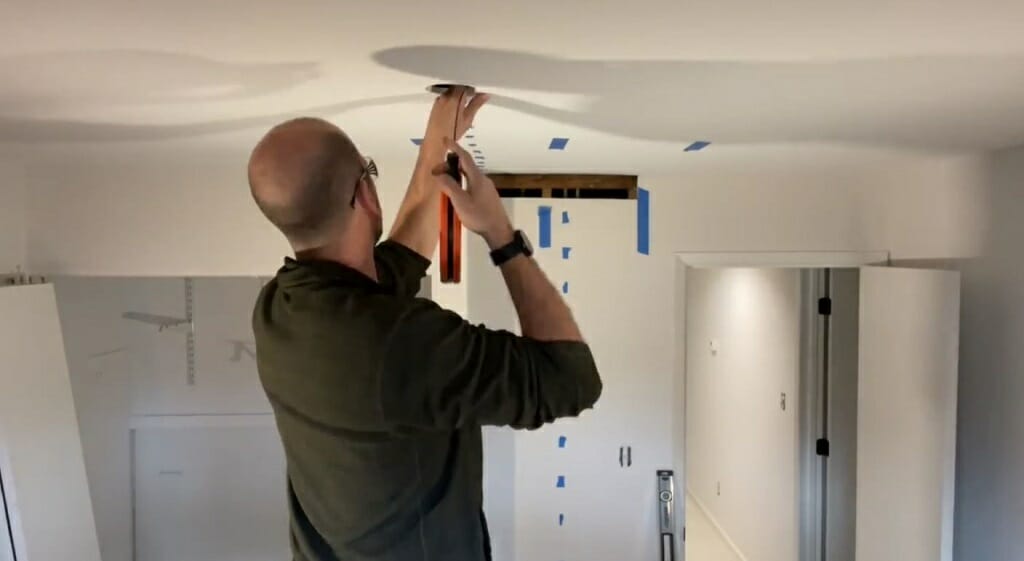
Then, take the 12-2 NM cable and fish it from the main panel to the 1st smoke alarm.
Use the fish tape to complete this step. Remember to connect the wires to the circuit breaker.
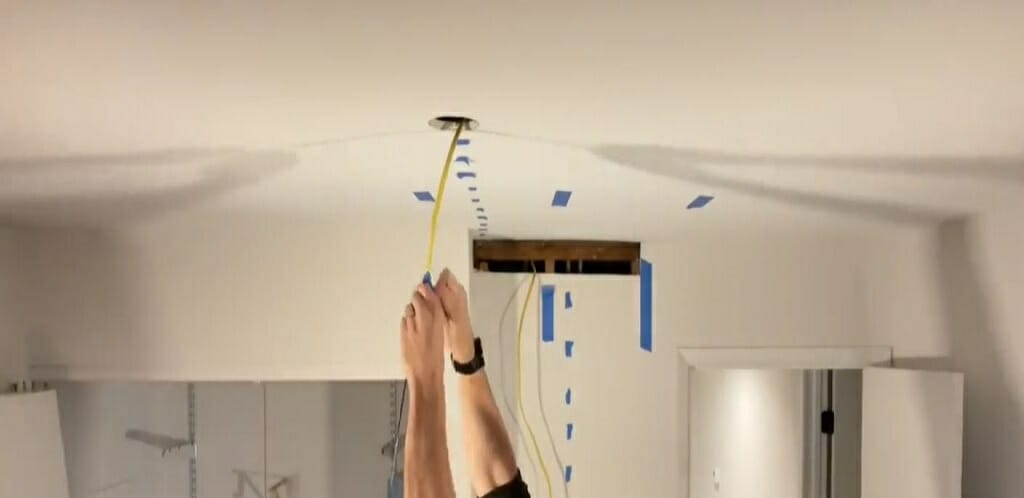
Step 5 – Fish the 12-3 NM Cable
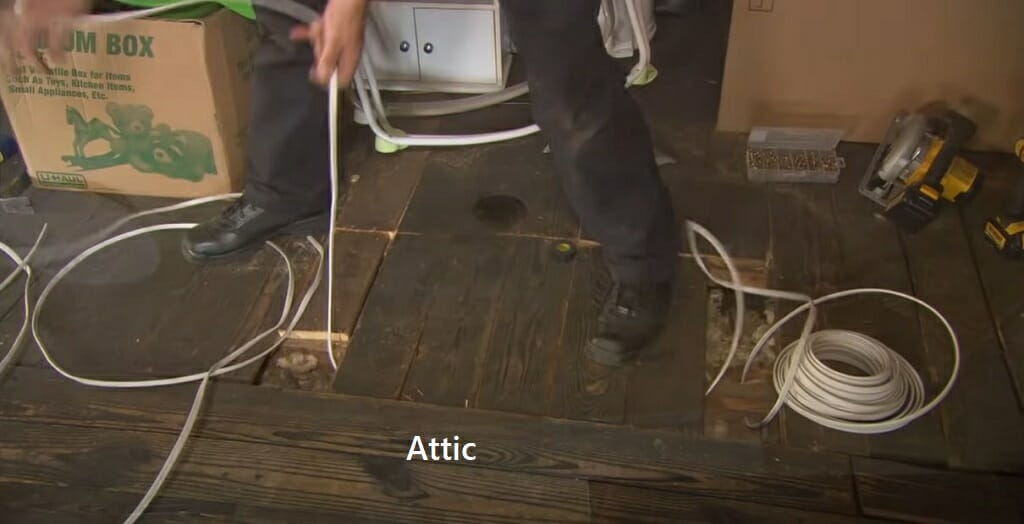
Now, fish the 12-3 NM cable from the 1st to the 2nd alarm. Do the same for the 2nd and 3rd smoke alarms. If you can access the attic, this step is much easier. (1)
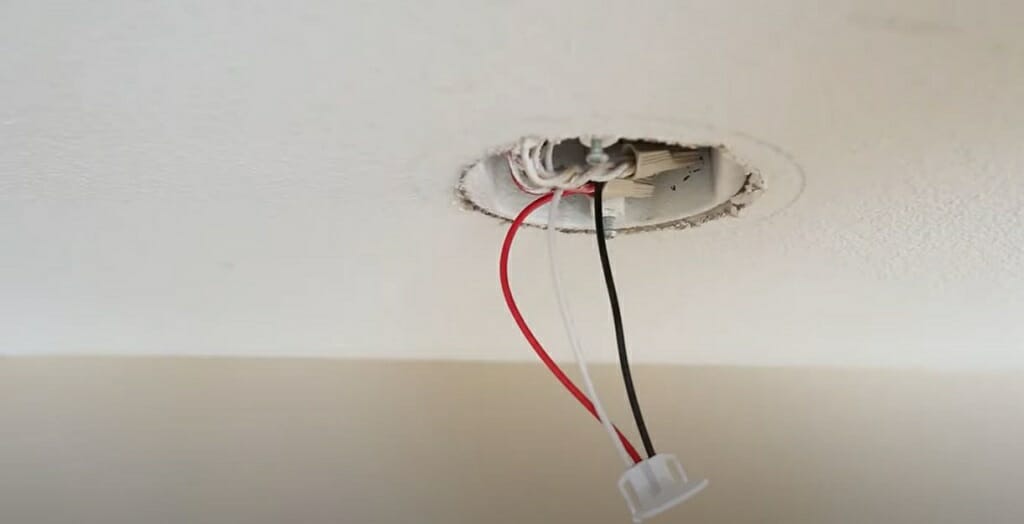
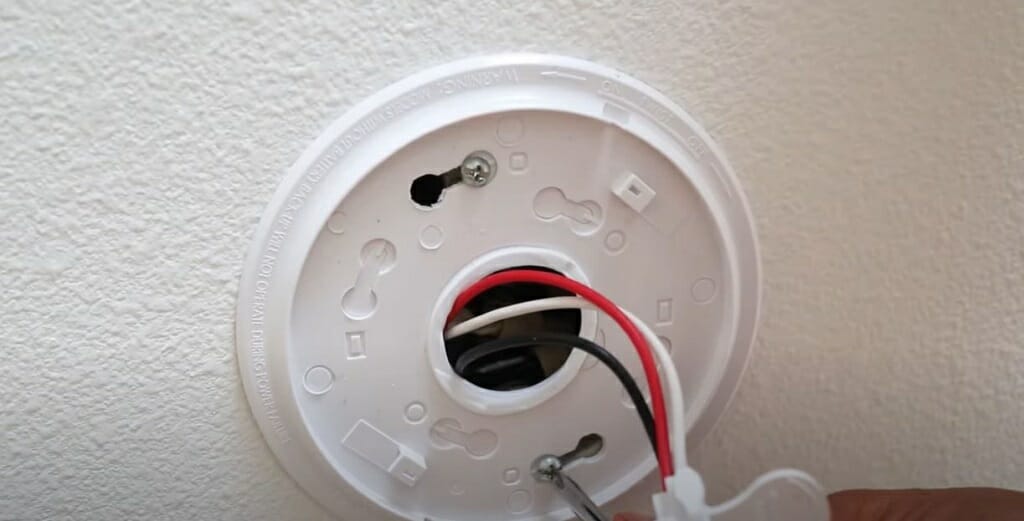
Step 6 – Install the Old Work Boxes
After fishing wires, you can install the old work boxes. However, the wires should come out at least 10 inches from the old work box. So, pull out the wires accordingly and install the old work boxes by tightening the wing screws.
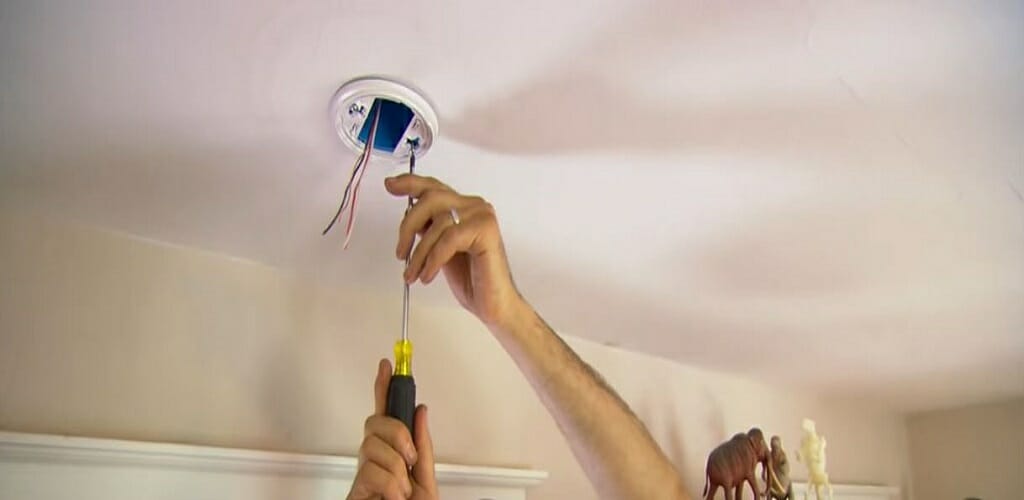
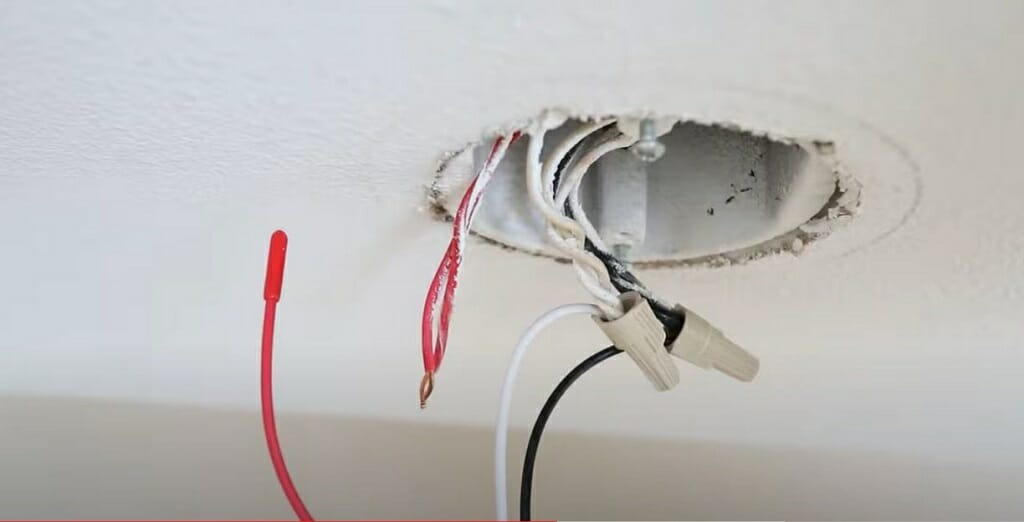
Step 7 – Strip the Wires
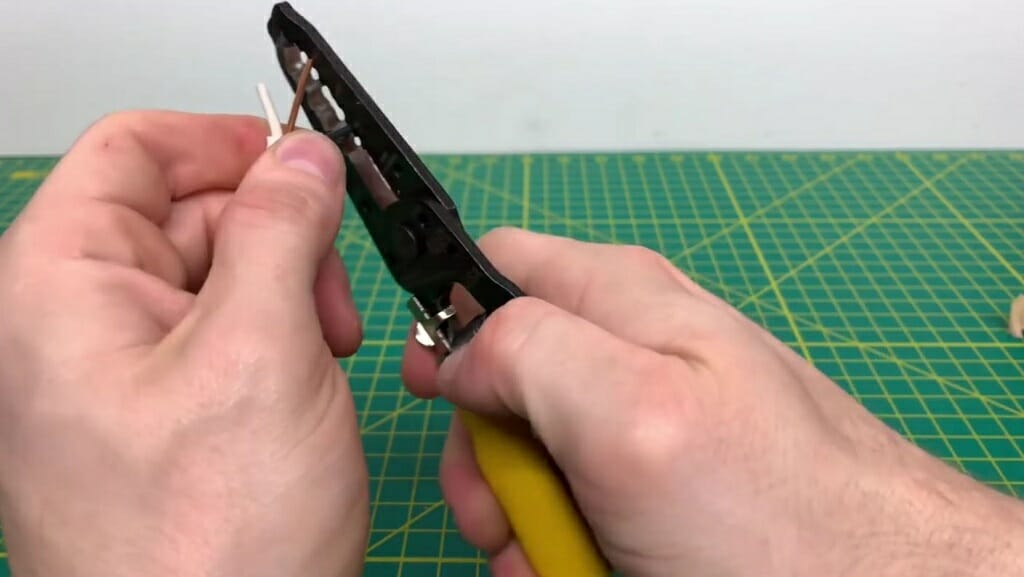
Next, move to the 3rd smoke alarm location. Strip the outer insulation of the NM cable. You’ll get a red, white, black, and bare wire with the NM cable. The bare wire is the ground connection. Connect it to the work box by using the ground screw.
Then, strip each wire using the wire stripper. Expose ¾ inch of each wire. Apply the same technique to the other two smoke alarms.
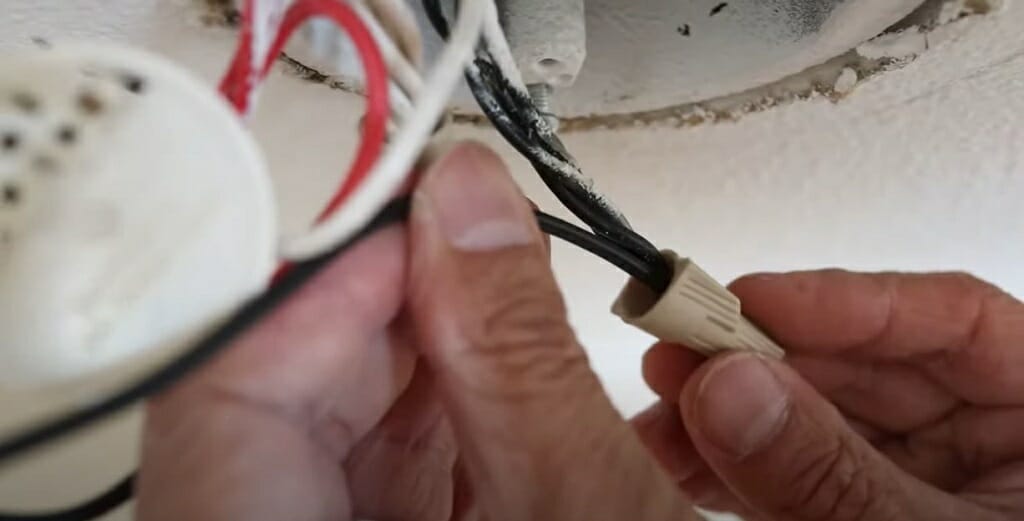
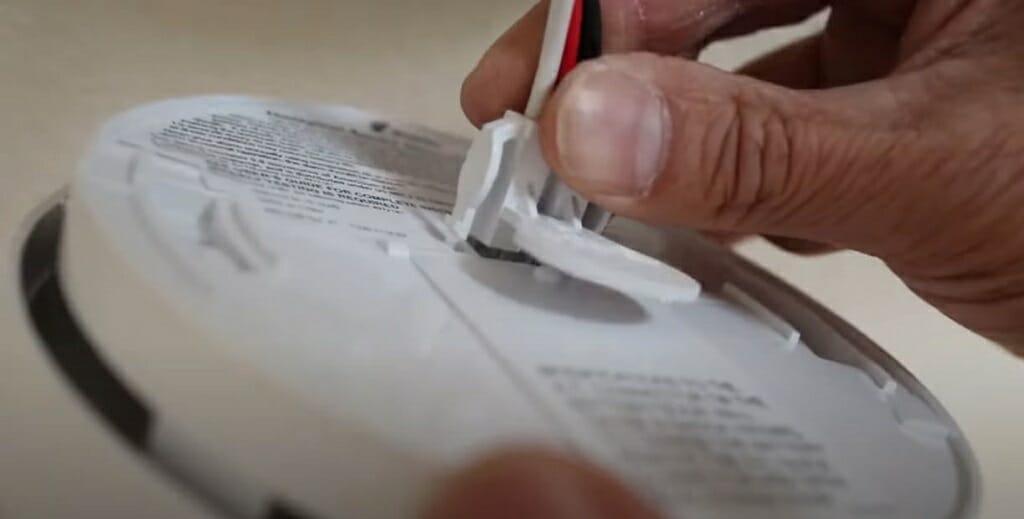
Step 8 – Connect the Wire Harness
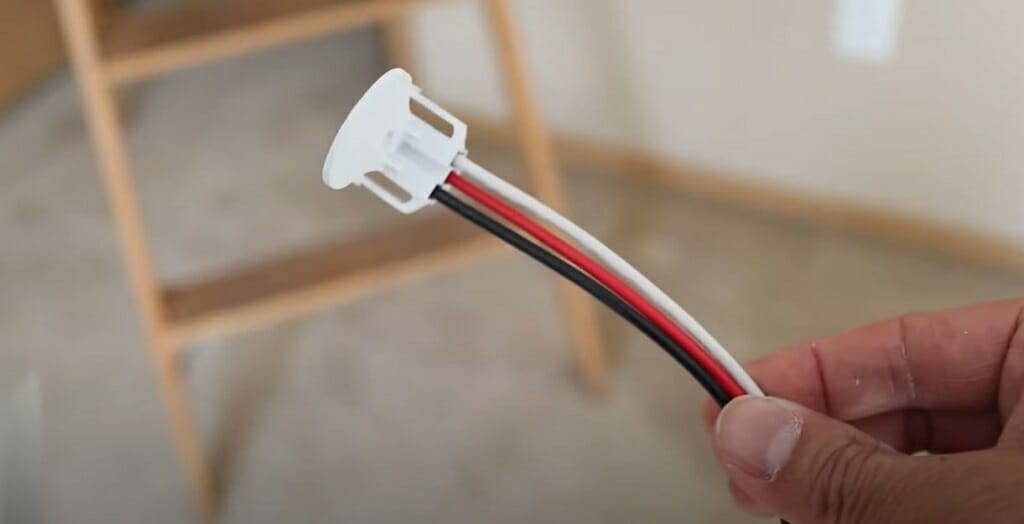
With each smoke alarm, you’ll get a wire harness.
The harness should have three wires: black, white, and red. Some harnesses come with a yellow wire instead of a red wire.
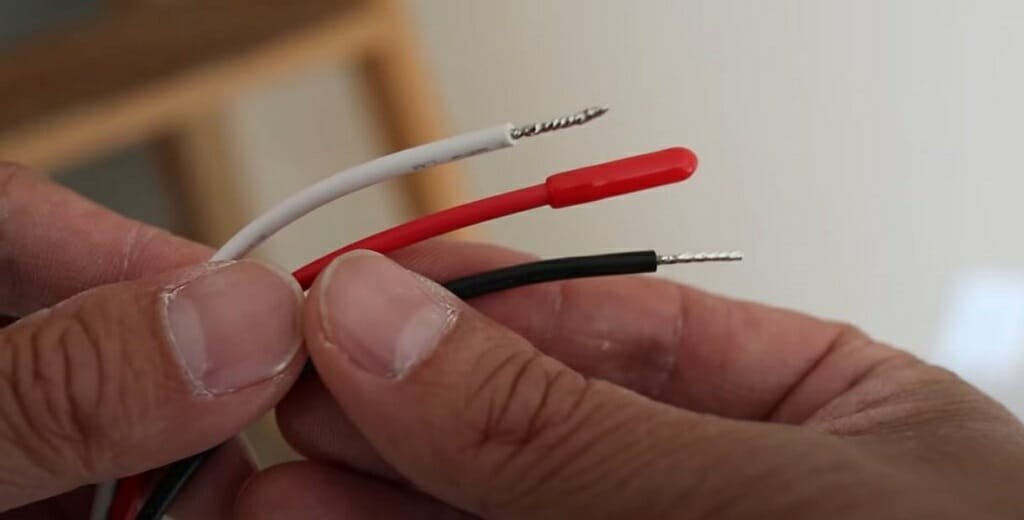
- Grab the 3rd smoke alarm’s wire harness.
- Connect the harness’s red wire to the NM cable’s red wire.
- Do the same for the white and black wires.
- Use wire nuts to secure the connections.
Then go to the 2nd smoke alarm. Connect the two red wires that come from the work box to the wire harness’s red wire.
Do the same for the black and white wires.
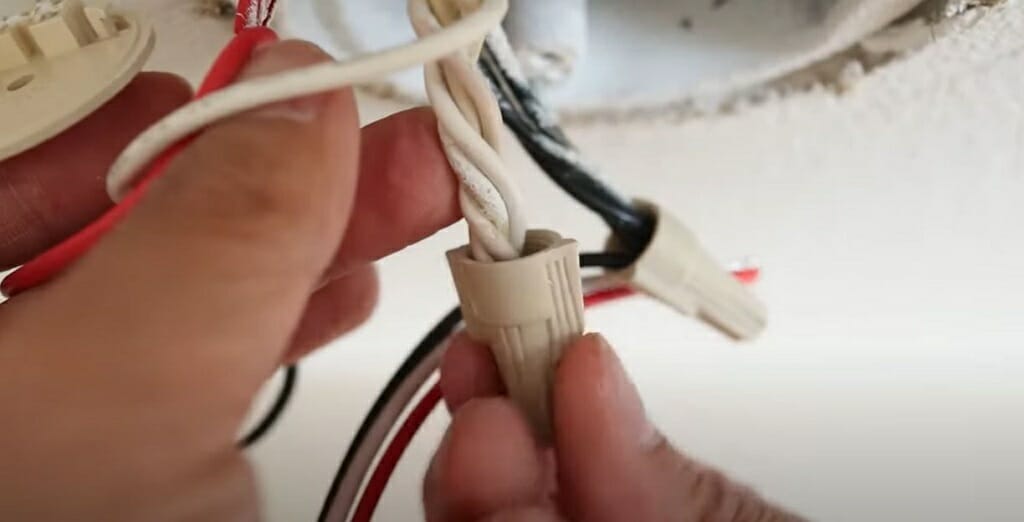
Use wire nuts accordingly. Repeat the process for 1st smoke alarm.
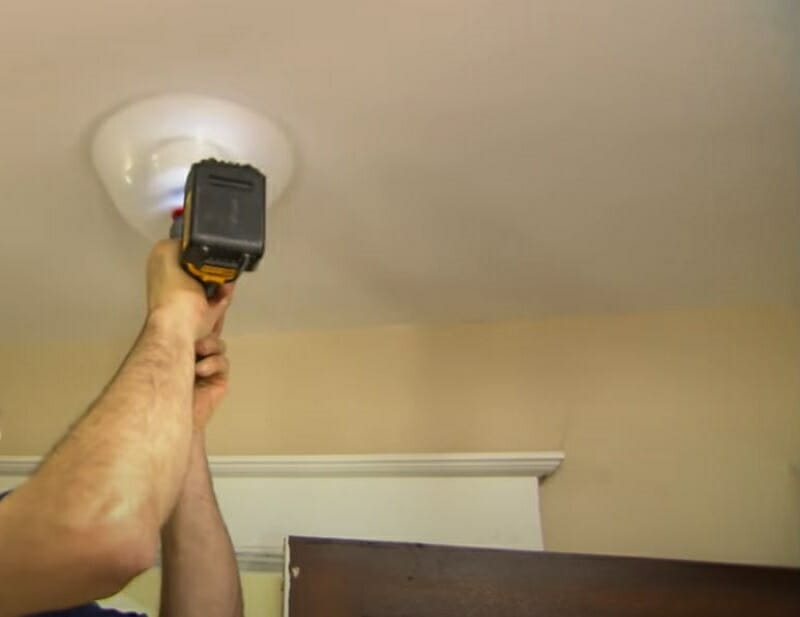
Step 9 – Install the Smoke Alarm
After completing the wiring process, you can install the mounting bracket on the old work box.
If needed make the holes on the mounting bracket.
Then, snap the wire harness into the smoke alarm.
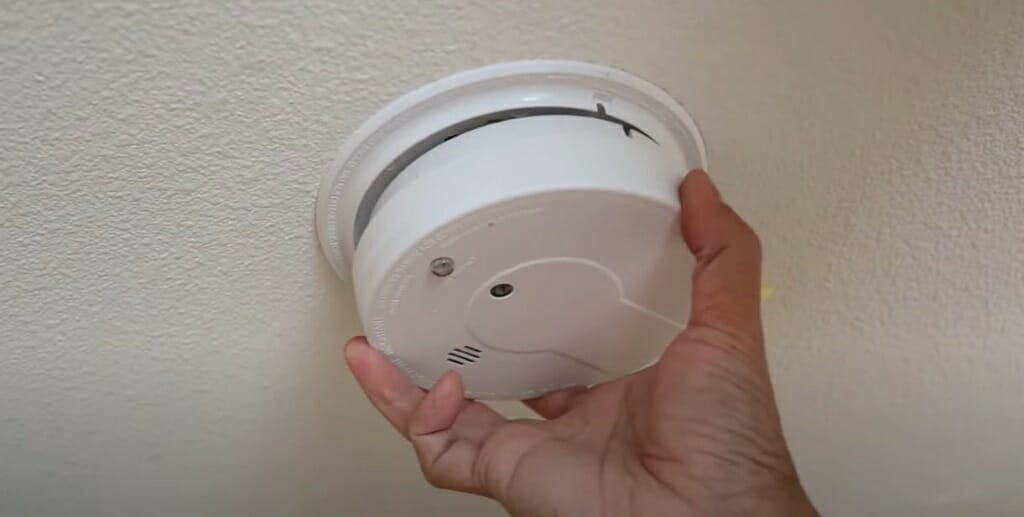
Next, twist the smoke alarm onto the mounting bracket.
Be mindful of: Follow this process for all three smoke detectors.
Step 10 – Test the Alarm and Insert the Backup Battery
Now all three smoke alarms are properly installed.
Turn on the power. Locate the test button on 1st alarm and press it for the test run.
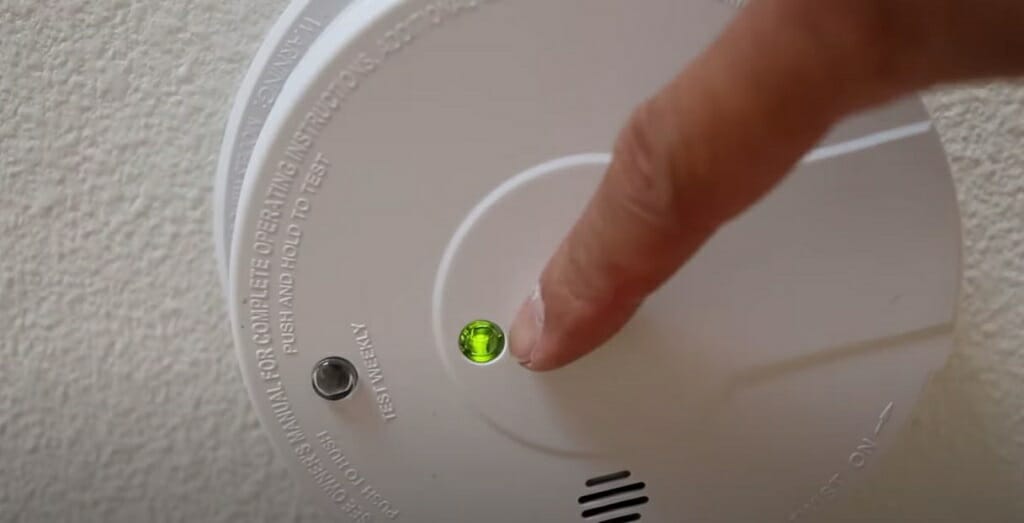
You should hear all three alarms sound at the same time. Press the test button once more to stop the smoke alarms.
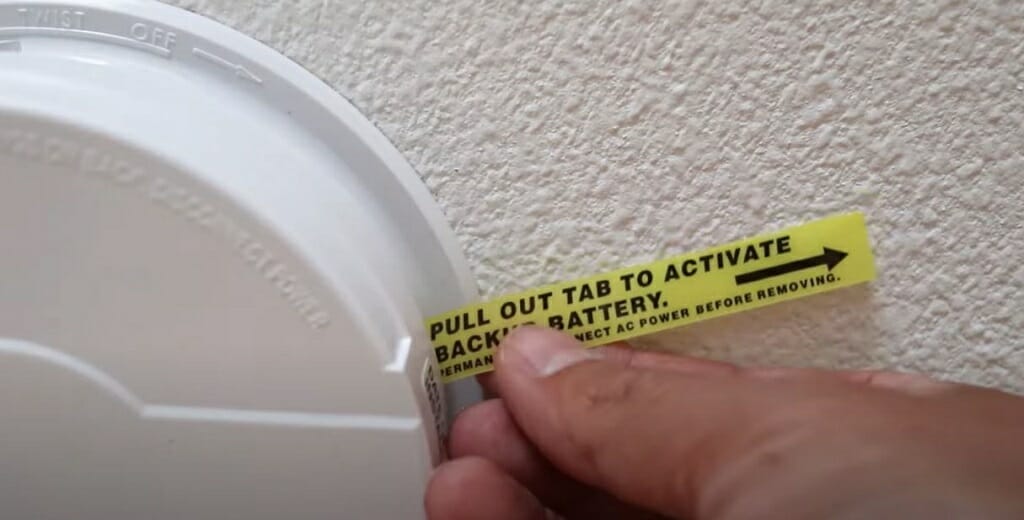
Finally, pull out the plastic tab to activate the backup battery.
Wrapping Up
Wiring multiple smoke alarms in a parallel connection is an excellent safety feature for your home. If a sudden fire occurs in the basement, you’ll be able to detect that from your living room or bedroom. So, if you haven’t wired your smoke detectors in parallel, do it today. (2)
Take a look at some of our related articles below.
- What gauge wire to connect two 12v batteries in parallel
- How to connect ground wires together
- How to wire multiple lights to one cord
References
(1) attic – https://www.britannica.com/technology/attic
(2) living room or bedroom – https://www.houzz.com/magazine/it-can-work-when-your-living-room-is-your-bedroom-stsetivw-vs~92770858
Video References
TheRenderQ
This Old House
Everyday Home Repairs