10 min read
How to Wire a 3-Prong Plug with 2 Wires (2 Scenarios)
If your cable has 2 wires, and you need to wire a 3-prong plug, you might wonder how to do it.
It might seem perplexing, but once you recognize which wire is which and know which one to ignore, it’s quite easy.
To wire a 3-prong plug with 2 wires, identify the hot and neutral wires or terminals on the 3-prong plug and connect them to the cable’s corresponding hot and neutral wires or the plug terminals. The cable won’t have a third ground wire, which is the one to ignore on the plug. So, connect the hot to hot and neutral to neutral before sealing the joints or closing the plug.
I will go into more detail below, cover the procedure for an open plug, and tell you the different color schemes.
Safety, Requirements, and Scenarios
Safety Precautions
The normal safety precaution is to cut off the power supply to the circuit you are working on by switching off the breaker.
However, it’s only necessary in this case if either the plug or appliance is permanently connected. You don’t need to switch the power off for an isolated system, as it’s already disconnected.
Requirements
You usually need the following to wire a 3-prong plug with 2 wires:
- Tools: pair of pliers, screwdriver, wire stripper
- Materials: Electrical tape
Scenarios
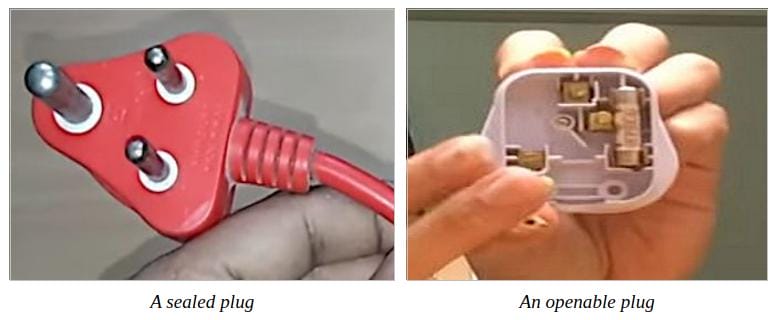
We will consider 2 scenarios: one in which the plug is sealed, making you have to connect the two sets of wires (wire to wire), and one in which the plug can be opened and you connect the wires to its terminals (wire to terminal).
Wiring a 3-Prong Plug with 2 Wires (Wire to Wire)
This method is for where the plug is sealed, making you connect two wires. You can apply it to any 3-prong plug if you can at least distinguish the ground wire (see Step 1). A South African and Indian-style plug is used to illustrate the steps below.
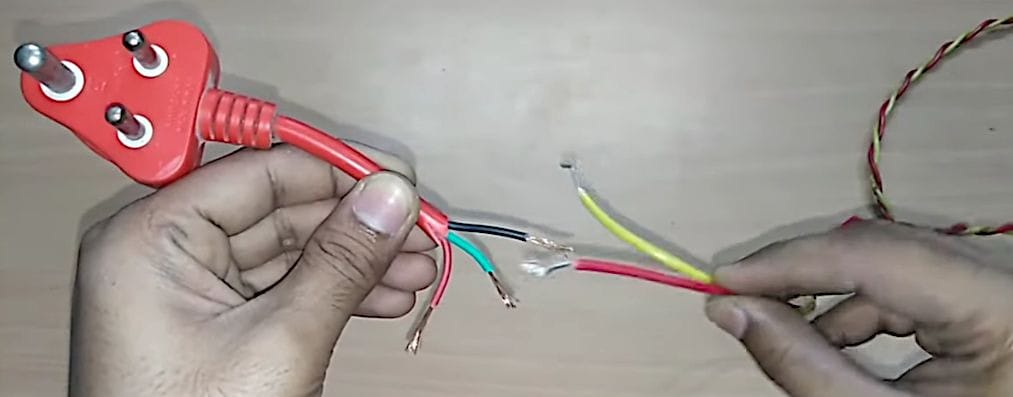
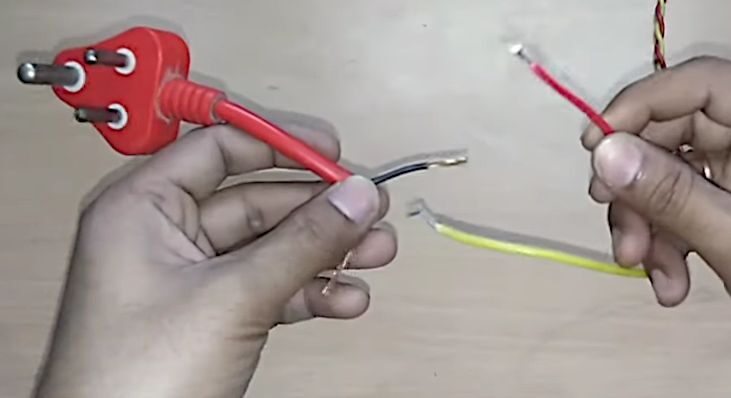
Step 1: Identify the Wires
You must identify the wires to know which one is hot (or live), neutral, and ground (or earth).
In particular, you must be sure which wire is the ground one because we will cut it off in the next step. It’s typically the green (most common) or yellow wire.
If you can see the wires connected to the terminals, it’s the one connected to the prong that is different and separate from the other pair – the top one in the triangular formation.
The other (non-ground) wires in US schemes are as follows:
- Hot wire – black (most common) or brown
- Neutral wire – white (most common) or grey
If you see a red wire, it’s a hot wire in a non-US scheme, in which case the other wire is the neutral one (black or white). If you see a blue or grey wire, it’s likely a neutral wire accompanied by a brown wire for the hot connection.
Step 2: Cut Off the Ground Wire
We will cut off to terminate the ground wire, usually the green or yellow, as it’s unnecessary.
Carefully cut off the end with pliers so the conductor doesn’t stick out of the insulation layer.
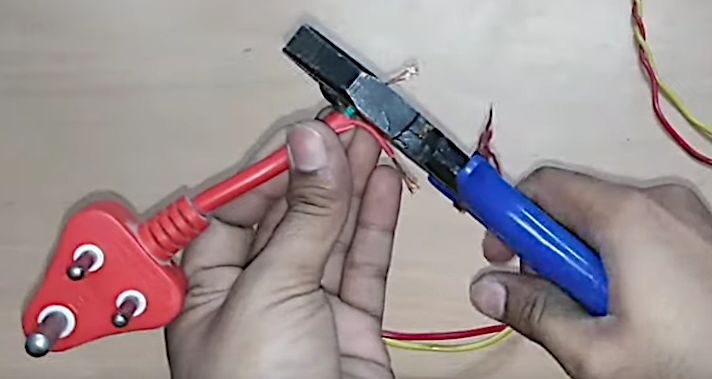
After cutting the ground wire, you can see that the task has become much easier because we now have 2 wires to connect to only 2 wires (not 3).
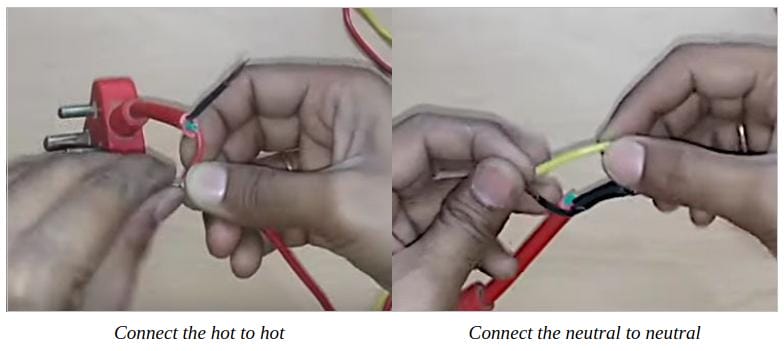
Step 3: Connect the Wires
Now that we have only 2 pairs of wires, we can easily connect them by connecting the corresponding wires:
- Connect the 2 hot wires.
- Connect the 2 neutral wires.
Technically, it doesn’t matter which wires you connect because it’s an AC system, but connecting the corresponding wires is best. In a DC system, you must observe the correct polarity (positive and negative).
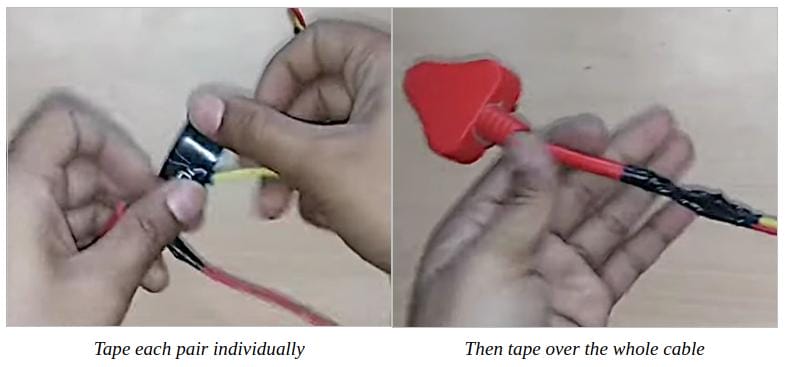
Step 4: Secure the Joints
You can either solder the wires, solder them, and use a shrink tube, or splice and wrap them using electrical tape.
I suggest you tape over each corresponding pair and then around both together, i.e., the whole cable.
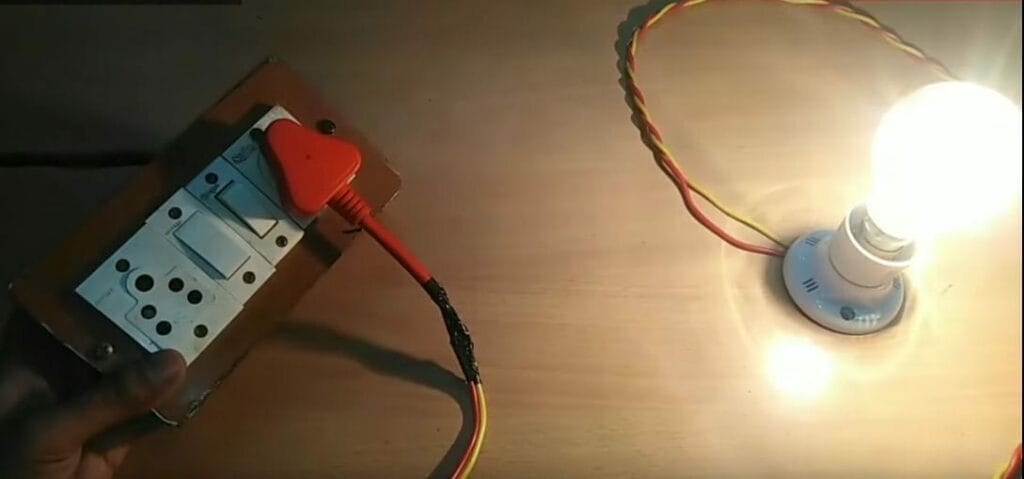
Step 5: Test the Wire
The wiring is done, but I strongly recommend testing it before using it for good.
The example below, the 2-wire cable is connected to a light bulb holder at the other end. Insert a light bulb into the holder. Then, insert the plug into an outlet or the socket of an extension cord and switch it on to provide power. The light bulb should come on.
Wiring a 3-Prong Plug with 2 Wires (Wire to Terminal)
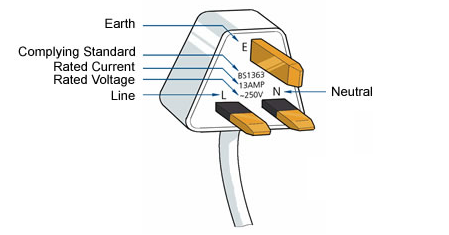
This method allows the plug to be opened, and you have to connect the wires to its terminals. You can only apply it to a 3-prong plug if you know which scheme to follow. The one used to illustrate the steps below is a UK-style plug.
Step 1: Identify the Wires and Terminals
You must identify the wires and terminals (connected to prongs) to know which ones are hot (or live), neutral, and ground (or earth). They are of 3 kinds: hot (or live), neutral, and ground (or earth). In US-style plugs:
- The hot terminal is typically the shorter vertical one, the other being the neutral terminal. If you look at the plug with its prongs facing you in an upright triangular formation, the hot terminal is on the bottom right. The wire attached to it is black (most common) or brown. In non-US wiring schemes, it’s usually red or brown.
- The neutral terminal is typically the longer vertical one, the other being the hot terminal. If you look at the plug with its prongs facing you in an upright triangular formation, the neutral terminal is on the bottom left. The wire attached to it is white (most common) or grey. In non-US wiring schemes, it’s usually black or blue instead.
- The ground terminal is typically the one that is different and separate from the other pair – the top, rounded, or semi-rounded one in the triangular formation.
Step 2: Strip Off the Insulation
Remove the insulation layer, about ½ inch off the ends of both wires, using a wire stripper.

You can use pliers instead if you don’t have a wire stripper. Note that if the two wires were removed from a 2-prong plug, first cut out the plug header of the 2-prong plug before stripping the wires.
Step 3: Unscrew the Plug
Unscrew the 3-prong plug, including the wire binder, and remove its cover.

Step 4: Connect the Wires
Connect the 2 wires to the 3-prong plug.

First, twist the stripped ends of the two wires individually (not together) to make them compact. Then, insert the twisted ends into the screws of the 3-prong plug. Fasten the connection to the screws.
Note: The two terminals where you connect the two wires are neutral and live plugs/screws. The third plug is in the ground. The wires are color-coded in most cases, and you can easily distinguish between the neutral, hot, and ground wires.
Step 5: Restore the Cover
Restore the 3-prong plug’s cover.

Restore the 3-prong plug’s cover that you removed while wiring the plug. Screw the cover into place.
Finally, test your new plug before using it.
Grounding
You will have noticed that neither of the 2 methods provides a proper ground, as the ground connection is severed in both scenarios.
If you don’t have an earth wire, don’t be tempted to connect the neutral wire to the ground terminal or bridge the connection between the neutral and ground terminals. It could be dangerous.
Two wires, which are hot and neutral, cannot provide a ground connection. A 3rd wire is necessary to provide proper grounding, so use a 3-wire cable instead if you prefer grounding. Ensure the ground wire is connected to a metallic part of the appliance’s casing.
References
Website Resources:
- safety goggles. https://www.rollingstone.com/product-recommendations/lifestyle/best-safety-glasses-goggles-1083929/
- insulation layer. https://www.sciencedirect.com/topics/engineering/insulation-layer
Video References:
Andrea Goh
Technical Work