10 min read
How to Test 3-Wire Crank Sensor with a Multimeter (5 Steps)
A high-intensity operation can deteriorate a vehicle’s crankshaft position sensor over time.
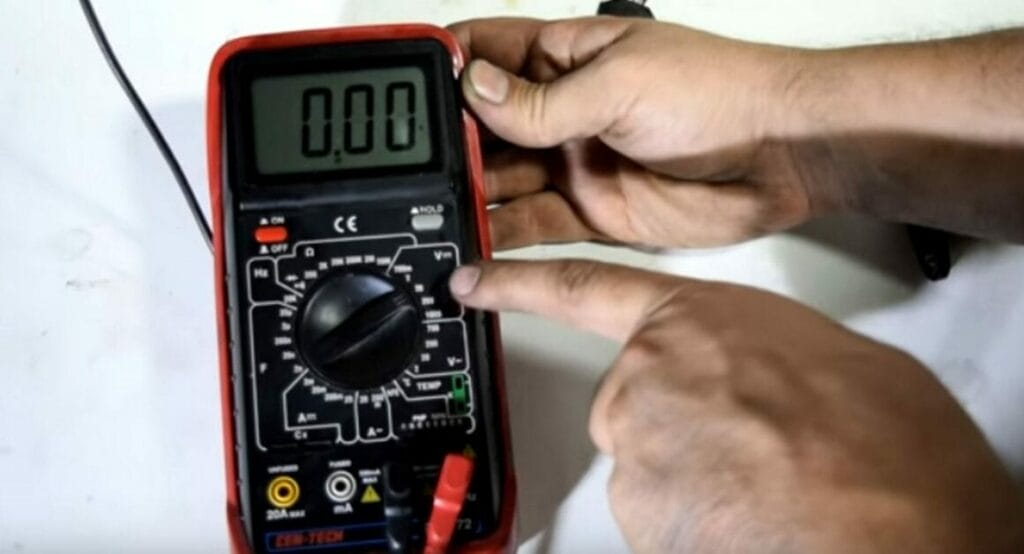
A weak or faulty crankshaft sensor can give rise to several issues, making it necessary to test it using a multimeter. A digital multimeter is ideal as it allows checking with greater precision than an analog one.
To test a 3-wire crankshaft sensor, set a multimeter to DCV, turn the ignition on without starting the engine, and attach the multimeter’s probes, as indicated in the table below.
- The sensor’s reference wire with the ground (ignition on) should be 5-12 volts;
- Its signal wire with the ground (engine on) should be around 5 volts;
- The battery’s positive with the sensor’s ground should be 10-12 volts;
- The sensor’s ground with the battery’s negative should give a beep.
| Test/Wire | Ignition/Engine | Positive (Red) Probe | Negative (Black) Probe | Expected Reading |
| Reference volt wire | Ignition on, engine off | Sensor’s reference wire | Ground wire or battery’s negative terminal | 5-12 volts |
| Signal wire | Engine on | Sensor’s signal wire | Ground wire or battery’s negative terminal | ~5 volts |
| Ground wire I | Engine off | The battery’s positive terminal | Sensor’s ground wire | 10-12 volts |
| Ground wire II | Engine off | Sensor’s ground wire | Battery’s negative terminal | (beep) |
See steps 4a, 4b, 4c, and 4d for the above 4 tests for more detailed instructions.
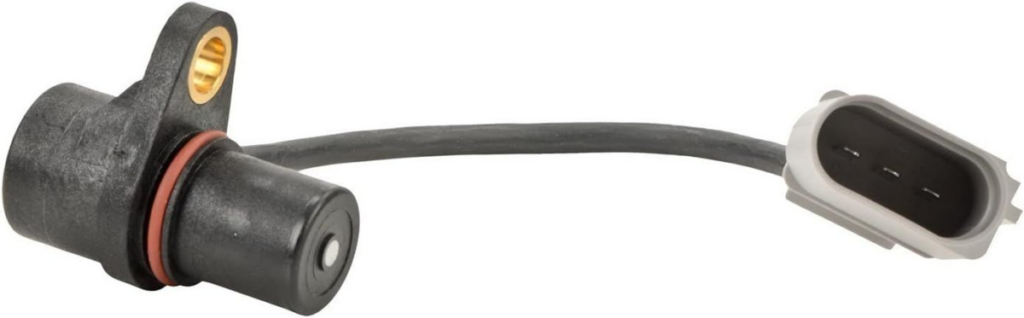
3-Wire Crankshaft Sensors
A crankshaft sensor, also known as the crankshaft position sensor, crank sensor, or camshaft sensor, is used in combustion engines to measure a crankshaft’s position and speed as it rotates. It helps ensure the crankshaft operates effectively and efficiently.
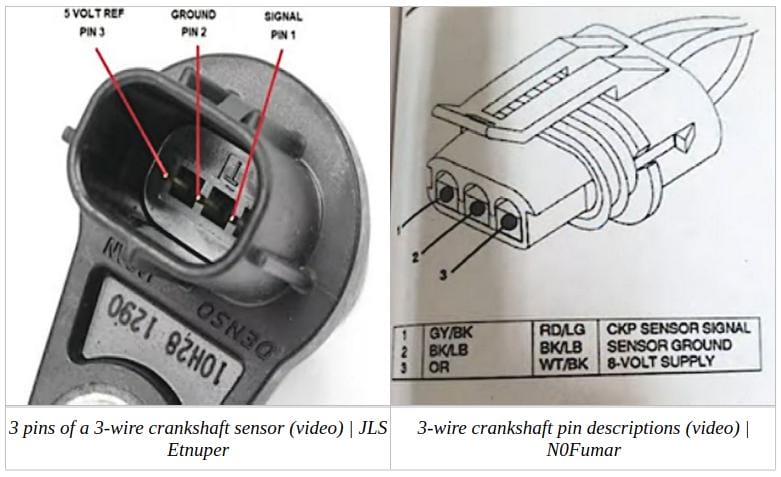
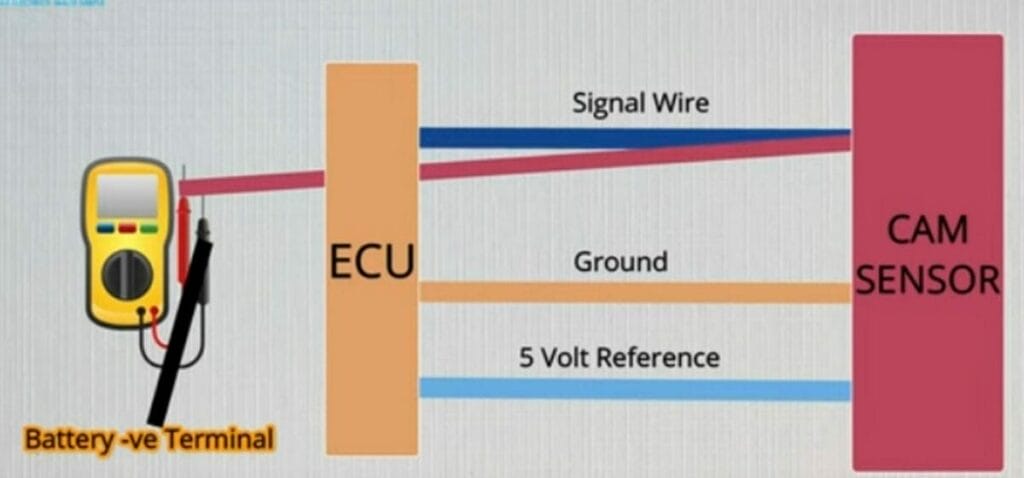
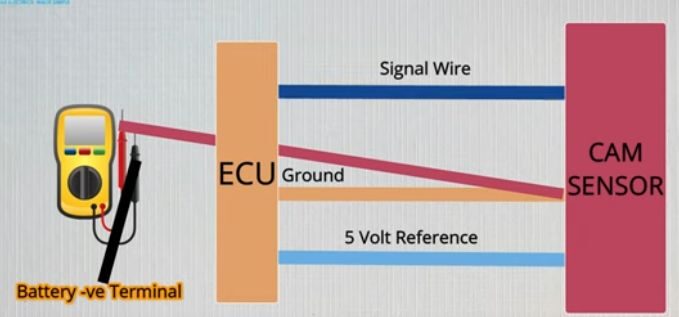
The 3 pins of a 3-wire crankshaft sensor are labeled below.
It has a signal pin, a ground pin, and a low-volt reference one. We will collect readings from all 3 while testing it and compare them with the values specified in the vehicle’s manual.
Correctly identifying the wires and pins is crucial because you must test the reference and signal separately against the ground one or the battery’s negative terminal. Refer to your vehicle’s manual if you are unsure which pin is which. The positions shown in the diagrams below are the typical ones.
Symptoms that Indicate the Need to Test a Crankshaft Sensor
Using a multimeter to test a crankshaft sensor’s performance can become important.
A malfunction of this component can result in a whole cascade of problems for your vehicle. Testing is, therefore, necessary to avoid such problems and failures in the future. It means preventing more costly repairs later on.
You will know that you need to test a crankshaft position sensor (CKP) if you experience one or more of the following issues frequently:
- Start and stall condition
- Cranking (non-start condition)
- Hard start
- Hesitation
- Rough idle
- Poor acceleration
- Misfiring
- Increased fuel consumption
- Check that the engine light comes on.
Sometimes, a camshaft position sensor can fail. Some symptoms could indicate the need to repair or replace the sensor, especially the following:
- The vehicle repeatedly stops accelerates slowly, the engine power is reduced, or the fuel consumption is inadequate. The camshaft position sensor may need to be replaced when a vehicle has one of these symptoms, although it can be a sign of another problem.
- The check engine indicator comes on. This can happen if the camshaft position sensor has a certain fault, although it can also lighten up for other reasons.
- The vehicle won’t start. A deteriorated camshaft position sensor can also cause other vehicle parts to deteriorate. This is a serious situation that can happen suddenly while parked or driving.
Testing a 3-wire Crankshaft Sensor with a Multimeter
Apply the general procedure described below to test a 3-wire crankshaft sensor with a multimeter if necessary or during a general maintenance check.
Refer to the vehicle’s repair instruction manual for exact specifications and more detailed instructions specific to your vehicle.
Step 1: Unplug the Crankshaft Position Sensor
Unplug the CKP sensor.
Step 2: Set the Digital Multimeter
Set your digital multimeter by selecting a low range on the DC voltage scale.
Step 3: Start the Ignition
Turn the vehicle’s key to the ignition ‘on’ position without starting the engine.
Step 4: Connect the Wires
Connect the multimeter’s red and black leads, as per the instructions in 4a, 4b, 4c, and 4d below, where we will test the sensor’s reference volt wire, the signal wire, and the ground wire (twice) in turn.
Here, preventing the engine from starting during Step 4a is important. You can remove the fuse and deactivate the fuel system if necessary.
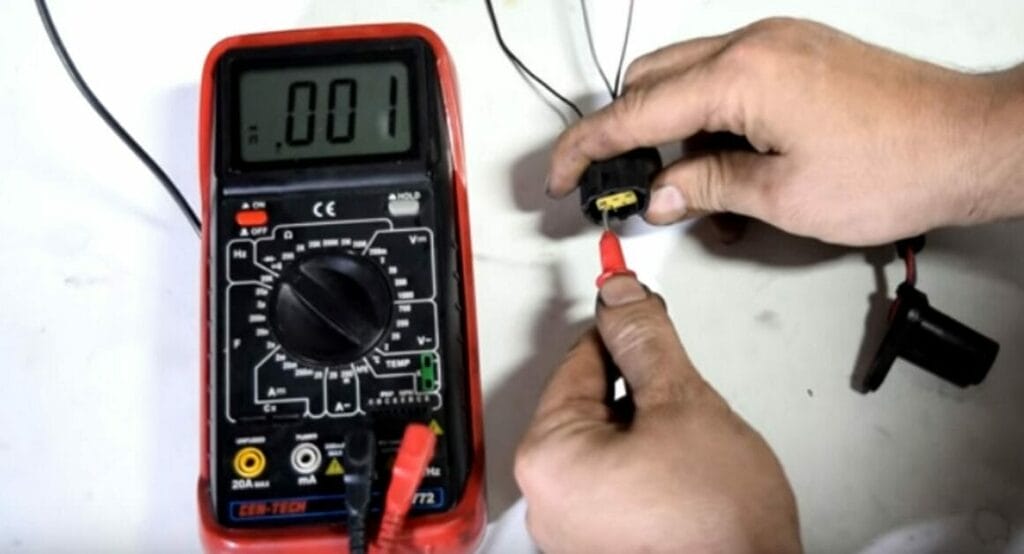
Step 4a: Test the Reference Volt Wire
Connect the multimeter’s red (positive) lead to the sensor’s reference volt wire or pin and the black (negative) lead to the sensor’s ground wire/pin or the battery’s negative terminal.
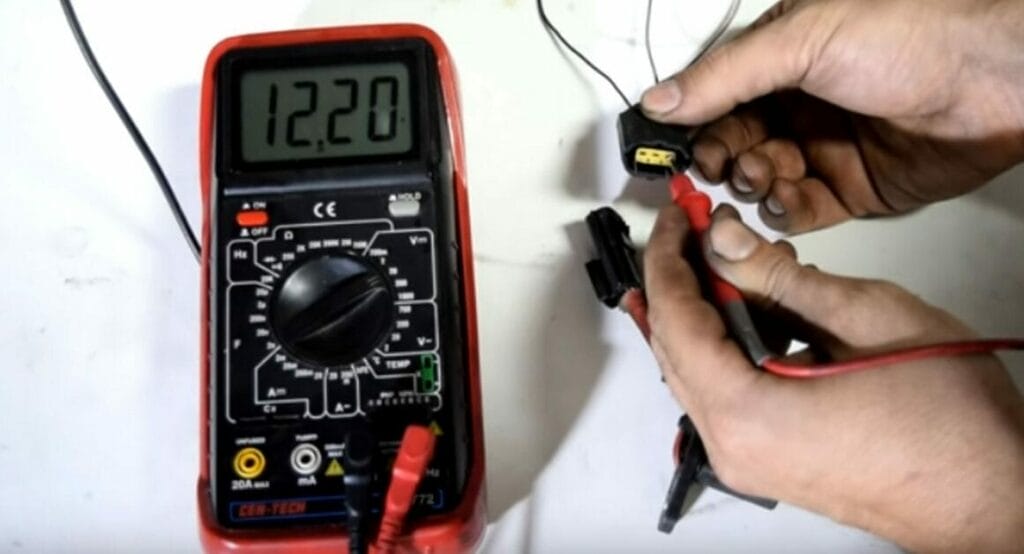
Step 4b: Test the Signal Wire
At this point, start the engine.
Then, connect the multimeter’s red (positive) lead to the sensor’s signal wire or pin and the black (negative) lead to the sensor’s ground wire/pin or the battery’s negative terminal.
Step 4c: Test the Ground Wire I
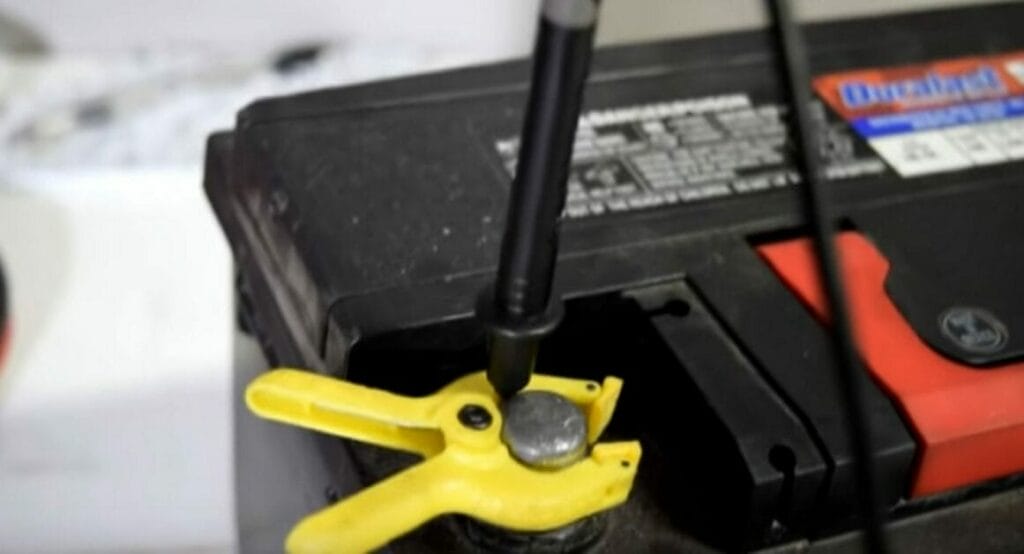
Turn the engine off again and disconnect the crankshaft connector.
Then, place the black (negative) lead on the ground wire and the red (positive) lead on the battery’s positive terminal.
Step 4d: Test the Ground Wire II
Place the red (positive) lead on the ground wire this time and the black (negative) lead on the battery’s negative terminal.
Step 5: Obtain and Interpret the Reading
Obtain a reading on the multimeter.
- Reference volt wire test – The reading should be between 5 and 12 volts, depending on the vehicle and sensor used.
- Signal wire test – The reading should be about 5 volts.
- First ground wire test – The reading should be between 10 and 12 volts.
- Second ground wire test – You should hear a beep, indicating the ground wire is fine.
Refer to the manual for the exact specifications. No reading, an inconsistent reading when testing multiple locations along the wire, or a value outside the range, in either case, suggests one of the wires may be faulty, or else the entire crankshaft sensor is faulty.
Replace all faulty wires, if any, and repeat the test.
Resetting a Crankshaft Sensor
Can You Reset a Crankshaft Position Sensor?
You can often resolve an issue by resetting the crankshaft position sensor, assuming it works fine.
Disconnecting the battery’s negative terminal is an effective way to do this. Keep it disconnected for about an hour before reconnecting it.
This procedure will allow you, for instance, to reset the engine check light. After this procedure, the short-term memory will be cleared because the electric power will have been drained while the battery is disconnected.
Procedure for Resetting a Crankshaft Sensor without a Scanner
Follow the procedure below to reset a crankshaft position sensor without a scanner.
- The coolant and air temperatures should be at 5 degrees Celsius. From then on, you can start the engine and keep it neutral for about 2 minutes.
- At this point, you should accelerate your vehicle to 55 miles per hour for about 10 minutes. The goal is to have the vehicle’s engine at the correct operating temperature.
- Once you have reached this temperature level, continue at the same speed for another 6 minutes.
- Once the 6 minutes have passed, slow down to 45 mph without using any brakes and continue for one minute.
- Every 25 seconds, you should decelerate and cycle four times without using the brakes.
- After the four cycles, you should continue at 55 mph for 2 minutes.
- Finally, stop the vehicle with the brakes applied and hold for 2 minutes. Also, the transmission should be neutral, and the clutch pedal should be depressed.

Replacing a Crankshaft Sensor
Is It Hard to Change a Crankshaft Sensor?
A weak or faulty crankshaft sensor must be replaced.
When changing a crankshaft sensor, it is possible to encounter an issue during the procedure, especially with the long stem. It can get stuck in the block and cause issues.
Therefore, it is necessary to hold the sensor firmly once it is loose. A rotational movement will be necessary to remove this part from the motor block. From there, you can replace the crankshaft sensor to avoid further issues in your vehicle.

References
Website Resources:
- HowStuffworks. https://auto.howstuffworks.com/camshaft.htm
- ScienceDirect. https://www.sciencedirect.com/topics/chemistry/crankshaft
- 3-wire crankshaft sensor. https://www.amazon.com/Bosch-Original-Equipment-0261210199-Crankshaft/dp/B006K8ZHEA/
Video References:
Easy Car Electrics
JLS Etnuper
N0Fumar
Ratchets And Wrenches