12 min read
How to Move Electrical Outlet (7 Quick Steps)
Hey everyone! So, you’ve got a power outlet that’s not cutting it where it is, right? Maybe it’s in an awkward spot, or you’ve shuffled around your room, and now it’s out of reach. I get it, and I’m here to help you fix that.
Quick Summary: Moving an outlet is easy with these steps:
- Step 1: Disconnect the Power – Ensure you turn off the power at your main circuit breaker.
- Step 2: Remove the Old Outlet – Carefully remove the cover, unscrew the outlet, and disconnect the wires.
- Step 3: Plan Your New Outlet Location – Pick the perfect new spot for your outlet.
- Step 4: Run the Wiring – If you need more length, run a new wire from the old outlet to the new location.
- Step 5: Install the New Box – Fit your new outlet box into the wall, ensuring it’s snug and secure.
- Step 6: Connect the Wires – Attach the wires to your new outlet just like they were on the old one, ensuring a solid and safe connection.
- Step 7: Test and Finish Up – Once everything’s hooked up, turn the power back on and test the outlet for function and safety.
I will break down how you can do this step by step. Stick with me, and let’s turn that electrical inconvenience into a home improvement win!
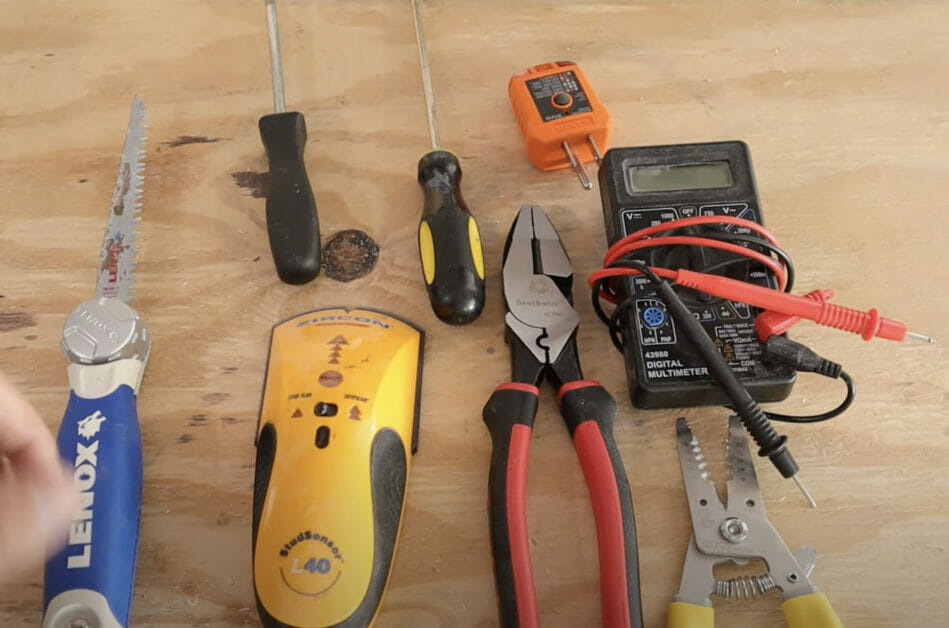
Tools and Materials
Let’s gear up for moving that outlet. Here’s what you’re going to need:
- Pencil: This is your roadmap—Mark where you will cut for the new outlet.
- Hammer: Essential for any DIY project, right?
- Screwdriver: I can’t do much with outlets without this guy.
- Cutter or Drywall Saw: For carving out that new spot on the wall. Be precise!
- Power Drill (maybe): This is your go-to tool if things get tough or you need extra precision.
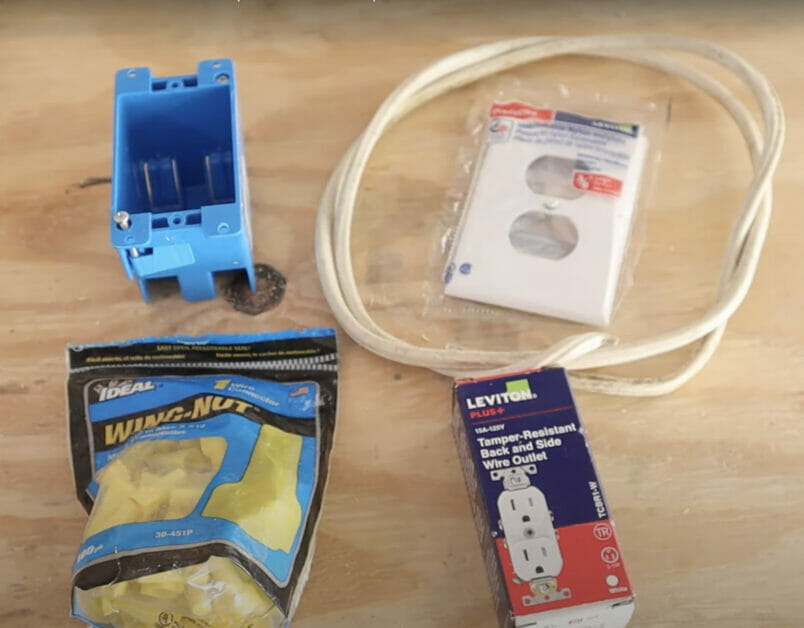
- New Outlet Box: This is the new home for your outlet.
- Wire: You’ll need this to connect your new outlet, especially if it’s further away from the original spot.
- Wire Cutters and Wire Nuts: Adjust the wire lengths and secure connections.
Video | How To Home
Moving an Electrical Outlet
I’m going to walk you through moving an electrical outlet. Let’s get into it!
Step 1: Disconnect the Power
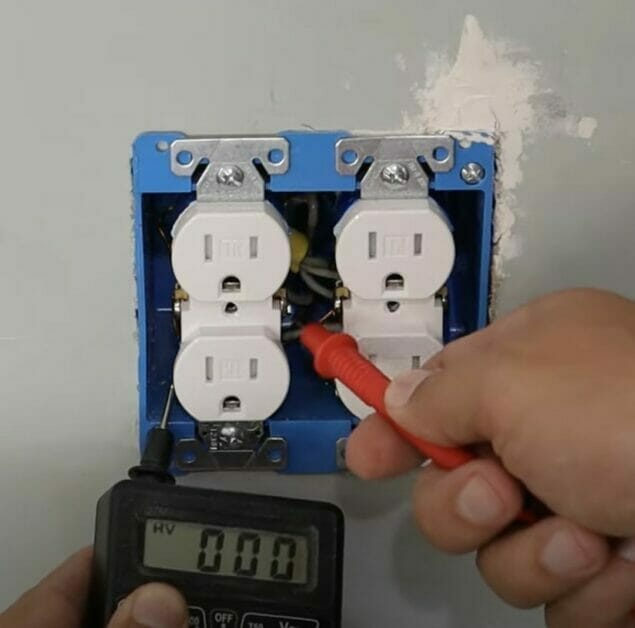
Safety first, folks! Head over to your main panel and switch off the circuit breaker for the room you’re working in.
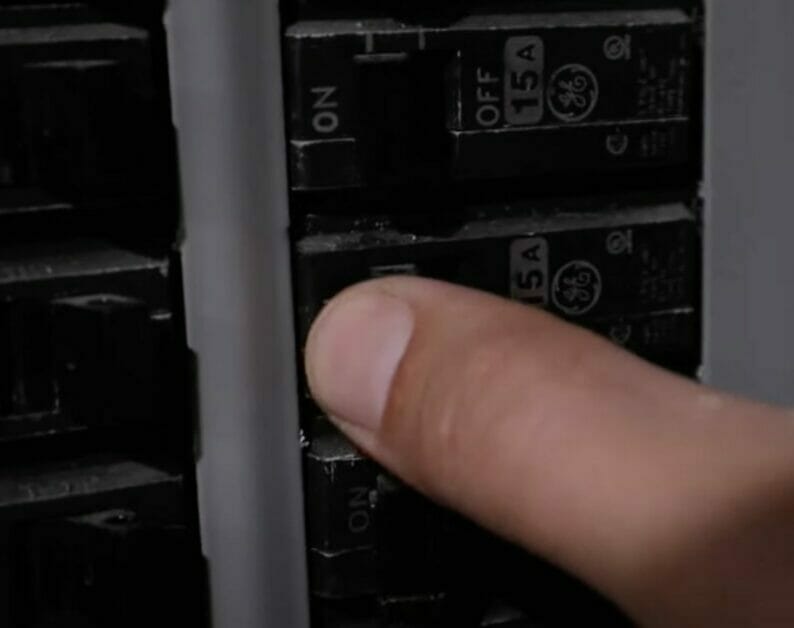
Always double-check with a voltage tester to ensure there’s no power. You don’t want any surprises!
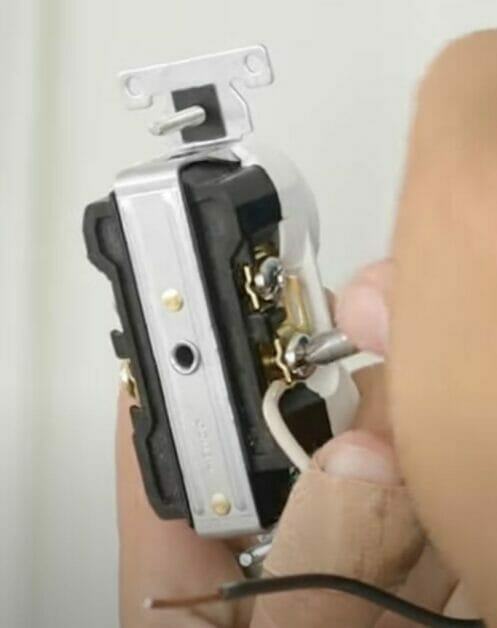
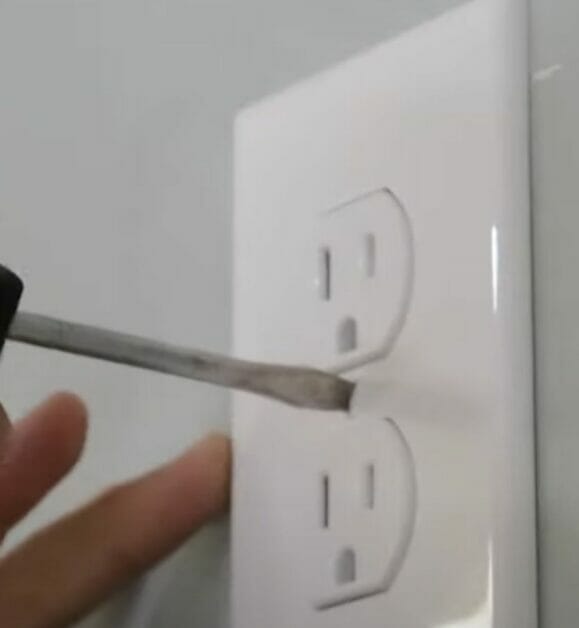
Step 2: Remove the Old Outlet
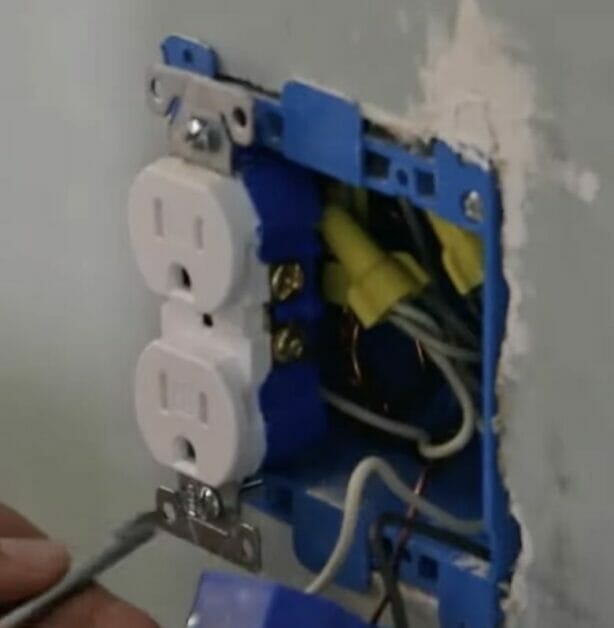
Now, let’s remove that old outlet. Take off the cover plate, then gently pull out the outlet.
Disconnect the wires – but hey, remember how they’re connected. You’ll need that info later.
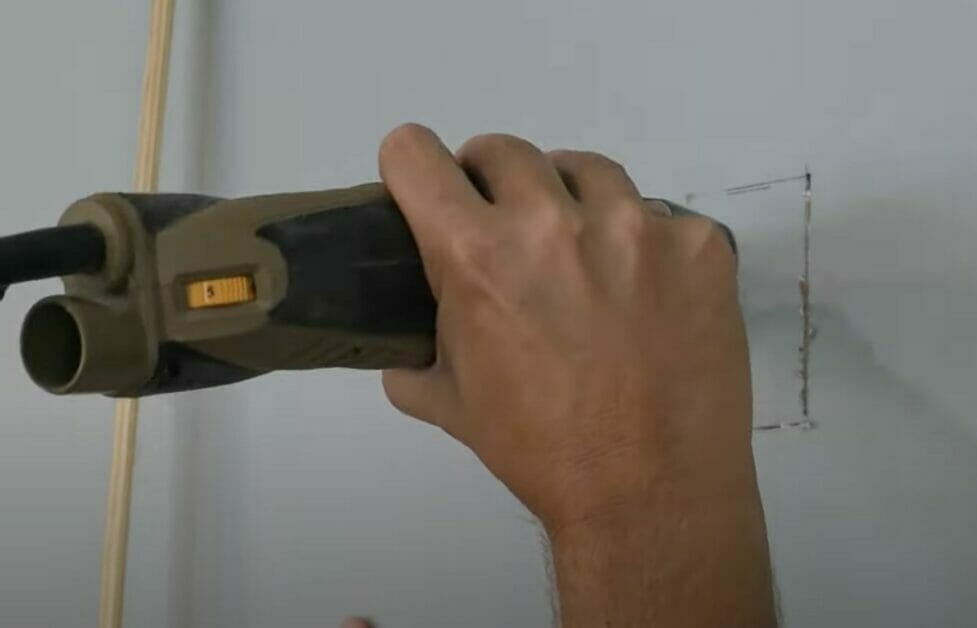
Step 3: Plan Your New Outlet Location
Choose where you want your new outlet. Keep it away from any studs in the wall.
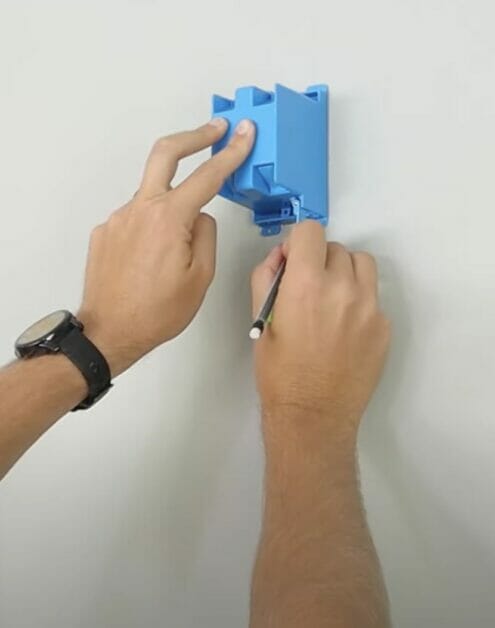
Mark the spot and use a drywall saw or a multi-tool (my favorite for a clean cut) to open your new outlet box.
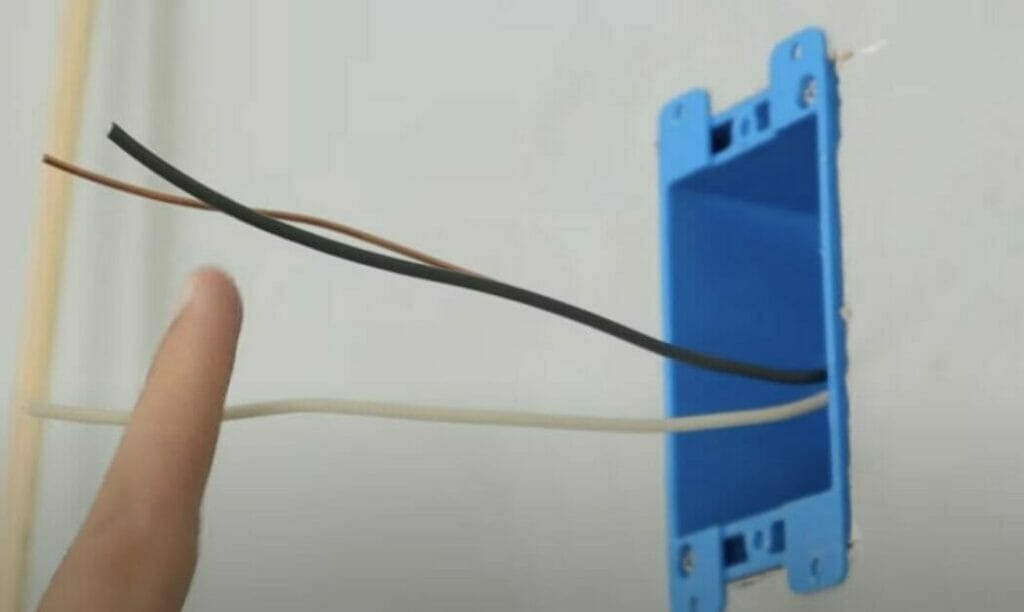
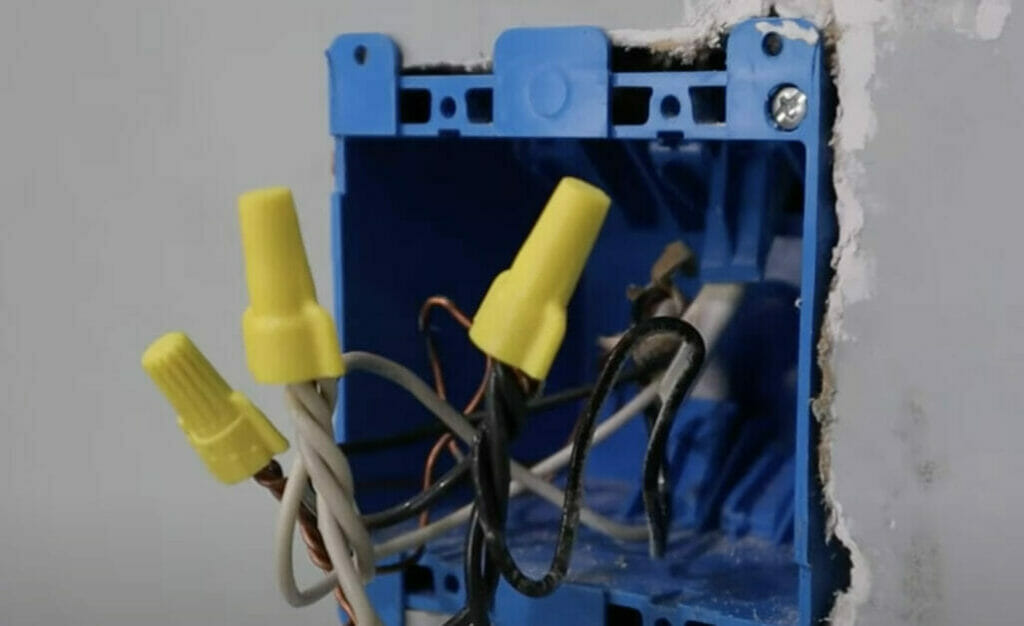
Step 4: Run the Wiring
You might use the existing wire if the new spot is close enough. Otherwise, you’ll need a new wire.
Run it from the old box to the new location. A fish tape can be super handy for this part.
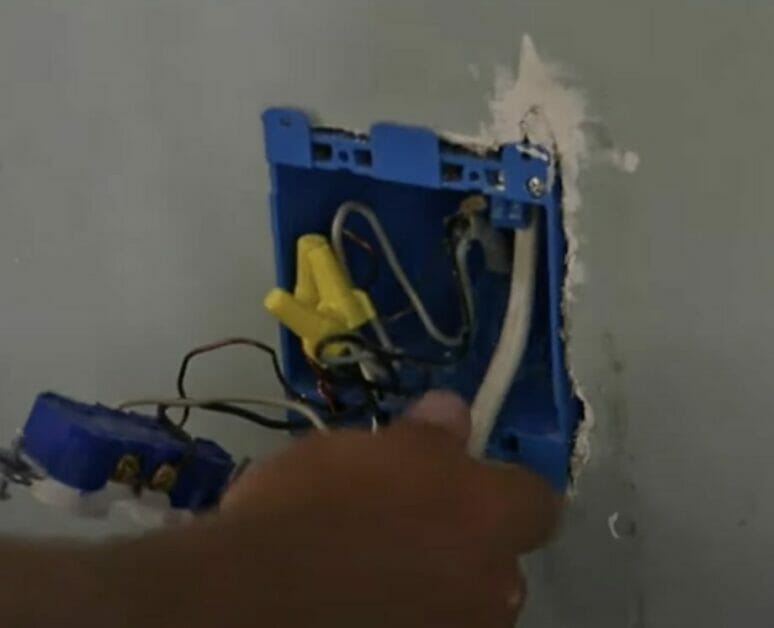
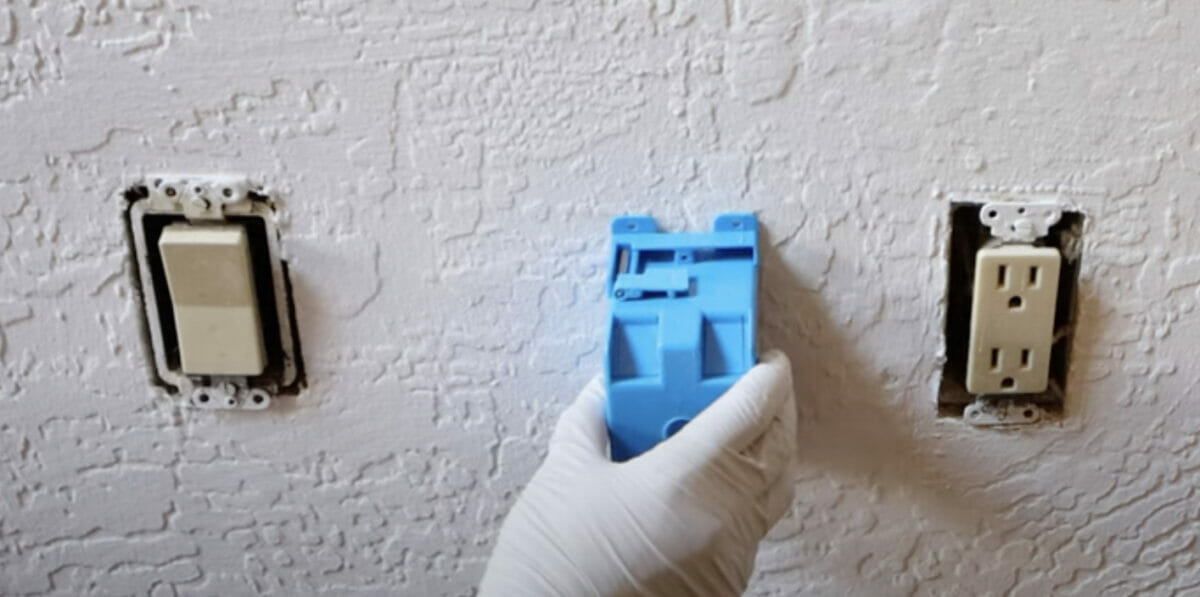
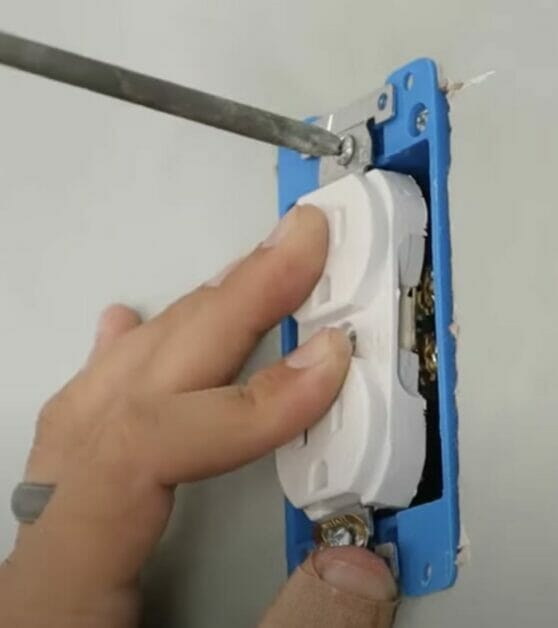
Step 5: Install the New Box
Put your new outlet box into the hole. If it’s the kind with clamps, make sure they grip the back of the drywall tightly. This step is crucial for a secure fit.
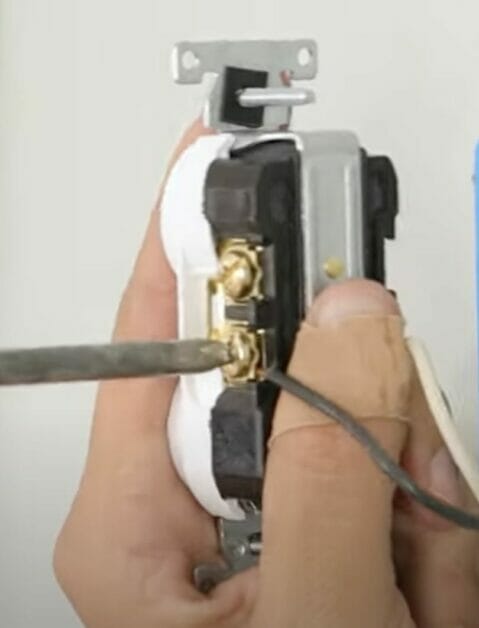
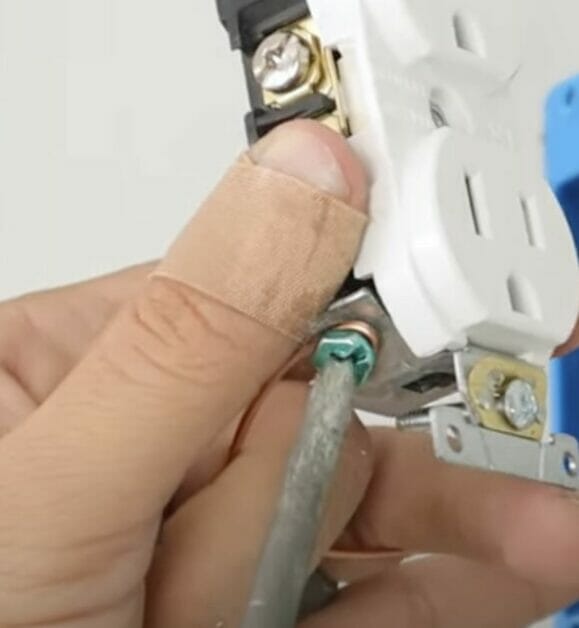
Step 6: Connect the Wires
Now, connect the wires to your new outlet. Follow the same wiring setup as the old one – black to brass, white to silver, and don’t forget the ground wire to the green screw. Precision is key here.
Video | How To Home
If you connect wires, you use wire nuts to hold the wires of the same color together.
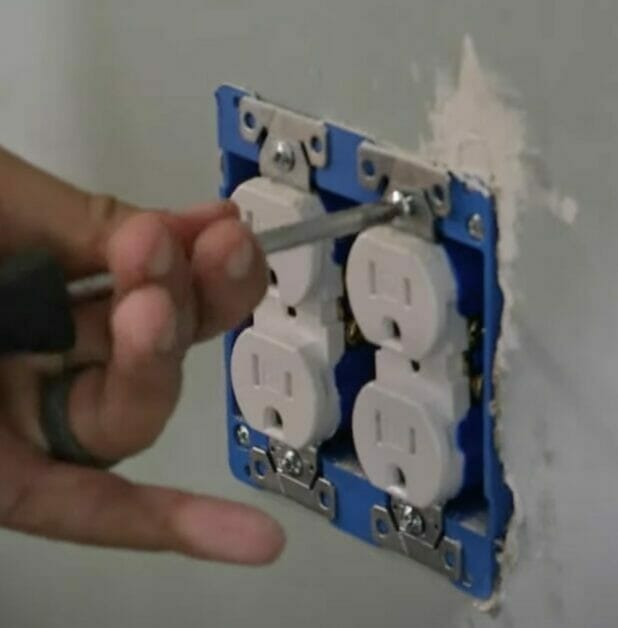
Step 7: Test and Finish Up
Once everything’s connected, turn the power back on and test the outlet with a tester. If all’s good, secure the outlet in the box and screw on the cover plate. Voila! You’ve got a new outlet in the perfect spot.
Video | How To Home
Troubleshooting When Moving an Outlet
Let’s dive into some common hiccups you might run into when moving that outlet and how to tackle them step by step.
Encountering Unexpected Wiring Configurations
- Problem: You open up the wall, and, to your surprise, the wiring doesn’t match what you expected. Maybe there are more wires, different colors, or an odd arrangement.
- Solution: First, don’t panic. Take a photo of the original setup before disconnecting anything. If you see wires that aren’t the standard black, white, and copper, it’s time to research. Different colored wires can indicate different functions. A wiring diagram can be super helpful here. If you’re still unsure, this is a good time to call in a pro for advice.
Dealing with Older Wiring
- Problem: Older homes can have wiring that’s not up to current standards, like lacking a ground wire.
- Solution: Safety first! If you don’t see a ground wire (that’s the bare copper one), it’s a sign of outdated wiring. In this case, consider upgrading the wiring to include a ground. This might be a bit beyond DIY for some, so consulting an electrician is a smart move. Remember, messing with old wiring can be risky, so better safe than sorry.
Wire Length Issues
- Problem: You’re moving the outlet, but the existing wire is too short to reach the new location.
- Solution: You’ve got a couple of options here. You can add a junction box at the original location and run a new wire to the new outlet. Ensure this junction box remains accessible – no hiding it behind the drywall! Two, you can run a new wire from another power source, but this can get tricky, so be sure you understand the route and connections.
Damaged Wires
- Problem: You find damaged or frayed wires when removing the old outlet.
- Solution: Safety alert! Damaged wires need to be replaced. You can cut back to undamaged wire if the damage is near the end. If the damage is extensive, you must replace the entire wire run. Don’t take chances with damaged wiring.
Difficulty Fitting the New Box
- Problem: The new box doesn’t fit snugly into the wall, or you’re having trouble securing it.
- Solution: If the hole is too big, you can use drywall patches or shims to secure the box. If it’s too small, carefully enlarge the opening. Always ensure the box is firmly attached to the wall or a stud. A wobbly box can lead to loose connections down the road.
Reversed Connections
- Problem: You’ve wired everything up, but something’s not right. Maybe the outlet isn’t working, or it trips the breaker.
- Solution: Double-check your connections. The black (hot) wire should connect to the brass screw, the white (neutral) to the silver screw, and the ground wire to the green screw. If you’ve mixed these up, it can cause problems. Always follow the wiring scheme of your specific outlet.
Remember, DIY can be rewarding, but your safety is paramount. Consulting a professional is the best action if you’re ever in doubt. Happy fixing!
Electrical Outlet Maintenance Tips
Let’s talk about keeping those outlets in top shape. Regular maintenance is key to ensuring they stay safe and functional. Here’s a straightforward schedule to help you keep track:
| Maintenance Task | Frequency | Details |
|---|---|---|
| Visual Inspection | Every 6 Months | Check for any visible damage like cracks or discoloration. If an outlet looks old or worn, it’s time to consider replacing it. |
| Test Outlet Function | Every 6 Months | Plug in a small appliance to ensure each outlet is working properly. If you notice any flickering or inconsistent power, it could indicate an issue. |
| Check for Loose Plugs | Annually | Plugs should fit snugly. If they’re loose, it could be a sign of wear inside the outlet. This can lead to overheating and potentially fire hazards. |
| Safety Test (GFCI Outlets) | Every 3 Months | Ground Fault Circuit Interrupter (GFCI) outlets, typically found in bathrooms and kitchens, use the test and reset buttons to ensure they work. |
| Dust and Debris Cleaning | Every 3-4 Months | Keep outlets dust-free. Use a dry cloth or compressed air to gently clean them. Be cautious not to push debris inside the outlet. |
| Professional Inspection | Every 5 Years | Having a professional electrician inspect your home’s electrical system, including outlets, is a good idea to ensure everything is up to code. |
Regular maintenance can go a long way in preventing problems, but always err on caution. Keep these tips in mind, and you’ll be all set!
Frequently Asked Questions
- Do I Need a Permit to Move an Electrical Outlet?
- In many areas, yes. Electrical work often requires a permit, especially if it involves wiring changes. Always check with your local building department to stay on the safe side.
- Can I Move an Outlet Myself, or Should I Hire a Professional?
- If you’re comfortable with basic DIY tasks and understand electrical safety, you can try moving an outlet yourself. However, hiring a professional electrician is best if the project seems complex or you’re unsure.
- What Should I Do If I Encounter Old or Damaged Wiring?
- If you come across old or damaged wiring, it’s safest to replace it. Working with old wiring can be risky and may not meet current safety standards. In such cases, consulting an electrician is advisable.
- What’s the Ideal Height for an Electrical Outlet?
- Typically, outlets are placed about 18 inches above the floor. However, this can vary based on your needs and the room’s layout. For example, outlets for wall-mounted TVs might be higher.
- How Can I Cover the Old Outlet Space?
- You can use a solid wall plate to cover the old outlet space. If you want to patch it up completely, use a small piece of drywall, joint compound, and some paint. It’s like it was never there!
References
Organizations:
- National Fire Protection Association (NFPA). https://www.nfpa.org/en
- Underwriters Laboratories (UL). https://www.ul.com/
Books:
- “Wiring a House” by Rex Cauldwell. https://www.barnesandnoble.com/w/wiring-a-house-rex-cauldwell/1118175264
- “Electrical Wiring Residential” by Ray C. Mullin and Phil Simmons. https://www.barnesandnoble.com/w/electrical-wiring-residential-ray-c-mullin/1116778103
Website Resources:
- The Spruce – Electrical Repair Tutorials. https://www.thespruce.com/electrical-4127800
- This Old House – Electrical. https://www.thisoldhouse.com/electrical
Video References:
How To Home