9 min read
How to Install a 220v Outlet in a Garage (9 Steps)
If you plan to install a 220v outlet in your garage, I’ll show you how to do it step-by-step.
A 220-volt outlet is useful in a garage for operating high-powered appliances. 220v outlets are similar to ordinary 110v ones except that they take 2 110-volt hot wires instead of one and are larger.
The procedure to install a 220v outlet in a garage is similar to installing a regular outlet except that you have 2 hot wires to attach instead of one hot and one neutral.
However, some extra considerations exist when installing an outlet and wiring in a garage. I cover this information below as well.
Installing a 220V Outlet in a Garage
Requirements
You will likely need the following items, depending on your project’s complexity:
| Knowledge | Tools | Fixtures |
NEC 211.10(C)(4) since 2014 Section 210.52(G) The information in this Toolsweek article How to install an outlet 220v requirements | Pencil Measuring tape Flashlight or lamp Screwdrivers Electrical tester Wire stripper Cordless drill Hammer Staple gun | Electrical boxes Outlets Wire (10/12 gauge) Conduits (if exposed wiring) Circuit breaker (20 or more amps, 2-pole) |
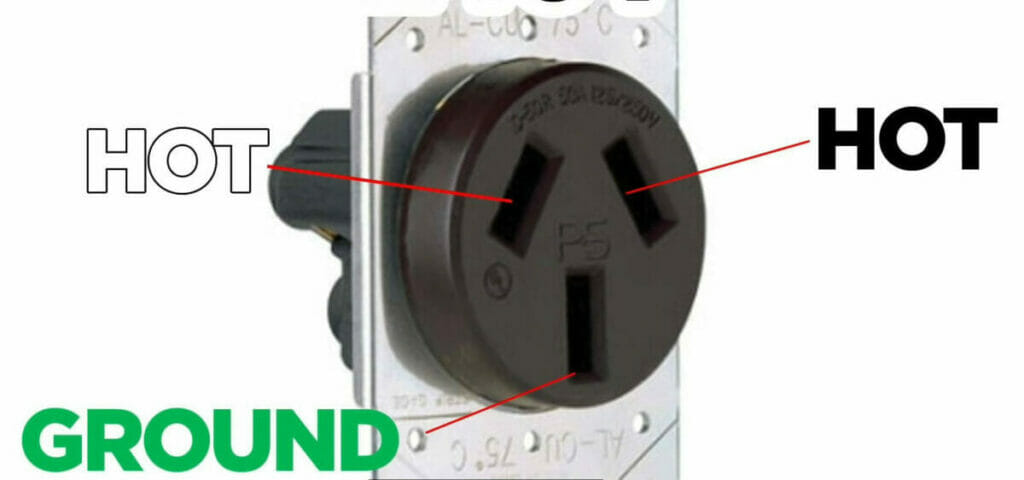
220-Volt Outlets
Besides the two hot wires (3-phase system), the external face of this outlet is also different, depending on the circuit’s ampacity, like one of those shown below.
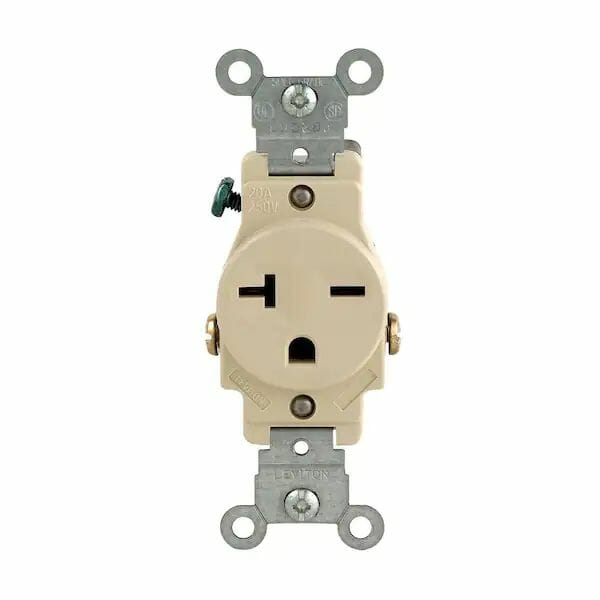 | 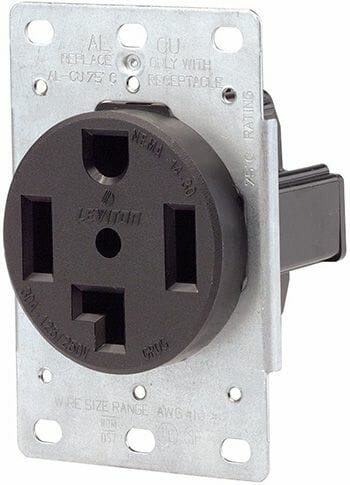 | 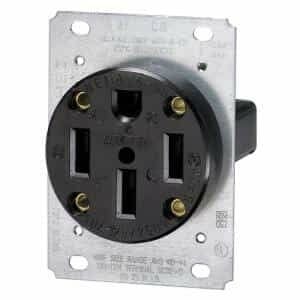 |
If you see a three-slot 220v outlet, the top 2 diagonal slots are for the hot wires (see picture below).
Estimated Time
The estimated time to install a 220v outlet in a garage is a few hours if the wiring is already present to one day if you need to wire the garage, depending on your expertise. If you install multiple outlets or arrange a complex layout, it might take up to 3 days.
Important Things to Consider
- Is it a residential or commercial garage? Remember: Romex wiring for a residential garage and metal raceways for a commercial garage.
- Is it an attached or detached garage? Power is necessary for an attached garage but optional in a detached garage unless it is wired. An attached garage will have its circuit but be connected to the rest of the house, whereas a detached garage will have a separate system.
- How many parking bays and workbenches? You’ll need at least one outlet per parking bay, above 18” from the floor, and one for each workbench about 4’ from the floor, plus lighting.
- Are you going to install multiple outlets? If so, space them at least 6 feet apart.
- Are you going to install concealed or exposed wiring? You can cover the wiring with drywall or use conduits for exposed wiring. The ideal time for concealed wiring is during construction.
- Are you going to install a garage door opener? If so, you’ll need at least a 14-gauge wire (12-gauge if it operates on high power).
For more detailed information, see ‘Outlets in Garages’ below.
Installing the Outlet
To explain the method, I’ll show you how to install a single 220v outlet for a parking bay in your garage.
I assume that yours is an attached garage with a power supply, and you chose to do concealed wiring inside a stud wall.
Here are the steps to follow in order:
- Step 1: Mark the spot
- Step 2: Drill the holes
- Step 3: Set the box
- Step 4: Run the cable
- Step 5: Secure the cable
- Step 6: Cut the cable
- Step 7: Wire the outlet
- Step 8: Secure the outlet
- Step 9: Connect the power supply
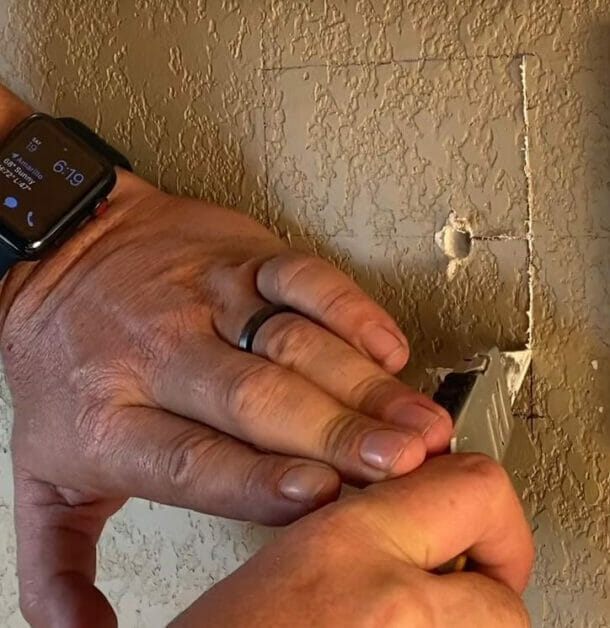
Step 1: Mark the Spot
Firstly, mark the exact spot where you want the outlet located.
Remember that a parking bay must be no less than 18” from the floor. I suggest placing its height within the 2’ to 3’ range. If you have a stud wall, you’re also limited by placing the outlet against one of them horizontally.
Make an outlet with a pencil around the electrical box.
Step 2: Drill the Holes
Drill holes, as necessary, to fix the outlet and run the cable through each stud to reach the power supply.
The stud holes must be at least 1¼” in from the front. Once drilled, cut around it for the box.
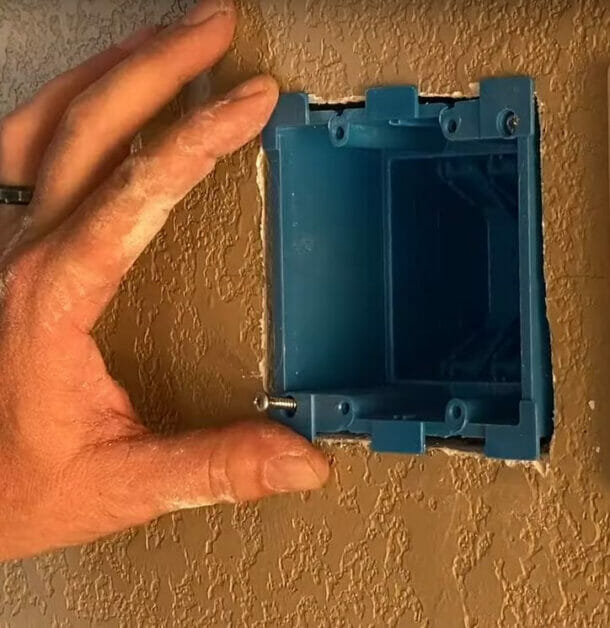
Step 3: Set the Box
After you’ve cut the space for the electrical box, you can set the box into place.
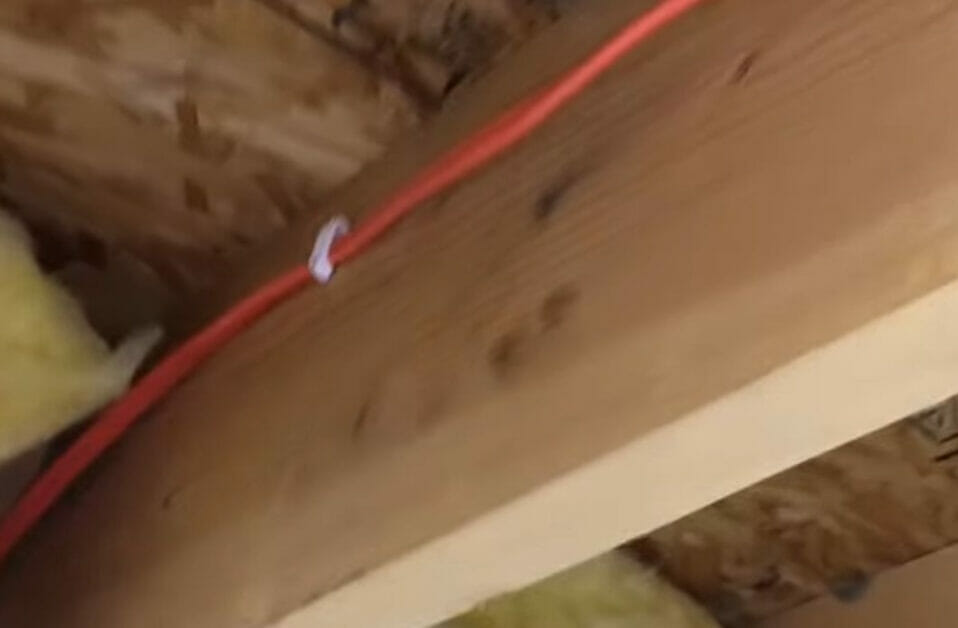
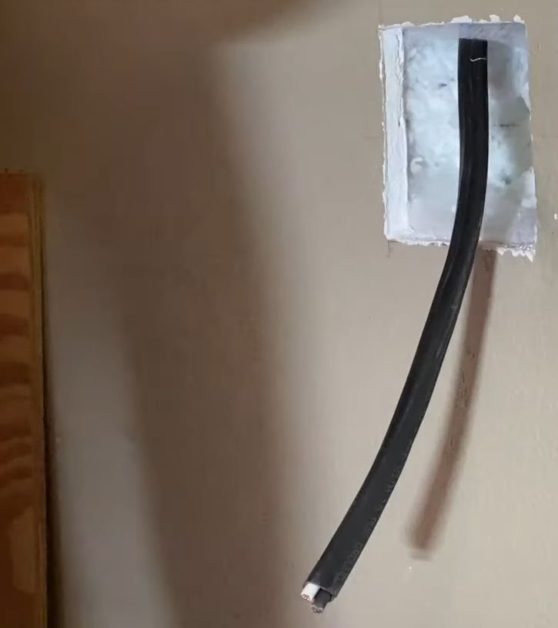
Step 4: Run the Cable
Strip at least 6” of sheathing from each wire’s end and thread the cable through the opening in the box and each stud.

Step 5: Secure the Cable
Once you’ve run and set the cable, you must secure it using clips or staples. The spacing should not be more than 4’ apart.
Ensure the cable is tight around beams, roofs, and corners.
Step 6: Cut the Cable
When you reach the outlet, leave at least 12” at the end before cutting the cable.
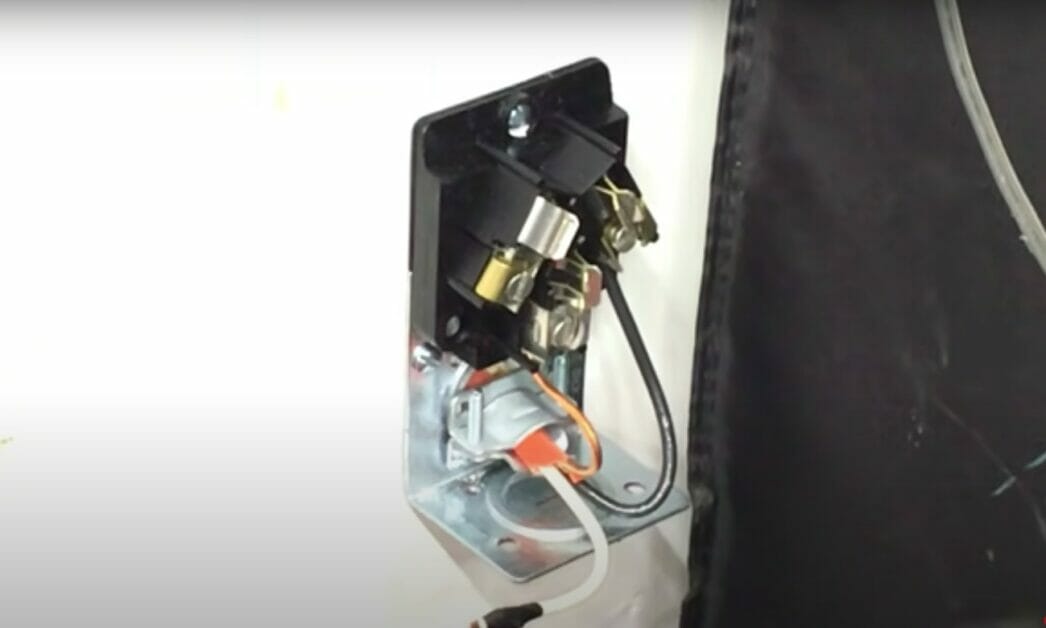
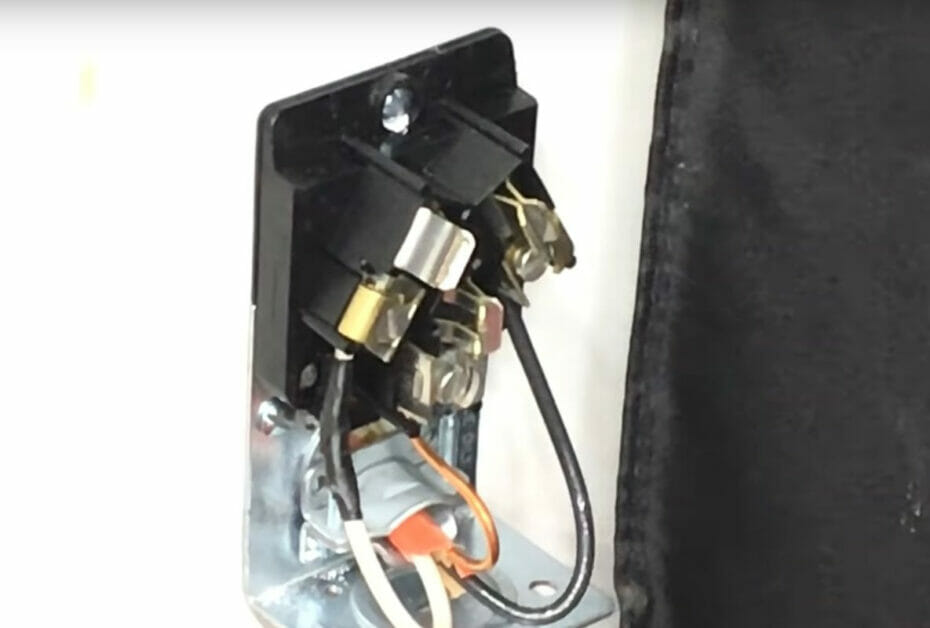
Step 7: Wire the Outlet
The inside of the 220v outlet will look something like the picture below before attaching the cover.
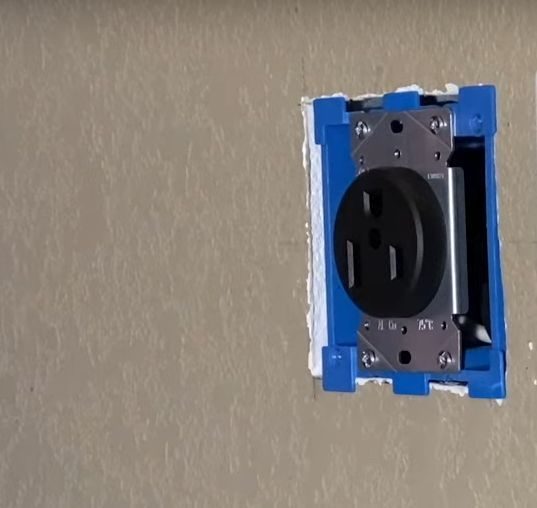
Step 8: Secure the Outlet
You can now secure the outlet in place.
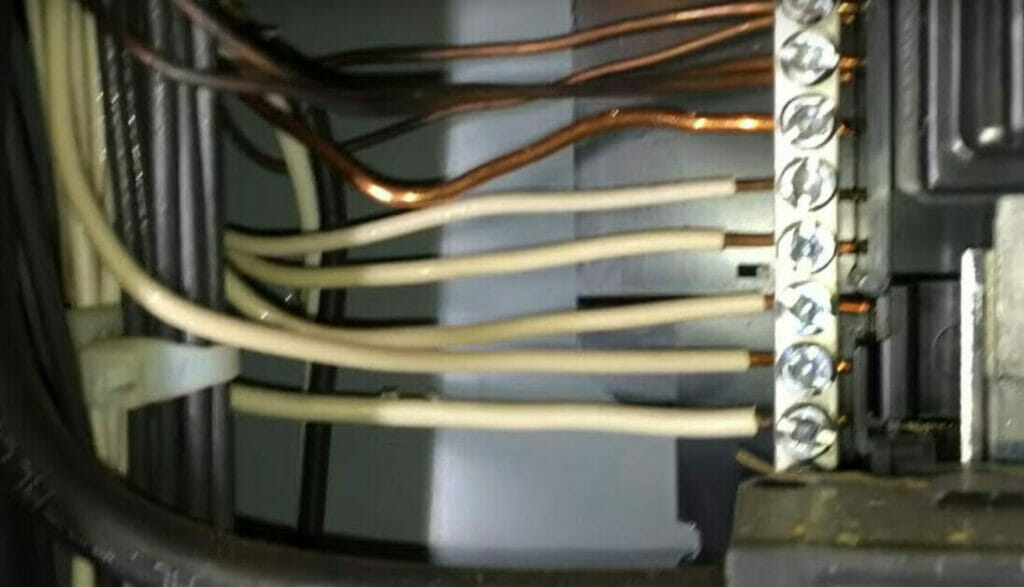
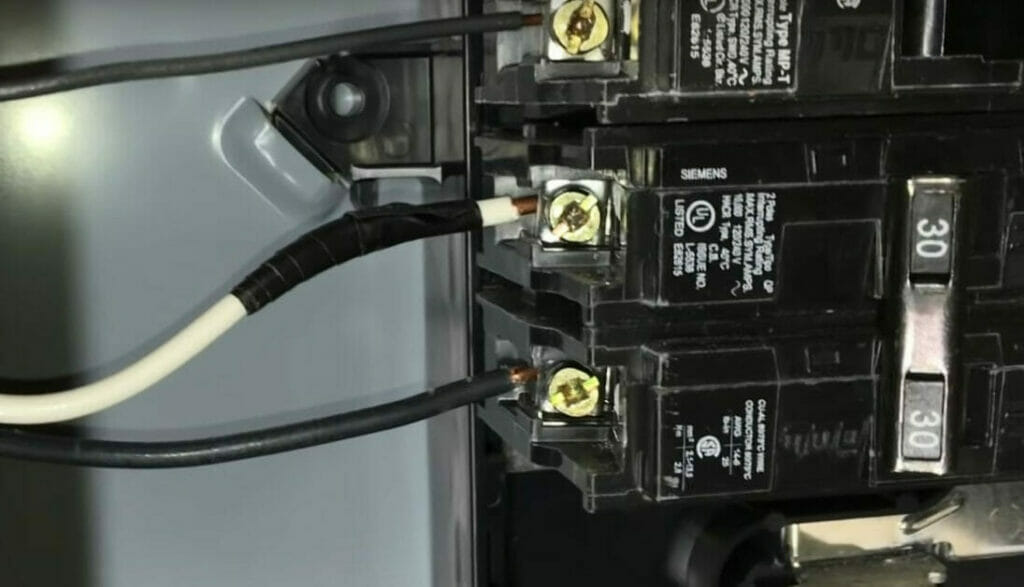
The two (white and black) hot wires will be connected to the double-pole circuit breaker, as shown below.
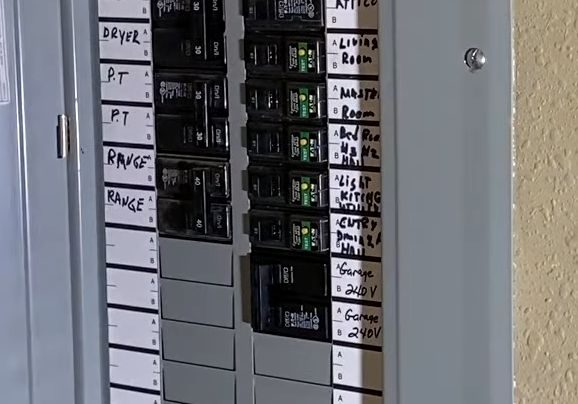
Labeling the new 240v outlet for the garage in the panel alongside its circuit breaker is a good idea. See the bottom right in the picture below.
Outlets in Garages
Outlets
The outlets installed in garages are often 220-volt so that you can use power tools or other high-powered appliances.
They are usually fitted on at least 20- or 30-amp circuits, i.e., with 20- or 30-amp circuit breakers and the appropriate wiring to handle large currents. A minimum 20-amp dedicated circuit is a legal requirement for a garage, as per NEC 211.10(C)(4) since 2014. This applies to attached garages, whereas power is optional in a detached garage unless wired.
As per Section 210.52(G), there must be at least one outlet for each car space, and the branch circuit supplying them must not supply other outlets outside. It is permitted to connect them to nearby outlets to offer them the same protection as in a daisy chain, but not to other outlets elsewhere in the house.
Also, it must have GFCI/AFCI protection. AFCI protection is essential in a parking bay due to the fire risk from gasoline fumes. Another requirement is that such an outlet be situated above 18 inches from the floor for the same reason.
If it’s a commercial garage, an outlet must also be installed near the door so that a welder can use it for outdoor work nearby. The outlet can alternatively be installed as an extension on the exterior wall.
Supply and Wiring
You have three options for the power supply to the outlet: The garage can either have its service or gets power via an underground or aerial feeder from the house. [Herres, 2015]
How the garage is wired depends on whether it is residential or commercial. The wiring in a residential garage is usually done in Romex (Type NM cable). It resembles typical household wiring with GFCI outlets.
In a commercial garage, you will normally see metal raceways for the wiring. It would be a code violation to wire a commercial garage in Romex due to the greater hazards present in them.
References
David Herres. The homeowners’ DIY guide to electrical wiring. McGraw Hill. 2015.
Video References
6th Gear Garage
TX Tool Crib