
15 min read
How I Made My Small Bathroom Look Twice as Big — No Demo Required


Edited by: Louise (Editor In Chief)
Fact/quality checked before release.
Fact/quality checked before release.
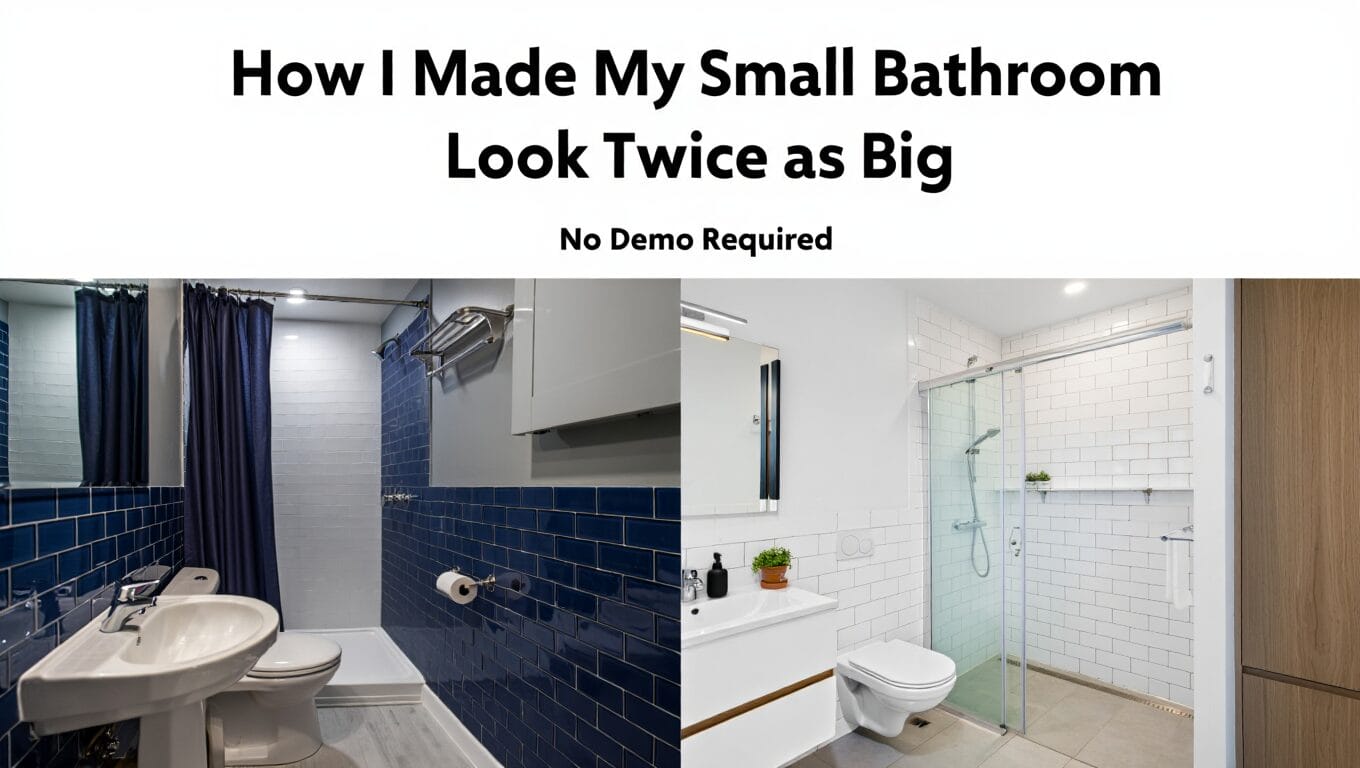
Let me just start by saying—if your bathroom feels more like a closet than a calming oasis, you are not alone. My bathroom? Tiny. We’re talking barely enough room to turn around without smacking into something. For the longest time, it drove me nuts. I dreamed of knocking down walls, gutting everything, starting fresh. But… demo is expensive, messy, and way above my DIY pay grade.
So I challenged myself: could I make this cramped little space feel open, light, and maybe even a little luxurious—without touching a single wall?
Spoiler alert: I did it, and you can too.
Whether you’re renting, budgeting, or just not ready for a renovation, I’m about to walk you through the exact tricks I used to make my bathroom feel twice as big—visually, emotionally, and honestly, even practically. These are high-impact changes that require no demolition, minimal tools, and best of all? They actually work.
Let’s dive in.
I Ditched the Dark—and Let the Light In (Literally and Figuratively)
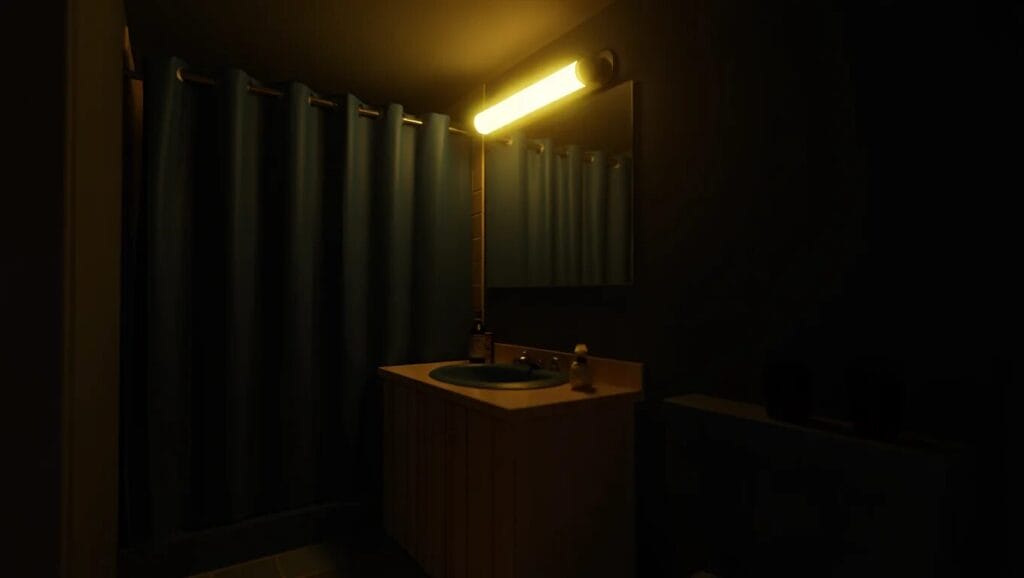
The first thing I noticed when I started really analyzing my bathroom was how dark and heavy it felt. And not just because it’s a windowless, shoebox-sized space (though that didn’t help). The real issue? My color palette.
There were gloomy grays on the walls, a brown wood vanity, a dark shower curtain that sucked all the light out of the room—and overhead lighting that was basically a dim, yellow sigh.
If you’re trying to make a small space feel bigger, the first rule is this: light is your best friend. So here’s what I did to brighten things up without touching the walls or rewiring anything.
✨ I Repainted Everything (Including the Ceiling)
I chose a clean, cool-toned white for the walls—specifically Sherwin-Williams “Extra White” in a satin finish. Why satin? It reflects light better than matte, and in a steamy bathroom, it holds up well against moisture.
But I didn’t stop there. I also painted the ceiling the exact same color. This trick visually erases the hard line where the walls meet the ceiling, making the whole space feel taller and airier.
And yes—white bathrooms can feel clinical if you don’t warm them up with texture and contrast (more on that later). But in a tiny room? White is magic.
💡 I Swapped Out the Light Fixture (In Under 10 Minutes)
This was maybe the easiest and most impactful change. My old fixture was a single, yellow-tinged bulb in a frosted-glass globe. Cute in 1995. Not so much now.
I found a sleek, LED vanity bar on Amazon that gives off bright, natural white light—and bonus: it was super affordable. I’m not an electrician, but changing out a light fixture is totally doable with the power off and a little YouTube guidance. (Always turn the breaker off, though. Seriously.)
Now my bathroom looks like it’s bathed in daylight—even at 10 p.m.
🪞 I Went Bigger With the Mirror
Here’s a small-space secret: mirrors are your optical illusion MVPs. My old mirror was tiny and framed, so it felt like a picture hanging on the wall, not like a light-reflecting surface.
I swapped it for a large, frameless mirror that nearly spans the width of the vanity. It instantly made the room feel deeper. Plus, the reflection bounces all that beautiful light around the room, multiplying it.
Tip: If you can’t find a big mirror in your budget, check home improvement stores for builder-grade mirror panels—they’re inexpensive, minimalist, and surprisingly chic when styled right.
🚿 I Replaced the Opaque Shower Curtain
I didn’t realize how much my old shower curtain was closing off the space until I switched it. It was dark gray and totally opaque, so it basically cut the room in half.
I upgraded to a light, waffle-textured white curtain with a clear liner. Game. Changer.
Now the eye keeps moving instead of stopping at the curtain wall. It’s a simple trick, but it makes the whole room feel more expansive.
Bonus: That spa-like waffle texture makes the space feel way more high-end, too!
I Tamed the Clutter—Stylishly
Let’s get real for a second: in a small bathroom, clutter isn’t just messy—it’s overwhelming. Every bottle, brush, and Q-tip suddenly feels like a visual anchor dragging the whole vibe down. And when you’re working with tight square footage, even a little bit of chaos can make your bathroom feel like it’s closing in on you.
So my next mission? Cut the visual noise and replace it with smart, beautiful storage that actually made the space feel bigger.
Here’s how I did it—without sacrificing a single product I actually use.
🧼 I Went Full KonMari on My Toiletries
Before we even talk about cute containers or wall shelves, I had to face the hard truth: I was hoarding half-empty bottles of shampoo I didn’t even like.
Sound familiar?
So I laid everything out—EVERYTHING—and asked the classic Marie Kondo question: does this spark joy? (Or, more realistically: do I actually use this?)
Gone: the expired sunscreen, the ten crusty nail polishes, the hotel minis I never touch. I was ruthless, and it paid off. Suddenly, I wasn’t trying to organize clutter—I was curating my space.
🧴 I Decanted Like a Spa Pro
Once I knew what I was keeping, I upgraded my packaging. You know how spas always have those sleek, uniform bottles? That’s no accident—it’s a design trick that reduces visual clutter.
So I grabbed a set of amber glass pump bottles and labelled them clearly: shampoo, conditioner, body wash. I even added a set for hand soap and lotion by the sink.
They look luxe, they’re super functional, and they completely erased the chaos of mismatched drugstore bottles. Pro tip: add a lazy Susan under the sink so everything’s accessible but hidden away.
🧺 I Ditched the Junk Drawer Mentality
My vanity cabinet used to be a terrifying black hole—stuff shoved in, baskets overflowing, zero strategy.
Enter: stackable acrylic drawers. These things are game-changers. I used them to create a mini drawer system under my sink. Now all my cotton rounds, hair ties, and toothpaste have actual homes.
Plus, because they’re clear, I can see what’s inside without pulling everything out. That means no more frantic “Where’s the tweezers?!” moments at 7 a.m.
🧻 I Installed Wall Storage That’s Pretty and Practical
When you can’t build out, build up.
I added a slim, open shelf above the toilet (classic move, I know—but it works!) and styled it with a mix of function and flair: a lidded basket for backup TP, a plant for some life, and a candle that makes the whole room feel fancy even when it smells like, well, bathroom.
But the real MVP? A magnetic strip inside my medicine cabinet for bobby pins, tweezers, and nail clippers. No more digging. Everything is in plain sight and off the counter.
🧴 I Created a “One Touch” Rule for the Counter
You know those pretty Instagram bathrooms with the completely clear counters? Yeah, I love them too—but I also use my bathroom.
So I compromised: I gave myself permission to keep exactly three things out—my toothbrush in a sleek holder, a candle (because mood matters!), and a small tray with my daily skincare. Everything else? Out of sight.
This tiny rule keeps the space looking tidy and open, even on the busiest mornings. And trust me, once you see your clean countertop every day, you’ll never go back to chaos.
I Brought in Texture and Personality—Without Adding Bulk
Okay, so by this point, my bathroom was brighter, less cluttered, and already feeling bigger. But it still lacked soul. You know what I mean? It was clean and functional, but kinda flat—like a white box with soap in it.
That’s when I realized: the secret to making a small space feel bigger and better isn’t just about decluttering and brightening. It’s about texture, contrast, and character—done in a way that doesn’t crowd the space.
So I gave my little bathroom a full personality transplant, all without changing its footprint. And the best part? No tools, no demo, no drama.
Here’s exactly what I did:
🧵 I Swapped My Bath Mat for a Turkish Towel Rug
Let’s talk textiles.
My old bath mat was plush, beige, and—let’s be honest—kind of sad. It soaked up water like a champ, sure, but it also made the floor look smaller and felt…heavy.
Enter: flat-weave Turkish cotton rugs. These are my new obsession. They’re thin enough to avoid visual bulk, but textured enough to add interest. I went with a subtle stripe in neutral tones and boom—instant boutique hotel vibes.
Bonus: Turkish rugs dry fast, last forever, and most are machine washable. Practical + pretty = my favorite combo.
⚙️ I Upgraded My Hardware (In Less Than an Hour)
It’s wild how much of a difference a few small details can make.
My original faucet, towel bar, and cabinet knobs were a mismatched mix of chrome and brushed nickel. Functional, sure. Fabulous? Nope.
So I did a mini hardware refresh. I chose a matte black faucet and matching towel hooks (yes, hooks—more on that in a sec). Then I swapped out the old knobs for modern brass pulls. Mixing metals gave the space a more curated feel, like I meant to make it stylish—not like I was just making do.
And no—you don’t have to be a plumber to swap a faucet. With a wrench, a YouTube tutorial, and a little patience, I got it done. And I felt like a boss afterward.
🪄 I Discovered the Magic of Peel-and-Stick Everything
Listen, if you’ve never tried peel-and-stick wallpaper or tile… get ready to fall in love.
I had this sad little wall behind the toilet that was just asking for something fun. So I ordered a roll of peel-and-stick wallpaper in a soft geometric pattern—nothing too bold, just a little movement to draw the eye.
Installation was a breeze (once I figured out how to line it up straight!), and now that wall is a total conversation starter. People literally walk into my bathroom and go, “Wait… did you redo this whole thing?”
Nope. Just some sticker magic.
And yes, it’s renter-friendly. Comes off clean when you’re ready for a change. Thank you, peel-and-stick gods.
🪴 I Added Plants (Fake and Real—No Judgment)
Let’s be honest: bathrooms aren’t always the most plant-friendly environments. But greenery makes a huge difference in a small space—it adds texture, breaks up the hard surfaces, and makes the whole room feel alive.
So I added a low-light, low-maintenance plant (hello, pothos) on a shelf, and a super-realistic faux succulent on the back of the toilet tank. Even if you’re a certified plant killer, you can get the look with good fakes. No shame in the faux game.
Tip: Don’t overdo it. One or two well-placed greens can warm up the space without making it feel crowded.
🪞 I Switched from a Towel Bar to Hooks—and Never Looked Back
This might sound small, but it was huge in terms of space and function.
Towel bars take up more wall space than you’d think—and you have to fold the towel just right or it looks sloppy. I swapped mine for a row of simple black hooks, and suddenly everything felt more modern, more minimal, and way more practical.
Now I can hang multiple towels without it feeling cluttered. It’s a tiny upgrade that seriously changes the vibe.
I Rethought the Layout—No Construction Required
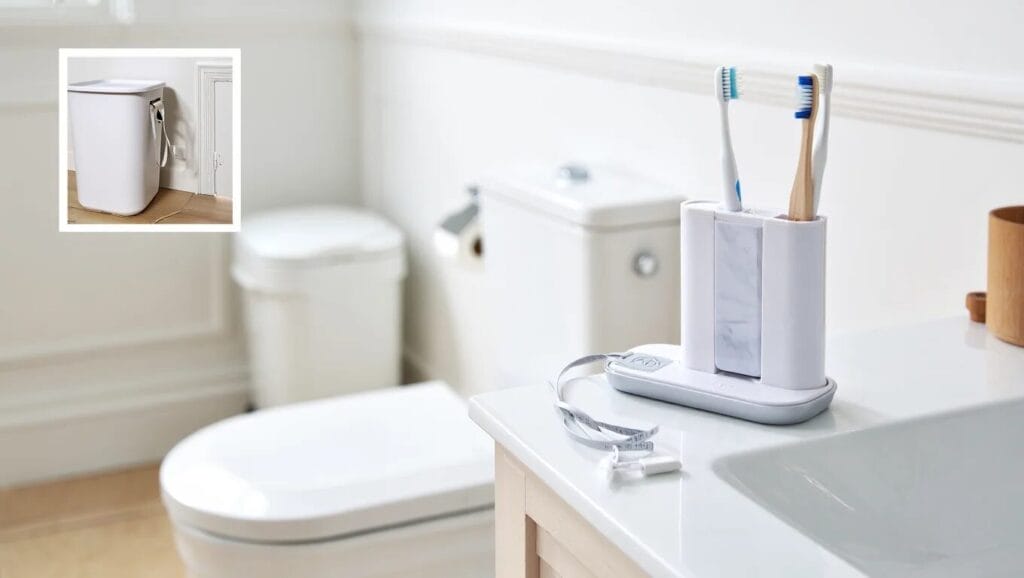
At this point, I had already brightened the space, decluttered it, and added a ton of personality without adding anything structural. But something still felt… off.
That’s when it hit me: even if I couldn’t change the walls, I could totally change the flow.
A lot of us just live with the layout we inherited—where the trash can sits, how the hamper’s wedged behind the door, where the toothbrush charger awkwardly dangles off the vanity edge. But with a little creativity (and a tape measure), I realized I could make the room feel smarter, more open, and way less cramped.
Here’s how I fine-tuned the layout and gave everything a proper place—without lifting a hammer.
🚪 I Repositioned the Essentials
Let’s talk about that trash can. For years, mine was sitting between the toilet and the vanity—literally the most annoying and visible spot possible.
I moved it under the vanity, into a little nook I hadn’t thought to use. Suddenly, the floor felt cleaner and more open. Same with the laundry hamper—I swapped my bulky bin for a narrow, vertical hamper with handles that tucks neatly behind the door. Out of sight, out of mind.
Moral of the story? Just because something fits somewhere doesn’t mean it belongs there. Look at your space with fresh eyes.
🔁 I Reorganized for Flow, Not Just Storage
In a small bathroom, movement matters. If you’re constantly bumping into the vanity corner while grabbing a towel, or reaching across the sink for floss, it’s time to rethink.
I moved my most-used items to a lazy Susan tray on the counter (just one!) and organized drawers by routine, not item type. So now my morning skincare, toothbrush, and floss are all in one place. No more zigzagging across the bathroom like I’m doing a skincare obstacle course.
And yes, that five seconds of saved time each morning? Worth it.
🖼️ I Hung My Art Higher (Trust Me on This)
Here’s a weird but wonderful optical illusion: raising your art can make the ceiling feel higher and the space more expansive.
I had a cute framed print that was sitting at eye level—standard, right? But when I raised it by about 8 inches, suddenly the wall felt taller. I even leaned a second smaller piece on the shelf above the toilet for a layered, intentional look.
Pro tip: Stick with light, airy frames or even frameless prints. You want height, not heaviness.
🔄 I Created Visual “Zones”
One thing I learned while obsessively scrolling Pinterest: small bathrooms feel bigger when they’re divided into visual zones.
So instead of one uniform slab of wall and floor, I used subtle touches to separate the space:
- A slim vertical mirror acts as its own little dressing zone.
- A patterned rug anchors the sink area.
- My peel-and-stick accent wall defines the “toilet nook” (yes, that’s a thing now).
It all feels a little more intentional—and a lot less like a utility closet.
🪟 Bonus: I Added a Faux Window (Yes, Really)
Okay, I saved the weirdest for last. My bathroom doesn’t have a window. It’s just a box with a fan and a prayer. So I got creative.
I found a framed mirror shaped like a windowpane, hung it on the main wall across from the vanity, and styled a plant shelf underneath it. Add some warm light reflection from the fixture—and BAM.
It looks like natural light is streaming in from a window that isn’t even there. Every single guest comments on it. Total cost? $30. Total transformation? Massive.
Final Thoughts: You Don’t Need a Demo to Do a Makeover
Let’s be clear—I didn’t knock down a wall. I didn’t install a skylight. I didn’t call a contractor.
But I did completely transform how my bathroom feels. It’s brighter, cleaner, calmer, and full of personality—and it cost me way less than even the design fee for a renovation.
If your small bathroom is driving you nuts, trust me—you can change so much with just a few intentional tweaks. Rethink your light. Cut the clutter. Add texture. Play with layout. And don’t be afraid to experiment.
Because here’s the truth no one tells you: you don’t need more space. You just need smarter style.
The Bathroom Glow-Up, Summed Up
If you take anything from my small-bathroom makeover journey, let it be this: you don’t need a sledgehammer to make a big impact.
I didn’t renovate. I didn’t even hire help. I just got intentional—about light, layout, and what actually deserves a spot in my space. By focusing on what I could control (paint, texture, storage, layout), I turned a dark little box into a bright, breathable, functional sanctuary. And I honestly love walking into it now. Like, weirdly love it. I light a candle. I linger. I fold my towel neatly like I’m in a hotel. It’s that good.
And if I could do it—with no design degree, no big budget, and barely any tools—you can absolutely do it too.
Start small. Swap one thing. Paint a wall. Hang a hook. Then just keep going. Before you know it, you’ll look around and think, Wait… did I just totally transform this space? (Yes. Yes you did.)
Thanks for hanging out with me through this bathroom glow-up!
Got questions, want product links, or have your own tiny-space win to share? Drop me a message—I live for this stuff.