
19 min read
Designing a Home Bar Area: Layout, Storage, and Style Tips


Edited by: Louise (Editor In Chief)
Fact/quality checked before release.
Fact/quality checked before release.

Let’s talk about one of my favorite home upgrades ever: designing a home bar area! Whether you’re the go-to host for game night, love mixing up a craft cocktail on a Friday evening, or just want to create a cozy little nook to unwind after work—having your own bar at home is next-level adulting. And guess what? You don’t need a mansion or a massive budget to pull it off.
I’ve helped friends, clients, and even tackled my own DIY bar build, and let me tell you—getting the layout, storage, and style right can make all the difference between a cluttered countertop and a seriously impressive setup.
This guide is your go-to for creating a home bar that’s not just functional, but absolutely drool-worthy. We’re talking layout hacks, clever storage tips, and style moves that’ll make your space look like something out of a Pinterest dream board. So grab your drink of choice (coffee counts!), and let’s dive in.
Layout First — Because Flow Is Everything
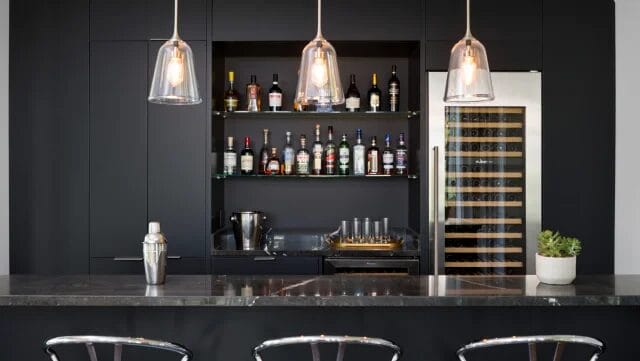
Before we even start thinking about what kind of bar cart to get or what color to paint the backsplash, we need to talk layout. I’m a big believer that even the prettiest setup will flop if it doesn’t work. A good layout makes your home bar feel intentional, organized, and like a natural extension of your living space—not just a random table with a shaker on it.
So let’s break down how to get your layout just right.
Define Your Purpose (a.k.a. Know Your Vibe)
Start with a brutally honest question: How are you actually going to use this space?
- Are you the weekend mixologist? Then you’ll need counter space, maybe a sink, and storage for bitters, syrups, and glassware.
- Wine connoisseur? You’ll want wine racks, maybe a built-in fridge, and a spot for decanting.
- Casual entertainer? Think about seating, snack space, and room for guests to gather without crowding.
If your bar’s main function is to support your Netflix-and-red-wine routine, that’s totally cool—but let’s design for that. The point is to build your bar, not someone else’s Pinterest fantasy.
Pick the Right Spot in Your Home
Here’s the thing: location sets the tone. You want your bar to feel accessible but not intrusive. The best placements usually fall into one of these categories:
- Living Room Corners: These are GOLD. Especially if you entertain often, a corner bar near your social zone keeps the drinks flowing without dragging people into the kitchen.
- Dining Rooms: A bar cabinet or sideboard setup fits naturally here and can double as storage for dishes or serving ware.
- Kitchens (or Butlers Pantries): If you’ve got space, a built-in wet bar here makes a ton of sense. It’s close to the action and easy to plumb in a sink or mini fridge.
- Basements/Game Rooms: Perfect for a full-service setup—especially if you’re going for that cozy speakeasy or sports bar feel.
💡 Pro tip: Check where your outlets and plumbing are before committing. Trust me, nobody wants to demo drywall just to plug in a wine fridge.
Work With the Space You’ve Got
Not everyone has room for a walk-in wine cellar (if you do—invite me over, please). But no matter your square footage, you’ve got options:
- Small Space? A bar cart or floating shelves with a compact cabinet underneath can work wonders. You’ll just want to be smart about vertical storage (more on that later).
- Medium Space? A dedicated bar cabinet with a countertop and some overhead shelving gives you more flexibility.
- Large Space? You lucky duck! Consider adding an island-style bar with stools, a wet bar with plumbing, or even a built-in wall unit with lighting. Go big or go home, right?
Think Flow: The Bartender’s Triangle
You’ve probably heard of the kitchen work triangle (fridge, stove, sink). Well, bars have a similar idea. I call it the bartender’s triangle: storage, prep, and serve.
Here’s how it breaks down:
- Storage Zone: Where bottles, glasses, and tools live.
- Prep Zone: A counter area for mixing, shaking, slicing limes, or opening wine.
- Serve Zone: A clear space where drinks are handed off or guests can access their own.
You want these zones to be as intuitive and close together as possible. No one wants to cross the room just to get a cocktail spoon.
Include Seating (If It Makes Sense)
Adding a couple of stools to your home bar can totally change the dynamic. Suddenly it becomes a hangout spot, not just a drink station. If you’ve got a bar-height counter or island, throw in some comfortable, stylish stools and boom—now it’s the best seat in the house.
Just make sure you leave enough clearance behind the stools (at least 36 inches is ideal) so it doesn’t feel cramped.
Storage That Works — Smart, Stylish, and Totally Satisfying
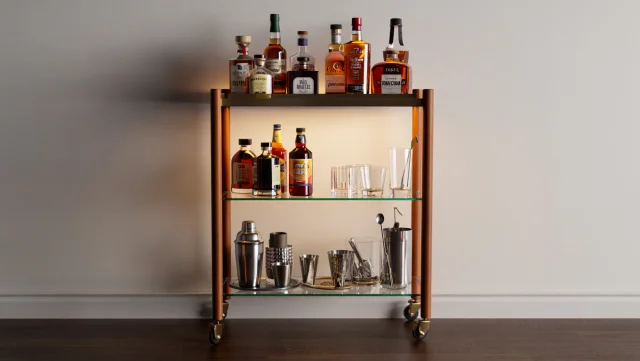
Okay, now that you’ve got your layout figured out, let’s talk storage. Because listen—there’s nothing less fun than trying to mix a mojito while rummaging through a drawer of mismatched tools and half-empty bottles. Storage isn’t just about hiding things; it’s about keeping your bar functional and looking amazing.
Whether you’re working with a compact cart or a built-in unit, the goal is to make everything you need accessible, organized, and visually chef’s kiss. And yep, I’ve got tricks for every size space and budget. Let’s go!
The Essentials: What You Actually Need to Store
Before you go crazy with cabinets and cubbies, make a quick inventory. Here’s a baseline list of what most home bars need space for:
- Bottles – Liquor, wine, mixers, syrups.
- Glassware – Wine glasses, rocks glasses, highballs, coupes, etc.
- Bar tools – Shakers, jiggers, strainers, muddlers, openers.
- Garnishes & extras – Citrus, herbs, bitters, sugar cubes, cocktail picks.
- Ice access – Either a bucket or an icemaker/freezer nearby.
- Serveware – Small plates, coasters, napkins, maybe even a tray or two.
Once you know what you’ve got, you can plan smarter instead of just buying random organizers and hoping for the best.
Vertical Storage = Secret Weapon
Let me tell you a secret: walls are storage gold mines. If you’re short on surface space, go vertical!
- Floating shelves: These are perfect for displaying bottles or showing off your prettiest glasses. Choose wood for warmth, metal for an industrial vibe, or glass if you want something sleek and modern.
- Hanging racks: Under-shelf stemware holders keep wine glasses secure and out of the way while looking super pro.
- Pegboards: Yep, just like in a garage or kitchen—only fancier. Paint it, hang your bar tools, and suddenly you’ve got functional wall art.
And if you’re going the open-shelf route, here’s a tip: keep the clutter to a minimum. Treat it like a curated display, not storage overflow. Your bar will look 10x more intentional.
Bottle Storage: Think Beyond the Wine Rack
Sure, wine racks are a classic. But liquor bottles? They need a little more creativity.
- Tiered risers in a cabinet help you see everything at once (no more forgetting you had that fancy bourbon hiding in the back).
- Lazy Susans make corner cabinets more usable, especially for mixers or smaller liqueur bottles.
- Built-in cubbies or X-style racks are perfect for wine if you’re going custom.
- Crates or bins (especially wooden or acrylic ones) can keep like-items together: syrups in one, infusions in another, etc.
🧠 Organizing tip: Group bottles by type (vodka, gin, whiskey, etc.) or by frequency of use. That way, your go-tos are always within reach and you don’t knock over a bottle of vermouth trying to get to the tequila.
Drawers and Cabinets: The Hidden Heroes
If your bar setup includes cabinetry, high five. That’s prime real estate for keeping things tidy. Use it wisely:
- Drawer dividers for your tools so you’re not digging through a tangle of spoons and strainers.
- Pull-out trays or sliding shelves give you easier access to deep cabinets (especially helpful for heavier bottles or appliances like a blender).
- Bins inside drawers can corral small stuff like wine stoppers, cocktail napkins, or straws.
If you’re DIYing, don’t be afraid to repurpose kitchen organizers. A silverware tray can totally become your bar tool caddy. It’s all about function!
Cool It — Fridges, Ice, and More
If your home bar game is leveling up, adding a fridge or beverage cooler is a game changer. Seriously, there’s nothing better than a perfectly chilled drink right where you need it.
Options to consider:
- Mini fridge: Ideal for mixers, white wine, or cans. Look for one with adjustable shelves.
- Wine fridge: These come with dual zones for red and white, which is fancy and functional.
- Built-in drawer fridges: If you’re splurging, these are sleek and save space.
Don’t have room for a fridge? Get a stylish ice bucket and make it part of your bar’s aesthetic. Add a pair of tongs and a nice tray underneath, and suddenly it looks like part of the design.
❄️ Pro Tip: A dedicated ice cube tray that makes big, slow-melting cubes will instantly upgrade your cocktails. Silicone molds FTW.
Hidden but Handy: Stash Spots for Non-Pretty Stuff
Not everything belongs on display. That big bottle of tonic water? Extra packs of napkins? Limes you’re not slicing just yet?
Create a “stash zone” that’s within reach but out of sight:
- A deep drawer at the bottom of your setup.
- Baskets on a low shelf.
- Lidded boxes tucked under a console.
This is your catch-all spot for bulk items, backup supplies, and anything that doesn’t need to be part of the “ooh, pretty bar” moment.
Display With Style (Without Losing Sanity)
Last thing on storage: don’t be afraid to show off a little! A well-organized bar can be a total design feature.
Here’s how to strike the right balance between function and flair:
- Glass decanters make even cheap booze look classy.
- Trays can corral your “everyday” items and make them feel intentional.
- Plants or fresh herbs (like mint or basil) add life and color.
- LED strip lighting under shelves or inside cabinets makes a huge difference and adds that moody, speakeasy vibe.
The trick is to treat your bar like a curated shelf—yes, it holds stuff, but it’s also something you look at. So make it a vibe.
Style It Up — Creating a Bar with Serious Personality
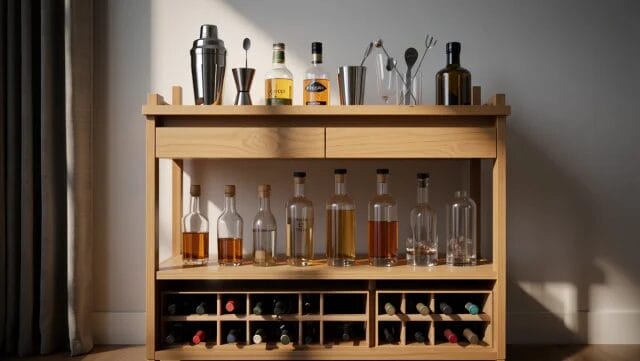
Alright, so your layout’s locked in, your storage is working overtime, and now it’s time for the best part: STYLE. This is where your home bar really comes alive. Because let’s be honest—half the fun of having a home bar is making it look like it belongs in a boutique hotel or some hip cocktail lounge downtown.
Whether you’re going bold and moody, bright and modern, or vintage and vibey, your bar should reflect you. Think of it as part function, part flair—and 100% personality. Let’s dive into how to make it pop.
Pick a Vibe (Then Commit to It)
Before you grab a paintbrush or buy neon signs on Etsy at 2am (guilty), pause and ask: What kind of feeling do I want this space to have?
Here are a few popular style vibes to consider:
- Mid-Century Modern: Think walnut woods, brass accents, globe lighting. Very Don Draper. Very smooth.
- Industrial Chic: Black metal, reclaimed wood, exposed brick (or faux brick wallpaper—no shame!), Edison bulbs.
- Modern Glam: Mirrors, metallics, marble finishes, and maybe a pop of deep jewel tones like emerald or plum.
- Tropical Tiki: Rattan, palm prints, vintage tiki mugs, and a healthy dose of whimsy.
- Rustic Farmhouse: White shiplap, galvanized trays, vintage crates—plus mason jars for cocktail garnishes, of course.
- Speakeasy Cool: Dark walls, leather bar stools, moody lighting, and maybe a record player nearby.
Pick a direction that vibes with your home’s style—or completely contrasts it if you want this space to stand out. Just make sure every design choice supports the look so it feels intentional, not random.
Color: The Ultimate Mood Setter
Color can totally transform the feel of your home bar, even if the rest of the room stays neutral.
- Dark colors (like navy, charcoal, or deep green) add drama and sophistication—perfect for moody, lounge-y vibes.
- Light, neutral colors (like white, beige, or soft greys) keep things fresh, airy, and more casual.
- Bold pops (like mustard, teal, or coral) add energy—especially fun for smaller bars or accent walls.
- Metallic finishes (gold, copper, brushed nickel) work great as accents—think hardware, shelves, or lighting.
If your bar is part of a larger room, use color to define the space. An accent wall or painted cabinet can visually carve out your bar zone, even in an open floor plan.
Light It Right
Lighting is everything. It sets the tone, makes the drinks sparkle, and keeps your bar from looking like a forgotten corner.
Options to consider:
- Pendant lights: Great for over a bar counter or island. Choose styles that match your overall vibe—glass globes for modern, metal cages for industrial, rattan for boho.
- Under-cabinet lighting: Soft LED strips under shelves or cabinets highlight bottles and glassware in a subtle, super-chic way.
- Backlighting: If you’ve got open shelves or a niche, adding backlights gives a lounge-y, “wow” effect.
- Sconces: Wall-mounted lights add both function and flair without taking up space.
💡 Pro Tip: Dimmer switches are your best friend. Bright for prepping, low for sipping.
Add a Statement Piece (or Two)
This is where your bar goes from “cool” to memorable. Every great bar needs a focal point. Think of it like jewelry for the space—something eye-catching that instantly tells people: this bar is different.
Ideas:
- A large framed art print (think vintage alcohol ads, abstract art, or a bold quote).
- A funky mirror—bonus points if it reflects light and makes the space feel bigger.
- A neon sign with your catchphrase (“Cheers,” “Drink Up,” or my favorite, “Liquid Courage”).
- An oversized chalkboard for writing cocktail recipes or a rotating drink menu.
- A quirky gallery wall with drink-themed photography, bar blueprints, or vintage finds.
Make it fun. Make it you. Your home bar should feel like your personality turned into a drink.
Incorporate Texture and Materials
Layering materials is a pro design move that makes your bar feel rich and dynamic. You don’t want everything to be wood or all metal—mix it up!
Here’s how:
- Wood + metal = cozy and cool.
- Marble + brass = upscale and glam.
- Glass + rattan = breezy and tropical.
- Brick + leather = bold and masculine.
Even adding a small rug underneath your bar cart or stools can ground the space and add texture. Just be sure it’s low-pile or flat weave to handle the occasional spill.
Plants, People. Always Plants.
You need something living (besides your friends at happy hour). Even just one little plant or fresh herb brings warmth and freshness to the space. It breaks up all the bottles and barware with a pop of green that’s both calming and stylish.
- A small potted plant on the counter.
- Hanging greenery on a nearby wall.
- A glass jar of fresh mint or rosemary—looks pretty and smells amazing.
Low light? No green thumb? Go faux. I promise it still works.
Seasonal Swaps for Extra Fun
One of my favorite things? Changing up my bar with the seasons. It’s a simple way to keep things fresh without a total redesign.
- Summer: Citrus bowls, tiki glasses, bright colors.
- Fall: Copper accents, darker liquors, little pumpkins.
- Winter: String lights, pine or cinnamon sticks, red-toned napkins.
- Spring: Floral coasters, pastel-toned glassware, fresh herbs.
It keeps the space playful and gives you an excuse to update your drink menu too. Win-win.
The Finishing Touches — Making It Functional, Fun, and Totally You
You’ve got the bones: layout, storage, style. But now? Now it’s time to add the little touches that make your home bar sing. These are the things that turn it from “wow, that looks nice” to “OMG I never want to leave this spot.”
Whether it’s the playlist you’ve got queued up, the tools you didn’t know you needed, or the signature cocktail that says you, this final section is all about tying it together—and making your bar not just a pretty corner, but a full-on experience.
Stock It Like a Pro (But Keep It Real)
Let’s be honest: you don’t need 47 types of bitters or 14 liqueurs you can’t pronounce. What you do need is a well-thought-out base that fits how you drink (and entertain).
The Home Bar Core Four:
- Spirits – At least one of each: vodka, gin, tequila, rum, and whiskey. If you lean more one way (say, you’re a bourbon buff), double down there.
- Mixers – Club soda, tonic water, ginger beer, cola, and a few juices (cranberry, lime, orange).
- Bitters & Syrups – Start with Angostura, simple syrup, and maybe a flavored syrup like honey or ginger.
- Fresh Ingredients – Lemons, limes, herbs (mint, basil), and seasonal fruit.
Bonus:
- Wine & Beer – Obvious additions if they’re your go-tos.
- Mocktail Supplies – Sparkling water, flavored syrups, fresh herbs for zero-proof vibes.
Keep things rotating with what you actually use. It’s your bar, not a hotel lobby.
Must-Have Tools (That You’ll Actually Use)
You don’t need a 20-piece bartender’s kit unless you’re doing flair tricks. A solid basic setup will serve you just fine.
Here’s what I recommend:
- Shaker (Boston or cobbler)
- Jigger (measuring = better cocktails, period)
- Bar spoon
- Strainer (Hawthorne or fine mesh for shaken drinks)
- Muddler (great for mojitos and herbs)
- Corkscrew & bottle opener
- Ice tongs or scoop
- Citrus juicer (fresh juice always wins)
Put them in a dedicated drawer, display them in a cute container, or hang them for quick grab-and-go access. Tools should be easy to reach and even easier to clean.
Create a Signature Drink Menu
Here’s a fun idea: put together a house cocktail menu. It doesn’t have to be fancy, just a few go-to drinks you and your guests love. This instantly makes your bar feel personal and a little luxe.
Ideas:
- A classic (like an Old Fashioned or Margarita)
- A custom twist (e.g., your spin on a Negroni with blood orange)
- A mocktail for non-drinkers or sober-curious friends
- A seasonal drink that rotates (apple cider mule in the fall, watermelon gin fizz in summer)
You can even write it out on a chalkboard, letterboard, or frame it. Instant ambiance, and zero pressure to reinvent the wheel every time someone asks, “what do you recommend?”
Add the Extras That Set the Mood
This is where your bar turns into an experience. These aren’t just decor items—they’re the little details that change the vibe from “I made a drink at home” to “I had a moment at the bar tonight.”
Here are some finishing touches worth adding:
- A curated playlist – Keep a “Bar Vibes” Spotify list with a mix of chill, jazzy, or upbeat songs depending on your taste.
- Bar snacks – Think small bowls of nuts, olives, or gourmet popcorn. It’s those little nibbles that elevate the whole feel.
- Drink recipe book – A stylish cocktail book adds decor and inspiration. My faves: Death & Co, Meehan’s Bartender Manual, and Tequila Mockingbird.
- Candles or scent diffusers – Subtle scents like citrus or vanilla make the space feel cozy and polished.
- Coasters and napkins – Fun prints or classy neutrals, they’re functional and stylish.
Set Up for Hosting (Like a Pro)
If you plan to entertain (and even if it’s just once a month), setting your bar up to host makes life so much easier.
Here’s how:
- Tray with pre-cut garnishes – Lemon wedges, lime wheels, cherries, fresh herbs.
- Extra glassware – Always have a few clean spares ready to go.
- Small trash can nearby – Not glamorous, but very necessary during parties.
- Backup ice – Fill a cooler or extra bin in the freezer for larger groups.
- Batch cocktails – Pitcher drinks = more mingling, less mixing. Try sangria, mojitos, or a big-batch Moscow mule.
Your future party host self will thank you.
Don’t Forget the Personal Touches
At the end of the day, your bar is an extension of you. Don’t feel like you have to stick to rules or trends. Make it personal.
- Display a vintage glass you found at a flea market.
- Keep your granddad’s whiskey decanter front and center.
- Add a framed photo from a favorite trip or a quote that makes you smile.
- Throw in a travel souvenir or two—your bar should tell a story.
These are the little details that make your bar feel not just stylish, but meaningful. They’re the things people notice. And more importantly—they’re the things you’ll love coming back to.
Final Sip: Your Bar, Your Rules
There’s no one way to build a home bar. There’s no secret formula or checklist that works for everyone. But here’s what I do know: when you design it with intention—choosing a layout that flows, storage that works, style that speaks to you, and touches that make it yours—it becomes more than just a place to pour a drink.
It becomes a moment. A ritual. A conversation starter. A tiny little oasis in your home.
So whether you’re mixing a killer Negroni for friends or sipping sparkling water solo on a Tuesday night, you deserve a bar that feels like a celebration of your taste, your vibe, and your life.
Cheers to that 🥂