
12 min read
6 DIY Farmhouse Projects (Easy Weekend Makeovers)


Edited by: Louise (Editor In Chief)
Fact/quality checked before release.
Fact/quality checked before release.
Ever dreamed of bringing that rustic farmhouse charm into your home without breaking the bank? You don’t need to be a master carpenter or interior designer to transform your space into a cozy country haven! Trust me, with just a few simple materials and a weekend to spare, you’ll be amazed at what you can create.
In this article, I’ll walk you through six incredibly doable DIY farmhouse projects that’ll have your friends asking “Where’d you buy that?” The best part? These projects won’t drain your wallet or require specialized tools. From weathered wood signs to mason jar lighting fixtures, you’ll discover how easy it is to add that warm, lived-in farmhouse feel to any room in your home.
1. Create a Rustic Wooden Sign for Your Entryway
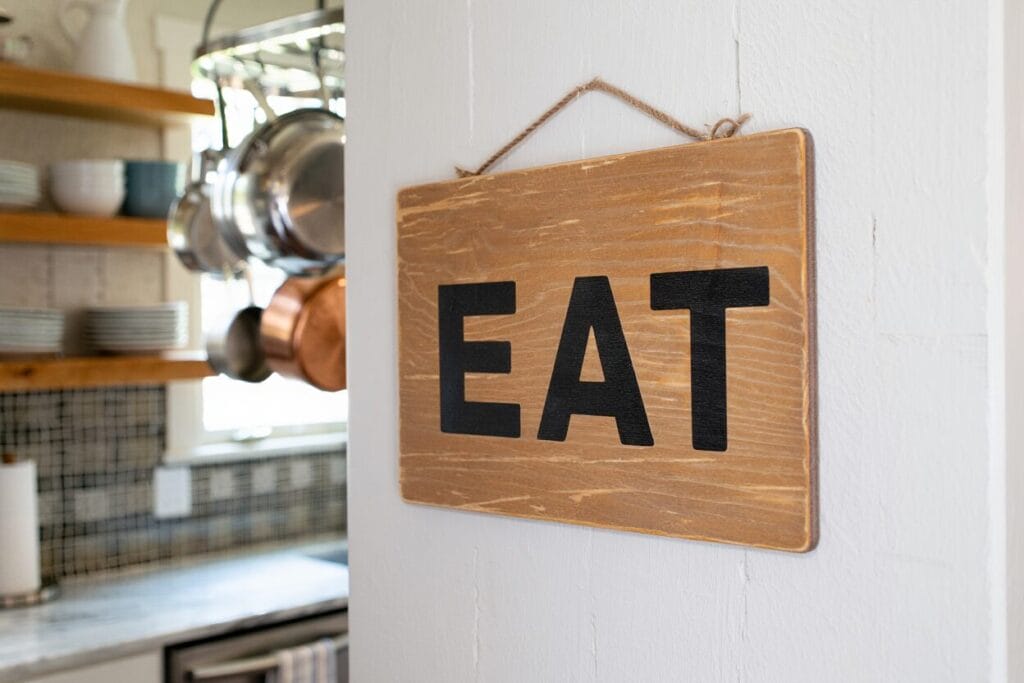
Welcome to your first farmhouse DIY project! A custom wooden sign adds instant charm to your entryway and sets the tone for your home’s aesthetic.
Materials You’ll Need for Your Wooden Sign
- 1 wooden board (pine or pallet wood works great)
- 220-grit sandpaper
- White or cream acrylic paint
- Dark stain (Minwax Dark Walnut or similar)
- Paintbrushes in various sizes
- Stencils or printed letter templates
- Pencil for tracing
- Black acrylic paint for lettering
- Clear polyurethane spray (optional for sealing)
- Steel wool or distressing tools
- Clean rags
- Sawtooth picture hanger
Step-by-Step Instructions for a Professional-Looking Result
- Start with the right piece of wood – reclaimed barn wood or pallet pieces give you that authentic farmhouse look right off the bat! If you’re using new lumber, rough it up a bit with a hammer, chains, or even the edge of a screwdriver to create some character.
- Sand your board lightly with 220-grit sandpaper. You don’t want it baby-smooth, folks! Just smooth enough to prevent splinters but still maintain that rustic texture we’re after.
- Apply your base stain or paint. For that classic farmhouse look, try a whitewash technique: mix white paint with equal parts water and brush it on, then immediately wipe most of it off with a rag. Let this dry completely – patience makes perfect here!
- Choose your message – family names, welcome phrases, or meaningful quotes all work beautifully. Position your stencil or printed template on the board and secure with painter’s tape.
- Trace your letters with a pencil, pressing firmly if using a template. If using stencils, dab paint don’t brush to prevent bleeding under the edges.
- Fill in your lettering with black paint using a small brush for precise edges. For extra character, intentionally leave small imperfections – that’s what makes it look authentically handmade!
- Once dry, lightly sand the edges and parts of the lettering for that worn, been-in-the-family-for-generations look.
- Distress strategically, not randomly! Focus on edges and corners where natural wear would occur. Use steel wool or the edge of a screwdriver to create authentic-looking wear marks.
- Optional: Seal your masterpiece with a light coat of matte polyurethane spray to protect without adding shine that would ruin the rustic effect.
2. Transform Mason Jars into Farmhouse-Style Lighting
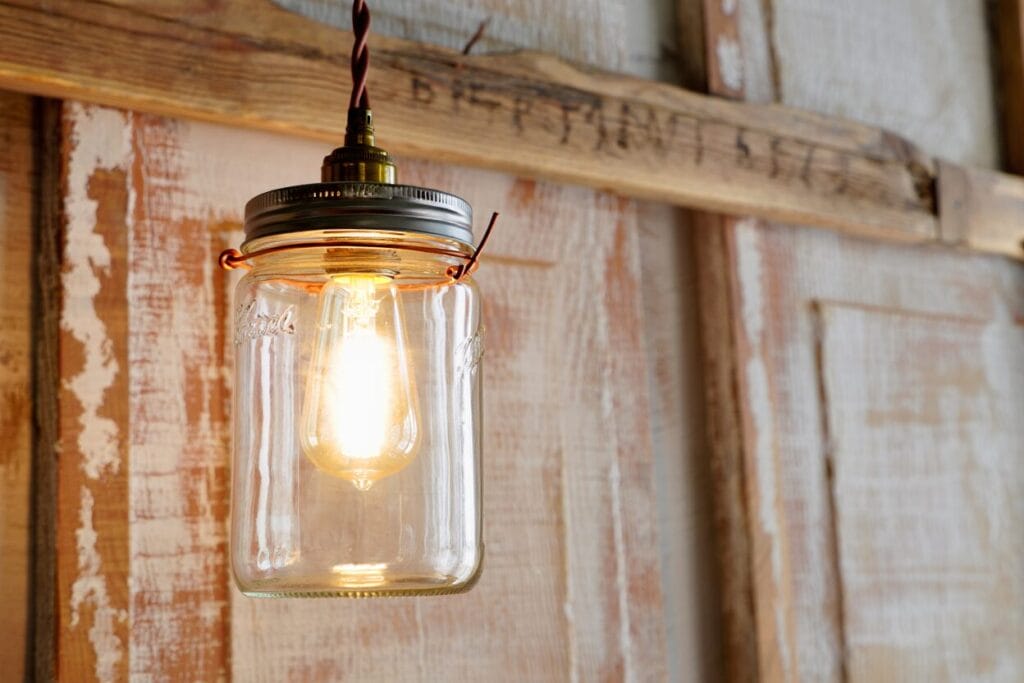
Mason jars are the unsung heroes of farmhouse decor, and turning them into pendant lights adds both charm and functionality to any space. This weekend project will instantly elevate your home’s rustic appeal with minimal effort.
Gathering Your Supplies for Mason Jar Lights
To create these gorgeous farmhouse pendant lights, you’ll need to gather a few simple materials first. Most of these items can be found at your local hardware store or might already be hiding in your home:
- Quart-sized mason jars (clear or blue vintage-style jars work best)
- Pendant light kits with cord, socket, and ceiling canopy
- Edison-style bulbs for that perfect warm, vintage glow
- Drill with a 1/2-inch glass drilling bit
- Jute twine or wire for decorative wrapping
- Optional embellishments like artificial greenery or rustic metal accents
- Safety gloves to protect your hands during drilling
- Ceiling hooks for hanging your new fixtures
If you want to customize your jars further, grab some sandpaper, white chalk paint, or jute ribbon to add extra farmhouse flair. The beauty of this project is that you can tailor it to match your specific style preferences.
How to Assemble Your Charming Farmhouse Pendant Lights
Let’s get those gorgeous lights hanging! Follow these steps and you’ll have stunning farmhouse lighting in no time:
- Start with safety first by wearing gloves and protective eyewear when drilling into glass. Trust me, nobody wants a DIY emergency!
- Mark your drilling spot on the center of the mason jar lid with a permanent marker. This is where your pendant cord will enter the jar.
- Fill your jar about halfway with cold water before drilling – this helps keep the glass from cracking and catches the glass dust.
- Drill slowly with steady pressure using your glass bit. Let the bit do the work – don’t force it! Once you break through, drain the water and rinse the jar thoroughly.
- Thread your pendant cord through the hole you’ve created, leaving enough slack inside the jar to position the socket properly.
- Secure the socket inside the jar according to your pendant kit instructions. Most kits have a simple mechanism that secures the cord and socket in place.
- Add your personal farmhouse touch by wrapping jute twine around the neck of the jar or adding a bit of greenery inside. Mason jars with subtle distressing look incredibly authentic in farmhouse settings.
- Install your Edison bulb – these vintage-style bulbs create the perfect warm glow and add so much character!
- Hang your new pendant light using the ceiling hardware included in your kit. For a truly custom look, hang three jars at different heights above your kitchen island or dining table.
- Step back and admire your handiwork! You’ve just created lighting that looks like it came straight from a high-end farmhouse decor store at a fraction of the cost.
Remember to keep the bulb wattage low enough that it won’t overheat inside the glass jar. These charming lights work beautifully in kitchens, entryways, bathrooms, or even as bedside reading lamps when hung in pairs.
3. Build a Simple Wooden Serving Tray with Rope Handles
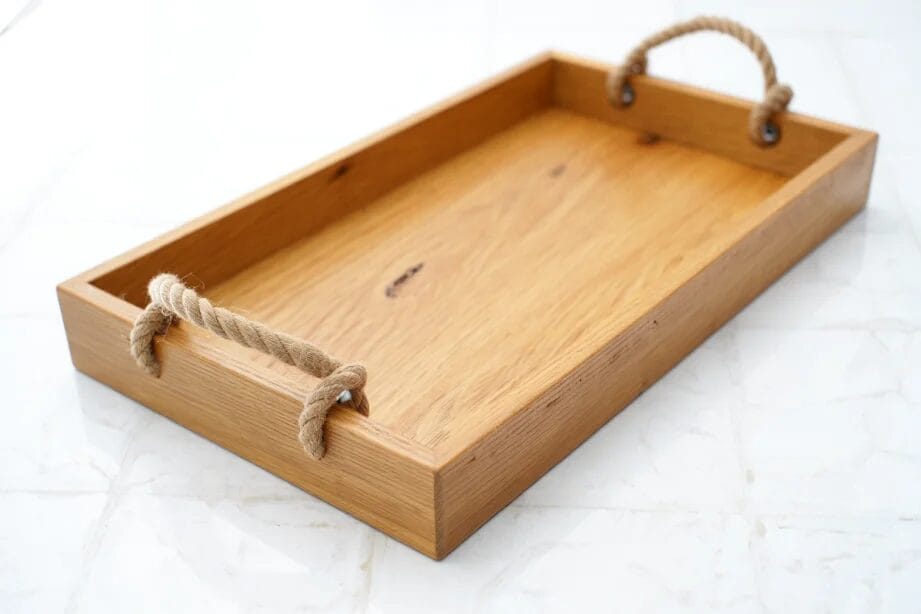
A wooden serving tray with nautical-inspired rope handles combines functionality with farmhouse charm. This versatile piece works for breakfast in bed, coffee table organization, or displaying decorative items.
Essential Materials for Your Farmhouse Serving Tray
To create your rustic serving tray, you’ll need these basic supplies:
- 1″ x 8″ pine board (cut to your desired tray size, typically 18″ x 12″)
- 1″ x 2″ pine strips for the sides (2 pieces at your length, 2 at your width)
- 3/8″ thick rope (about 2 feet)
- Wood screws (1″ length)
- Pre-conditioned wood stain in a warm, earthy tone for that authentic farmhouse look
- Clear polyurethane sealer
- Sandpaper (medium and fine grit)
- Drill with 1/2″ bit
- Measuring tape and pencil
- Wood glue
- Electric screwdriver
- Clamps
Weekend-Friendly Assembly Process
Hey folks! Let’s jump right into creating this gorgeous tray that’ll have your friends thinking you’ve gone pro!
- Start with the base – Cut your 1″ x 8″ pine board to your desired length and width. Sand all surfaces until silky smooth, working from medium to fine grit.
- Create the frame – Measure and cut your 1″ x 2″ strips to form the tray’s perimeter. These will be your sides! For those corners, cut 45-degree angles for that professional miter joint look that screams quality craftsmanship.
- Assemble the frame – Apply wood glue along the bottom edge of each side piece and position them around the perimeter of your base. Pre-drill holes to prevent splitting, then secure with wood screws from underneath the base.
- Add those stunning rope handles – Measure and mark where you want your handles on the shorter sides of your tray (typically centered, about 2″ from each edge). Drill 1/2″ holes completely through the side pieces. Thread rope through, making sure equal lengths extend from both sides, and tie secure knots underneath to hold them in place.
- Finish with style – Apply your wood stain according to the manufacturer’s instructions. I love using a foam brush for even application without those pesky brush marks! Let it dry completely, then seal with 2-3 coats of polyurethane for durability and that subtle sheen.
- Let it cure – Give your tray 24 hours to fully dry before putting it to use. Trust me, the wait is worth it for a piece that’ll last for years!
4. Craft a Shiplap Accent Wall Without Major Renovations
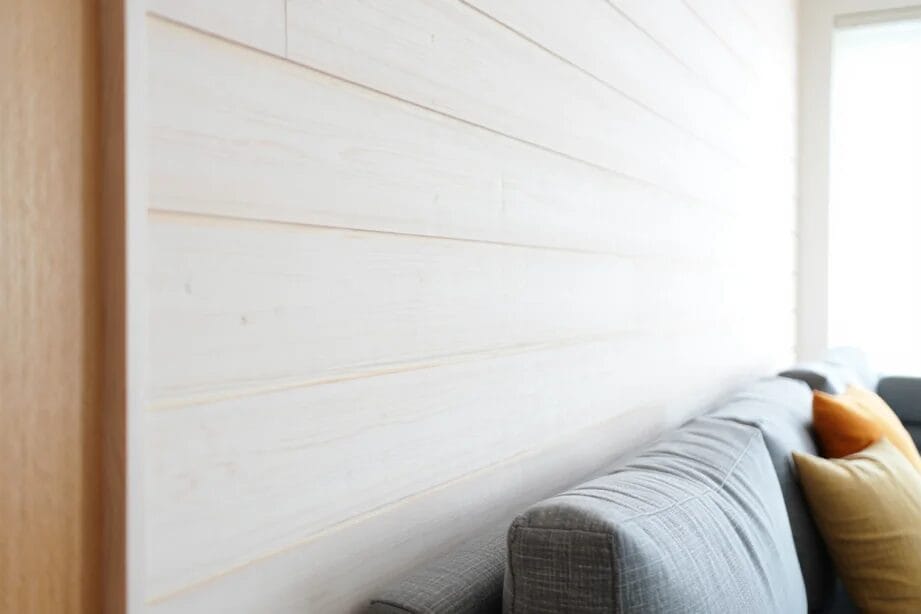
Shiplap walls instantly add that coveted farmhouse charm to any room, but you don’t need to tear down drywall or spend thousands on contractors to achieve this look. With some clever materials and a few hours of work, you’ll transform a boring wall into a stunning farmhouse focal point.
Budget-Friendly Shiplap Alternatives
Creating the shiplap look doesn’t require expensive wood planks or professional installation. You can achieve this classic farmhouse style using plywood strips cut to 6-8 inch widths at most home improvement stores for under $30. Alternatively, try peel-and-stick shiplap wallpaper that mimics the real thing without any sawdust or complicated measurements. For the ultra-budget-conscious, use 1/4-inch plywood underlayment cut into 6-inch planks—it’s lightweight, easy to handle, and costs a fraction of traditional shiplap boards. Many DIYers have also had success with vinyl floor planks applied to walls, offering both water resistance and authentic wood texture. For smaller accent areas, adhesive shiplap panels provide instant gratification with minimal effort.
Quick Installation Tips for Perfect Farmhouse Walls
Start your project by finding and marking all wall studs with painter’s tape—this ensures secure attachment points. When installing your boards, use a nickel as a spacer between planks to create that signature shiplap gap consistently across the wall. To avoid an unbalanced look, calculate your layout so you don’t end up with a tiny sliver of a board at the top or bottom. For corners and edges, paint the wall behind your boards a matching color so any gaps blend seamlessly. When nailing boards, use 18-gauge brad nails which hold firmly but leave minimal evidence. For that perfect farmhouse finish, apply a whitewash technique by mixing white paint with water (1:1 ratio) and brushing it lightly over the boards to let some wood grain show through. Remember to remove all outlet covers and switch plates before starting, and use a jigsaw to cut openings for electrical outlets.
5. Repurpose an Old Window Frame into Wall Art
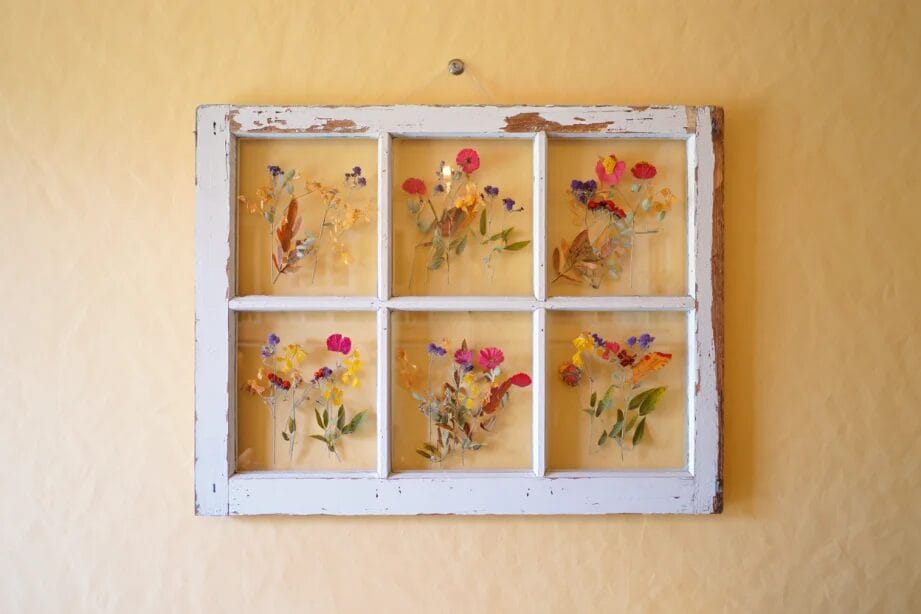
Repurposing an old window frame into wall art creates instant farmhouse character with minimal effort. This weekend project transforms forgotten frames into stunning focal points that tell a story in your space.
Where to Find Vintage Window Frames
Old window frames are treasures hiding in plain sight! Check local architectural salvage yards where you’ll find frames with authentic weathering and character impossible to replicate. Don’t overlook estate sales and farm auctions which often yield unique windows with original hardware intact. Your neighborhood Habitat for Humanity ReStore typically stocks donated frames at fraction-of-retail prices.
Social media can be your secret weapon too! Join local buy-nothing groups or marketplace platforms where people frequently give away old windows during renovations. Don’t be shy about asking friends and family—many have old frames stored in garages or barns they’d happily part with. For truly distinctive pieces, explore rural antique shops where window frames with unique muntins and divided light patterns often sell for surprisingly reasonable prices.
Creative Styling Ideas for Your Repurposed Window
Transform that dusty old window into a showstopper! Mount botanical prints or pressed flowers between the window panes for a garden-inspired gallery that brings the outdoors in. For a more personal touch, insert family photos behind each pane creating a remarkable conversation piece that celebrates your loved ones.
Love the minimalist look? Simply hang the frame as-is, letting its weathered patina and architectural details speak for themselves. Or kick it up a notch by attaching chicken wire to the back and using mini clothespins to display seasonal postcards, children’s artwork, or inspirational quotes.
6. Make a No-Sew Dropcloth Curtain Set
Transform your windows with rustic charm using inexpensive canvas dropcloths. This no-sew project delivers that perfect farmhouse look without breaking the bank or requiring advanced crafting skills.
Selecting and Preparing Your Dropcloths
Start your curtain project by purchasing heavyweight canvas dropcloths from your local hardware store for under $15 each. Choose 6’x9′ or 9’x12′ sizes depending on your window dimensions, making sure they’re about twice the width of your window for proper fullness. Before hanging, wash your dropcloths in hot water with 1 cup of bleach to soften the fabric and achieve that perfect off-white farmhouse color. Toss in some tennis balls during drying to help break down the stiffness. Remove your dropcloths while slightly damp and iron them flat to eliminate wrinkles. For a truly authentic look, consider tea-staining your dropcloths by soaking them in a bathtub filled with brewed tea for an hour, creating that vintage, aged appearance farmhouse style embraces.
Conclusion: Enjoying Your New Farmhouse-Inspired Home
There you have it! Six approachable projects that can transform your space into the farmhouse retreat you’ve been dreaming of without breaking the bank. The beauty of these DIY endeavors lies in their simplicity and the personal touch you’ll bring to each creation.
Remember that farmhouse style is all about embracing imperfections and celebrating handcrafted charm. Don’t worry if your projects don’t look store-bought perfect – those little quirks add authentic character to your home.
Start with just one project this weekend and you’ll be amazed at how quickly you can infuse your space with that cozy farmhouse feel. Soon you’ll be relaxing in your newly transformed home enjoying both the results and the satisfaction of having created them yourself!