6 min read
3 Pin Horn Relay Wiring Diagram
In this article, I’ll explain the wiring diagram of a 3-pin horn relay to simplify the process of wiring the relay on your bike or car.
A relay aids in the control of the horn circuit’s power. It facilitates the release of the link that completes the circuit, allowing it to ring when engaged. Knowing how to wire a horn relay will help replace a faulty one or deal with racing faults in a dysfunctional one.
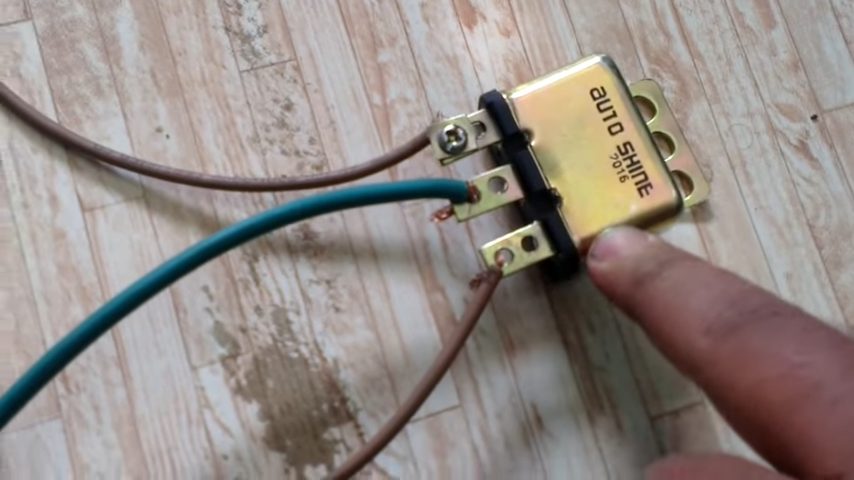
An electrical relay switch consists of an input terminal or pins for single or multiple control systems and an operating contact terminal. The switch may have indefinite contacts in various forms. On a 3-pin relay:
- The first pin (Pin 1 or H) connects to the electric horns;
- The center pin (Pin 2 or B) connects to the battery’s positive terminal;
- The third pin (Pin 3 or S) connects to the horn’s switch.
Ground the battery, horn switch, and electric horn by connecting their negative terminal to a ground point.
I will go into detail in this guide.
The 3-Pin Horn Relay Wiring Diagram
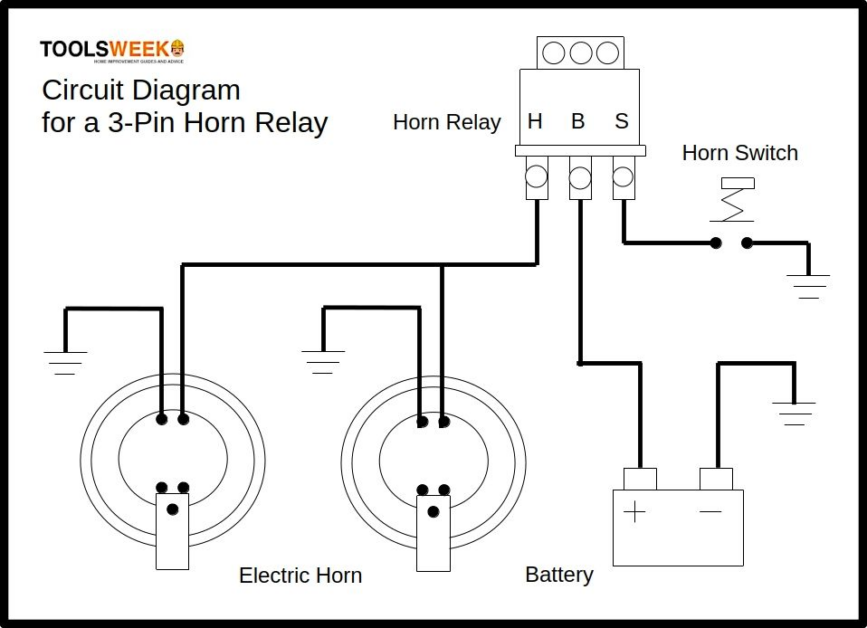
We will follow the circuit diagram below to wire a 3-pin horn relay.
Connections
There are 3 wiring connections to make on the 3-pin horn relay as follows:
- Connect the 3-pin horn relay’s first pin (Pin 1 or H) to each electric horn.
- Connect the 3-pin horn relay’s center pin (Pin 2 or B) to the battery’s positive terminal.
- Connect the 3-pin horn relay’s third pin (Pin 3 or S) to the switch.
- Then, connect the ground terminals on the battery, the horn switch, and the electric horn to ground points nearby. Let’s go through it in more detail.
The End Pins (1 and 3 or H and S)
The end pins (1 and 3 or H and S) connect as follows:
- Connect a wire from the horn’s first or H terminal to the horn.
- Connect a wire from the horn’s third or S terminal to a nearby ground point with a horn switch in between.
The other end of the wire on the H terminal connects to a terminal on each electric horn.
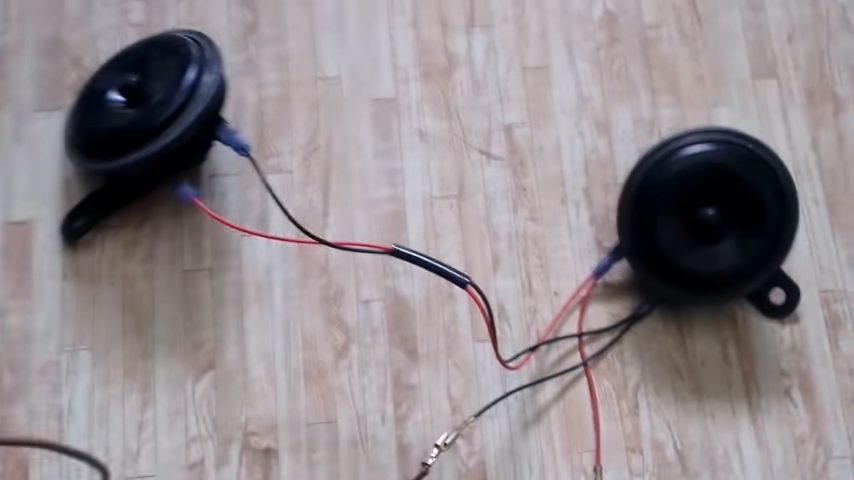
Note: Horns don’t have polarity, so it doesn’t matter which wire goes where when splitting the wire from the horn’s H terminal to connect to the horns.
The Middle Pin (2 or B)
Connect a wire from the horn’s second (middle) or B terminal to the battery’s positive terminal.
The B terminal connects to the wire that delivers the electrical power, i.e., the hot wire attaches to the battery’s positive terminal.
The standard color for a hot wire in a DC system is red, which connects to the relay’s middle terminal (as shown in the above diagram). You can strip the wire about 1 inch deep to expose the conductive threads or surface.
Grounding
After making the above connections, you also have to ground the components.
Grounding involves connecting the negative terminal to a ground point on the vehicle, which must be bare metal (an unpainted and clean spot). If the electric horn doesn’t have positive and negative terminals marked, just ground the remaining terminal. Ground the following components:
- The horn switch – the other side of the terminal connected to the horn relay.
- The battery is the negative terminal from it.
- The electric horn(s) – the remaining terminal.
Grounding is shown in the above diagram by the 3 horizontal lines attached to each of the above components.
Importance of Using a Relay in Horn Connections
A vehicle or bike’s horn uses a significant amount of current to produce enough sound.
A horn circuit threads up the steering column on early vehicles, and it was not rare for the ‘Push Switch’ on the column to weld closed because it was not pushed hard enough. Furthermore, carrying the high current required a fairly heavy wire, which was a fire hazard.
Including a relay eliminated the need for a high current running up the steering column, allowing for much quicker switching and the control of two or more horns.
Frequently Asked Questions – FAQs
Is a Horn Relay a Must?
Relays allow a lower power circuit to control a higher power circuit.
The cables and sprung switch contacts in the steering column have low power in the horn circuit, while the horn itself consumes more power. The relay input is controlled with little power, but the output contacts can tolerate much more power. A typical automotive relay will draw far less than one amp to activate the power contacts, which can handle up to 30 amperes.
The starter solenoid is a relay that can carry hundreds of amps. You don’t want that much power flowing through your key switch.
Is It Possible to Wire a Horn without Using a 3-Pin Relay?
Wiring a horn without a relay is pointless and abortive because the purpose of wiring the horn will be lost. When connecting a horn, you will need a relay, an important component in the horn circuit.
The relay aids in regulating the horn circuit’s power and releasing the linkage that completes the horn circuit, allowing it to complete the circuit and ring when engaged.
Is It Necessary to Fuse Any Relay?
You certainly should. When wiring a horn relay circuit, use the fuse/relay/load configuration. When connecting the circuit, a fuse is usually the first item to be connected. When connecting or wiring, fuse the power cable based on size and use a fuse to protect the relay’s wire.
The relay and the fuse serve distinct functions. A relay is an electromechanical switch, whereas a fuse is a low-resistance piece of wire. When a greater current flows through the horn components, which can burn the components, the filament heats up and burns/melts instead, thereby safeguarding the other elements from burning.
RELATED Horn Relay Diagram
References
Video References:
shabbir koylawala