14 min read
What to Do with the Ground Wire if There’s No Ground (Guide)
Ever found yourself tangled in a DIY electrical project, staring at a ground wire with no clue where to connect it because there’s no ground?
You’re not alone. It’s a common scenario that can leave even the most seasoned DIY enthusiasts scratching their heads.
But don’t worry. I have a step-by-step guide to help you create a new ground connection safely. Here’s the lowdown:
- Step 1: Find the outlet lacking ground and switch off its circuit at the breaker box.
- Step 2: Unscrew the outlet, remove it, and disconnect the wires.
- Step 3: Decide between installing a GFCI receptacle or running a new cable with a ground wire.
- Step 5: Connect wires to a GFCI outlet or run a 12-gauge wire with ground from the panel to the outlet.
- Step 6: Wire the outlet and install it in an electrical box.
- Step 7: Attach the wire to the arc fault circuit breaker and connect the ground wire to the grounding bar.
- Step 8: Turn on the breakers and test the outlet with a receptacle tester for correct wiring and grounding.
In this article, I’ll unravel the mystery behind this conundrum. We’ll delve into what a ground wire is, why it’s crucial, and most importantly, what to do when there’s no apparent ground.
Understanding the Importance of Ground Wires
When you’re elbows deep in a DIY electrical project, the ground wire is your unsung hero. Acknowledging its significance will make your electrical projects safer and more efficient.
So, what’s a ground wire? Its very existence is for one purpose: safety. The ground wire helps to prevent the risk of electrocution and damage to your appliances by diverting excess electricity. If there’s a short circuit (where the electrical current takes an unintended path), the ground wire catches that unruly electricity and sends it into the ground.
Our association with ground wires mostly happens when we witness a rogue one without apparent ground during a DIY electrical project.
Relax, no need to panic! Be it missing, old (from when ground wires were not a common sight), or camouflaged, I’ve got some expert tips to navigate this situation.
Finding the Right Spot to Ground
Let’s get down to the nitty-gritty of finding that perfect grounding point. It’s like a treasure hunt in your home but with a safety-first approach. Here’s what I’ve learned through my own hands-on experiences:
A grounding point is where you safely dump excess electrical energy. Think of it as an emergency exit for electricity. This can be anything from a metal water pipe to an outlet box or a grounding bar in your electrical box.
- Metal Water Pipes: I’ve encountered many older homes where metal water pipes were the go-to for grounding. But here’s a heads-up – not all pipes are game for this. They need to be continuous metal, leading straight to the ground. Plastic sections? Big no-no. They’re like trying to conduct electricity through a rubber band – not happening.
- Watch Out for Warm Water Pipes: And let me tell you, avoid those hot water pipes. You don’t want a surprise sauna session during your shower because the pipe got too excited with all that extra electricity.
- Alternatives When Pipes Don’t Work Out:
- Outlet Boxes: Sometimes, the good old metal water pipe isn’t an option. In these cases, an outlet box can be your next best friend. Just make sure it’s clear of paint or rust.
- Grounding Bars: Another solid choice is a grounding bar in an electrical box. These are designed for this very purpose and can be a real lifesaver.
Finding that ideal grounding point might seem daunting initially, but it’s doable. It’s about keeping your eyes open and using a bit of common sense.
Creating a New Ground Connection: Step-by-Step Guide
It’s easy to get a little nervous when you’re knee-deep in a DIY electrical project without a ground. But let me tell you from experience, it’s not impossible to work with. These cases often call for one thing: creating a new ground connection.
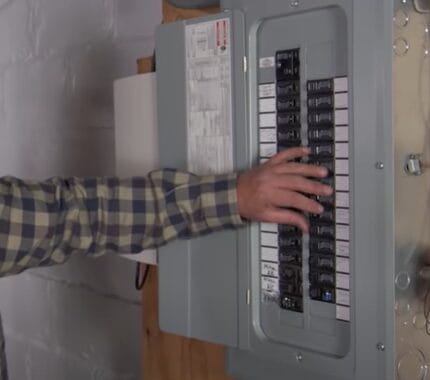
Step 1: Identify and Turn Off the Ungrounded Outlet
- First up, find that the two-prong outlet is lacking ground.
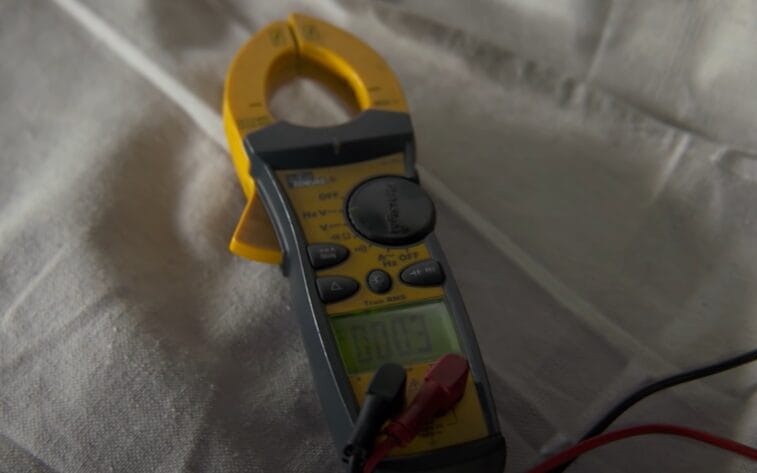
- Then, head to your breaker box and shut off the circuit. I always double-check with a multimeter to make sure the power’s off. Safety comes first, always.
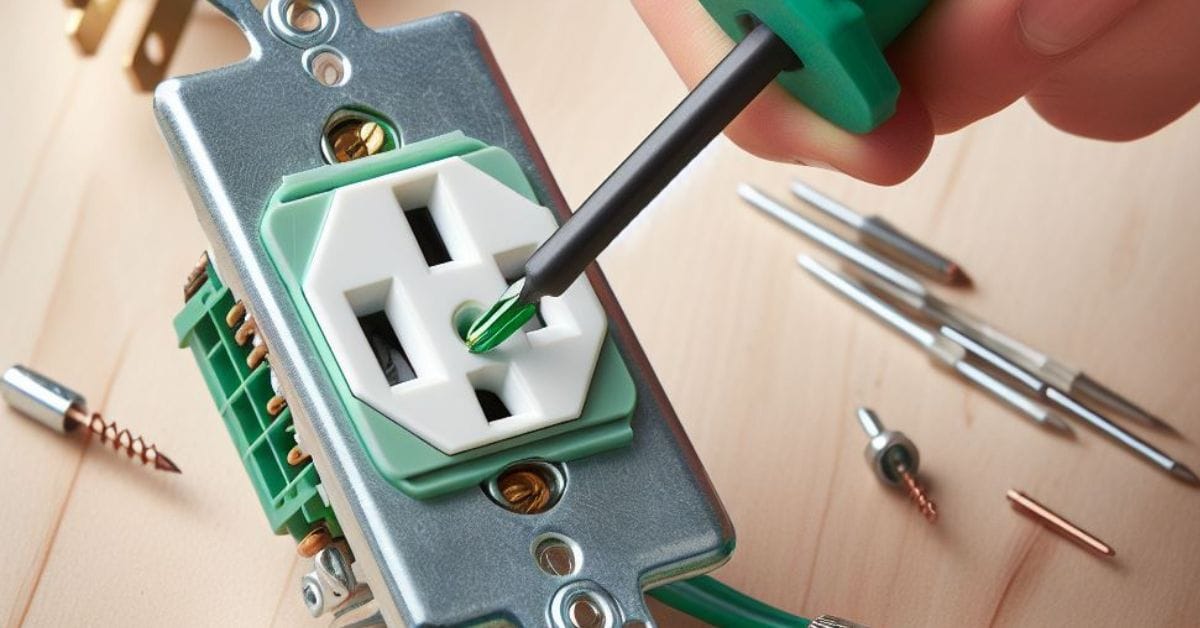
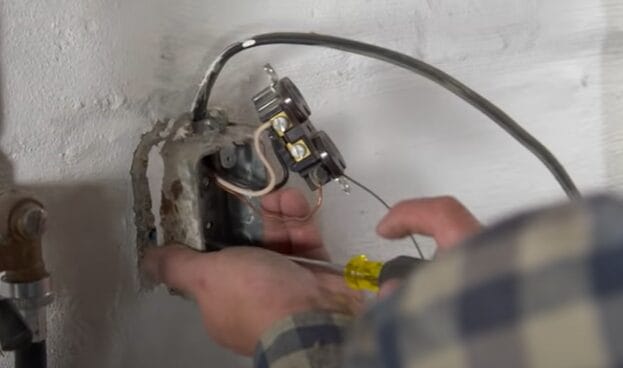
Step 2: Remove Existing Outlet
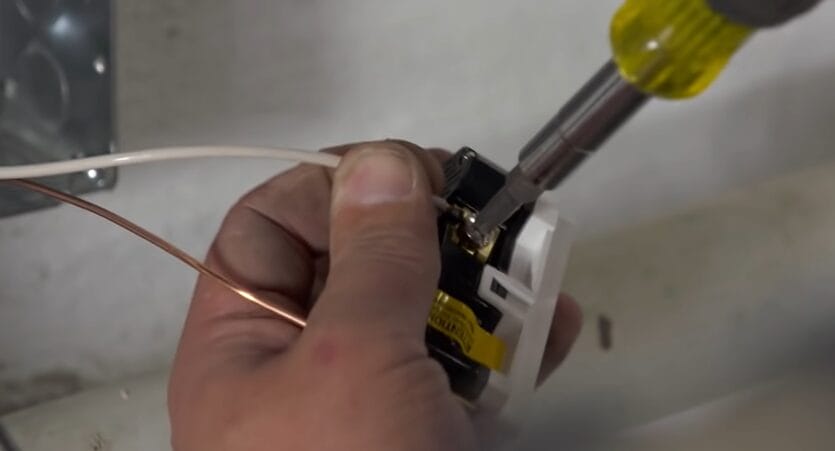
- Next, unscrew and gently pull out the existing outlet from its box. Disconnect those wires with care. Taking extra caution here saved me from a big headache later.
Step 3: Choose Installation Method
- Now, you’ve got a decision to make. Either install a GFCI receptacle, which is a solid choice for protection despite not adding ground, or run a new cable with a ground wire. I’ve done both, depending on the situation.
Step 4: Install GFCI Receptacle (If Chosen)
- If you choose the GFCI option, connect the existing wires to the new GFCI outlet. This won’t ground the outlet but will enhance safety.
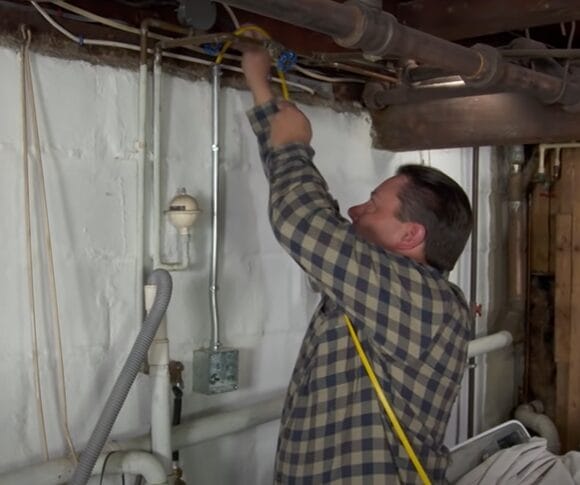
Step 5: Run New Cable (If Chosen)
- For those going the new cable route, run a 12-gauge wire from the breaker panel to the outlet. Don’t forget to include a ground wire. I recall doing this in an old house, and the difference it made was night and day.
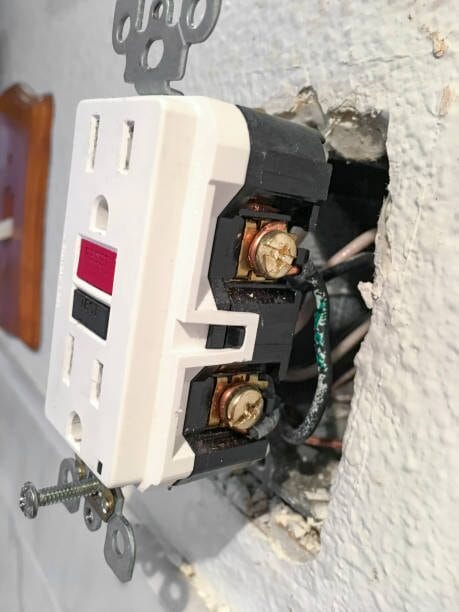
Step 6: Wire the New Outlet
- Connect the hot, neutral, and new ground wires to your outlet. Make sure it’s snug in a suitable electrical box. Getting this right is key for a solid connection.
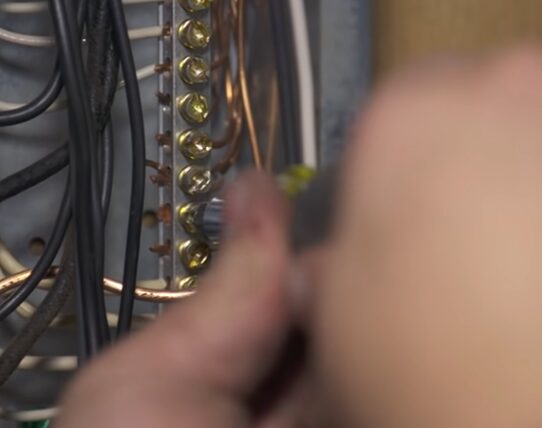
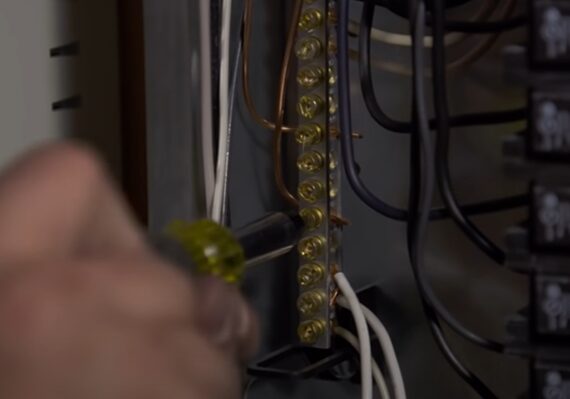
Step 7: Connect to Breaker Panel
- Hook up your new wire to your panel’s arc fault circuit breaker. Attach the hot and neutral wires correctly, and connect that ground wire to the grounding bar.
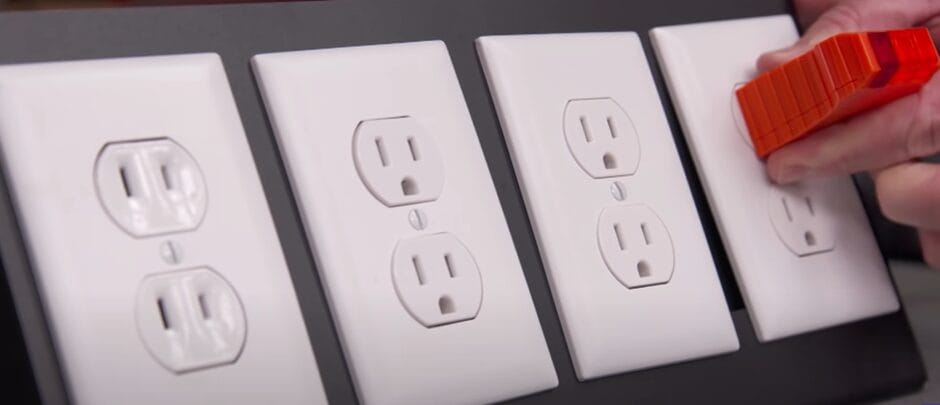
Step 8: Test and Activate
- Finally, power up the main and new circuit breakers. I use a receptacle tester to ensure everything is wired correctly and grounded. It’s a great way to ensure you’ve done the job right.
Adhering to local electrical codes and safety guidelines is crucial when performing electrical work. Consult a licensed electrician if you’re unsure about this process.
Troubleshooting Advanced Grounding Problems
Let’s dive into some of the trickier grounding issues you might encounter. Over the years, I’ve encountered a few curveballs that taught me a thing or two.
Here’s a rundown of advanced troubleshooting tips that might save your day.
| Challenge | Description | Solution |
|---|---|---|
| Standard Grounding Issues | Difficulty with grounding in older or unconventional structures. | Run a new ground wire to a suitable external grounding rod or point. |
| Interference Issues | Electromagnetic interference affects the electrical system, often from external sources like power lines. | Reroute the grounding system away from interference sources, such as power lines. |
| High Moisture Environments | Corrosion and rust due to high moisture or salty air are common in coastal areas. | Use corrosion-resistant materials and perform regular maintenance to prevent rust and corrosion. |
| Multiple Grounding Points | Larger homes or buildings with complex systems may require multiple interconnected grounding points. | Install multiple interconnected grounding points throughout the building to ensure comprehensive safety. |
| Knowing When to Call a Pro | It is recognizing complex or risky grounding situations that require professional intervention. | Call a professional electrician when the situation is beyond personal expertise or involves significant risk. |
Every home and situation is unique; sometimes, grounding can get complex. Stay safe, and don’t be afraid to seek help when needed. Happy DIY-ing!
Ground Connection Maintenance Tips
Maintaining sturdy and reliable ground connections has remained a constant priority in all the years I’ve been doing DIY home projects. Trust me, it’s not as complex as you might think!
- Regular Inspection: Make it a habit to check your ground wires and connections every few months. Look out for loose connections, wear and tear, or any signs of damage. Keeping everything snug and intact is key for a healthy electrical system.
- Fight Corrosion Like a Pro: Corrosion is a real troublemaker. Moisture and air are not friends to your metallic components. Don’t ignore even a bit of rust – it’s the silent enemy of your electrical system’s health. I’ve seen too many good setups go bad because of it.
- Dielectric Grease: My go-to solution here is dielectric grease. This stuff is fantastic for keeping moisture at bay. Apply it sparingly to the metallic parts of your grounding points and the ground wire itself.
- Choose the Right Grounding Source: Incorrect grounding often comes down to a bad choice of grounding source. Intermittent issues? Take a close look at where your ground wire is connected. You want a source that’s a solid conductor through and through. Don’t settle for less.
- Safety is Paramount: Remember, working with electricity is no joke. Call in a pro if you’re in doubt or feel out of your depth. There’s no shame in getting expert help. I’ve done it plenty of times, and it’s always a learning experience. Safety always comes first.
Stay diligent with these maintenance practices; you’ll keep your ground connections solid and reliable. Happy and safe DIY-ing!
Common Mistakes to Avoid
Dealing with electrical grounding in your DIY projects can feel like a tricky puzzle. However, avoiding some common mistakes can make it a whole lot simpler. Let’s break it down into simpler terms.
Don’t Mix Up Your Wires
When connecting wires, don’t mix up the ground wire (usually bare or green) with other wires. It’s like ensuring you don’t put sugar in your salt shaker – they look similar but serve different purposes.
Use the Right Wire
Using the correct wire is key. Don’t use a thin wire if you’re grounding a heavy-duty appliance. It’s like using a small rope to tow a big truck – it won’t hold up.
Install GFCI Outlets Properly
If you’re putting in a GFCI (those outlets with the test and reset buttons), connect the wires to the right terminals, marked ‘LINE’ and ‘LOAD.’ It’s like making sure you plug the right cables into your TV – putting them in the wrong place won’t work properly.
Ground to the Right Spot
Make sure you’re grounding to a metal that can conduct electricity well. Don’t ground to things like gas pipes or painted surfaces. It’s like trying to listen to the radio with no antenna – you won’t get a good signal.
Don’t Forget to Connect the Ground Wire
This one sounds obvious, but it’s easy to forget. Always make sure you connect the ground wire. It’s like locking your door but forgetting to latch it – it defeats the purpose.
Know Your Limits
Lastly, know when a job is beyond your DIY skills. If grounding seems too complicated, it’s like recognizing when a recipe is too hard for your cooking skills – sometimes, it’s best to call in a pro.
So there you have it, grounding made simple. Just like following a recipe, taking it step by step and avoiding these common mistakes can lead to a safe and successful project.
Frequently Asked Questions
- What are the Legal Implications of Improper Grounding in Residential Properties?
- Understanding the legal side of electrical work, including grounding, is crucial. Laws and regulations vary significantly by location, and improper grounding might violate local building codes. It’s essential to consult with a local electrician or legal expert to understand the specific legal implications in your area.
- Can Grounding Affect My Home Insurance Policy?
- Grounding and electrical safety can indeed impact home insurance policies. Some insurers may have specific requirements or may adjust premiums based on the safety and code compliance of your home’s electrical system. Speaking directly with your insurance provider for the most accurate information is best.
- Are There Any Innovations in Grounding Technology I Should Be Aware Of?
- Electrical safety and grounding continuously evolve, with new technologies and methods being developed. To stay updated on the latest advancements, consider consulting with an electrical engineer or subscribing to a professional electrical trade journal.
- How Does Grounding Differ in Older Homes Compared to New Constructions?
- Older homes may have different grounding requirements and challenges compared to newer constructions due to the evolution of electrical standards and building materials.
- What Is the Environmental Impact of Grounding?
- The environmental impact of grounding, particularly in terms of material use and any potential soil or groundwater effects, is an area that might require specialized knowledge. Environmental engineers or local environmental protection agencies can provide more detailed information.
References
Studies:
- “Grounding for the Control of EMI” by Kimmel & Gerke Associates. https://interferencetechnology.com/designing-electronic-systems-for-emc-grounding-for-the-control-of-emi-3/
Organizations:
- National Fire Protection Association (NFPA). https://www.nfpa.org/en
- Institute of Electrical and Electronics Engineers (IEEE). https://www.ieee.org/
- International Association of Electrical Inspectors (IAEI). https://www.iaei.org/
Books:
- “Wiring Simplified: Based on the 2020 National Electrical Code®” by Frederic P. Hartwell, Herbert P. Richter, and W.C. Schwan. https://www.barnesandnoble.com/w/wiring-simplified-frederic-p-hartwell/1142524149
- “Electrical Grounding and Bonding” by Phil Simmons. https://www.abebooks.co.uk/9781418050306/Electrical-Grounding-Bonding-Phil-Simmons-141805030X/plp
- “Soares Book on Grounding and Bonding” by the International Association of Electrical Inspectors. https://www.thriftbooks.com/w/soares-book-on-grounding-and-bonding-9th-edition_international-association-of-electrical-inspectors/553872/
Website Resources:
- Mike Holt Enterprises. https://www.mikeholt.com/
- The Spruce. https://www.thespruce.com/
- EC&M’s website. https://www.ecmweb.com/
Video References:
This Old House