8 min read
How to Wire 115 230 Electric Motor (10 Steps)
Are you having trouble wiring a 115 230 electric motor? If so, this short guide will show you how to do it properly.
Wiring an electric motor can be tricky, especially if you are not an expert. And the wrong wiring can spell doom for your motor.
In general, to wire a 115V 230V electric motor:
- Read the data plate on the electric motor.
- Remove the casing that protects the motor wires.
- Loosen all the wires.
- Identify the starter wires and label them.
- Connect the starter wire to the capacitor.
- Set the multimeter to check continuity.
- Check all six wires for continuity.
- Check the paired wires for resistance.
- Identify the motor winding and starter winding properly.
- Complete the wiring for your electric motor (115V or 230V).
Read the below ten-step guide for more details.
10-Step Guide on How to Wire 115 230 Electric Motor
Things You’ll Need
- Screwdriver
- Masking tape
- Marking pen
- Digital Multimeter
- Crimp connectors
- Electrical wires
- Electrical tape
- Notebook
- Pen or pencil
Step 1 – Read the Data Plate
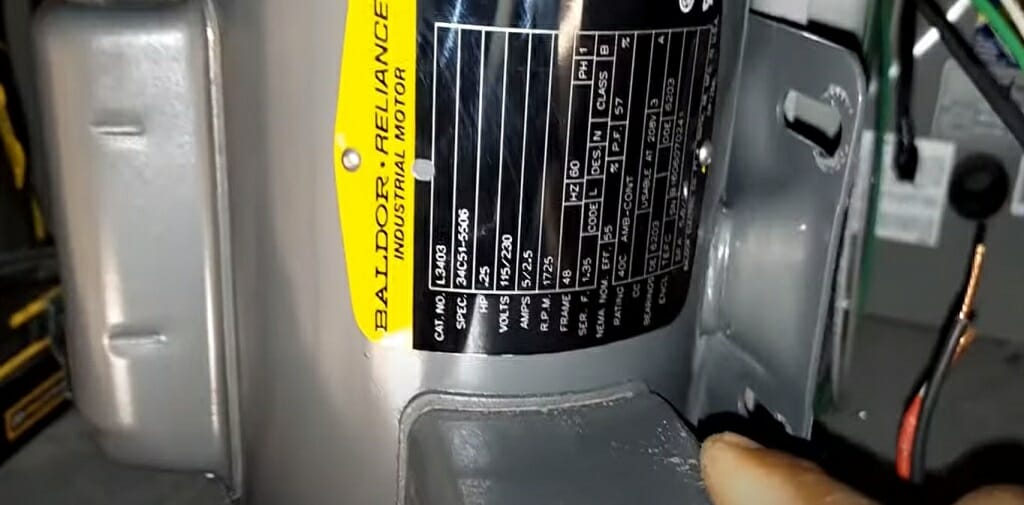
First and foremost, take the electric motor and examine the data plate. This step will give you vital details such as voltage, amperage, and RPM value. Also, you’ll know whether the motor is single-phase or three-phase.
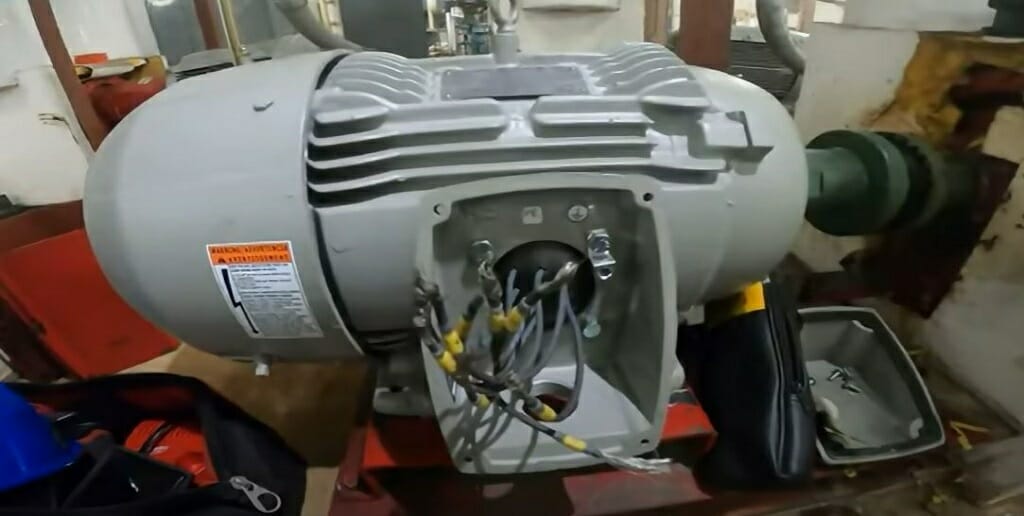
Step 2 – Expose the Wires
Take a screwdriver and remove the outer casing that protects the electric motor wires. As you can see, here I’m using a single-phase electric motor. So, it has six wires.
However, if you use a three-phase motor, you’ll find nine wires. Either way, you can apply the same procedure for both motor types.
Step 3 – Loosen All Wires
Most often, motor wires might be connected. And the starter wires might be connected to the capacitor. So, disconnect all the wires from each other. Before you start the next step, you should follow this step.
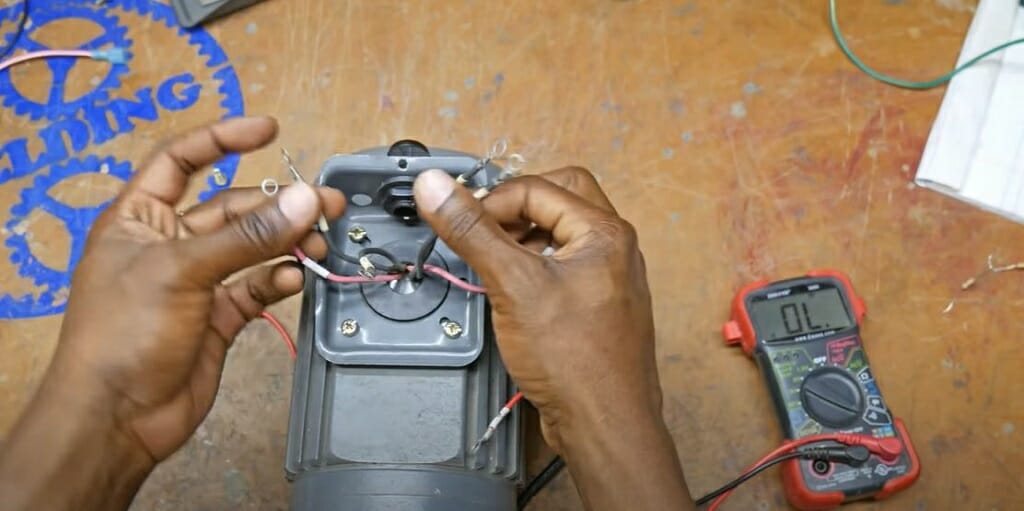
Step 4 – Identify the Starter Wires and Label Them
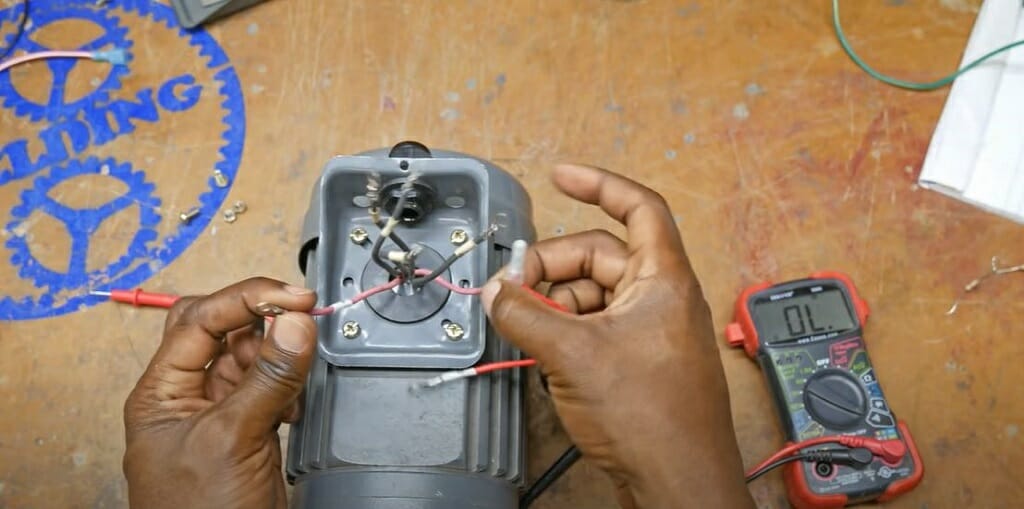
Next, examine the motor wire’s color codes. As you can see from the above image, I have two red wires and four gray wires. The two red wires are the starter wires and connect to the main power supply.
So, take some masking tape and apply it to both starter wires. Use a marker pen to number them. For this demonstration, I’ll number them as 5 and 6.
Important: Not every motor comes with red color coding. But you can identify all the wires with a continuity and resistance test. I’ll explain that in steps 7 and 8. So, if you cannot identify the starter wires by their color codes, skip steps 4 and 5.
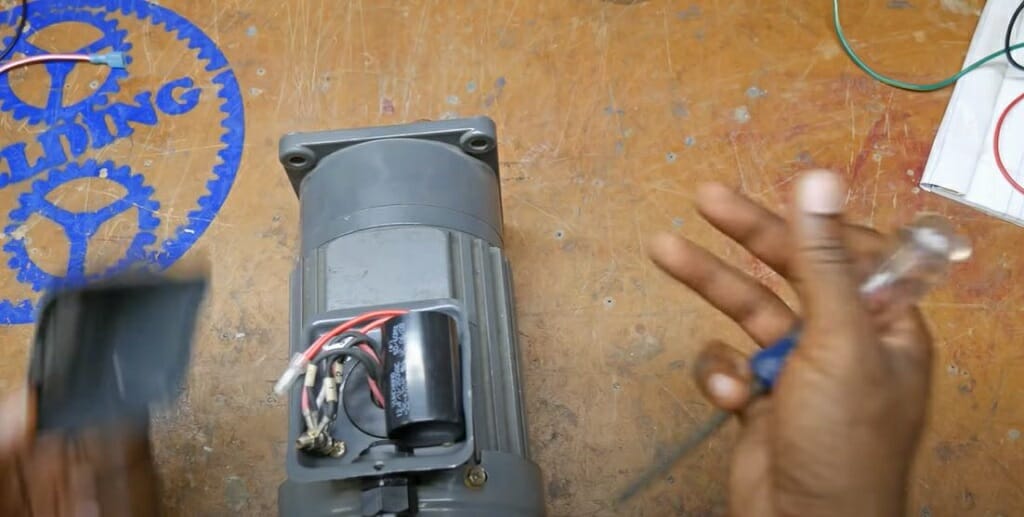
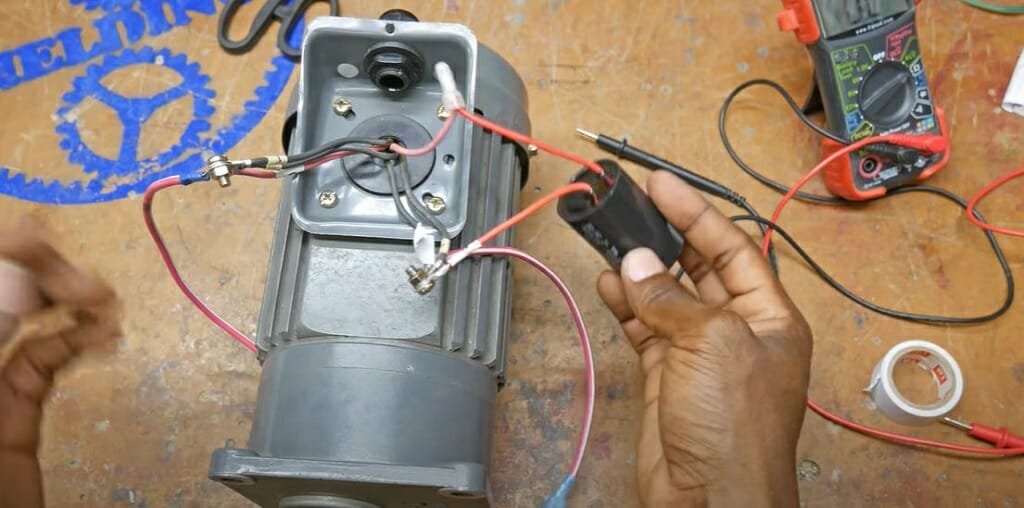
Step 5 – Connect the Starter Wire to the Capacitor
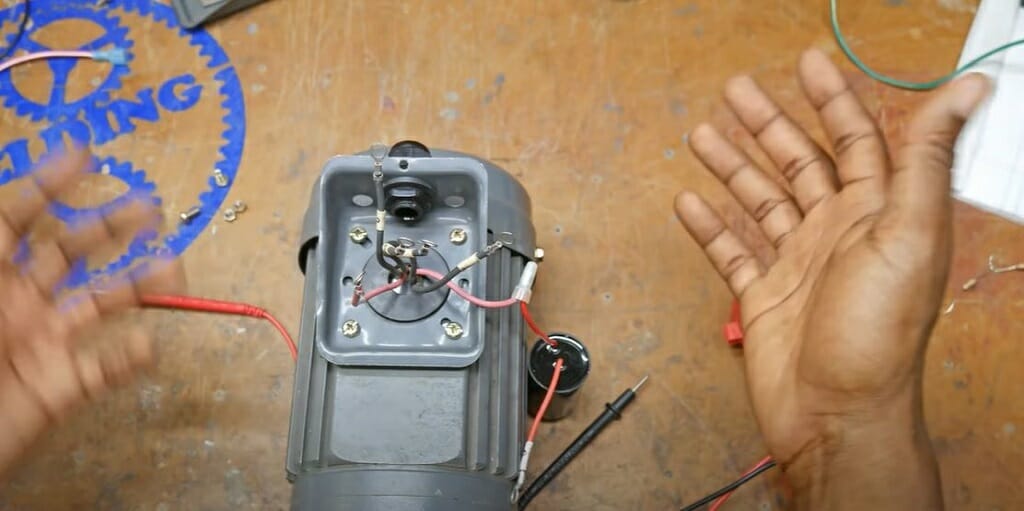
One wire from the starter wires should connect to the capacitor. So, make the connection. And take a piece of new wire with a crimp connector and connect that to the other terminal of the capacitor.
Step 6 – Set the Multimeter to Continuity Settings
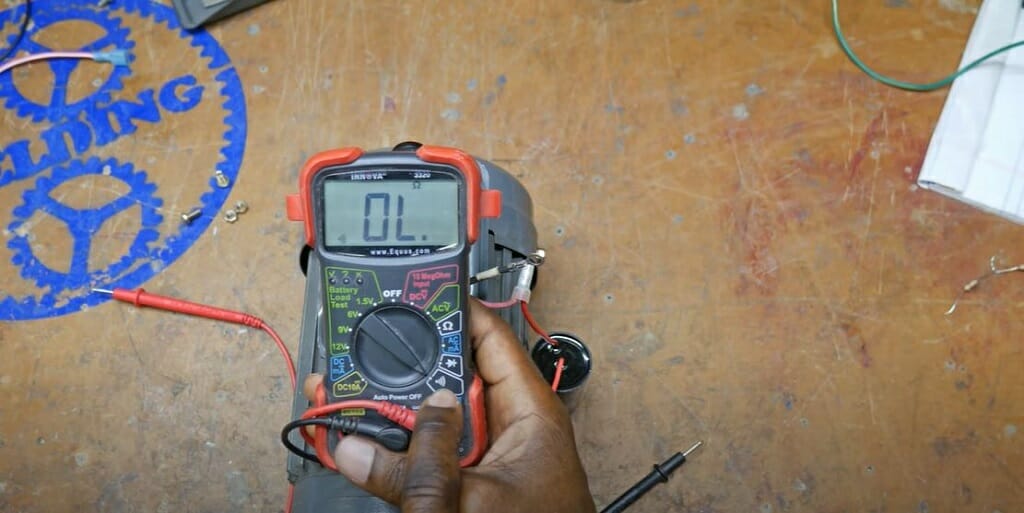
Now you are ready to check the continuity of all the wires. There are six wires which means three different pairs. So, you need to check all the wires.
But first, set the multimeter to continuity settings. To do that, turn the multimeter dial to the triangle with a line marking.
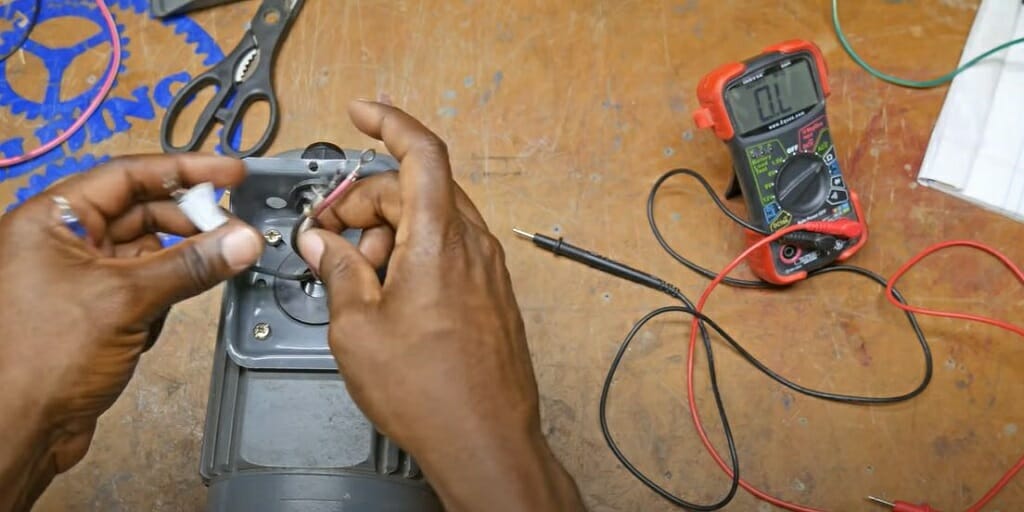
Step 7 – Check all Wires
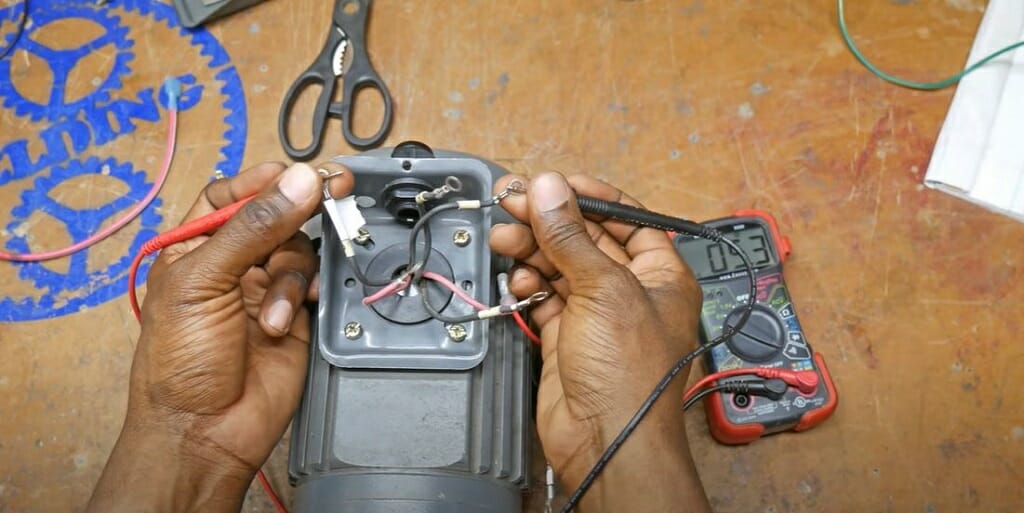
Because of the color coding, you already know which wires are starter wires. Checking continuity will confirm the connection between two wires. So, check the wires, and identify the other two pairs.
Connect the black lead to one of the gray wires and connect the red lead to another gray wire. If the multimeter shows continuity, those two wires are connected. So, label them as 1 and 2. Check the other two wires and number them as 3 and 4.
Note: If all six wires have the same colors, you’ll have to check all the wires for continuity.
Step 8 – Check the Resistance
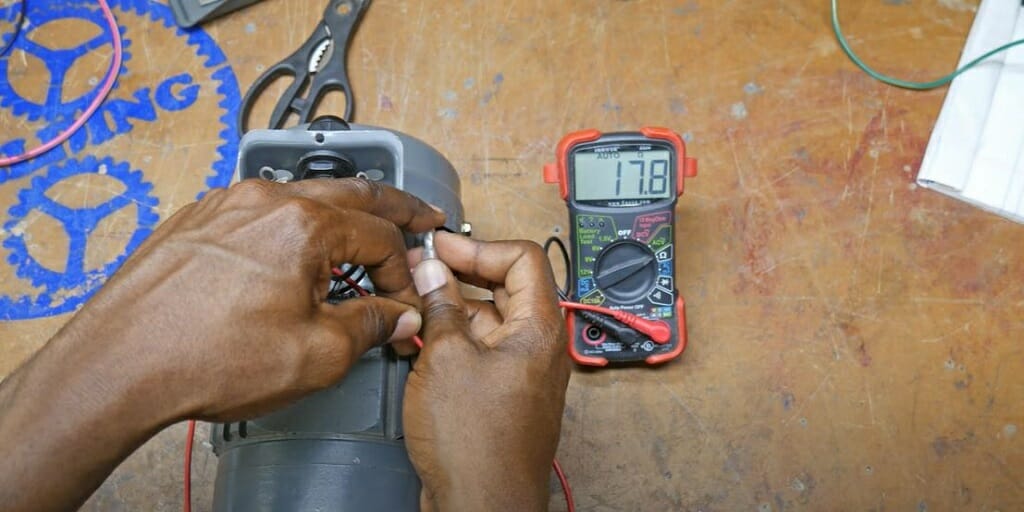
At this point, you’ll have three different pairs of motor wires. Check the resistance of all three pairs. Note it down in your notebook.
Results
1 and 2 – 4.8Ω
3 and 4 – 4.8Ω
5 and 6 – 17.8Ω
Note: You might get completely different results depending on your motor type.
Step 9 – Identify the Starter Winding and Motor Winding
Before getting into the wiring part, you’ll have to identify the motor and starter windings. Usually, starter winding has much higher resistance than motor windings. And the two pairs of motor winding wires should have the same resistance.
So, based on the above step 6 results:
1 and 2 – Motor winding
3 and 4- Motor winding
5 and 6 – Starter winding
Step 10 – Complete the Wiring
For 115V:
If you are wiring the motor for 115V, you should wire it in a parallel connection. Below image will give you a much better idea.
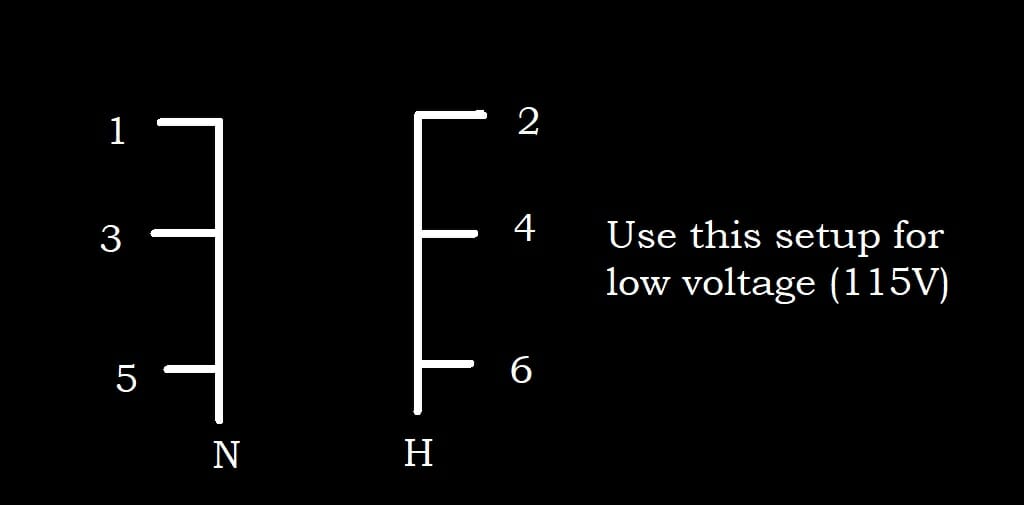
As you can see, 1,3, and 5 wires are connected to the main electrical panel’s neutral wire. And 2, 4, and 6 wires connect to the main hot wire.
For 230V:
If you are wiring the motor for 230V, follow the connection method shown in the below image.
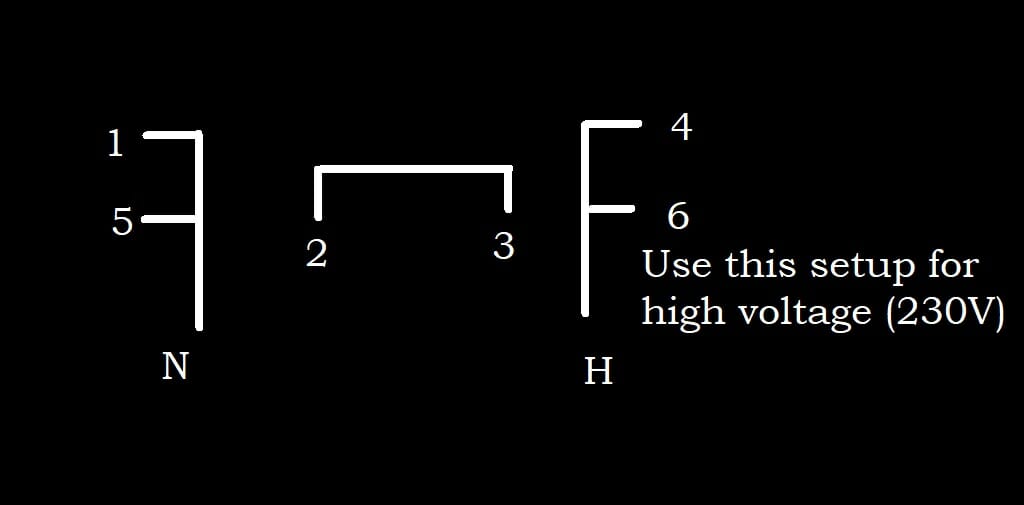
Here, connect the 1 and 5 wires to the neutral wire. And the 4 and 6 wires connect to the hot wire. Lastly, connect the 2 and 3 wires.
Don’t Forget the Ground Wire
Connect the green ground wire to one of the screws in the motor. It will keep you and your motor safe. Check the above image; it will give you a better idea.
Tip: The black wire is hot, and the white one is neutral. The green wire is the ground wire. This is the most common electrical wire color coding for US homes.
Finally, secure all the wires with electrical tape and fix the motor casing. Don’t let any active wires touch the metal parts of the motor.
Video References
Jumper man Tech
D2D NY Real World HVAC Simplified
Jeremy Fielding