15 min read
How to Test a GFCI Outlet (3 Tools and 3 Tests)
If you’re wondering how to check if your GFCI outlets are doing their job, don’t worry; I’ve got you covered with this guide.
Quick Summary: There are 3 ways to test your GCFI outlet. Here’s the rundown:
- Using a GFCI Outlet Tester – Plug it into your outlet and watch the indicator lights. They’ll tell you if the wiring is correct or if there are any issues.
- Using a Non-Contact Voltage Tester – Put it near your outlet, and it’ll light up or beep if there’s electricity present.
- Using a Multimeter – Set it to the right range, insert the probes, and get accurate readings.
We’re diving deeper below to understand how these GFCI works. Plus, I’ll walk you through some common GFCI outlet issues and how to fix them. By the time we’re done, you’ll be testing your outlets like a pro, with all the confidence and know-how you need.
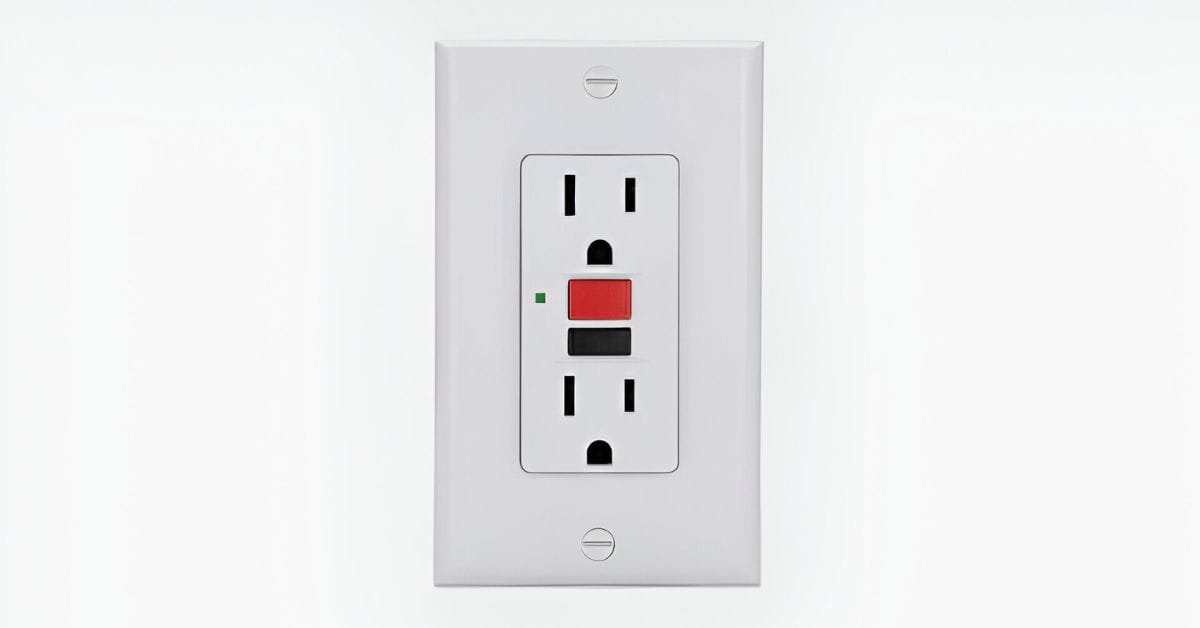
Understanding Your GFCI Outlets
Picture this: you’re jamming out to your favorite tunes, hairdryer in hand, and oops – it takes a dive into the sink full of water. Scary, right? But here’s where the GFCI outlet shines.
A GFCI outlet – your Ground Fault Circuit Interrupter – is your home’s safety net against electrical hazards. It detects even the slightest misstep in current flow and shuts down the power in a blink (about 1/40th of a second).
I’ve seen firsthand how crucial these outlets are. In my adventures renovating kitchens and bathrooms, I always install GFCIs. They’re essential in damp areas where water and electricity might mix – a recipe for danger.
But why stop there? I believe in erring on the side of safety. That’s why I recommend decking out your entire home with these lifesavers, especially in spots where the risk is higher.
They’re much bulkier and might pinch your wallet more than regular outlets. But trust me, for the peace of mind and safety they offer, they’re a no-brainer.
A Comprehensive Guide to Testing GFCI Outlets
We’re going to explore three amazing tools that are absolute game-changers. And the best part? I’ll break down each step-by-step procedure so you can test your outlets like a pro.
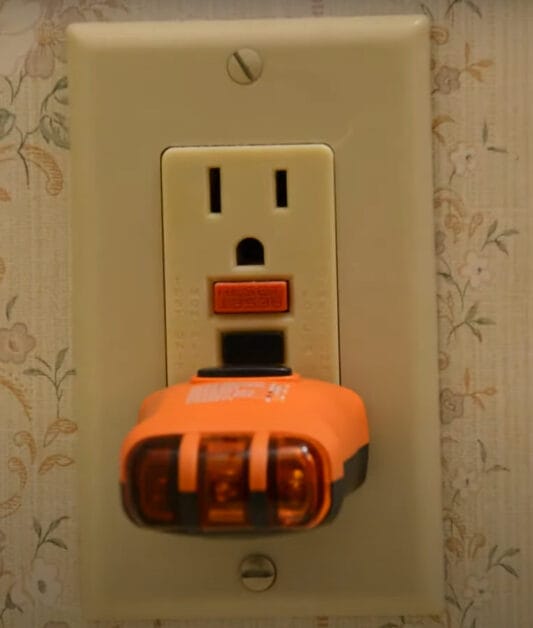
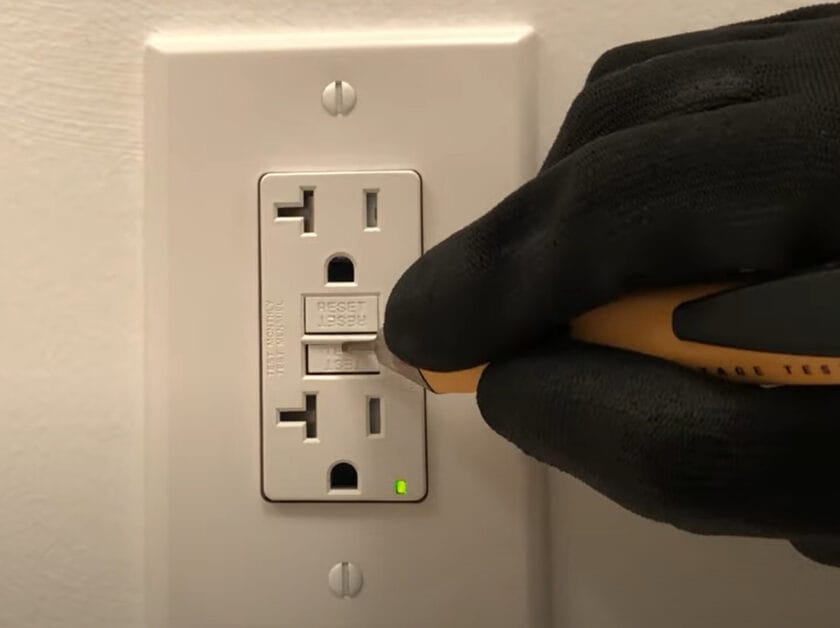
Method 1: Using a GFCI Outlet Tester
This little gadget is a must-have in your toolkit, especially if you’re like me, always tinkering around the house to ensure everything’s up to snuff.

Step 1: Plug your outlet checker into your wall outlet.
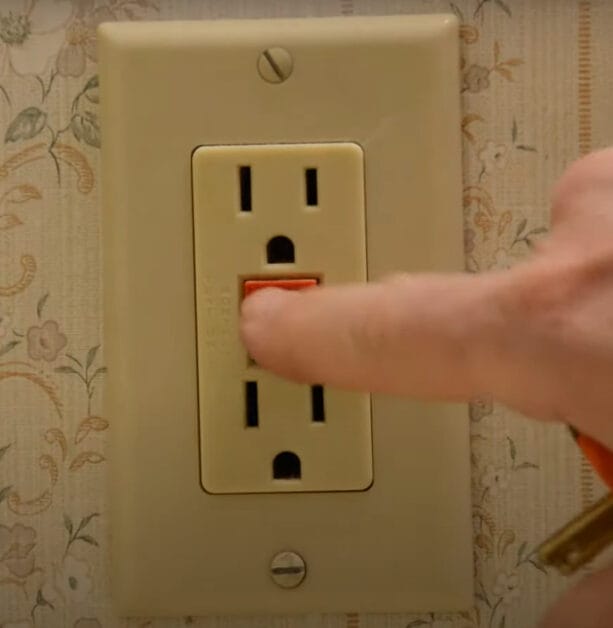
Step 2: Your outlet has a ‘Test’ button; pressing it’s like putting it through a mini-drill to see if it’s ready to protect you when needed.
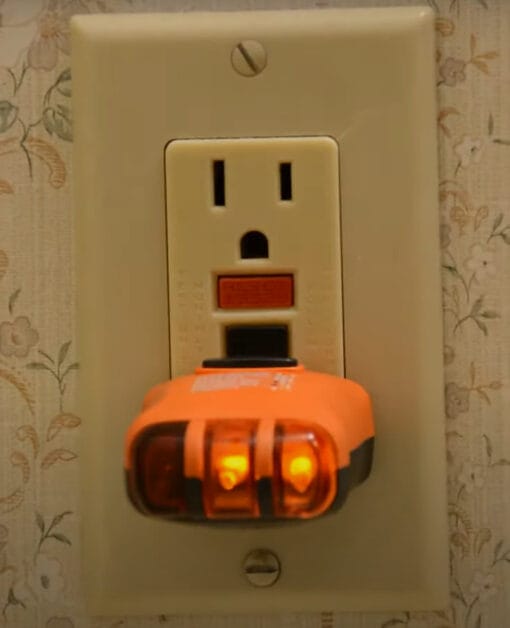
Step 3: Watch those lights – they will give you the scoop on how healthy your outlet is.
Let’s quickly decode your three-light receptacle tester. Here’s the scoop:
- Red Light on the Left: It lights up if there’s something fishy between the neutral and ground slots. It means, “Check the grounding!”
- Amber in the Middle: This one shines if there’s a voltage difference between the neutral and hot slots. It’s your sign that power is flowing, but we must ensure it’s correct.
- Amber on the Right: This light indicates a voltage difference between the hot slot and the ground.
So, that’s the lowdown on using a GFCI Outlet Tester, or as I like to call it, your outlet checker. It’s a great tool for ensuring your outlets are in tip-top shape.
Keep your home safe and sound, and have fun with your DIY adventures!
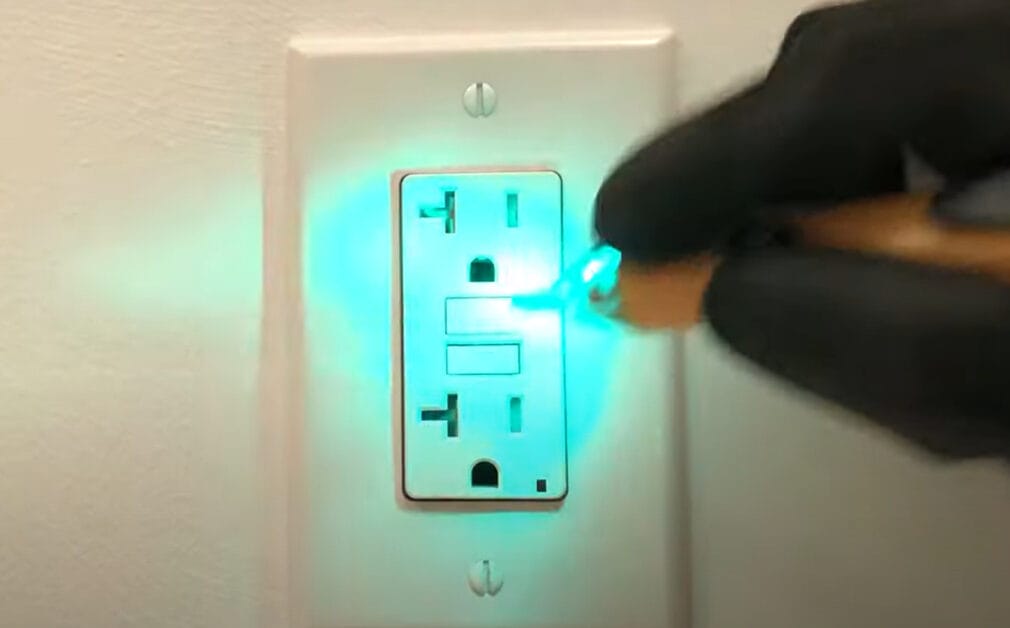
Method 2: Using a Non-Contact Voltage Tester
This gadget is a game changer for testing outlets, and I’ve got some cool tips to share from my toolbox.
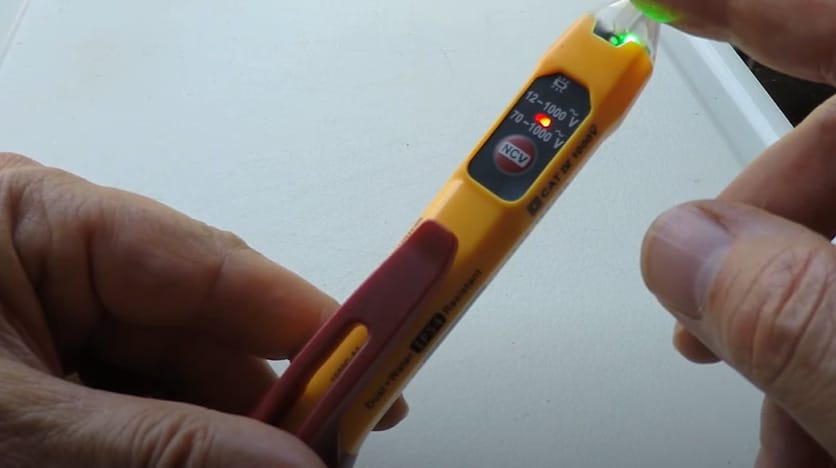
Think of this as your electrical detective. It’s a sleek, no-fuss tool that helps determine whether electricity runs through a wire or outlet. And the best part is You don’t even have to touch anything!
Step 1: Bring it close to your outlet or wire – not too close; a little space is all it needs.
Step 2: If electricity doesn’t or does flow, it’ll let you know with lights and sounds. The model I’ve used lights up and beeps when it detects electricity. It’s like it’s saying, “Hey, there’s power here!” The flashing light and beeping sound make it easy to understand, even if you’re new to this.
Here’s a quick rundown on non-contact voltage testers:
- You’re voltage-free if you see a green light or no light with no beep.
- But if it’s beeping with a red light, voltage is present. Keep it simple, and stay safe out there!
Using the Non-Contact Voltage Tester is a breeze and safe, making it a must-have in your DIY electrical tool belt. It’s helped me on countless projects, ensuring I work safely and efficiently. So, go ahead, give it a try, and step up your home electrical game!
Method 3: Using a Multimeter
Let’s discuss the Multimeter – a true powerhouse tool in our electrical testing lineup. I’ve used this tool more times than I can count, and it’s a real game-changer for getting precise readings.
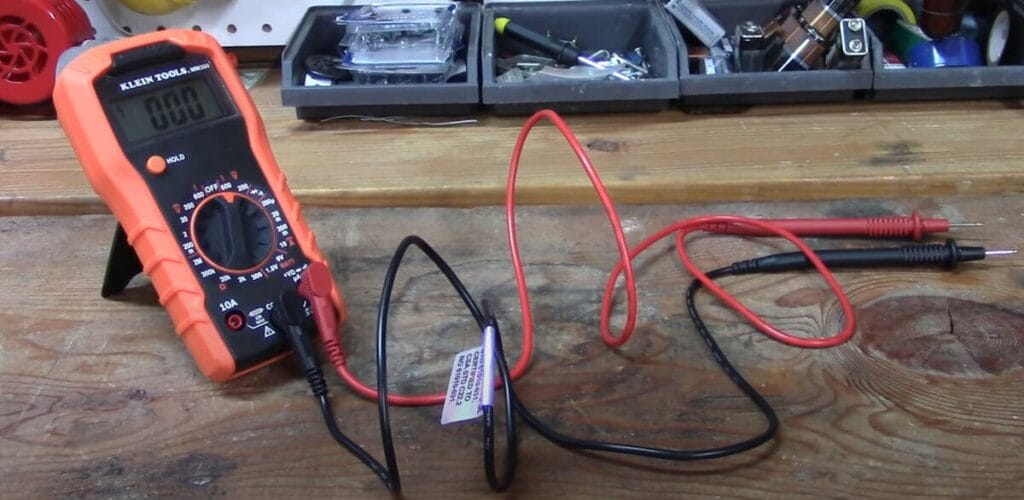
Here’s how to make it work for you:
Step 1: You need to set your multimeter to the right mode. If you’re measuring the juice in your GFCI outlet, you’ll want to set it to measure AC voltage, usually up to 200 volts. It’s all about getting the settings right for what you’re testing.
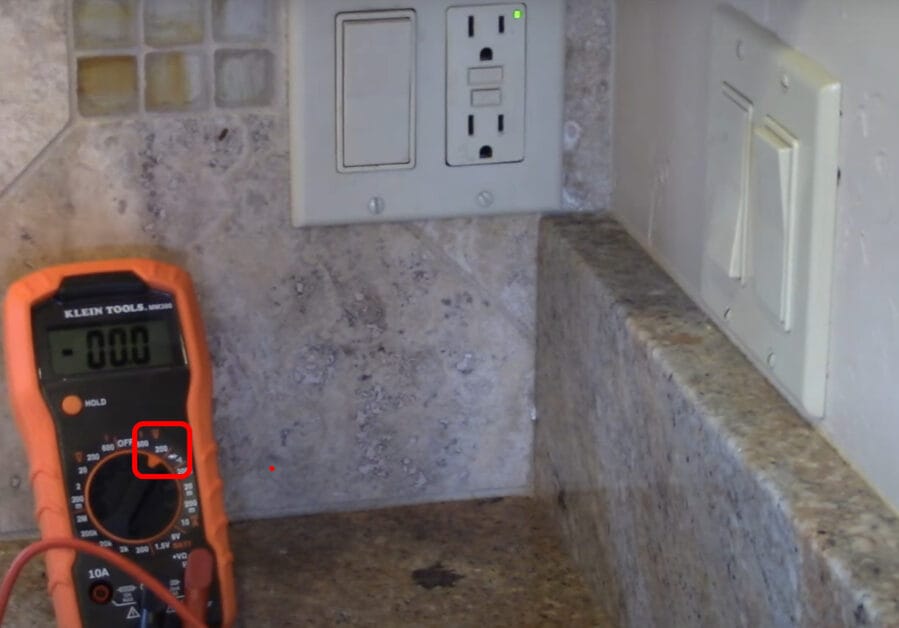
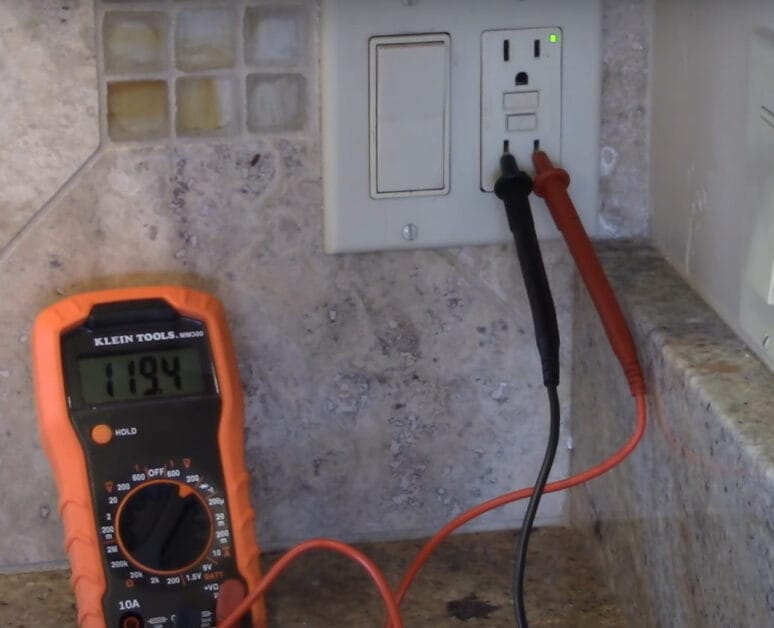
Step 2: Plug those probes into your outlet (carefully!), and watch as the multimeter works its magic, giving you the lowdown on your outlet’s electrical health.

Step 3: If the reading goes above 120 volts, it’s a red flag indicating that the outlet isn’t safe and needs fixing or replacing.
In my hands-on adventures, the multimeter has been an absolute lifesaver, especially when I needed to get precise readings on complex projects. So go ahead, give it a whirl, and see how empowering this tool can be in your DIY toolkit!
Troubleshooting GFCI Outlet Issues: My Go-To Solutions
Hey DIYers! Let’s dive into some common headaches you might face while testing GFCI outlets and how to fix them. I’ve had my share of these challenges and will share my experiences to help you.
| Issue | Possible Cause | My Solution |
|---|---|---|
| GFCI Won’t Reset | Faulty Outlet or Wiring Issue | If a GFCI won’t reset, it’s often a sign that the outlet is faulty or has an issue with the wiring. I usually start by checking for any obvious wiring problems. If everything looks good, I will replace the outlet. Remember, working with wiring can be tricky, so don’t hesitate to call a pro if you’re unsure. |
| GFCI Trips Frequently | Overloaded Circuit or External Fault | Frequent tripping can be super frustrating. It usually means the circuit is overloaded or there’s an external fault. I try unplugging appliances to see if that solves it. If not, I check for issues in connected devices or wiring. Sometimes, the solution is as simple as spreading your devices across different circuits. |
| No Power to GFCI | Tripped Breaker or Wiring Issue | No power at the outlet? First, I checked the breaker panel. A tripped breaker is often the culprit. If the breaker looks fine, I inspect the wiring to the GFCI. Loose connections can often cause power issues. Tightening them up can bring things back to life. |
| GFCI Trips When Testing | Working as Intended | If the GFCI trips when you hit the test button, that’s a good sign – the safety mechanism is working. Just hit the reset button, and you should be back in business. It’s a quick check to ensure your outlets are keeping you safe. |
| GFCI Doesn’t Trip When Testing | Faulty GFCI or Wiring Issue | If pressing the test button doesn’t trip the outlet, there might be a problem. This could be a faulty GFCI or an issue with the wiring. I usually replace the outlet in this case. It’s a small price to pay for peace of mind and safety. |
Tackling these issues can sometimes feel like a puzzle, but with patience and the right approach, you can solve them just like a DIY project.
Common Mistakes in Testing GFCI Outlets and How to Avoid Them
Let’s discuss common slip-ups when testing GFCI outlets and how to dodge them. We all make mistakes, but it’s better to be safe than sorry in DIY electrical work. Let me share a few tips from my experiences to keep you on track.
- Forgetting to Use the Test Button: First, your best friend is the test button on your GFCI outlet. I’ve seen folks plug-in testers and start poking around without hitting that button. Remember, the test button simulates a fault to ensure the outlet is responsive. So, always start there.
- Not Resetting After Testing: Some might walk away without resetting the outlet. I’ve done it myself! This leaves the outlet non-functional and potentially whatever’s plugged into it. So, after you test, hit that reset button to get things back to normal.
- Ignoring Safety Precautions: Safety first, always. I’ve seen seasoned pros and novices alike get a little too confident. Ensure the area around the outlet is dry, you’re using insulated tools, and you’re not touching any wires directly. A little caution goes a long way.
- Using the Wrong Testing Tool: Not all testers are created equal. For example, if you’re using a multimeter, ensure it’s set to the correct measurement. Incorrect settings can give false readings, leading you to think an outlet is safe when it’s not.
- Overlooking Linked Outlets: Sometimes, your GFCI outlet is linked to other outlets, and testing one can affect the others. I’ve had cases where testing one outlet in a kitchen tripped another that I forgot to check afterward. So, always check nearby outlets to ensure they’re all functioning post-test.
- Testing Under Load: Testing an outlet while appliances are still plugged in and running is a no-go. It’s not just about getting a wrong reading; it can be dangerous. Unplug everything first, then test.
- Skipping Regular Testing: GFCI outlets need regular check-ups. It’s not a one-and-done deal. I recommend testing every few months to ensure they’re always ready to protect you.
So there you have it – a few common missteps and how to avoid them. Keep these in mind, and you’ll be testing your GFCI outlets like a pro, keeping your home safe and sound. Remember, in DIY, learning from mistakes is part of the journey. Stay safe, and happy testing!
Keeping Your GFCI Outlets in Top Shape: Essential Maintenance Tips
Maintenance is key to ensuring they’re always ready to protect you. I’ve picked up a few tricks in my home renovation adventures, and I’m here to share them with you.
- Regular Testing is a Must: This one’s a no-brainer. Test your GFCI outlets every few months – press that test button to ensure it trips and resets correctly.
- Keep Them Clean and Dry: Moisture and dirt can be the archenemies of electrical outlets. I always make sure my GFCI outlets are dry and free from dust. A gentle wipe with a dry cloth does the trick. Remember, water and electricity are not friends!
- Check for Physical Damage: Now and then, give your outlets a visual inspection. Look for cracks, loose parts, or any signs of wear and tear. I once spotted a small crack in an outlet cover in a bathroom renovation, a potential hazard that was easily fixed with a replacement.
- Listen for Unusual Noises: If you hear buzzing or crackling from your GFCI outlet, that’s your cue to take action. These sounds can indicate internal problems. I remember a kitchen remodel where a buzzing outlet was the first clue to a wiring issue behind the scenes.
- Be Mindful of the Load: Overloading your GFCI outlets can lead to problems. I always advise against plugging too many appliances into one outlet. Spread them out and watch how much you’re asking of each outlet.
- Upgrade When Needed: GFCI technology keeps getting better. If your outlets are old, consider upgrading to newer models for better safety features. It’s like swapping out an old, trusty hammer for a shiny new one – it works better.
- Professional Check-Ups: If you’re ever in doubt, especially with older wiring systems, getting a professional electrician to check your GFCI outlets can be smart. I’ve seen cases where a professional eye caught issues that were not obvious to the homeowner.
By following these simple maintenance tips, you’ll ensure your GFCI outlets remain reliable guardians in your home. Remember, a little maintenance goes a long way in keeping your home safe and sound. Stay diligent, and happy DIYing!
Frequently Asked Questions
- Can a GFCI Outlet Wear Out Over Time?
- Yes, indeed! Like most things, GFCI outlets don’t last forever. Over time, they can wear out and stop functioning properly with regular use. That’s why testing them regularly is so important. If you find one that’s not working, it’s time for a replacement.
- What’s the Difference Between a GFCI Outlet and a GFCI Breaker?
- A GFCI outlet is installed at specific locations in your home, like the bathroom or kitchen. It protects whatever’s plugged into that outlet. A GFCI breaker, on the other hand, is installed in your electrical panel and provides ground fault protection to the circuits it serves.
- Are GFCI Outlets Required in Older Homes?
- Building codes vary, but in many places, if you’re doing significant renovations or updates to an older home, you might be required to install GFCI outlets for safety. It’s a smart move for added safety, even if it’s not required.
- Can I Install a GFCI Outlet Myself?
- If you’re handy and comfortable with basic electrical work, install a GFCI outlet yourself.
- Can GFCI Outlets Prevent Power Surges?
- While GFCI outlets are great at protecting against ground faults, they’re not designed to handle power surges. You’ll need a surge protector or a whole-house surge protection system for surge protection.
References
Organizations:
- Occupational Safety and Health Administration (OSHA). https://www.osha.gov/
- International Association of Electrical Inspectors (IAEI). https://www.iaei.org/
Books:
- “Wiring a House” by Rex Cauldwell. https://www.barnesandnoble.com/w/wiring-a-house-rex-cauldwell/1118175264
- “Black & Decker The Complete Guide to Wiring” https://www.barnesandnoble.com/w/black-decker-the-complete-guide-to-wiring-updated-8th-edition-cool-springs-press/1141325337
Website Resources:
- The Spruce. http://thespruce.com/
- This Old House. http://thisoldhouse.com/
Video References:
DIYwithWayne
S.E.R Safety
The Electrical Guide