13 min read
How to Test a Coax Cable Signal with a Multimeter
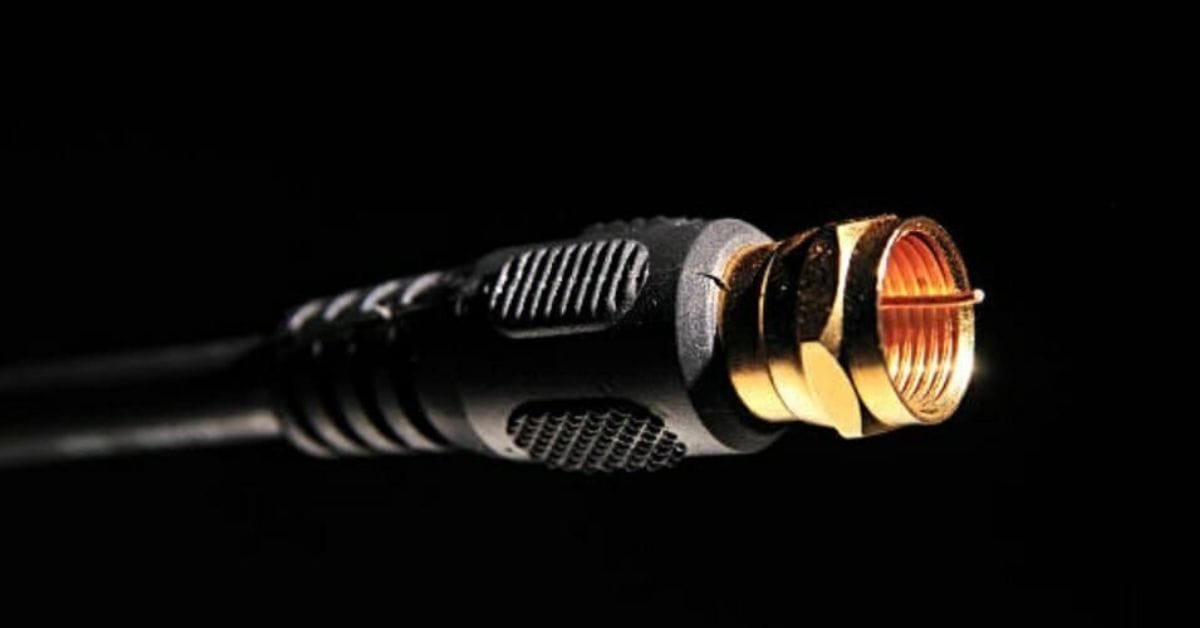
The coax (or coaxial) cable is a type of electrical cable with an inner conductor covered in a concentric conducting shield (braid mesh), separated by a dielectric material, usually also with an overlaying protective sheath (jacket).
It’s unlike a typical electrical wire, so how do you test one? This article shows you how it’s possible. Although we can’t strictly test for signal quality, we can conduct a continuity test to ensure the cable is good.
Quick summary: The coaxial cable testing procedure using a multimeter checks for continuity to see whether the cable is good.To conduct a continuity test, disconnect the cable and:
- Select a low ohms setting with the red lead in the positive port and the black lead in the COM port.
- Simultaneously touch one probe to the cable’s core conductor and the other to the core at the other end, then on their outer shields at both ends. The reading should be within the range of 0 to 2 ohms.
- Touch one probe to the core and the other to the outer shield on either end. The reading should be OL.
- Then, close one end using a dummy load and attach one probe to the core and the other to its outer shield at the other end. You should get a low resistance reading, confirming.
Continue reading for more detailed instructions.
Coax Cables and the Need to Test Them
Coax cables are used to transfer radio frequency signals from one point to another, so they act like transmission lines.
They have traditionally been used as feedlines connecting radio transmitters to receivers. This connection is achieved via antennae, internet connections, and digital audio and cable TV signals. These cables can fail to perform the intended task at some point, either partially or completely.
A damaged coax cable hinders the internet experience. It will detrimentally affect the television viewing experience and a computer system’s performance. They can even become inoperable. Coax cable failure is a minor problem, but detecting it requires the right measuring instrument and knowing how to use it.
Sometimes, the issue is not the cable but the transmitter or receiver. Still, it is important to master the techniques of testing a coax cable. It will help you to know whether it is still capable of sending a complete signal or not.
Testing Requirements
You will need the following measuring instrument and other items to perform the test:
- A multimeter – Digital or analog will do, but see below.
- Your coax cable
- Probe leads
- A dummy load or aluminum foil
An analog multimeter will only indicate whether the coax cable is working.
It will confirm continuity if the pointer deflects. However, a digital multimeter will not only indicate whether the coax cable is working or not but also will indicate the level of deterioration. This is helpful, especially if the cable sends weak signals or transfers data slowly.
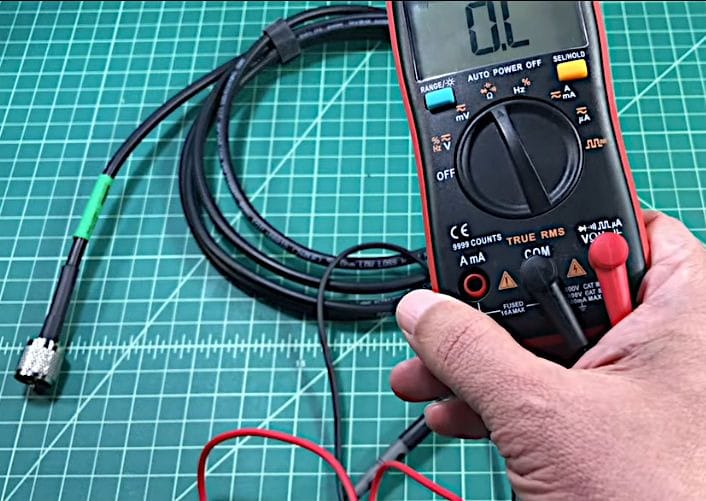
So, the easiest way to test your coaxial cable is by using a digital multimeter, which I will use to show you how to conduct the test.
Procedure
Note that you can’t test for signal strength using a multimeter. You must use a digital signal meter or oscilloscope like the one below. However, we can test for continuity by selecting a low ohms setting.
So, the type of test we will perform to check a coax cable signal is the continuity test. Follow the steps given below for the following 2 tests:
- Open connection continuity testing – with nothing attached at either end of the cable to check for continuity
- Closed connection continuity testing – with a dummy load attached to one of the cables to check for a short
Open Connection Coax Cable Signal Testing
Below are the steps to test for a signal on a coaxial cable with a multimeter for an open connection.
Step 1: Disconnect the Coax Cable
Disconnect the coax cable you want to test from the appliance or other attachment, whether a TV, camera, or cable splitter, before performing a continuity test.
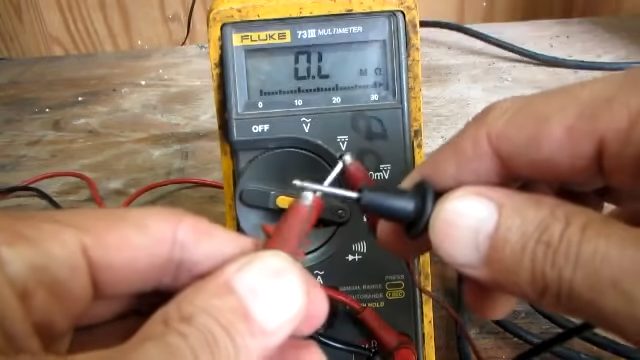
Step 2: Set the Multimeter
Set the multimeter to an ohm range to measure resistance.
The red lead should be plugged into the positive port, and the black one into the COM port.
Also, touch the 2 probes together before doing a continuity test. You should hear a beep and see OL displayed on its screen, confirming that it is working and set properly and ready to use.
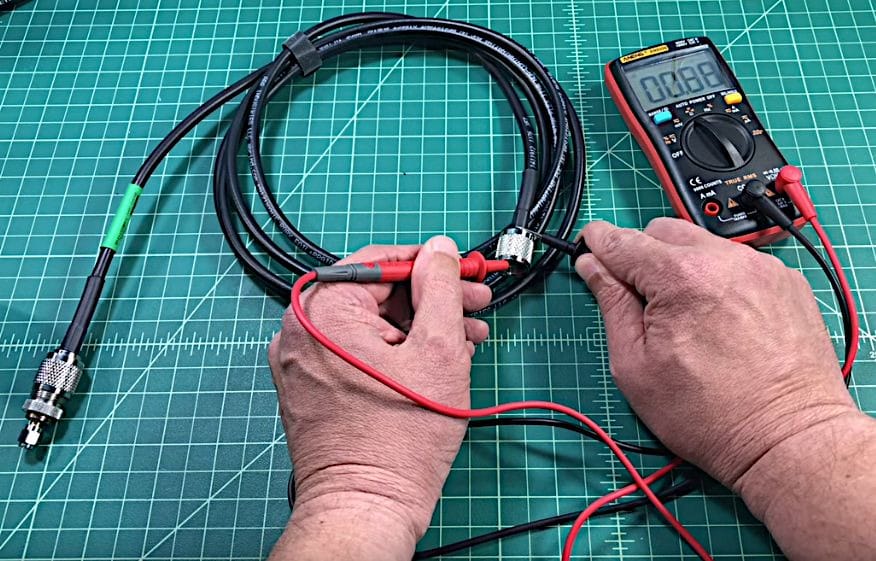
Step 3: Attach the Probes
In open connection coaxial cable signal continuity testing, you will attach the multimeter’s probes in 3 different ways:
- Touch one probe to the cable’s core conductor and the other to the core conductor at the other end. Be careful not to touch the outer shield. If the cable is good, the ohms reading should be close to zero or no more than 2 ohms (depending on the length). You may also hear a beep.
- Touch one probe to the outer shield at one end and the other probe to the same at the other end. The reading should be close to zero again, and you may hear a beep.
- Touch one probe to the cable’s core conductor and the other to the outer shield on the same end. You can repeat this for the other end to confirm the result. You should get an “OL” reading and not hear a beep.
The pictures below illustrate and summarize the above 3 continuity tests for coaxial cables.
Core Conductor Continuity
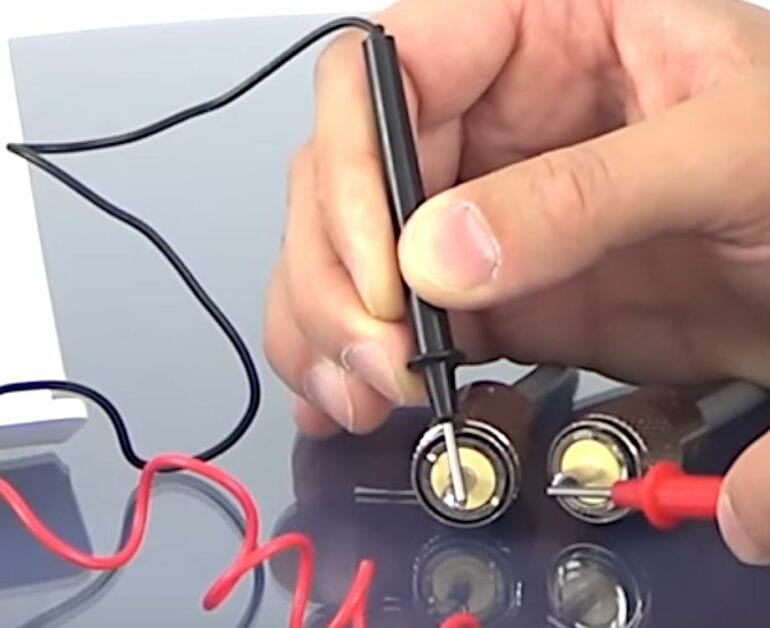
Touch the core conductors on both ends.
You should get a low resistance reading (close to zero to around 2 ohms), indicating that the core conductor of the coaxial cable is good.
You may also hear a beep.
Shield Continuity

Touch the shields on both ends.
You should get a low resistance reading again, indicating that the outer shield of the coaxial cable is good.
You may also hear a beep.
Core to Shield Continuity
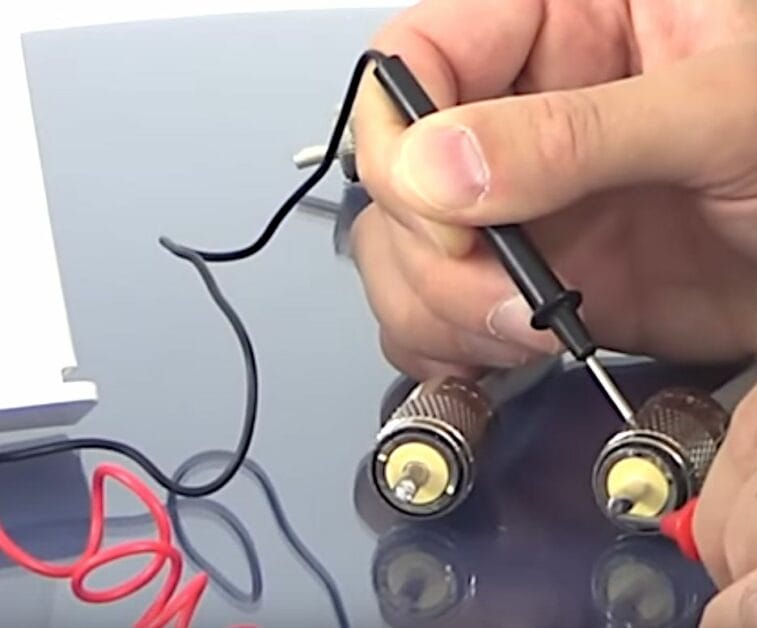
Touch the core conductor and shield of the same end.
You should get an OL reading indicating that there is no short between the core conductor and the outer cable, thus confirming that the coaxial cable is good.
You would hear a beep only if there were a short.
Note that it doesn’t matter which probe you attach to which end of the cable in a continuity test because there is no polarity to observe.
Step 4: Check the Reading
The results of the first 2 tests in Step 3 above should be close to zero or no more than 2 ohms, accompanied by a beep, and the result of the third test should be “OL” displayed on the multimeter’s screen.
If you get a reading greater than 2 ohms, your coax cable requires fixing or a replacement. Such a reading means the signal is prevented from reaching the receiving device.
Closed Connection Coax Cable Signal Testing
Testing a coaxial cable for short is necessary to check whether it is undamaged and can continue to be used.
A short usually happens when the coaxial cable is sharply bent. Below are the steps to test for a signal on a coaxial cable with a multimeter for a closed connection to test for a short. You will need a dummy load for this test.
Step 1: Disconnect the Coax Cable
Disconnect the coax cable you want to test from the appliance or other attachment, whether a TV, camera, or cable splitter, before performing a continuity test.
Step 2: Set the Multimeter
Keep the multimeter set to the ohms position to measure continuity or resistance.
Keep the multimeter’s red lead in the positive port marked “+” and the black lead in the negative port marked “COM.”
Step 3: Close the Connection
Close the connection by attaching a dummy load on one end of the cable.
Below are examples of dummy loads you can attach. The 3rd option, i.e., the aluminum foil on the right, maybe the easiest as it’s readily available.
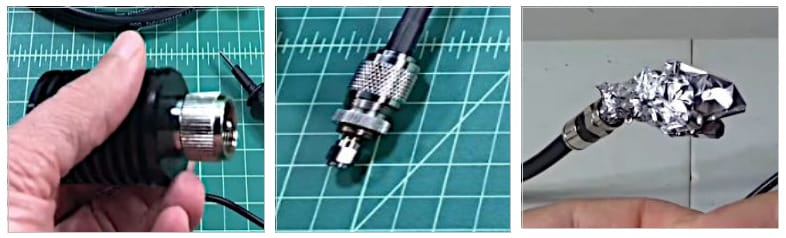
Put the aluminum foil into one side of the coaxial cable to close the connection.
Step 4: Attach the Probes
Touch one probe to the core of the coaxial cable and the other probe to its outer shield at the same end.
Step 5: Check the Reading
Observe the reading on the multimeter.
It should be close to zero ohms. If you see a reading on the multimeter, there is a signal on the cable. You shouldn’t hear any sound, which is usually a beep.
If you do hear the beep, it indicates a short in the coaxial cable. Try smoothing the sharp bend and check again. If you hear the beep again, you must replace the cable.
Assuming the cable is good, i.e., you don’t hear the beep, you can proceed to do the further tests detailed below.
RELATED What is a Coax Outlet?
Signal Quality
The signal’s strength or quality will vary depending on the type of coaxial cable, the signal, and the length of the cable.
Type of Coaxial Cable
If you’re looking for excellent signal quality from a coaxial cable, consider what it will be used for.
The RG-6 coax type is the best choice for most use cases, especially for television and the internet. The only exception is HDTV, better served using an RG-11 coax cable. You can use the thinner RG-59 as an alternative for CCTV and video.
Refer to the table below to help you decide.
| Use | Coax Cable | Notes |
| Television | RG-6 (75 ohms) | The 75 ohms version is recommended. |
| HDTV | RG-11 | RG-11 enhances HD for uninterrupted signal transfer at a higher speed |
| CCTV | RG-6 or RG-59 | RG-6 is ideal for longer distances and enhances performance, but RG-59 is a thinner cable. |
| Video | RG-6 or RG-59 | Either cable can be used, but the RG-6 provides improved signals for digital video. |
| Internet | RG-6 | Larger and better conductors and thicker dielectric insulation enhance signal quality more effectively and efficiently. |
Distance
Distance or cable length is an important factor in affecting signal quality.
Generally, you are more likely to suffer from degradation of signal quality the longer the coaxial cable. The signal strength of a 100-foot-long cable may be reduced to around a third of its normal level. For example, even an RG-6 coaxial cable at 100MHz will suffer a signal loss of around 6.4 decibels per 328 feet (100 meters).
Use short cable lengths where possible by minimizing the distance between the transmitter and receiver.
Damage
Cable damage is another reason for signal degradation or loss.
You should avoid sharp bends when installing the coaxial cable. Routinely inspect the coaxial cable for signs of weakening or damage. Test the signal quality using our Toolsweek guide if you suspect the cable is damaged or the signal quality has noticeably deteriorated.
References
Website Resources:
- TV signals. https://www.sciencedirect.com/topics/computer-science/television-signal
- transferring data. https://www.computerhope.com/jargon/d/datatran.htm
Video References:
CB World
Helpful DIY
TheSmokinApe
Know How Now
RVProject