12 min read
How to Run Wires Through Walls Horizontally (Guide)
The best way to prevent power supply interference and accidents is to run your wires through your walls horizontally.
You may be running your wires to additional outlets, lighting fixtures, or setting up a home entertainment unit. Running the cables (horizontally) will guarantee a seamless flow of electrical current.
Brief Summary: Threading wires through walls horizontally is not difficult. Here you go:
- Use a stud finder, a MultiScanner, or a Deep Scan to check free wall space to thread the wires horizontally.
- Plan a wire route that is suitable for a horizontal wire installation.
- Go on and cut the entry boxes using a drywall saw while avoiding crooked cuts.
- Use a relevant drill bit to drill into the studs – the holes should be close to the stud’s center.
- Go on and run the cables through each stud hole.
- Use a guidewire, a pole, or a powerful magnet to thread and fish the wires through.
- Finally, run the cables to the electrical box.
Getting Started
Tools

Wiring your electrical wires and cables through walls is not entirely easy. You will need to gather some tools to do a good job.
You will require the following tools and materials below:
- 24” to 72” Flex bit (for the drills)
- Drill bits (1/8” and ½ “)
- Wire-feeding tools
- A variety of cables
- Bundling options
- Stud finder (to find the studs)
- A voltage tester
- Drywall saw
- Cordless drill
- Bubble level
- Guidewire
- Fish tape
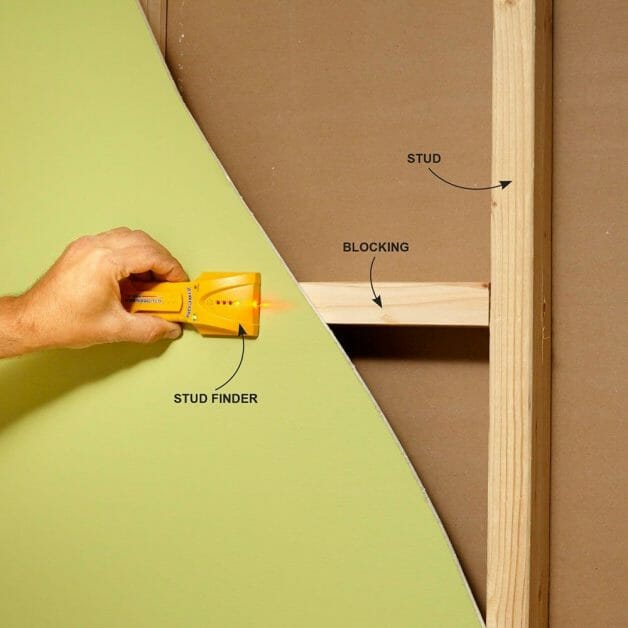
How to Check Free Wall Space for the Running Wires

Free wall space for the wires can be easily verified using a stud finder. The stud finders will also “tell” you where the electrical cables or wires run on the wall.
However, you may also decide to use a MultiScanner or a Deep Scan unit to obtain precise readings. They can detect wire bundles and pipes located deep in the wall. But in general, they are similar to stud finders on many fronts.
Always ensure you know the precise location of the existing wires and pipes before drilling the wall. That applies to whether you are drilling into the wall directly or horizontally.
For those using MultiScanners or Deep Scan units, weird tone frequencies and lighted signals show the presence of obstacles – wood studs, metal studs, wire bundles, stud plates, pipes, etcetera.
How to Plan the Wire Route
The wiring route is defined by the starting point (it could be a breaker or a junction box) and the destination of the wiring. Make sure you clarify the wire route.
Step 1: Are you Wiring the Cables Horizontally or Vertically?
Another wire route idea is to know the nature of the wiring – vertical or horizontal. You may be threading the wire horizontally, but at some point, you might create a vertical loop via the junction box. Be sure of that to have a proper wiring layout.
Step 2: Use the Stud Finder to Locate Pipes and Old Wires in the Wall
Identify the position obstacles (pipes, metal studs, wood studs, and many more) in the wall where you will be running your wire. That is also an important aspect to feature in your planning.
Knowing the number of studs at your disposal is also vital. You will drill into the stud and pass the wires through.
Step 3: Identify the Loadbearing and Non-loadbearing Wires
Next, pinpoint the loadbearing wires, and those that are not. That will help in the determination of the size and placement of the holes to be drilled. Everything must be within the building standards. Also, take note of the type of insulation on your wall.
Step 4: Tighten the Insulations
Finally, be informed that loose insulations can be light or cumbersome and needs to be adjusted before the installation kicks off.
Planning Tips
- Studs are usually kept 16 – 24 inches apart. So, choose the correct stud.
- Drill a hole that is less than ¼ of the lumber for a load-bearing stud.
RELATED Can You Drill into Metal Studs?
How to Cut the Entry Boxes
Step 1: Find the Best Location for the New Entry Box
The first step is identifying the best place to retrofit (substitute) the entry box – use a stud finder.
Step 2: Test if the Box Fits in the Space
Try to incline your box conveniently for their easy future retrieval. While doing that, ensure the box fits in the identified space.
Step 3: Describe the Outline to be Cut on the Box
Use a pencil to draw the outline to be sliced off.
Step 4: Cut the Box Using a Drywall Saw
Ensure the box is in a strategic space. Use a small level to cut drywall to thread the wires through. Crooked boxes can interfere with the wireframes and circuit covers. So, a level is a must when cutting the entry boxes.
And then rid the box and slightly cut it into the drywall with a scoring tool. That will avoid the development of unwanted cracks and fraying when completing the cut with a drywall saw.
Further Instructions
- Drill a hole at the corner of the box for easier use of the drywall.
- The box’s cover plate has an extended flange that off sights the rough edges on the drywall. Do not be scared if the cut edges are bumpy.
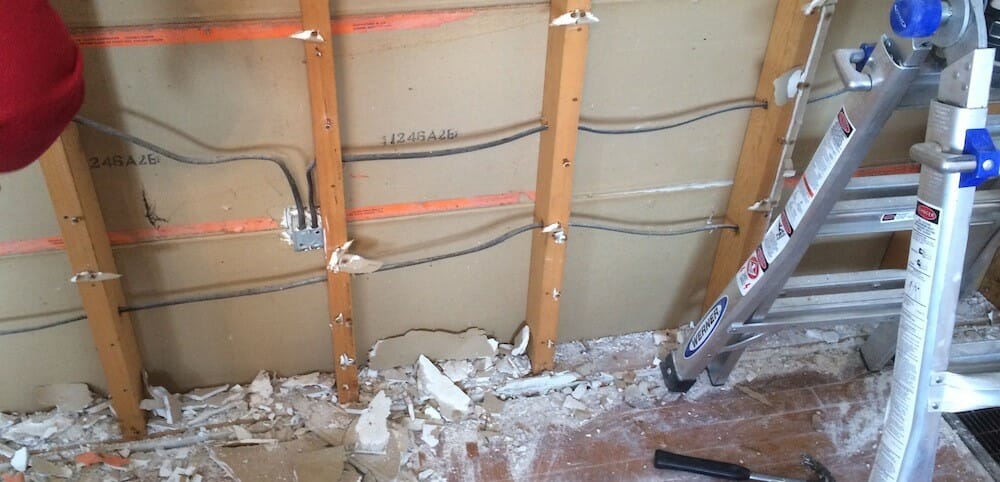
Drilling Into the Studs
Step 1: Finding the Studs in the Wall
Use the stud finder to locate the studs by knocking on the wall. While knocking, be all ears and try to tell a hollow tap from a solid one. Stud finders are available in most shops and online stores at affordable prices.
Step 2: Get the Correct Drill Bit
You need a correct size drill bit whose length can reach the studs. A 12-bit drill can be useful for shorter holes but at a sharp angle. Otherwise, even a 72-inch flex-bit is available.
Step 3: Align the Studs and Drill a Hole Into Them
To drill through several studs to run your wires through horizontally, cut out a small section of plasterboard next to the studs that you have marked with a pencil.
Step 4: Furnish the Studs with a Plasterboard and Paint – Aesthetics
When the wire installation is complete, it is wise to path up plasterboard holes, and re-plaster and furnish it with paint. Make sure you drill holes close to the studs’ center. To achieve that precision, use a flexible bit shank which allows you to add leverage pressure on the drill terminal of the bit.
Step 5: Remove the Drill Bits from the Drill
After you have completed drilling the holes in the studs, use a reverse function to remove the drill bit on your drill bit. That will prevent snags while passing back via the studs.
Important Notes
- The load-bearing studs should have holes drilled close to the center.
- The size/diameter of the holes should not exceed 25% of the wood’s width. I recommend holes to be 10% of the wood’s width.
- You can drill holes off the center on the non-load bearing studs. But their widths should be similar to those of the load-bearing studs.
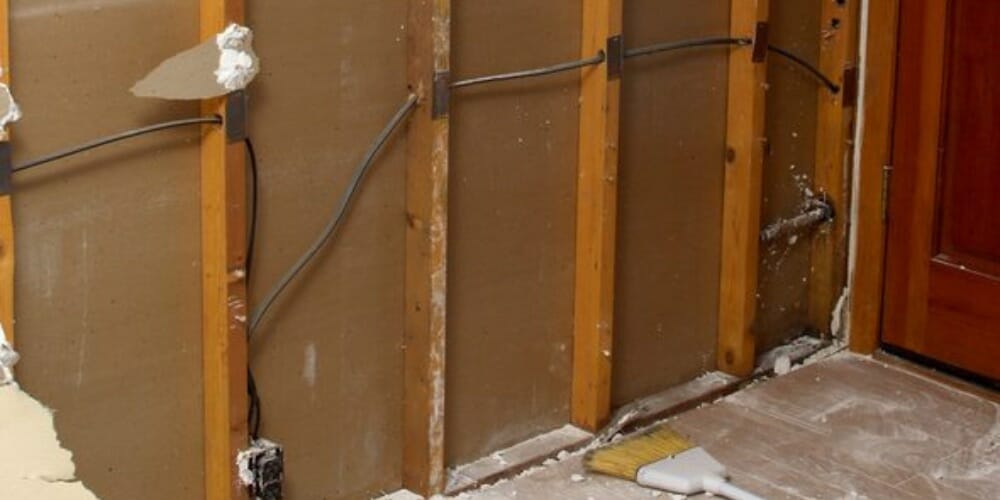
How to Run and Fish Cable Wires Through Each Wall Stud
The guidewire and the powerful earth magnet are the major tools in this step. Use a soft fabric to cover the earth’s rock so you do not damage your walls while threading and fishing the cable wires.
Where can you find a strong magnet? The answer is inside a hard drive of an old computer.
As aforesaid, this is the trickiest part, running and fishing the wires through the stud holes. You can however simplify the task by using a set of tools.
Step 1: Attach the Cable or Wire to a Guidewire (You may Use a Pole)
Secure the cable to one end of the pole.
Step 2: Push the Wires Through the Holes and the Insulation
Alternatively, you can use a magnetized tool to conveniently fish the wires through the stud holes. The tool will not only locate the wires screened off by the drywall, but it will also guide the wires to the outlet opening.
Fixing the Wires to the Electrical Box (Outlet)
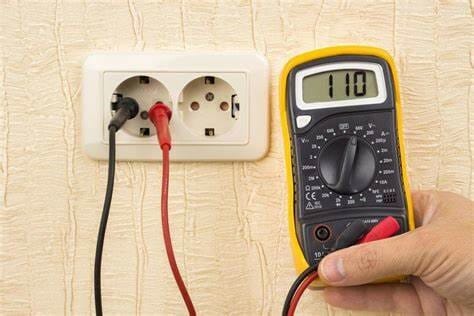
Step 1: Use a Voltage Meter to Verify the Presence or Absence of Residue Current
Before you begin this process, ensure there’s no residue power flowing to or from the electrical box.
Step 2: Guide the New Cables Through the Outlet Opening
Upon completing the safety check, pull out the fold faceplate and outlet, and then guide the new cables through to the outlet opening.
Step 3: Go ahead and thread the wires via the wiring hole to the new outlet hole.
Identifying the Nature of the Wires
- By American standards, the black wire is the hot or live wire. It should be linked to the silver screw on your outlet unit. Be cautious, your country’s electrical wiring standards may be different.
- The white wires are neutral; connect them to the silver screw.
- The ground wire is a bare copper wire, and most have a designated spot on either side of the outlet.
RELATED Can You Drill into Metal Studs?
FAQs
Should you thread electrical wires through walls horizontally?
Running wires through walls in a horizontal manner has many benefits. You may be installing a security system in your home, upgrading old wires, installing new internet cables, or setting up an entertainment system. Running the conducting wires horizontally will be convenient in all those scenarios.
Threading the connecting wires horizontally offers room for an organized set-up, let alone the aesthetical implications. A proper wire setup encompasses good wire and cable management. The risks of toppling over a sagging wire are reduced. The horizontal threading also utilizes the existing cable paths, hence creating a cleaner and safer home environment. (1)
The tricky part of the whole process is pulling the cables through to one end. The process consumes a lot of time, and that scares many people. But with proper planning and tools, you can easily accomplish the task. You also need to arm yourself with the basic principles of wiring.
Why should I run the wires through the walls horizontally and not vertically?
Well, horizontal alignment of wires is the most convenient way of threading wires. You can easily connect the wires to your entertainment system or any other equipment which is often located at a lower level. Horizontally threaded wires are firm and safe; the kids won’t topple over them while moving around in the house. Vertical alignment of wires is not suitable because most outlets and circuits are on the wall sides.
With the horizontal connection, you screen off the wires behind the walls to make your home entertainment system sleek and clean.
Can I extend a circuit to a news outlet if I run the wires through the walls?
Yes, you can do that if your existing circuit can sustain the extra load. So, the addition of extra wires and outlet points will require running the wires horizontally through the walls.
Is it possible to set up a new circuit from the breaker box to a news outlet?
That is one of the reasons you should run the wires through the walls. So yes, you can set up another circuit where you have placed the new circuit. However, you need to use the correct wire gauge in this situation. Wrong gauge wire can fail to ferry the required amps, and ultimately burn out or cause major issues on your electrical fixtures.
Is it wise to drill multiple holes in one stud?
The answer is no! Having several holes on a stud can cause issues, drill one hole per stud to run the cables through. Also, make sure the holes are of small sizes, about 10% of the entire width of the stud.
What are the basic precautions I should take while threading my cables through the wall?
– Always be sure of what is behind the wall before you start drilling to avoid damaging the following: water and gas pipes, existing electrical wires, etcetera.
– Ensure a safe runway. Drilling a small hole maintains the walls’ structural integrity. Use the correct tool for each task. Using the right drill bit to drive holes into the studs is important. You may use MultiScanner and Deep Scan to find studs behind the wall – they give more precise results than the stud finders. (2)
Take a look at some of our related articles below.
- How to hook up 2 amps with 1 power wire
- How to cap off electrical wires
- Can I connect red and black wires together
References
(1) home environment – https://psychology.fandom.com/wiki/
Home_environment
(2) structural integrity – https://www.sciencedirect.com/science/article/
pii/1350630794900167
Video Reference