7 min read
How to Wire a 5-Way Switch (4-Step Guide)
Wiring a 5-way switch can be difficult but by the end of this guide, you should be able to do it without a hitch.
There are two popular versions of the switch: Fenders 5-way switch and Import 5-way switch. Most manufacturers wire the Fender switch to guitars because it is the common one, while the Import switch is rare and limited to some guitars such as Ibanez. Both switches, however, operate similarly: the connections are relayed from one section to another, and then they are mechanically linked within an assembly.
Over the years, I have been using both the Fenders 5-way switch and the Import switch in my guitars. So, I have developed many wiring schemes for various guitar brands. In this guide, I will go through one of my 5-way switch wiring schemes to teach you how to wire a 5-way switch.
Let’s begin.
In general, the process of wiring a 5-way switch requires patience and precision.
- First, if the switch is in your guitar, remove it and identify the five contacts.
- Then, sweep the multimeter through the leads to verify the contacts.
- Next, make a nice wiring diagram or pull one out from the web.
- Now, follow the wiring diagram accurately to connect the lugs and the contacts.
- Lastly, double-check the connection and test your device.
We will go into detail in our guide below.
The Two Common Types of 5-way Switches
Some guitars and basses use a 5-way selector switch. You may find yourself in a situation where you have to replace the existing switch in your guitar; this guide will help you with that. But before that, let’s look at two examples of the typical 5-way switches below:
Type 1: Fenders 5-way Switch
This type of switch, when viewed from below, it has two rows of four contacts on the switch’s circular body. It is the most common type of 5-way switch. Since it is a common type of switch, it is found in more guitars than the Import switch. Other instruments that use this type of switch include the bass, ukulele, and violin. The pickup switches are used for volume control.
Type 2: Import Switch
The Import-type switch has one row of the 8 contacts. It is a rare type of the 5-way switch and it is hence limited to guitar brands like Ibanez.
Another type of 5-way switch is the rotatory 5-way switch but they are not used in guitars.
Switch Basics
How a 5-way Switch Works
The two switches are found in several guitars. It is also imperative to know how the switch works in a typical guitar to wire it accurately.
Both the Fenders switch and the Import switch have identical functionality and mechanisms. The main difference is in their physical layout.
In a typical 5-way switch, connections are relayed from one part to another and they are mechanically connected in the assembly. The switch has a lever system that connects and disconnects the contacts.
Technically, a 5-way selector switch is not a 5-way switch but a 3-way switch or a 2-pole 3-way switch. The 5-way selector switch makes similar connections twice, and then it relays them. For example, if there are 3 pickups like on a Start, the switch connects the 3 pickups twice. If the switch is wired up conventionally, it will connect the 3 pickups as follows:
- The switch that points toward the Bridge pickup – Bridge
- The 5-way selector switch that’s one notch above the Bridge and the Middle pickup – Bridge.
- The switch in the Middle pickup – Middle
- The switch that’s up one notch from the Neck pickup and the Middle pickup – Middle.
- The switch oriented toward the Neck pickup – Neck
However, this is not the only way you can wire the 5-way switch.
The History Behind the Development of the 5-way Switch
The first version of the Fender Stratocaster had 2-pole 3-way switches which were intended to contact only the Neck, Middle, or bridge pickup.
So, when the switch moved to a new position, the previous contact was made before the new contact was broken. With time, people realized that if you could place the switch in-between the three positions you could obtain the following contacts: both the Neck and the Middle, or the Bridge and the bridge pickups connected at once. So, people started to place the 3-way switch in-between the three positions.
Later on, in the 60s, folks started to fill notches in the détente techniques of the 3-way switch to achieve that in the in-between position. It became known as the “notch” position. And in the 70s, Fender adopted this switching technique in their stock switch that eventually became known as the 5-way switch. (1)
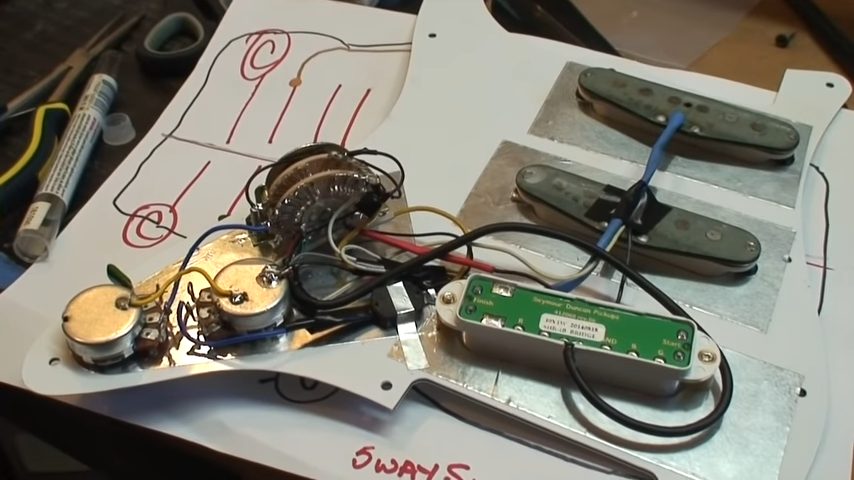
How to Wire a 5-way Switch
Remember that the two types of switches, Fender and Import, the only difference is in the physical forms of their contacts. Their operational mechanisms or schematics are strikingly identical.
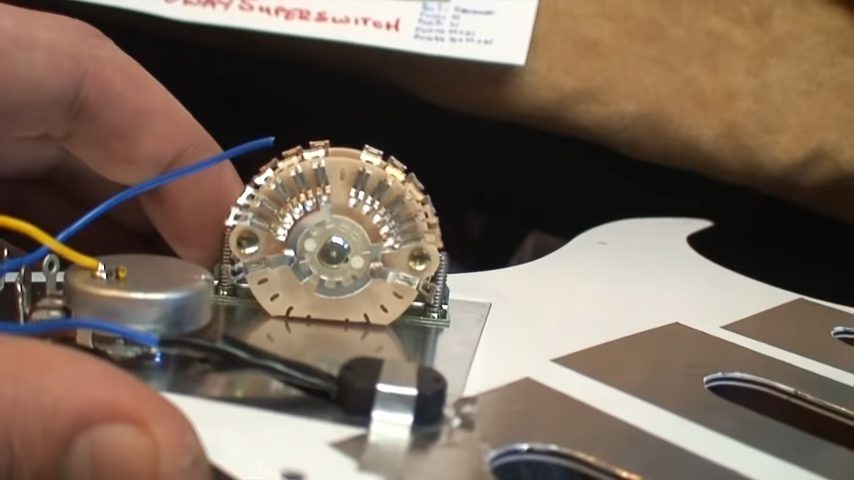
Step 1: Identify the contacts manually – Bridge, Middle, and Neck
The possible labels for the contacts of 5-way switches could be 1, 3, and 5; with the 2 and 4 in the in-between positions. Alternatively, the contacts might be marked B, M, and N. The letters stand for Bridge, Middle, and Neck respectively.
Step 2: Identifying the contacts with a multimeter
If you want to be sure which contact is which, use the multimeter. Still, you can make your predictions in the first step and verify the contacts with a multimeter test. In practice, a multimeter test is the best way you need to use to mark the contacts. Sweep your multimeter leads through the five positions to mark the switch contacts.
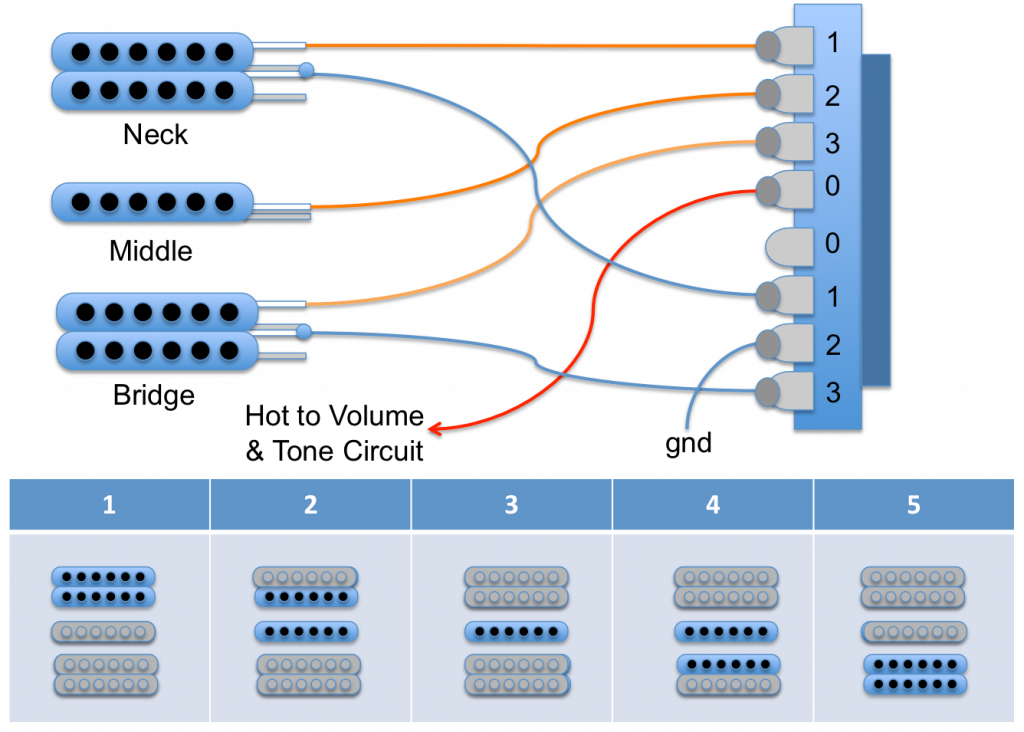
Step 3: The wiring scheme or diagram
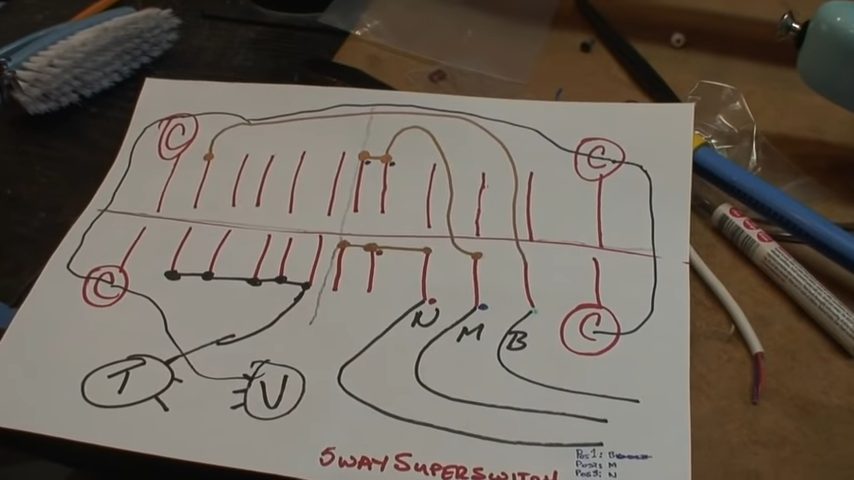
You need to have a plausible wiring diagram to know the engagement of the lugs or the contacts. Also, note that four outer lugs are common, wire them to the volume pot.
Follow the scheme below to wire the contacts:
In position 1, engage the Bridge pickup only. This will also engage the tonne pot.
In position 2, again, engage the Bridge pickup and the same tonne pot (in position one).
In position 3, engage the Neck pickup and a tonne pot.
In position 4, take the Middle pickup and bridge it to the two contacts in the middle position. Then, engage the bridged lugs to position four. So, you will have a combination of the Middle and the Neck pickups in position four.
In position 5, engage the Neck, the Middle, and the Bridge pickups.
Step 4: Double-check the wiring
Finally, verify the wiring and install the switch in its rightful device, which is often a guitar. Note, if the guitar housing makes weird sounds during contact engagement, you may replace it with a new one. (2)
Take a look at some of our related articles below.
- How to wire a 220 well pressure switch
- How to wire a pull chain switch diagram
- How to wire a fuel pump to a toggle switch
References
(1) 70s – https://www.history.com/topics/1970s
(2) guitar – https://www.britannica.com/art/guitar
Video Reference