
14 min read
DIY Built-In Bookshelves Anyone Can Do: Simple Steps for Stunning Storage


Edited by: Louise (Editor In Chief)
Fact/quality checked before release.
Fact/quality checked before release.
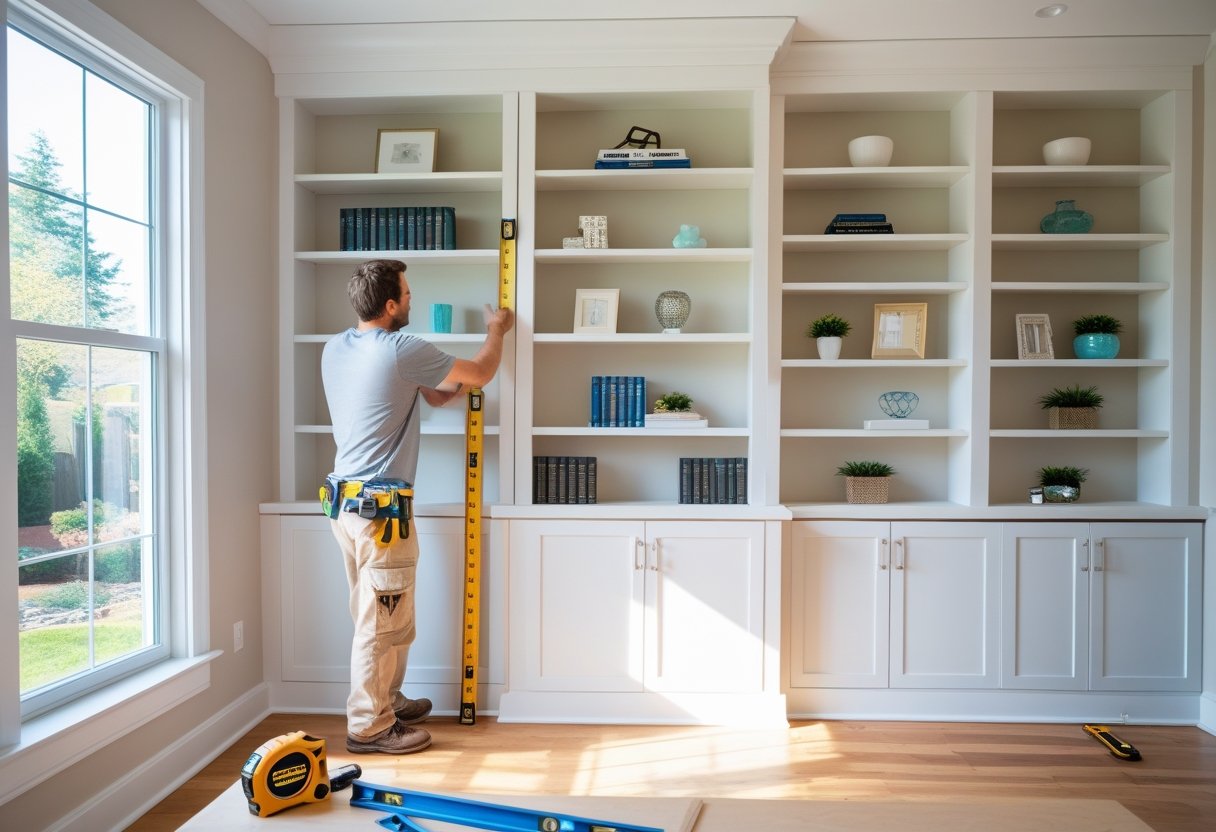
Ever looked at those stunning built-in bookshelves on home makeover shows and thought, “I could never do that”? Good news—you absolutely can create beautiful DIY built-ins with straightforward plans and everyday tools. These shelves aren’t just for designers or master carpenters; if you’re up for a rewarding weekend project, your dream shelving is within reach.
Imagine transforming your empty wall into a custom storage spot for books, decor, or family photos—elevating both style and function without breaking the bank. You’ll learn how to measure your space, choose affordable materials, and get that impressive built-in look that feels professionally done. With just a little planning and the right steps, you’ll discover how approachable this project can be.
Ready to roll up your sleeves? Let’s dive into the ideas, tips, and clear instructions that will help you turn a blank wall into a standout feature you’ll enjoy every day.
Planning Your DIY Built-In Bookshelves
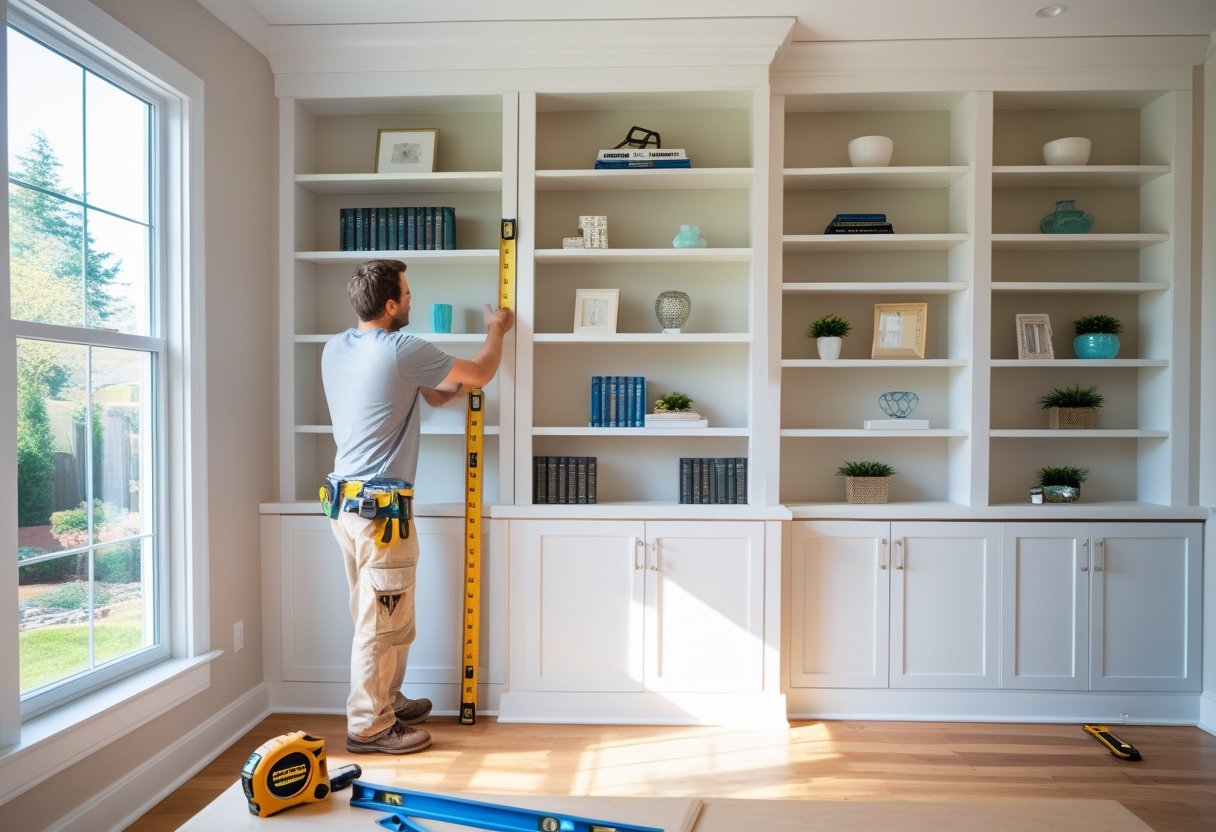
A successful built-in bookshelf project starts with accurate prep work. With just a bit of organization, you can avoid costly headaches and get a pro-looking result on your first try.
Measuring and Sketching Your Space
Before you even think about grabbing a saw, it’s all about the numbers. Measure your available wall area—height, width, and depth—three times just to be safe. Corners aren’t always square, so don’t be shy about checking for bumps or baseboard obstacles.
Use blue painter’s tape on the wall and floor to mock up the size and location. This gives you an instant visual and helps spot any awkward zones.
Sketch a simple diagram—not a work of art, just lines with numbers will do. Capture:
- Ceiling height
- Distance between windows or doors
- Any vents, switches, or outlets
A quick, labeled sketch makes trips to the hardware store so much smoother.
Choosing the Right Bookshelf Design
Are you going for classic and symmetrical, or is a modern, open-shelving vibe more your speed? Choosing the right style can make your DIY bookshelves blend seamlessly into your space or become a standout feature.
Consider these typical built-in bookshelf designs:
| Design Type | Best For | Look |
|---|---|---|
| Floor-to-Ceiling | Maximum storage | Dramatic, custom |
| Around TV/Fireplace | Media rooms, cozy areas | Framed, balanced |
| Alcove/Window Seat | Small spaces | Inviting, cozy |
Think about whether you want adjustable or fixed shelves. If you’ve got art or tall decor, flexibility is a winner. Budget tip: Simple designs with basic face trim cost less and look just as sharp with the right paint.
Adjusting for Room Dimensions
Unless your home was built yesterday, you’ll find walls that lean and floors that slope. You may need to tweak your bookshelf dimensions to fit perfectly and look built-in, not just “stuck on.”
Measure the top, middle, and bottom of your wall space, especially if it runs more than 8 feet. If you find different widths, plan for trim or scribe molding to cover gaps along the edges.
Here are adjustments you might make:
- Reduce overall height for a sloped ceiling
- Use deeper shelves for wide walls and shallow ones for tighter spots
- Add filler strips to the sides for snug installs
Pay extra attention to baseboards and crown moldings. Mark their depth, and factor them into your design so nothing gets in the way during install.
Materials and Tools Needed

Before you get started, take some time to gather the right lumber, tools, and safety essentials. The right prep not only saves headaches later but helps you build shelves that last for years.
Selecting Quality Lumber and Supplies
Going for straight, sturdy lumber means your shelves won’t sag and will stand up to daily use. You’ll want to look for wood like plywood, MDF, or select pine—each brings its own mix of cost-effectiveness and durability. Oak or maple adds a professional finish, but don’t forget those are heavier.
Check for warped or knotted boards at the store. Even a tiny bow can throw off your whole project. Pair your wood with 1×2 or 1×3 strips to frame and reinforce the shelves, and always have a little extra on hand for test cuts or mistakes.
In addition to wood, you’ll need a shopping list of essential supplies:
- Wood glue for solid joints
- Wood filler to hide nail holes and seams
- Screws and finishing nails
- Sandpaper
- Paint or stain and brushes
- Caulk for seamless edges
Essential Power Tools for the Project
The biggest time-saver in your tool stash is a miter saw. It lets you quickly and accurately cut boards to length and angle, making those shelf frames look built-in rather than bolted on. A circular saw (or a table saw for those with experience) helps for long, rip cuts in plywood or MDF.
You’ll need:
- Miter saw (essential for crisp corners and trim)
- Drill and screw-driving bits
- Stud finder (for safe, sturdy wall anchoring)
- Level (a must for straight shelves)
- Sander or sanding block for smooth surfaces
- Tape measure and pencil
Here’s a handy table for reference:
| Tool | Purpose |
|---|---|
| Miter Saw | Precise cuts & angles |
| Drill | Attach shelves securely |
| Stud Finder | Find secure wall studs |
| Level | Ensure straight installation |
Safety Gear and Workspace Setup
Safety always comes first—even for weekend warriors. At a minimum, grab these basics:
- Safety glasses (to shield your eyes from flying sawdust)
- Hearing protection (power tools are loud!)
- A dust mask, especially when cutting or sanding MDF or plywood
Work in a well-ventilated space. A garage or driveway works great, but even indoors, setting down a drop cloth and using a portable workbench can turn any area into a confident DIY zone.
Clean, clutter-free work areas reduce accidents and help you stay organized. Make sure your cords are untangled, and you have good lighting so you can enjoy the process from start to finish. Set out your supplies within reach, and you’ll feel like you’ve got your own TV workshop at home.
Building the Base Cabinets

Starting strong makes all the difference, and the foundation for your built-in bookshelves is all about getting those base cabinets solid and sturdy. Accuracy and secure installation keep everything level for a finished product you’ll actually want to show off.
Measuring and Cutting Base Cabinet Pieces
Accurate measurements are the backbone of any custom built-in. Start by measuring your wall space, noting electrical outlets or uneven floors. Use a stud finder to mark where the wall studs sit, so you know where your cabinets will be attached.
Grab a notepad and jot down:
- Wall length
- Desired height and depth of your base cabinets
- Locations for outlets, vents, or light switches
Cut your plywood or MDF panels for the cabinet sides, bottom, top bracing, and backs. If you’re stacking cabinets side by side, you might want to trim end panels flush so everything fits seamlessly. Always double-check measurements before making your final cuts—that “measure twice, cut once” advice is gold here.
Here’s a quick-cut list example:
| Piece Name | Quantity | Typical Size |
|---|---|---|
| Side Panels | 2 per unit | 34.5″ x 24″ |
| Bottom Panel | 1 per unit | 24″ x length |
| Back Panel | 1 per unit | Height x width |
Assembling Cabinets and Securing to Wall
Once all your pieces are cut, it’s assembly time—think of it like building the frame for your bookshelf dreams. Line up the side panels and attach them to the bottom panel using wood glue and screws. For serious strength, pocket-hole screws keep things tight without visible fasteners on the outside.
Secure cabinet backs for stability. Use 1/4″ plywood or MDF for the back, and nail or staple into place. Now you’ve got a solid box that’s ready to go up against the wall.
Set the assembled base cabinets in their spot. Shim underneath to make everything level if your floor is uneven. Drill pilot holes through cabinet backs at stud locations, then anchor the cabinets directly to the wall studs with sturdy screws.
If you’re installing multiple cabinets, join them together side-by-side with wood screws through the sides. This keeps everything flush and prevents gaps. Finally, check for level side-to-side and front-to-back, adjusting shims as needed before tightening all the screws.
This approach gives you a rock-solid foundation ready for shelving, trim, or anything your vision demands.
Constructing and Installing Shelving
Building your own DIY built-in bookshelves means getting precise with your cuts, firm with your assembly, and creative with spacing. This stage is where careful planning pays off and your project starts to look like a real showcase piece.
Cutting and Attaching Fixed Shelves
You’ll want to measure twice, cut once—this is the golden rule for shelving. Cut your shelf boards to fit snugly inside your frame, leaving just a hair of wiggle room for wrangling them into place. For strong, sag-free shelves, opt for 3/4-inch thick plywood or MDF.
A quick tip: clamp a straightedge as a guide for your circular saw to get perfectly straight cuts. Attach the fixed shelves by pre-drilling pocket holes or countersunk screws through the side panels. Use wood glue with your fasteners to add extra strength. For a clean finish, fill screw holes with wood filler.
Fixed shelves are best secured at points that will help anchor the unit to the wall, like the top and bottom, or where you plan to add extra support for heavy books.
| Shelf Material | Pros | Cons |
|---|---|---|
| Plywood | Durable, sturdy | Slightly pricier |
| MDF | Smooth, easy paint | Heavy, not water-resistant |
Adding Vertical Supports and Face Frames
Vertical supports are your stability heroes. These keep your shelving rigid and stop any sort of warping or bowing. Cut support pieces the same depth as your shelves and attach them from the bottom up using wood glue and screws.
For built-in bookshelves that look truly finished, you’ll want to install a face frame. Use 1×2 boards to create the frame, then fasten them to the front edges of your vertical supports and shelves. The face frame covers raw plywood edges, strengthens the unit, and brings a polished, furniture-grade look.
Remember to check for square as you go. A face frame that’s a little off can throw off the entire presentation of your built-in shelving.
Ensuring Even Spacing for Shelves
Even shelf spacing isn’t just for looks—it distributes weight evenly and prevents sagging over time. Measure and mark shelf locations with a measuring tape and pencil. Use a spacer block, usually a scrap piece of wood cut to your desired shelf height, to quickly mark consistent spots for all your shelves.
If you’re aiming for adjustable shelves, use shelf pin holes spaced evenly in vertical rows. You can buy a shelf pin jig or make your own with a strip of hardboard and evenly spaced holes.
A level comes in handy here: double check each shelf for level before locking it in place. This attention to detail guarantees your collections will sit straight and your DIY bookshelves will stand out—in a good way!
Finishing Touches for a Custom Look
Dialing in the final details transforms your built-in bookshelves from “just okay” to professional-quality statement pieces. A few strategic upgrades like decorative trim, seamless joins, and crisp paint lines make all the difference.
Installing Crown Molding and Baseboard
Adding crown molding at the top and a clean baseboard at the bottom instantly gives your shelves that high-end, built-in vibe. Crown molding draws the eye upward and integrates the shelving into the room’s architecture, while baseboards tie it down to the floor for a finished look.
Start by measuring the top edge and select a molding style that matches your home’s trim. Use a miter saw for precise corner cuts—inside or outside corners will need different angles. Pro tip: Dry-fit the pieces before permanently attaching them.
Secure each piece using a nail gun or finishing nails. For baseboards, align with the existing wall trim for a flush, continuous appearance. If your shelving stands proud of the wall, a small return piece makes a neat transition.
Here’s a quick reference:
| Trim Placement | Tool Needed | Special Tip |
|---|---|---|
| Crown Molding | Miter Saw, Nail Gun | Nail into studs or solid frame for best results |
| Baseboard | Miter Saw, Nail Gun | Match height/shape to room’s existing baseboard |
Filling, Caulking, and Sanding Joints
A big secret to a seamless look: painstaking attention to joints and gaps with the right fillers. Use wood filler to patch nail holes, small cracks, and minor dents in the wood surfaces. For gaps between the bookcase and wall (or trim), reach for paintable caulk.
Apply wood filler with a putty knife, pressing it into holes, then scrape smooth. Once dry, sand it flush. For caulking, run a smooth bead along every seam where wood meets wall, as well as where crown or baseboard meets the shelves. Wet your finger and gently smooth the bead—the cleaner your work, the sharper your paint lines later.
Allow everything to dry thoroughly. A light sanding afterwards removes any rough spots and ensures perfect paint adhesion. Wipe away dust with a tack cloth before moving on.
Painting and Final Detailing
Choosing the right paint and finish elevates your project from “DIY” to custom cabinetry status. Opt for a high-quality latex or enamel paint in a semi-gloss or satin finish; it’s both durable and easy to clean. Primer helps cover imperfections and makes colors pop.
Tape off any areas you want to keep paint-free with painter’s tape. Apply paint with a trim brush for detailed edges and a foam roller for larger surfaces, working in thin, even coats. Usually two coats does the trick, with a light sanding in between for maximum smoothness.
For a truly custom effect, consider painting the back panel a contrasting color or lining it with wallpaper. Swap out plain shelf pins for decorative ones, and install LED accent lighting for extra flair. These little touches make your built-ins truly one-of-a-kind.
Styling and Organizing Your Built-In Bookcases
When your built-in bookcases are ready, the real magic comes from how you style and organize them. Thoughtful arrangement, creative use of decor, and clever lighting can make the shelves both functional and visually appealing.
Decorating with Books and Accessories
Styling your shelves starts with the books, but it doesn’t end there. Arranging your collection by color, size, or category gives the shelves a neat and cohesive look. You could even stack some books horizontally for variety, breaking up the typical rows.
A little goes a long way when you’re adding accessories. Use a mix of personal items, framed photos, vases, and plants to inject your personality. Don’t be afraid to leave some negative space—this helps each item stand out and keeps things from looking cluttered.
Try this simple list for a balanced look:
- Stand some books upright, and stack some horizontally.
- Add a few objects (like a small sculpture or decorative box) to each shelf.
- Place a trailing plant or two for a touch of green.
- Mix in family mementos so it feels genuine, not staged.
Here’s a quick reference:
| Tip | Why It Works |
|---|---|
| Mix vertical/horizontal | Adds visual interest |
| Use decorative objects | Breaks up the lines of books |
| Add plants | Brings life to the display |
| Leave space | Prevents overcrowding |
Integrating Lighting and Personal Touches
Lighting boosts the appeal of built-in bookcases and makes everything easier to see. LED strip lights are easy to install and can be tucked above or below each shelf for a clean look. Puck lights work well for highlighting a favorite piece or collection.
If your built-in bookcases are near an outlet, look for plug-in options, or choose battery-operated lights for a quick, wire-free fix. Warm white light tends to make books and accessories look their best.
Add your personal stamp by including items that matter to you. Your favorite travel souvenirs, a quirky collectible, or framed notes all tell your story. The goal is to create shelves that show off your life, not just your stuff. Small framed art, displayed on stands or leaned against the back, adds depth and color.
Don’t forget a few unexpected touches—a vintage clock, a hand-lettered sign, or a funky lamp—can make built-in bookcases feel curated and lived-in.